Web developers are fond of developing and designing websites locally on their PC with the help of local web servers such as XAMPP, WAMP or EasyPHP. It is when the website is deem ready for production, that it is move or uploaded to a live web server. WordPress is no exception as it can also be developed locally.

Let’s see a step by step guide on how to successfully move WordPress from local host (we’re using XAMPP for this tutorial) to a live web server without any hitches. mind you, this is the same step in moving WordPress from one host to the other.
For simplicity, this tutorial is going to be broken into three parts.
- Backing up WordPress
- Uploading Backup to server
- Configuring WordPress Settings
Step 1: Backing up WordPress
We need to first take a backup the locally hosted WordPress files and Database. Since we are going to be making use of cPanel in uploading the backup files to the live server, we need to archive the WP files preferably in .zip.
Step 1.1: Backing up the files
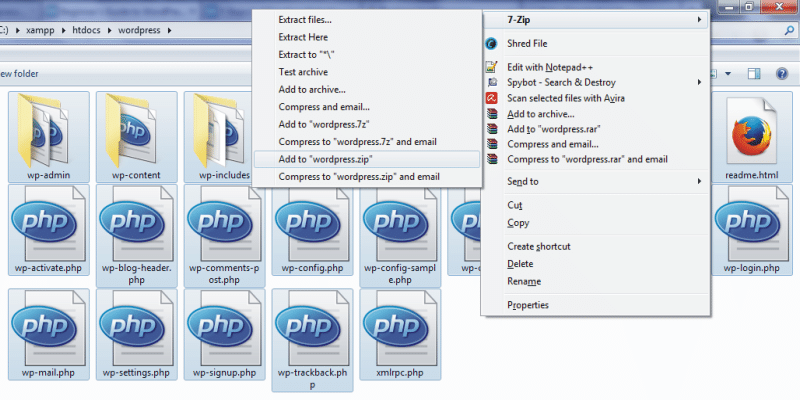
Navigate to the folder where the WordPress is installed; use zip utility software such as WinZip, 7-Zip or WinRAR to make a zip copy of the WP install files.
Step 1.2: Backing up the Database
We are going to be using the powerful phpMyAdmin to take the Database backup. Thankfully XAMPP is bundled with it.
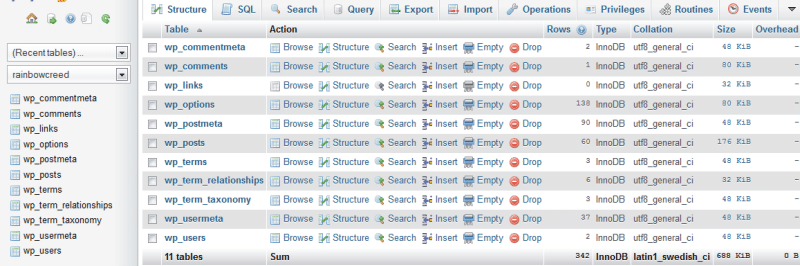
In your web browser, visit http://localhost/phpmyadmin/ to open phpMyAdmin then navigate to your WordPress Database.
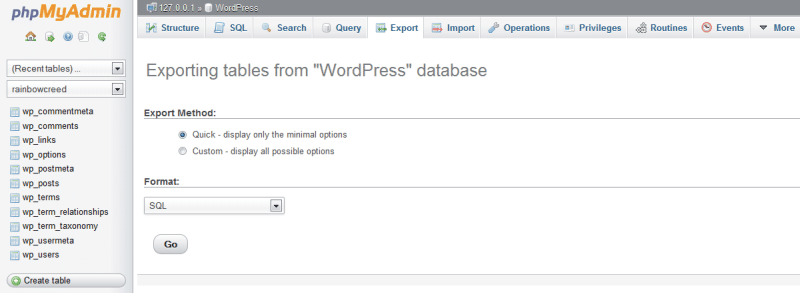
Click the Export button at the top menu. On the Export page, under Format, select SQL and click the GO button to download the Database backup.
Step 2: Uploading Backup to server
We now have the backup of both the files and Database in .zip and .sql format respectively.
Next is to upload the backups to your live web server.
Step 2.1: Uploading the backup files
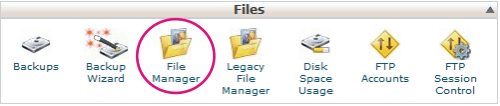
This is popularly done using a FTP client such as Filezilla but we are going to be using cPanel’s file-manager for the uploading of the backup files. Am quite sure your web host has cPanel.
Login to your cPanel dashboard via http://yoursite.com:2082 or http://yoursite.com/cpanel.
Under the File widget, click on Filemanager and navigate to the folder you want to install WordPress.
At the top of the Filemanager page are list of menu. Click the Upload.
At the upload page, browse to the location where the WordPress zip backup is to initiate the upload.
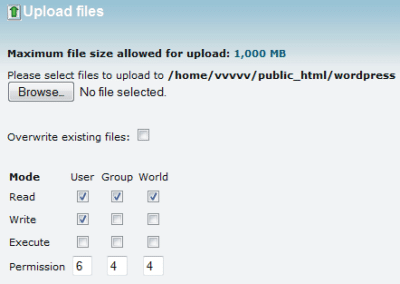
Extract the content from the zip archive you uploaded to the install folder.
Step 2.2: Uploading the backup Database
Now that the WordPress files are now in the right install folder, next is to replicate the Database on the live web server.
Firstly create a MySQL Database and user. This can be easily be done via following the on-screen instruction in cPanel’s MySQL Database Wizard.
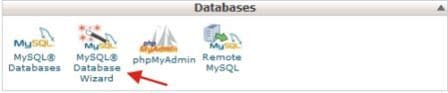
Next is to import the SQL database backup to the created Database. Just like in step 1.2, login to phpMyAdmin by clicking it link located close to MySQL Database Wizard. Navigate to the created Database click on the import link, browse and select the Database backup and hit the GO button

Step 3: Configuring WordPress Settings
Now that we have successfully uploaded the files and database, it time to configure some WordPress settings to reflect the changes.
Step 3.1: Changing Site URL
We need to change the site URL from http://localhost to say http://yoursite.com.
Still on phpMyAdmin, open the wp_options table and change the option_value of both siteurl and home to http://yoursite.com.

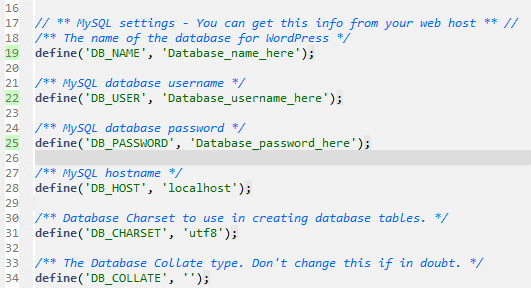
Step 3.2: Updating Database Settings
We need to update the Database name, username and password in wp-config.php MySQL settings to reflect the newly created Database.
Try visiting the WordPress site, it should be working now. But if you get a 404 or any other HTTP status error while opening any link, then step 3.3 is for you.
Step 3.3: Updating Permalink Settings
To correct any 404 error, you need to re-update your permalink settings.
Login to your WordPress dashboard, click the Permalinks link under Settings, choose your desire permalink structure and hit the Save Changes button.

Everything should be working fine now.
Conclusion
Moving a WordPress site from Local host to a live web server is quite synonymous to Migrating Website to a new host. One need to be very careful in order to achieve a successful migration. I enjoin you to follow the steps outline in this article so the migration won’t turn out to be like a night-mare.