Since the inception of this blog, i have been using Genesis Prose theme. The Prose theme for WordPress is the premier online publisher’s website solution. Its point-and-click design controls allow you to effortlessly change almost any aspect of your site without touching a single line of code. Prose is also fully mobile responsive, which automatically allows your audience to see your content beautifully displayed whether from a desktop, laptop, smart phone, or tablet.
it has 6 layout options; design settings; ability to add custom background and custom header; custom menus; fixed width, mobile responsive and threaded comments.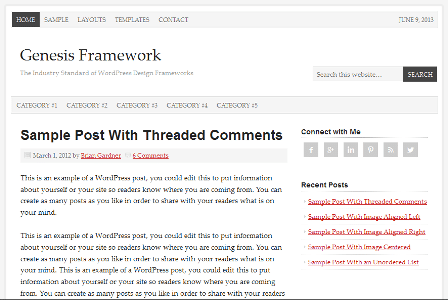
I will be revealing some tips on how you can customize and extend the prose theme to your desire. this post has the mind of non-code wranglers who’re afraid of coding at heart. am going to make this post as detail and comprehensive as possible. follow me as i guide you through this CSS customization journey.
Note – on no account must you edit the theme core file, all customization should be done it the custom code page in your WordPress dashboard. to locate it, mouse over the Genesis Tab 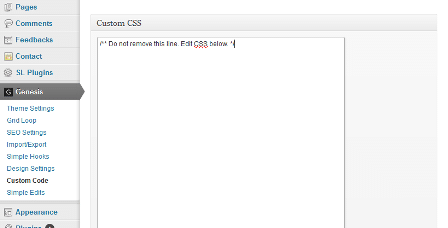 .
.
WARNING All code to be given and explained in this tutorial must be inserted there.
Reducing Header Height

That area is controlled by the #header css ID. to reduce the height use this css code [css] #header {
height: 100px;
} [/css]
change 100px to your preferred choice of height.
Changing Theme Font
By default, font of the prose theme is Palatino Linotype’,’Book Antiqua’,Palatino,serif; if you don’t like it like me, change it to the font you want. [css]body {
color: #222222;
font-family: ‘Palatino Linotype’,’Book Antiqua’,Palatino,serif;
font-size: 16px;
line-height: 1.6;
}[/css]
If you are to use any font from an external site such as Google Fonts, make sure you include a call to it.
for example, if we are to use Alef font instead of the default prose font, we first need to call the theme font using [css][/css] placing it in the header of your site.
Alternatively, import the css using @import rule by placing the below code in your css stylesheet [css]@import url(https://fonts.googleapis.com/css?family=Alef);[/css] then adding [css] body {
color: #222222;
font-family: ‘Alef’, sans-serif;
font-size: 16px;
line-height: 1.6; [/css]
Styling The Navigation Bar
![]()
this is controlled by #nav .wrap, #nav ul and #nav li a.
By default, their values are [css]#nav .wrap {
border: 1px solid #FFFFFF;
}[/css]
[css]#nav ul {
float: left;
list-style: none outside none;
margin: 0;
padding: 0;
width: 100%;
}[/css]
[css]#nav li a {
background-color: #F5F5F5;
color: #666666;
text-decoration: none;
}[/css]
- #nav .wrap – this is the <div> class and ID of the navigation menu.
- #nav ul – this is the css rule after the #nav .wrap.
- #nav li a – this is the css rule that has an effect on each navigation menu.
To get the css for the secondary navigation, replace the #nav in the above code to #subnav
Tweak the above CSS to your own design. read more on CSS Navigation Bar.
Customizing Sidebar Widget Titles
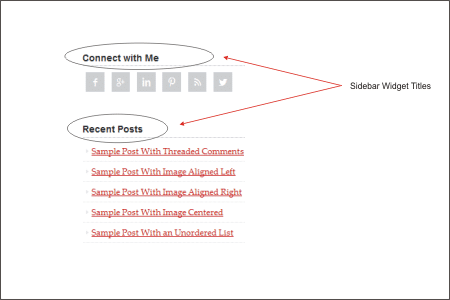
this is controlled by .widget-area h4. here is the default css for this rule
[css].widget-area h4 {
border-bottom: 1px dotted #AAAAAA;
color: #222222;
font-family: Arial,Helvetica,sans-serif;
font-size: 16px;
font-style: normal;
font-weight: bold;
text-transform: none;
}[/css]
Change this css to your own style.
Customizing Footer Widget Titles
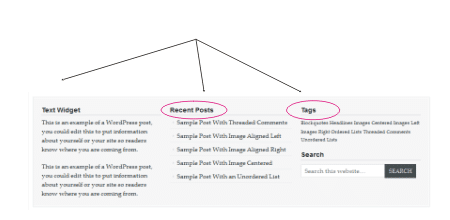
The footer widget title is controlled by #footer-widgets h4. below is it css rule
[css] #footer-widgets h4 {
border-bottom: 1px dotted #AAAAAA;
color: #222222;
font-family: Arial,Helvetica,sans-serif;
font-size: 16px;
font-style: normal;
font-weight: bold;
text-transform: none;
} [/css]
Adding Vertical line separating content from sidebar
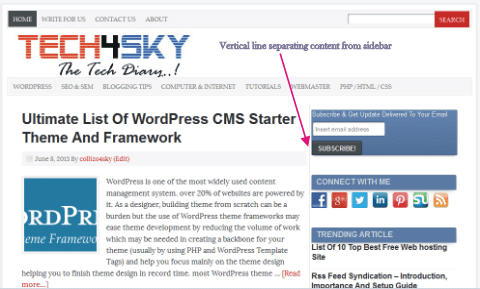
Here’s the css i use in adding a vertical line separating content from sidebar.
[css] #content {
background: none repeat scroll 0 0 #FFFFFF;
border-right: 1px solid #D3D3D3;
box-shadow: 0 2px 0 #F8FAFF;
float: left;
margin-right: 1px;
padding-right: 6px;
position: relative;
}
[/css]
Apart from doing the customization the hard way, the Prose theme comes with a built-in design and CSS customizer tool making adding header logo, custom background easy.
let’s see how to add a header logo and background using these powerful tools.
How To Add Header Image
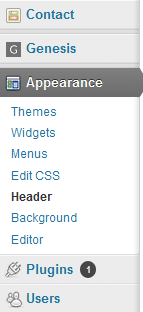 Navigate to header under Appearance tab in your WordPress dashboard.
Follow the on-screen instruction to add a header image to your Prose theme.
How To Add/change Background Image/colour
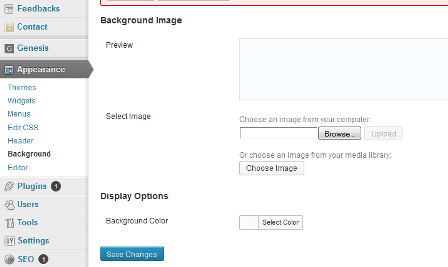 just like the step in adding header logo, Navigate to Background under Appearance tab in your WordPress dashboard.
Follow the on-screen instruction to add background image and colour to your Prose theme.
Now you’ve seen the awesomeness of the Genesis Prose theme, why not grab a copy.
If you want any customization to do in any of your Genesis or WordPress theme, feel free to contact me. I’ll be very happy to work for you.
genesis prose theme free download