From a beginner or newbie point of view, transferring or moving a website to a new web-host server might be too geeky for them to undertake as it is usually complicated.
With the right information and guidance, the process can be easily accomplished with help from cPanel.
I will try as much as possible to make this tutorial comprehensible, and by the end of this tutorial, you should be able to migrate a website to a new web server.
This tutorial is going to be broken into four parts for easy understanding.
- Backing up of files and database
- Uploading backups to new server
- Configuration of database settings
- Updating Domain name server
Backing up of files and database
First let’s go through the process of backing up the website files using cPanel manager. The backup is going to be in zip archive.
- Login to the cPanel of the host you want to move from, click filemanager under File widget.

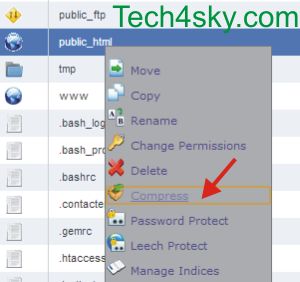
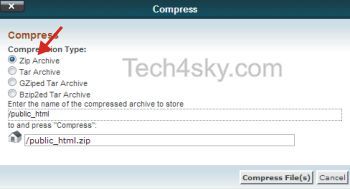
- Navigate to the root folder of the server, right-click on the public_html and click compress; select Zip Archive as the “Compression Type”. After compression is complete, click on the “public_html.zip” and download the file to your computer.
Next is to take backup of the MySQL database(s) still via cPanel.
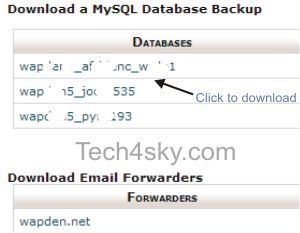
- Still under Files widget, click the Backup link.
- under Databases, click your website database to download it. Also if you have Email Forwarders, click to also download them.
Now we are done with backing up of the website files, next is to upload the new web server.
Uploading backups to new server
First, let’s upload the file backup to our new web server and later, we upload the Database backup.
- Go to the cPanel File Manager; upload the zip backup in your web server “public_html” folder.
- after upload is complete, right-click on the uploaded file and extract.
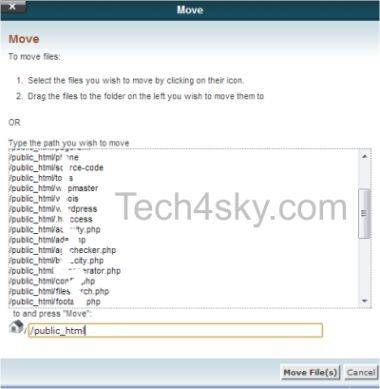
- Open the “public_html” that was gotten after extraction, click select all to select all content inside it, right-click, select “move” and set the location for the move to /public_html
Next is to upload the backup of our Database.
Under Restore a MySQL Database on the cPanel MySQL Backup page, upload the Database backup you did above to restore the Database.

Configuration of Database
Now that we have restored our website file and Database. There are two more things to do; create a MySQL Database User and Update Website Database settings.
-
Creating a Database user
You may wonder, why are we creating a Database user? When we did a backup of our database, it user wasn’t included.
Go to the cPanel MySQL page by clicking the MySQL® Databases link under Databases widget, create a new user and add it to your website database as illustrated in the image below.

-
Updating Database settings
Now that the user has been created and added to the Database, what we need do is, go to your Website Database settings and update it with the newly created username and password.
Updating Domain Nameserver
We have successfully moved our website file and database to our new web host. The final step is to update the website domain nameserver to point to your new web host name server, afterward wait for the DNS to propagate.
Conclusion
I have walk us through the basic procedure transfer of website to a new web host is done. You should now be able to do the migration seamlessly on your own.
Mind you, this is just to give beginners a head-up on how website migration is done as there are numerous quicker and efficient methods.