Are you looking to add payment gateways to your WordPress site without using WooCommerce? This article provides a step-by-step guide on integrating payment gateways in WordPress without relying on WooCommerce.
A reliable and user-friendly payment gateway is crucial when running a successful online business. While WooCommerce has long been the go-to plugin for integrating payment gateways into WordPress websites, a more straightforward, easy-to-use alternative is gaining momentum.
Say hello to ProfilePress, the plugin that allows you to add payment gateways to your WordPress site without needing WooCommerce. In this article, we will guide you through leveraging ProfilePress to integrate payment gateways, allowing you to process transactions efficiently and provide exceptional customer service.
Let’s get started!
ProfilePress: Better Alternative to WooCommerce for Selling (Digital Products)
ProfilePress is a versatile plugin with numerous benefits as a better substitute for WooCommerce when selling digital products on your WordPress website. Here are some reasons why ProfilePress stands out:
Ease of use: This plugin has simple, intuitive user interfaces that make it easy to use. Additionally, it provides comprehensive documentation covering every aspect of its functionality.
Improved User Experience: ProfilePress enhances the overall experience for customers purchasing digital products. It simplifies the registration and login process, removing unnecessary steps that could discourage potential buyers. By doing this, ProfilePress reduces friction and boosts conversion rates.
Dedicated Digital Product Selling Features: While WooCommerce is a comprehensive e-commerce platform, ProfilePress offers dedicated features specifically designed for selling digital products. It includes an order management system, an analytics dashboard, automated product delivery, access controls, and user profile management.
Flexibility in Customization and Integration: ProfilePress provides extensive customization options, allowing you to design and style your registration, login, and profile management forms to align with your website’s branding. It offers various customization features, including form templates, layout options, and styling controls. Furthermore, ProfilePress seamlessly integrates with popular payment gateways(stripe, PayPal, Razorpay, paystack, and Mollie), facilitating secure transactions and payment processing for digital products. It supports multiple currencies, one-time and recurring payments, multiple membership plans, drag-and-drop builders, and more.
Lightweight and Performance-Focused: Since ProfilePress focuses on user management and digital product selling, it is more lightweight and optimized for performance than WooCommerce, which has a broader scope and includes various e-commerce functionalities. ProfilePress ensures faster page load times, better website performance, and a smoother user experience.
Cost Efficiency: While WooCommerce provides a wide range of features for constructing an online store, it may prove excessive for websites that primarily sell digital products. ProfilePress, on the other hand, presents an active alternative that is cost-efficient. It offers a free version that allows you to get started even with a minimal budget. Moreover, you can upgrade to the Pro version if you desire to access premium features.
Support: ProfilePress actively demonstrates its commitment to customers through customer support and regular product updates. You can quickly resolve any issues and receive customized solutions for any problems.
While WooCommerce remains a powerful and widely-used solution for e-commerce websites, ProfilePress offers a specialized and efficient approach to selling digital products within the WordPress environment. By leveraging its simplicity, user-centric features, customization options, and optimized performance, ProfilePress becomes a compelling choice for those seeking a better option for digital product sales.
How to Install and Activate ProfilePress
To begin, you need to buy a ProfilePress license. Go to the ProfilePress website and select the pricing plan that best fits your needs.
Once you purchase, you will receive a confirmation email containing a link to download the plugin zip file and your license key. Alternatively, you can download the plugin from your account page on the ProfilePress website.
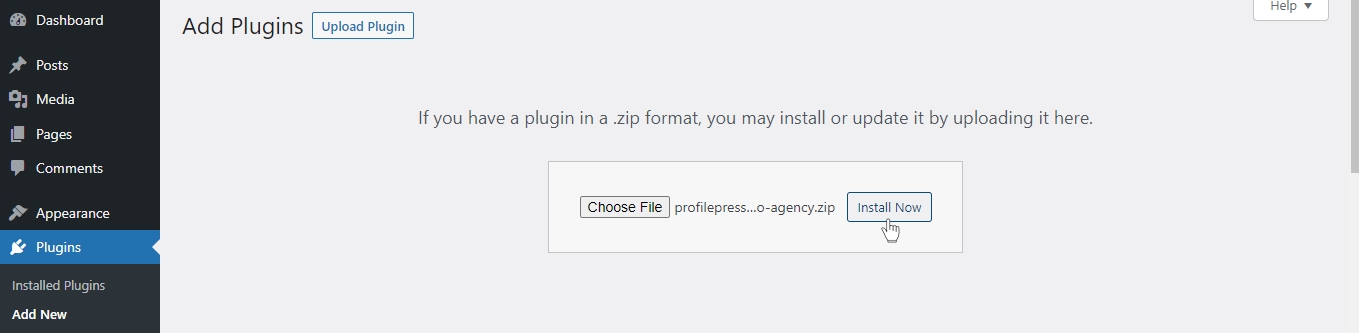
After downloading the plugin, access your WordPress admin dashboard, go to the Plugins page, and click the “Add New” button.
From there, select “Upload Plugin” and click “Choose file” to locate the previously downloaded plugin zip file. Finally, click “Install Now” to complete the process.
After installation is complete, click the Activate Plugin button.

You’ll see a notification at the top of your WordPress dashboard page saying, “ProfilePress needs to create several pages to function correctly.” Click on the “Create Pages” button to complete the plugin setup.

Having accomplished this task, we successfully set up the ProfilePress plugin on our WordPress site.
Establish a Payment Gateway Connection
ProfilePress easily integrates with popular payment services like Stripe, PayPal, Razorpay, Paystack, and Mollie. This article will guide you through connecting your website to Stripe and Paystack payment gateways.
Connecting Paystack Payment Gateway
Paystack is an African digital platform facilitating online payments for individuals and businesses.
With the Paystack ProfilePress addon, you can easily accept both one-time and recurring payments through various methods offered by Paystack on your WordPress website. These methods include credit/debit cards, bank transfers, and USSD.
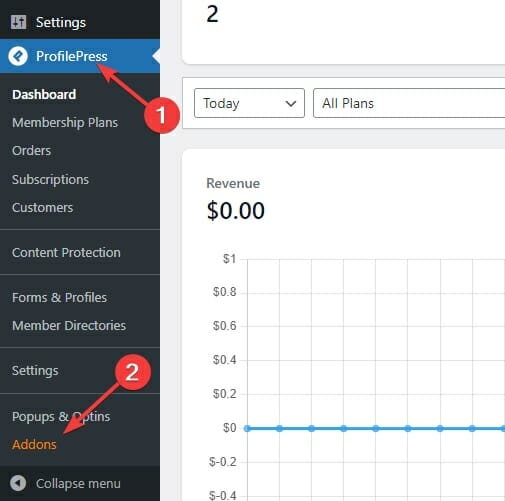
To connect to Paystack, navigate to the Addons section of ProfilePress settings.
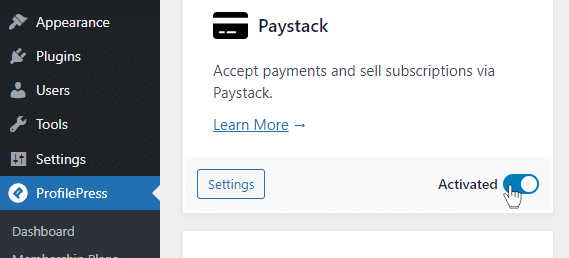
Next, enable Paystack payments.
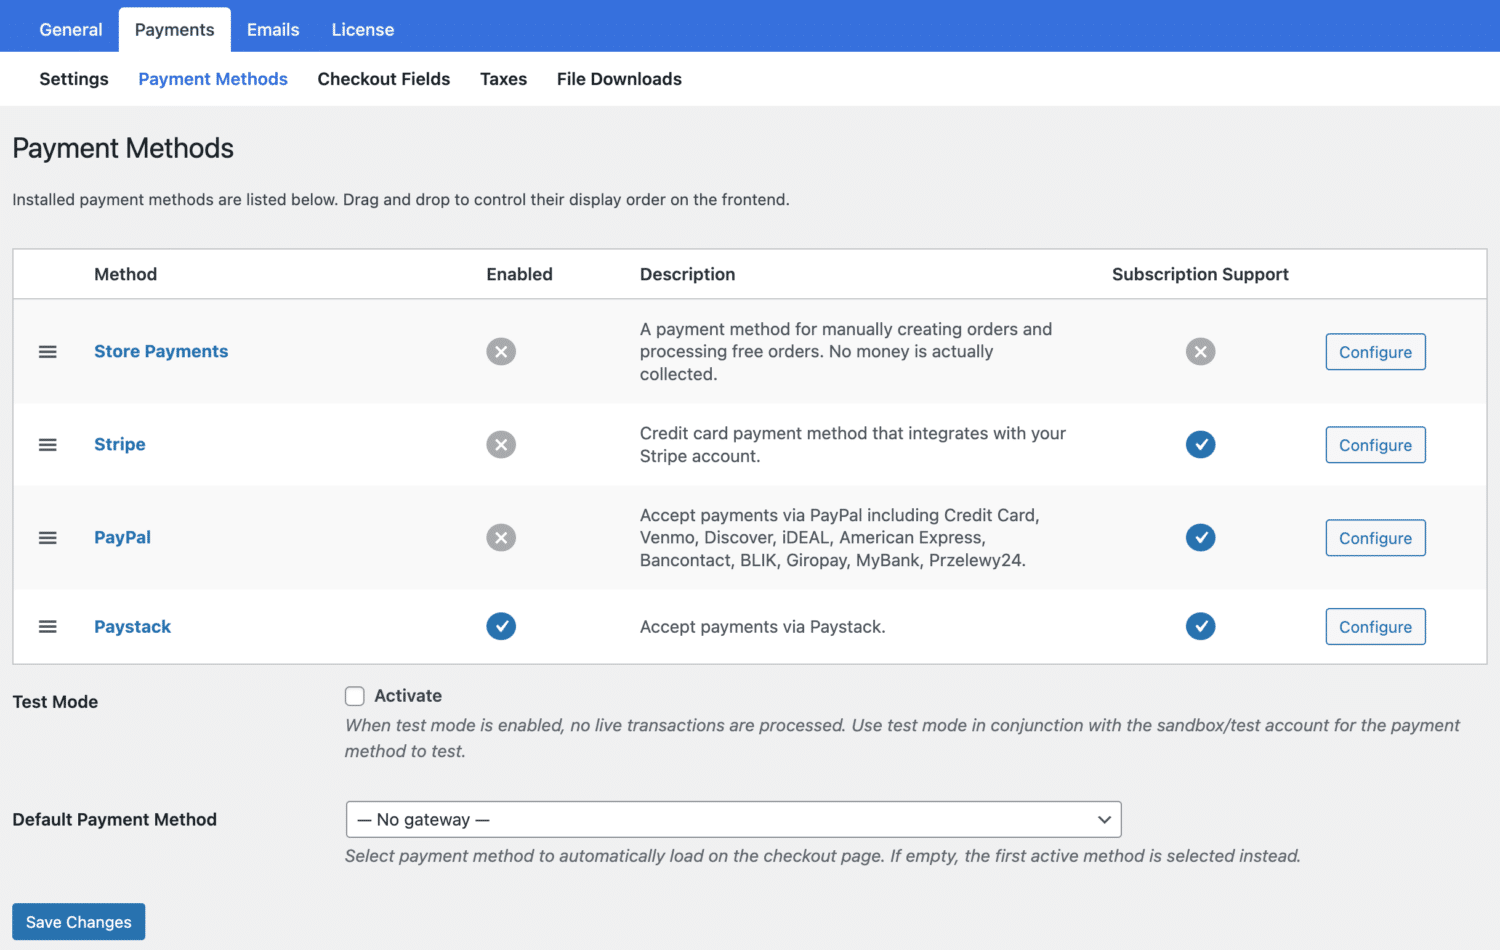
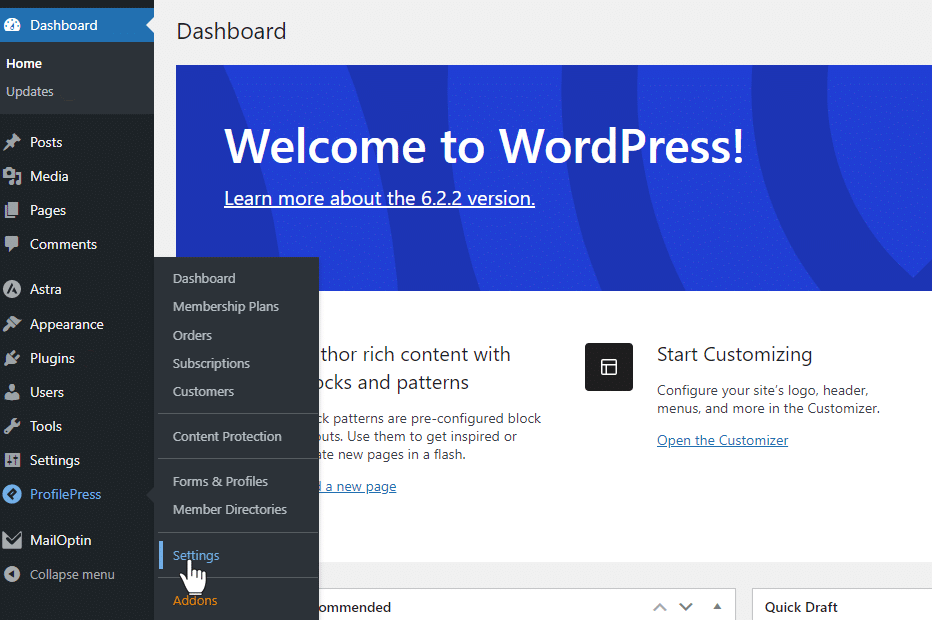
Next, navigate to the ProfilePress menu and select Settings. From there, proceed to Payments and click on Payment Methods. Locate the Configure button for Paystack and click on it.
If you wish to test the setup before making it live, activate the “test mode” option in this section before proceeding with the setup.
ProfilePress requires your Paystack API keys and webhook setup in Paystack to start accepting payments.
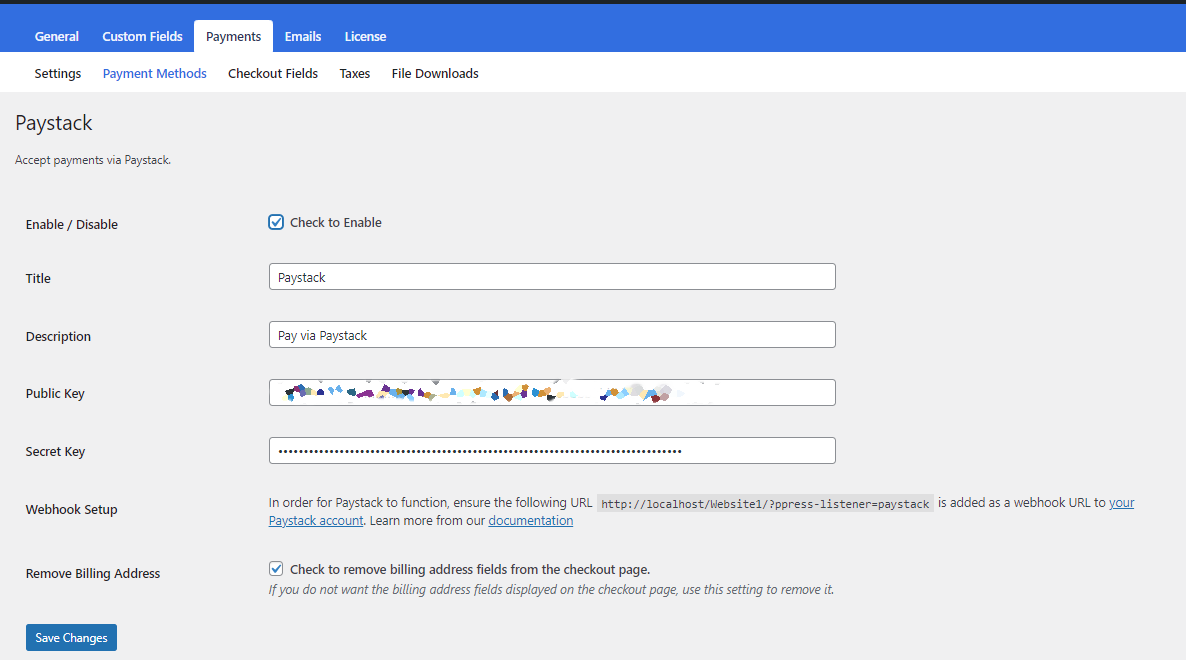
That’s it! Your website can now accept Paystack payments.
Connecting Stripe Payment Gateway
Stripe Payment Gateway has become a go-to solution for businesses seeking a reliable, secure, and feature-rich payment platform.
ProfilePress plugin allows you to quickly process one-time and recurring payments using the various methods provided by Stripe directly on your WordPress website.
To connect with Stripe, navigate to ProfilePress settings from your WordPress admin sidebar.
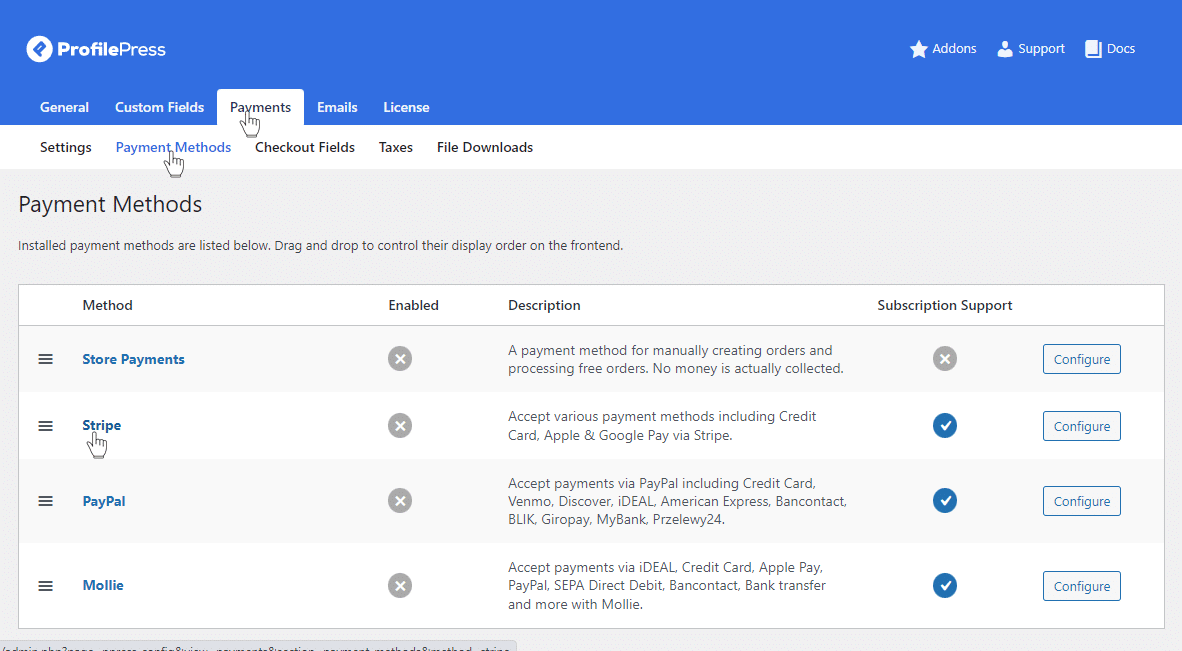
Next, click the Payments tab > Payment Methods sub-tab and choose Stripe.
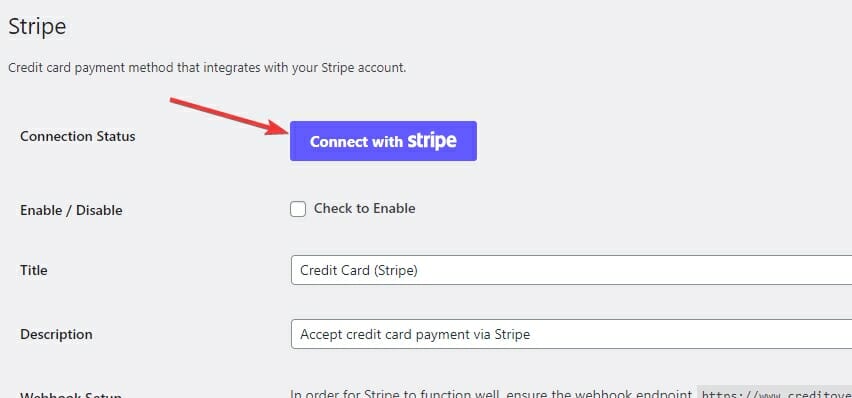
Click the giant, blue Connect with Stripe button.
Now, Stripe will ask you to log in.

Once logged in, you’ll be asked to select the account you’d like to use.
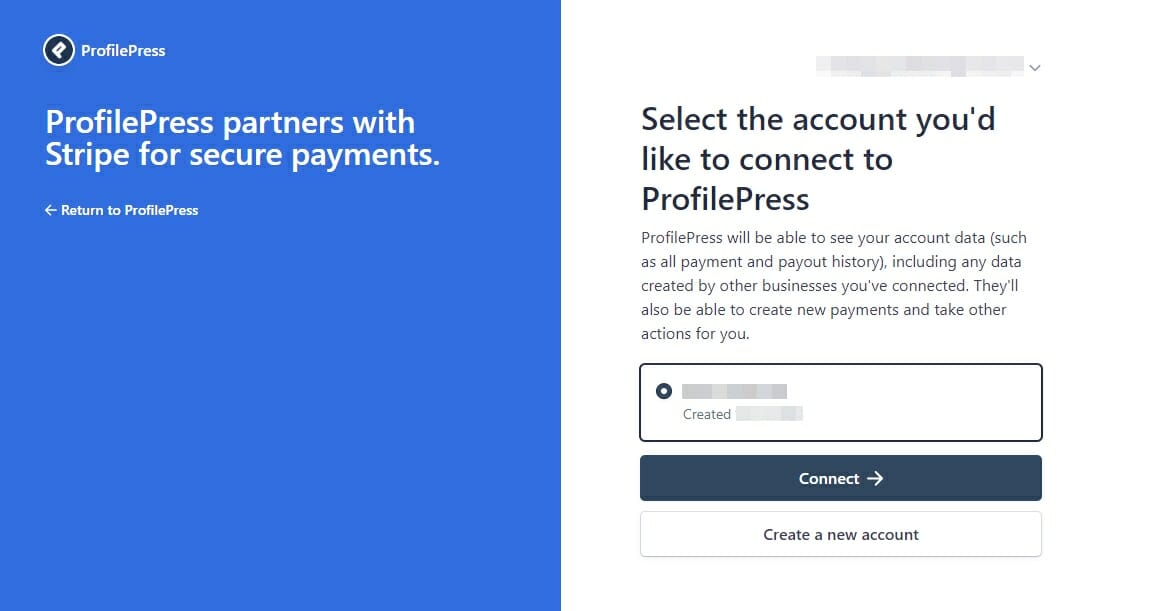
Choose the account you wish to use and tap on the connect button. This action will redirect you to the configuration page.
After successfully linking your Stripe account, mark the Enable checkbox and provide a statement descriptor. The statement descriptor is the text displayed on your customers’ credit card statements for charges. It is recommended to use your business name for this purpose. If you have a short domain name, you can enter it in this field.
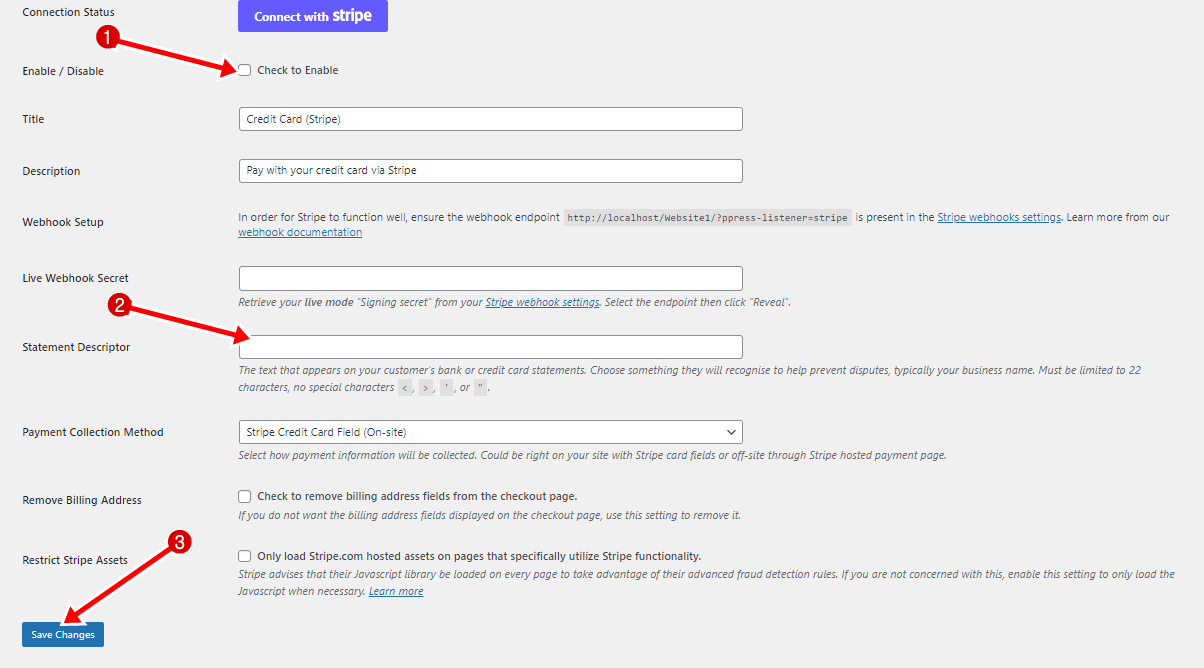
Click Save Changes to enable Stripe payments on your website.
And that’s it.
Next, we’ll guide you through selling digital products using ProfilePress.
How to sell digital products with ProfilePress
To get started, we must perform the setup and configuration on ProfilePress.
To do this, navigate to ProfilePress > Settings > Payments > File Downloads.
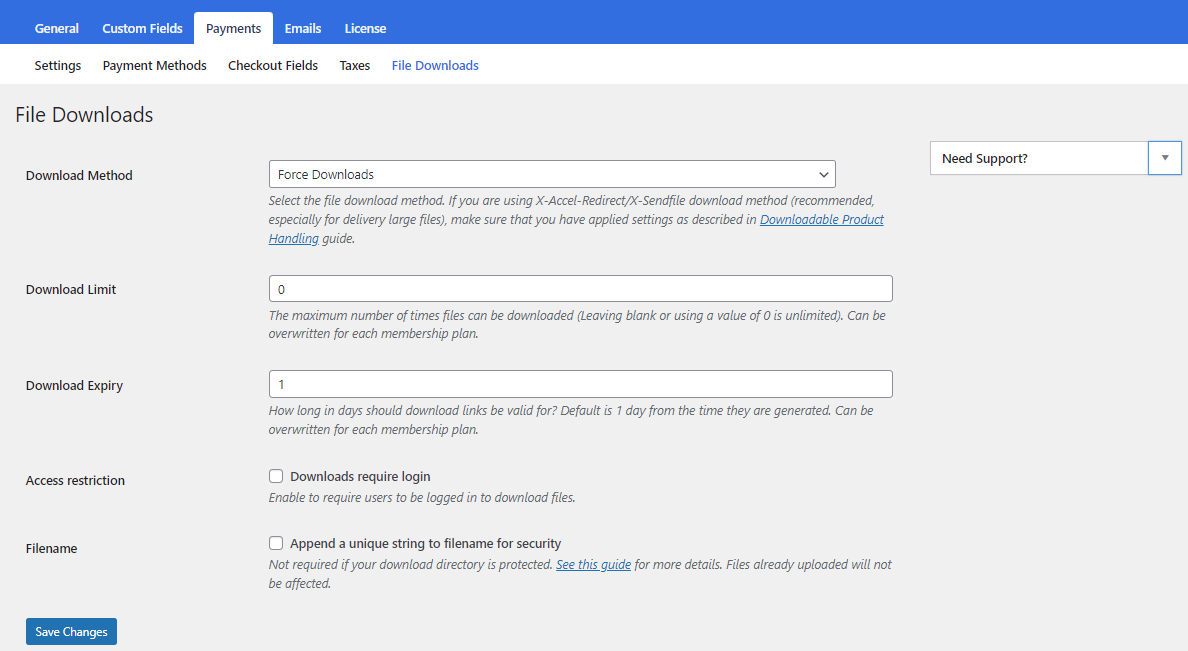
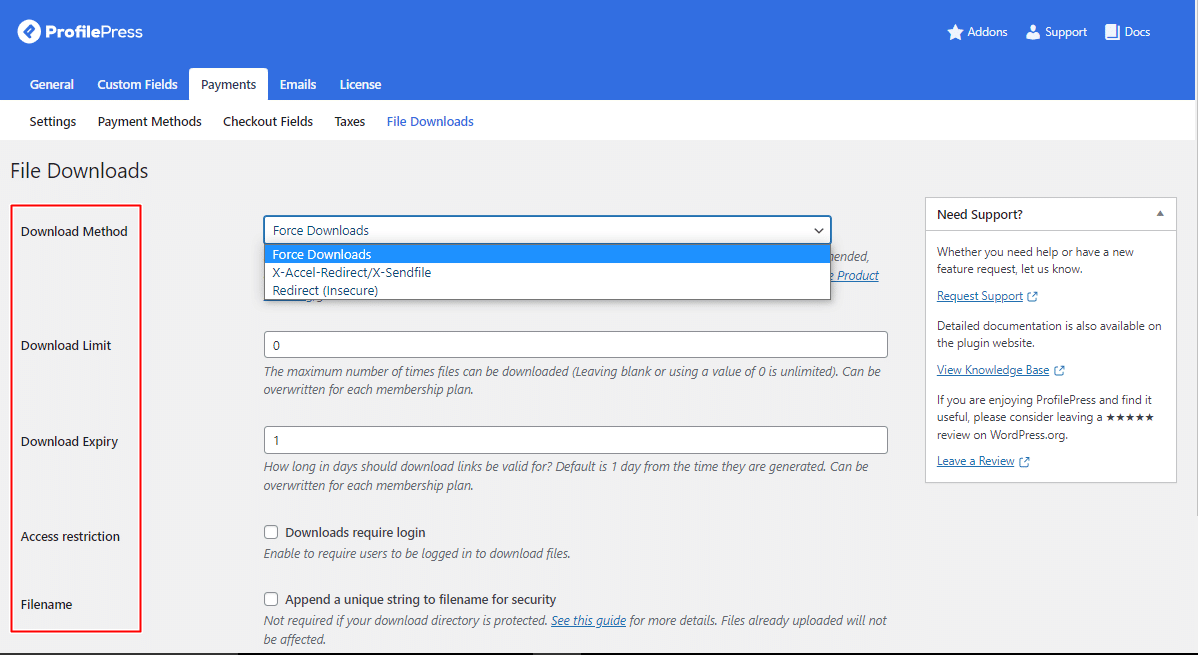
To select a File Download Method, go to the “Download Method” field and choose from the dropdown menu. You will have three options to consider.
- Force Downloads: This method utilizes PHP to protect files from direct linking. However, if your files are large or your server is not powerful enough, there might be timeouts during the download. In such cases, you should examine your server or consider using the “X-Accel-Redirect/X-Sendfile” method.
- X-Accel-Redirect/X-Sendfile: The server (Nginx, Apache, LiteSpeed, Lighttpd, or Cherokee) handles downloads. Before utilizing it, confirm with your web host that the server has the X-Accel-Redirect/X-Sendfile module installed and enabled. This method provides the highest reliability by directly serving files to customers, resulting in optimal performance. Files are also protected by a .htaccess file, making it secure.
- Redirect (Insecure): With this method, when users download a file, their link is redirected to the file. It’s important to note that using this method leaves your files unprotected, and anyone with the upload link can access them, even without being logged in.
Use the Download Limit setting to specify how many times files can be downloaded after a successful order and the Download Expiry setting to determine the duration until the generated download URL expires.
The Access Restriction setting enables you to require users to log in to your WordPress site before accessing their files or downloadable products.
Enhance the security of your files by enabling the “Append a unique string to the filename for security” option. Although it is recommended to enable it, turning it on is not mandatory if you have correctly configured your upload directory. Enabling this option will have no impact on filenames or links. Only files uploaded when this setting is checked will receive a unique string appended to them. This setting is fully backward-compatible, and you can toggle it on and off without impacting any generated file links.
Click the save changes button to save your file downloads configuration.
Creating Digital Products for Sale
After completing the file download setup, we can generate the product customers will download upon purchasing. Follow the steps outlined below to create digital downloads or downloadable files for your customers:
Navigate to ProfilePress and access the “Membership Plans” section.
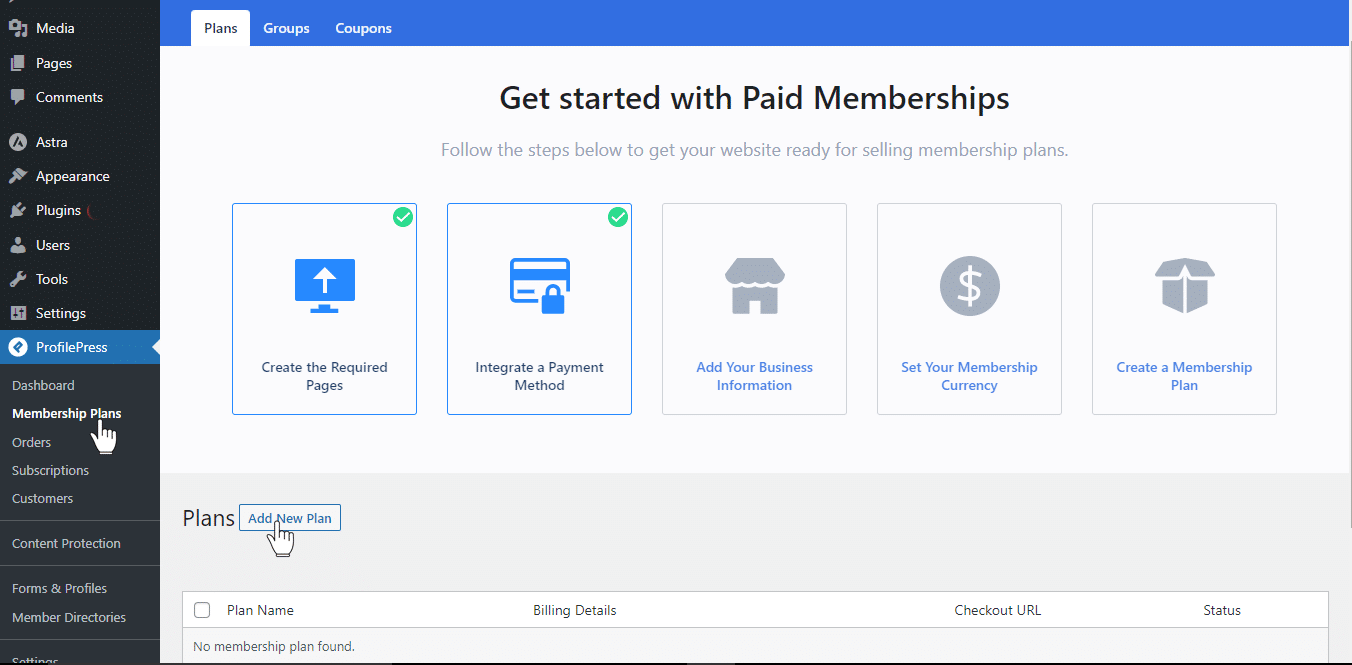
Click the Add New Plan button. It will take you to the Add Plan page.
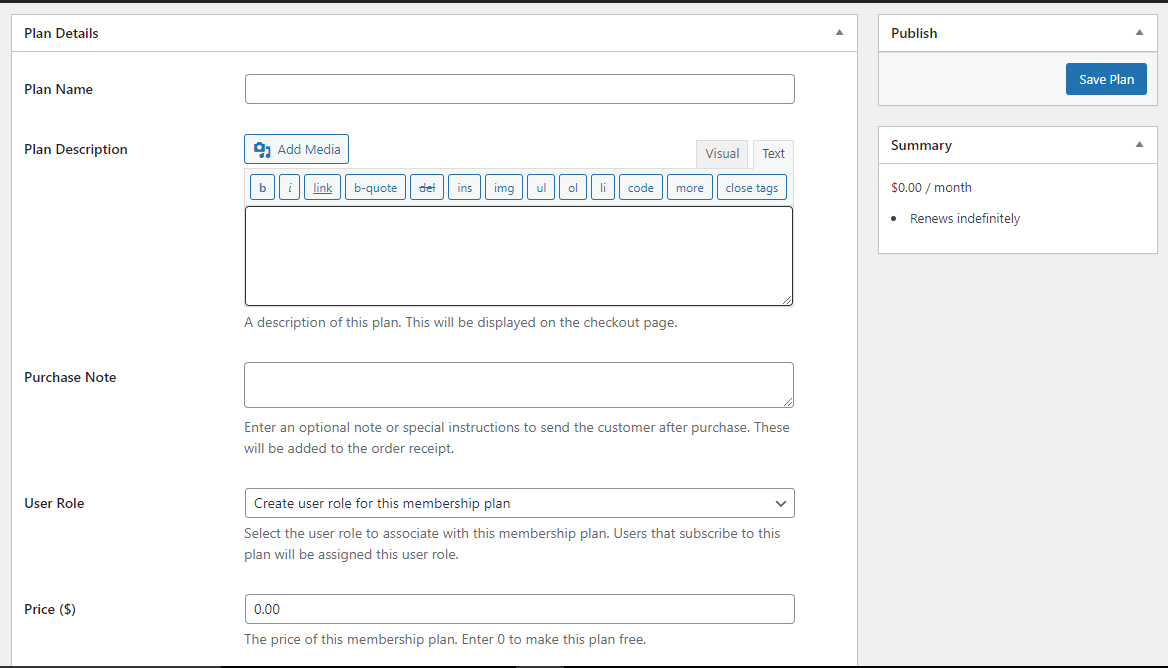
Under Plan Details, input the Plan name, Description, Purchase Note, User Role, and Price.
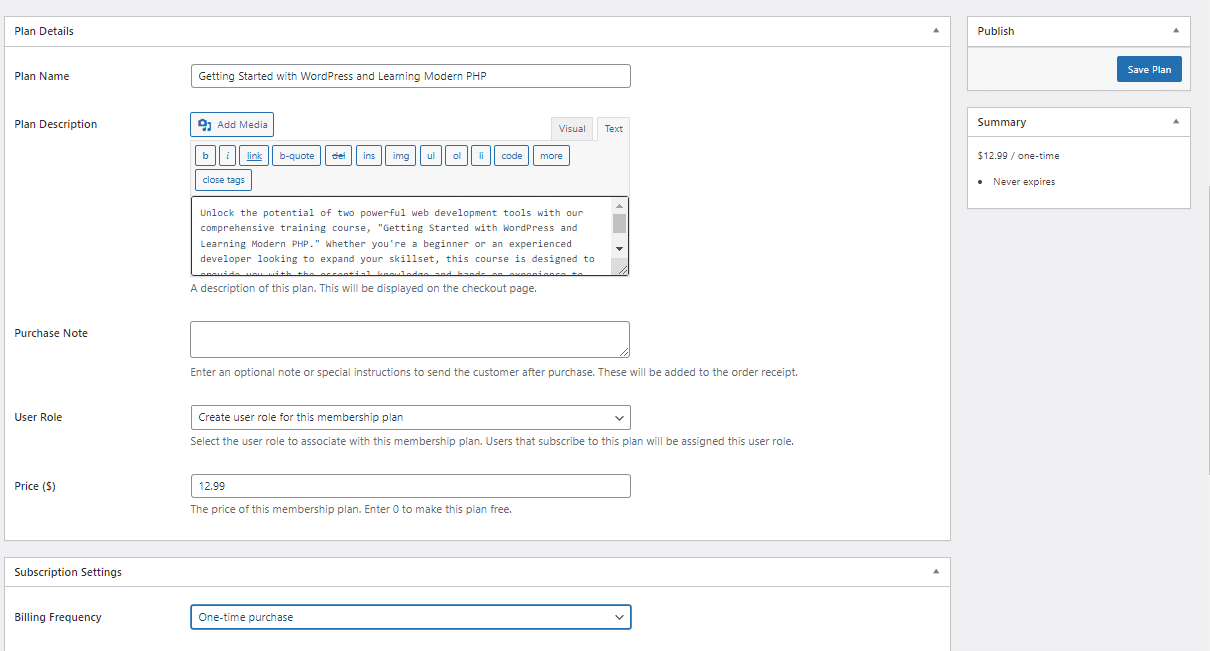
After specifying the plan’s name, price, and subscription settings, navigate to the Downloads & Integrations meta box and access the Digital Product section.
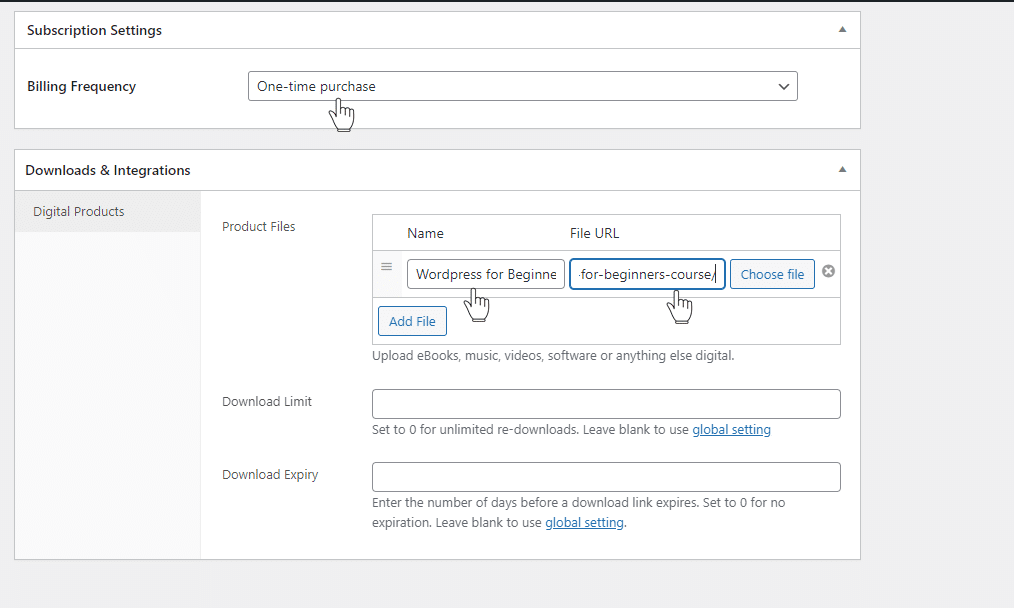
To add a file, click the “Add File” button and provide a name. If the file is hosted elsewhere, enter the downloadable URL. Alternatively, you can select the “Choose file” button to insert an existing file from your Media Library or upload a new file. Upload the file and click “Insert” to establish the URL for each downloadable file.
Enter a “Download limit” (Optional). Once users reach this limit, they can no longer download the file.
Specify a “Download expiry” period (Optional). If you set a certain number of days, download links will expire afterward.
After making these edits to the membership plan, save your changes.
Each membership plan provides a checkout link that can be added to your website’s pricing page or included in emails to allow users to make payments or purchase the plans.
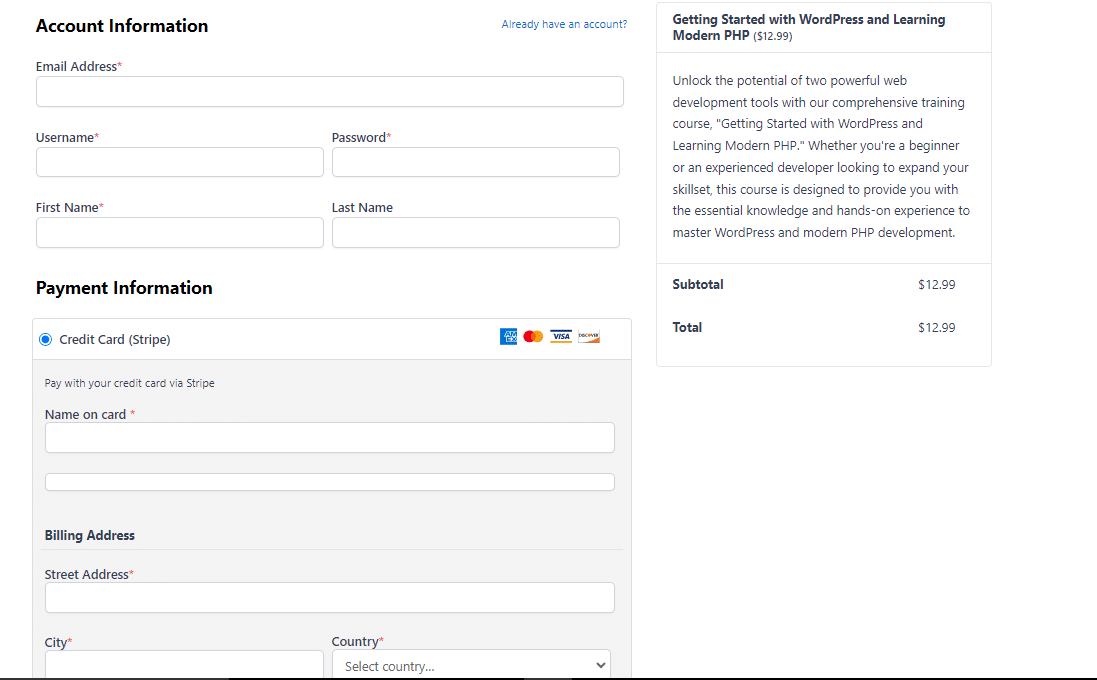
After saving the plan, you will find the checkout URL on the plan editing page.
Managing Orders with Downloadable Files
Customers or members can always access the downloadable files or digital products included in their membership subscription on the order details page from the My Account page.
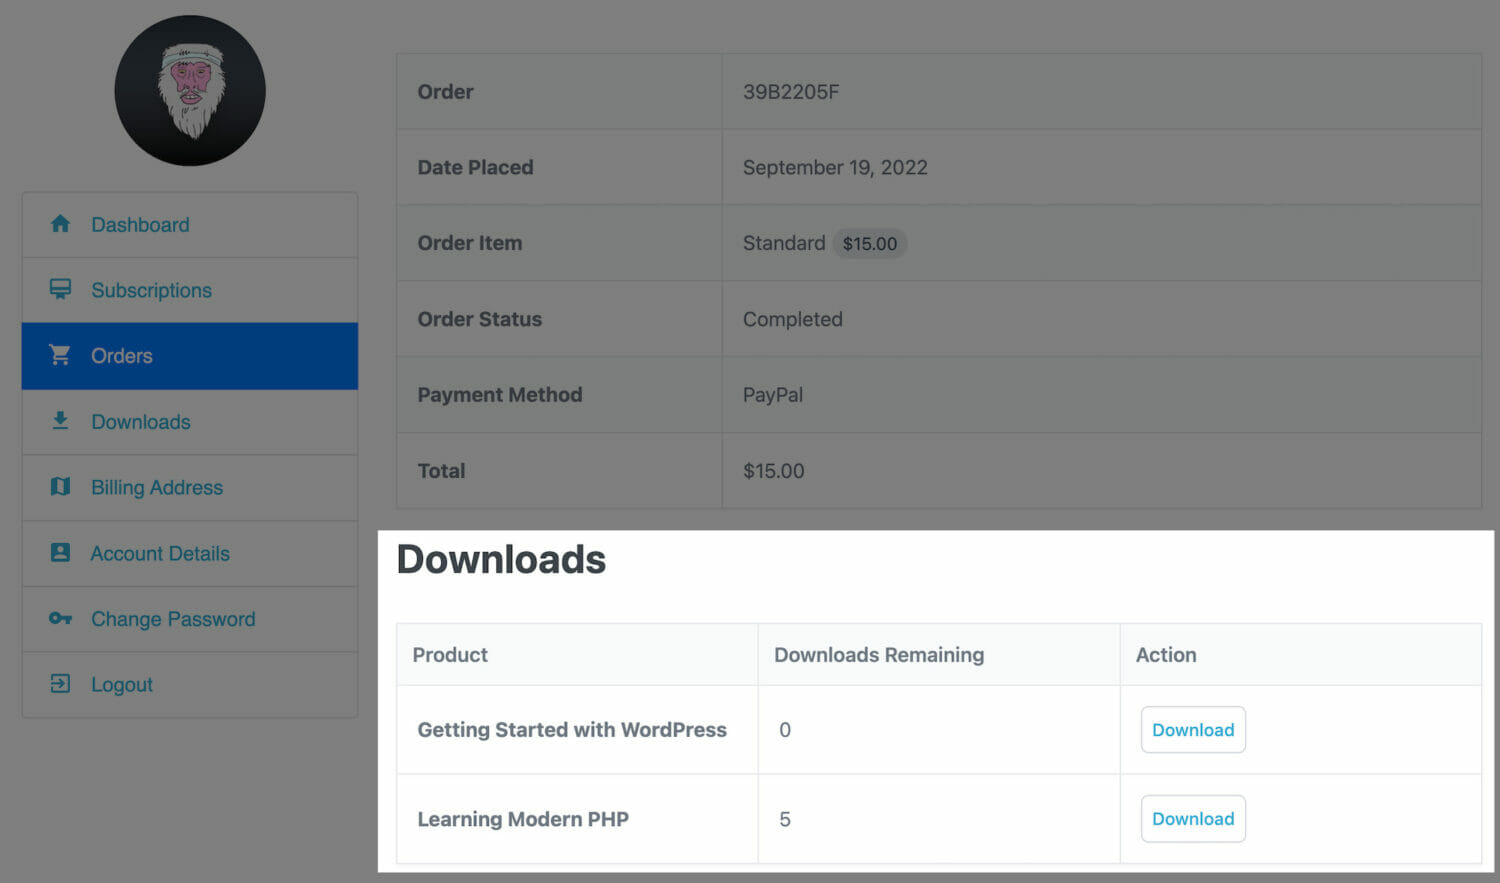
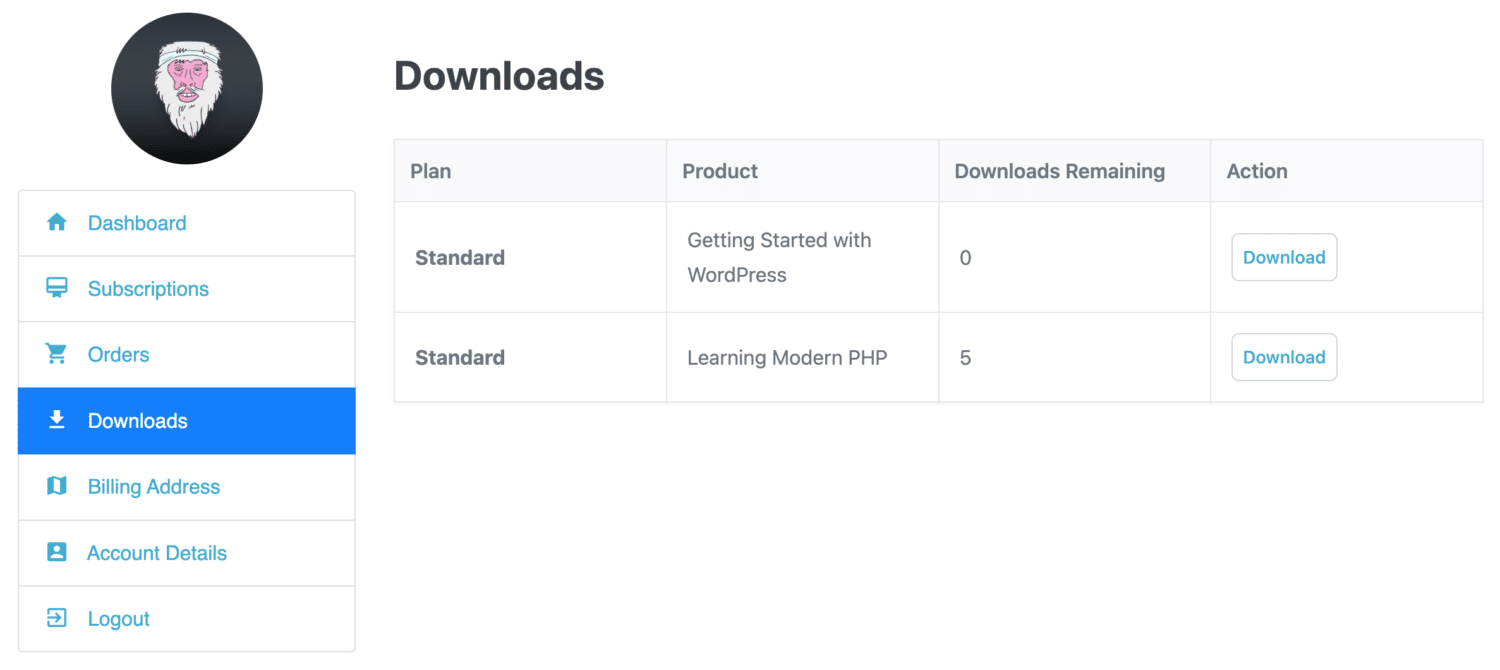
And from the dedicated “Downloads” section on the My Account page.
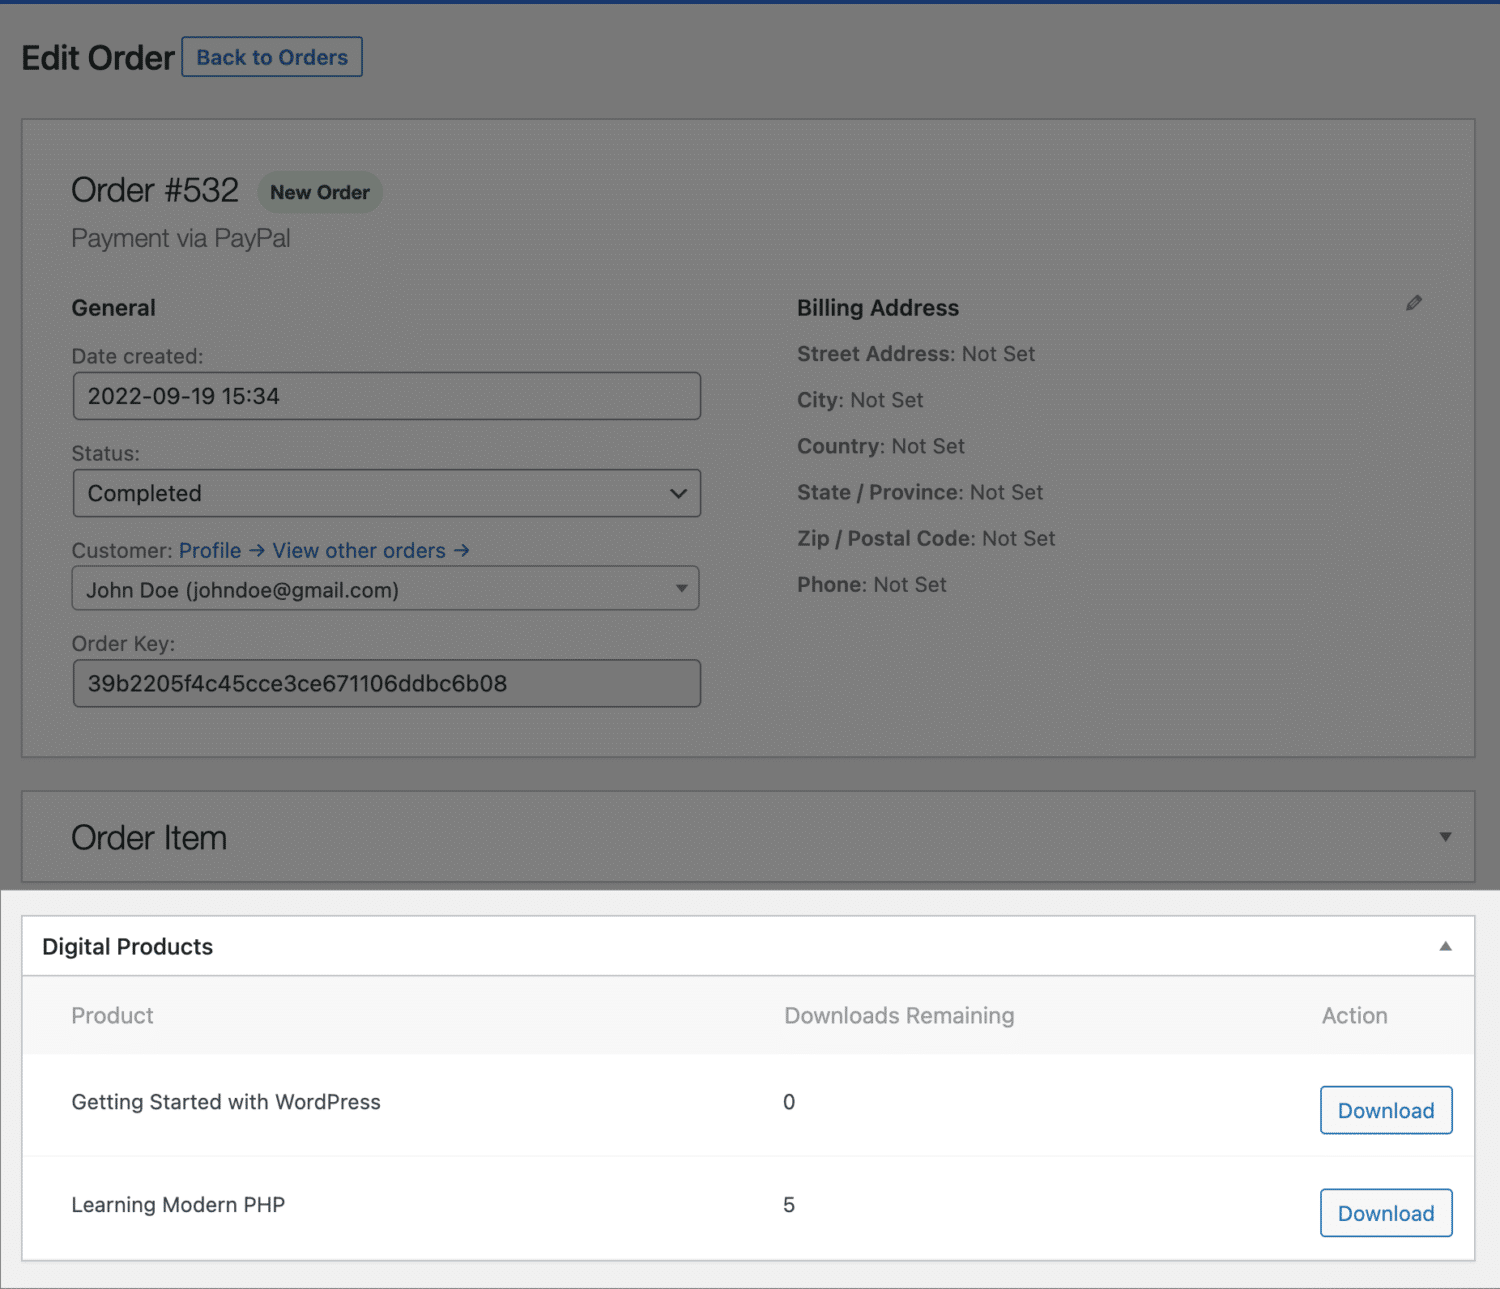
As the WordPress membership site admin, you can view, access, and download the files associated with any order by going to ProfilePress > Orders and selecting the order to view or edit.
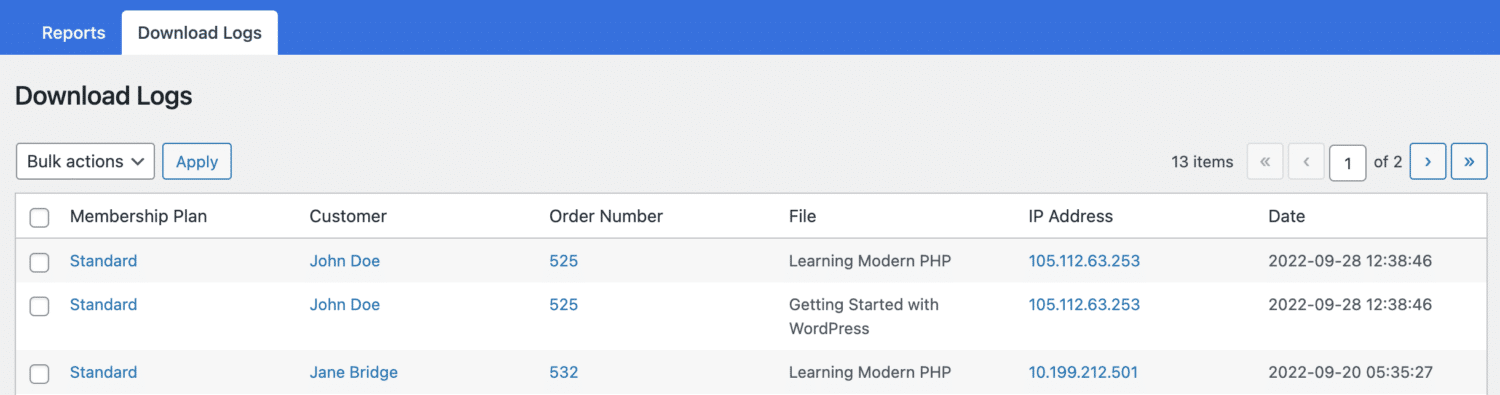
Download Logs
ProfilePress offers logs that provide a detailed report of all downloaded files and the corresponding user information. To access this valuable resource, navigate to ProfilePress, then proceed to the Dashboard and locate the Download Logs section.
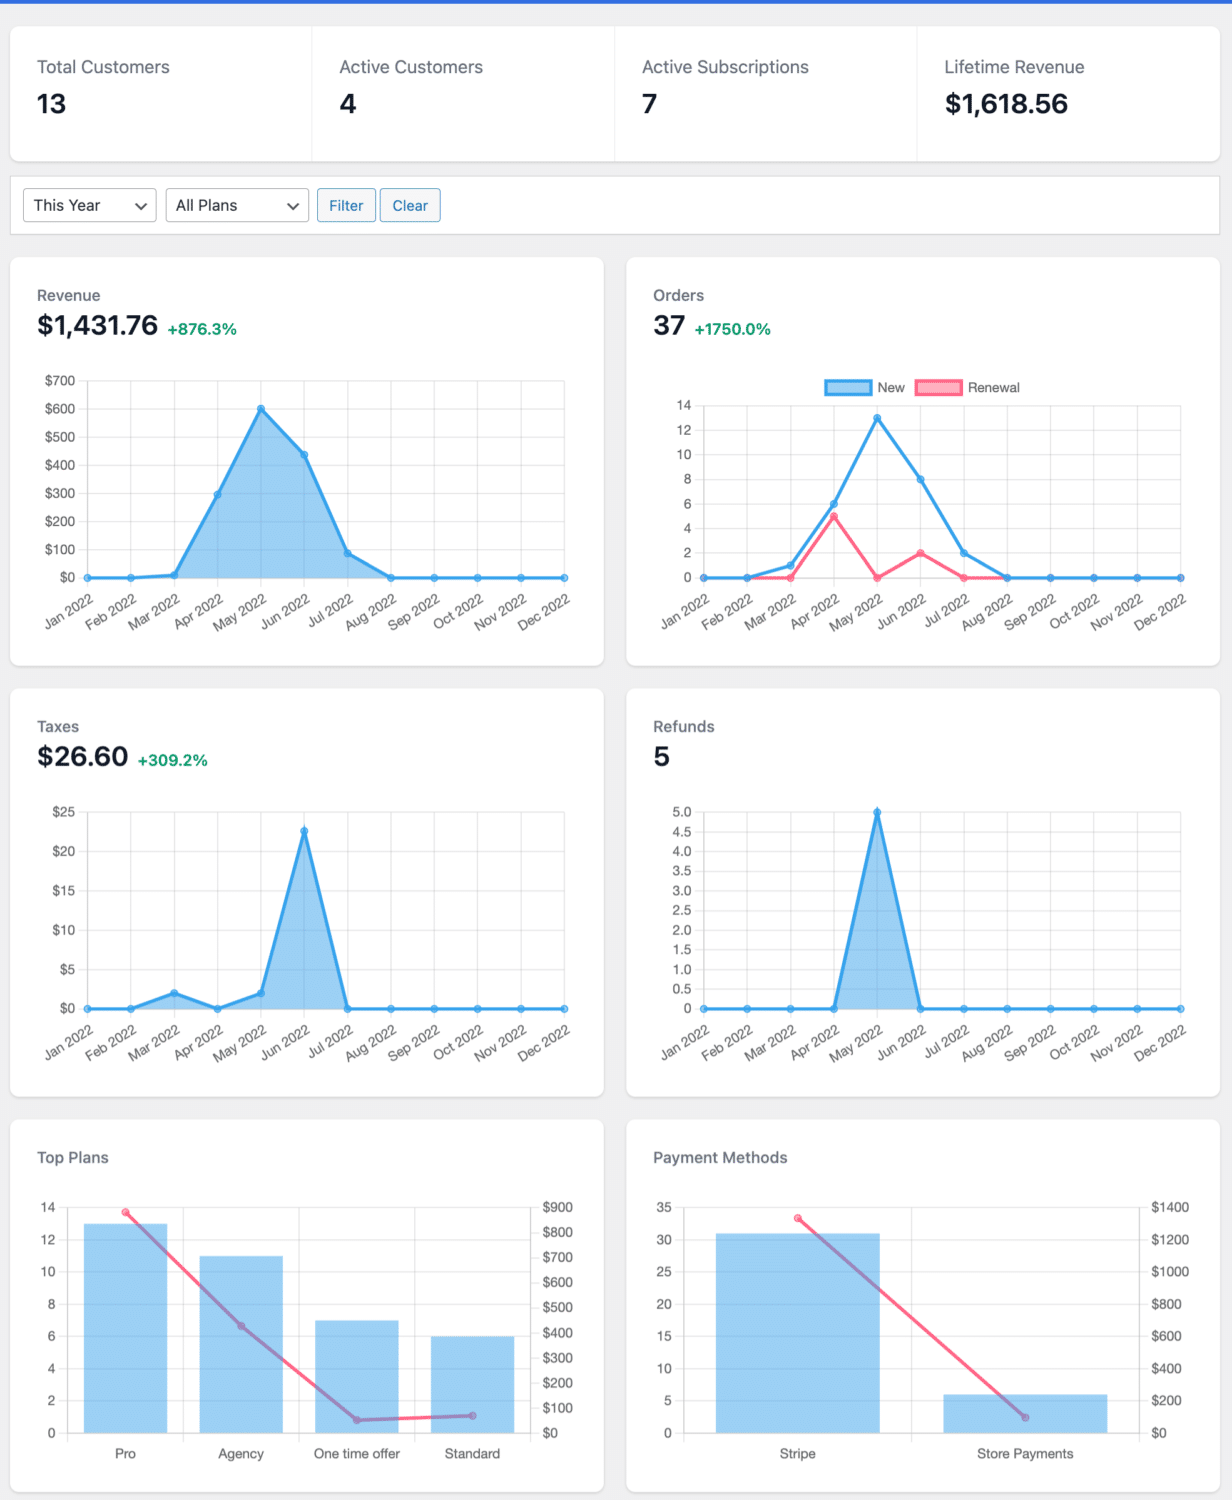
Reporting Dashboard
ProfilePress offers a reporting dashboard, providing a comprehensive breakdown of your earnings, refunds, sales, and other crucial metrics. This analytics tool lets you know your products’ performance effectively and make informed business decisions.
To access this feature, navigate to ProfilePress and click on the “Dashboard.”
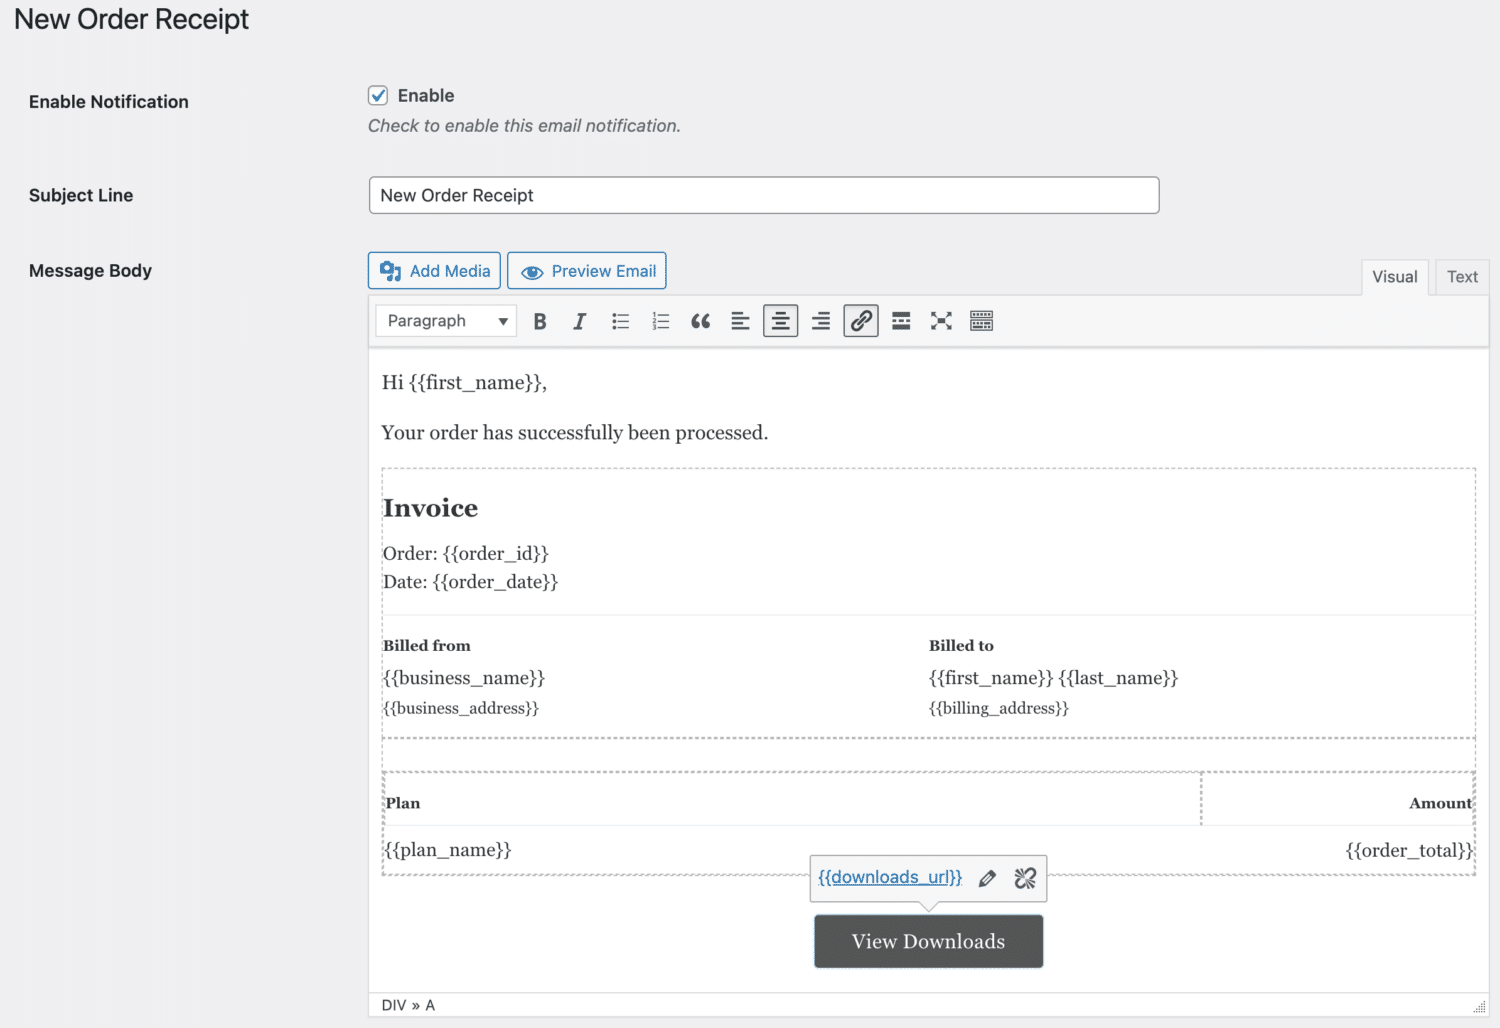
Invoice/Order Email
ProfilePress offers a feature that enables you to send Invoice or Order notifications to your valued customers. This feature includes the handy placeholder {{downloads_url}}, which automatically generates a URL directing users to the downloads section on their personal User’s Account page. This grants users or customers convenient access to their digital products or files.
You can use it as a link or a button in. This lets you present the URL as a clickable link or a button, enhancing the overall user experience.
You can find the template within ProfilePress at the following location: ProfilePress > Settings > Emails > Order.
After completing these steps, you will have a fully operational system for selling digital products on a WordPress website and accepting payment, eliminating the need for Woocommerce.
Closing Thoughts
This article presents a detailed guide on adding payment gateways to your WordPress website without relying on WooCommerce, utilizing the capabilities of ProfilePress.
By following the step-by-step instructions outlined in this article, you can set up a secure and efficient digital payment system and establish a functional and efficient digital product sales system on your WordPress site. With ProfilePress’s user-friendly interface and integration, you can easily manage your products, accept payments, and provide a smooth customer experience.
Whether you’re a small business owner, an entrepreneur, or an aspiring online seller, integrating payment gateways through ProfilePress opens up new opportunities for monetizing your digital products and services. With the flexibility and control offered by ProfilePress, you can improve your customer’s experience and make it easier for them to pay.
What are you waiting for? Get ProfilePress today and start enjoying its benefits.