Am a big lover of any Google product. one of such product i can’t do without is the Google Drive. i use it as my files cloud storage.
As a web developer, webmaster or a website administrator, it is always advisable to keep backup of your website, not just in one place but spread around various storage. you can have your site backup in a CD disk, HDD, flash and a cloud storage so you will have options in case any got corrupted.
This blog is powered by WordPress and one of such way i backup my blog using Google Drive. thanks to Google Drive for WordPress plugin, i don’t need to manually store my blog backup to Google Drive because this plugin handles it for me. it also have an option to schedule backup on either daily, weekly or monthly basis.
 Setting up Google Drive for WordPress Plugin is quite difficult if you not that techy. follow the below tutorial to learn how to configure and setup this plugin.
- Click http://wordpress.org/extend/plugins/wp-google-drive/ to download, install and activate the Google Drive for WordPress plugin.
- Click on configure Google under the plugin tab
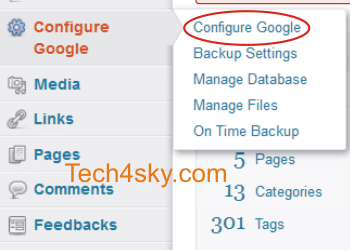 to reveal the set up page.
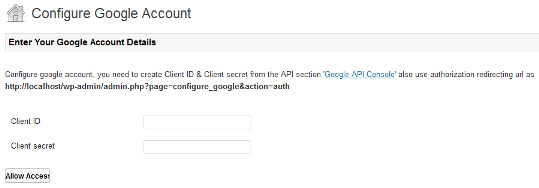
 - Below is how the Configure Google Account setup page is
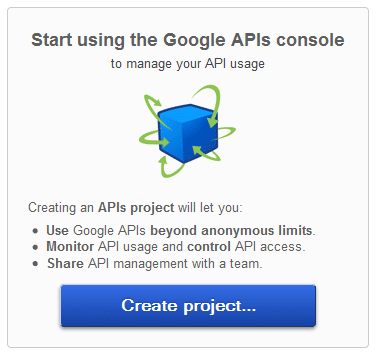
- Click on the Google API Console. if it’s your first time, you will see a create project page, just click it to continue.
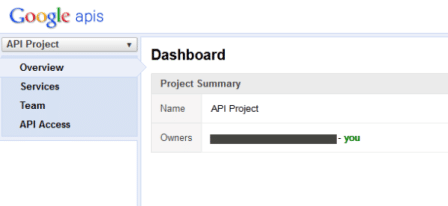
- You will see your dashboard. you will normally see a No active services notice.
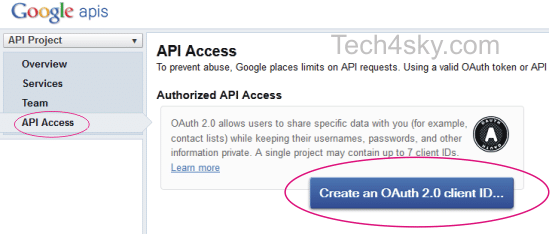
- Go to “API Access” tab and click on “Create an OAuth 2.0 client ID”
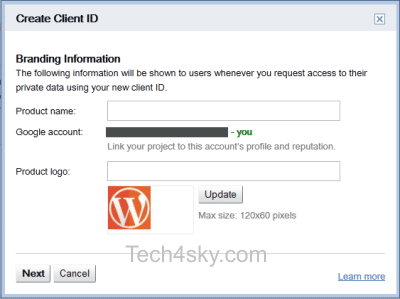
- In the pop-up window, give a product name, upload logo(optional) and in Homepage URL, just add your site address(i.e yoursite.com) before clicking on “Next” button.
- By default “Web Application” will be selected and don’t change it.
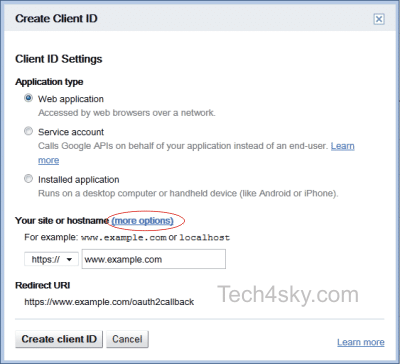
- In “Your site or hostname” section, click on “More Options” to expand link sections.
- Now, paste the link (http://yoursite.com/wp-admin/admin.php?page=configure_google&action=auth) in Authorized Redirect URIs .
In Authorized JavaScript Origins Enter domain name in it.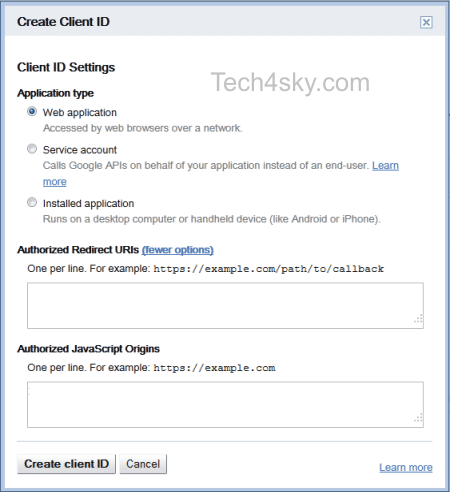
- Click on “Create Client ID” and you have successfully created a Client ID using Google API Console.
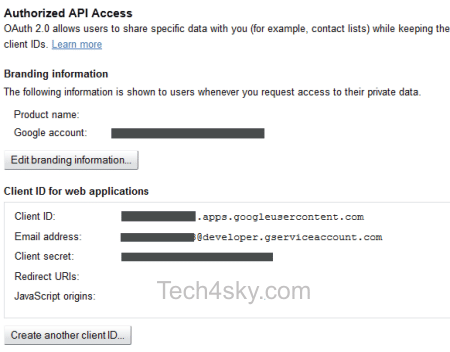
- Copy the Client ID and Client Secret from API dashboard and paste them in “Configure Google” page.
- You have to authorize the plugin by clicking on “Allow Access” button
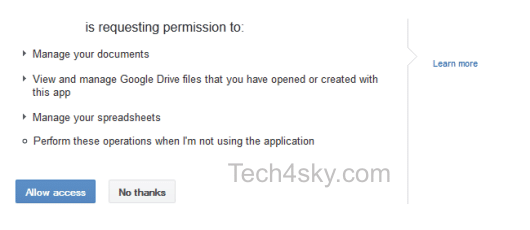
- Allow Access to the Plugin and the entire setup has been successfully installed.
Afterward, you can configure this plugin further by entering the custom folder ID of your Google Drive. Also define the maximum number of backups (use any positive integer in that field) and set the frequency of backup and everything will be automatically stored in your Google Drive.