Are you looking for a way to monetize your website and create a loyal community around your content? The best way to do this is to create a membership site in WordPress.
A membership site allows you to monetize your website’s content by offering exclusive access to a privileged group of members who have subscribed to your services. Creating a membership site can increase engagement with your followers, build a sense of community, and generate a recurring revenue stream.
But how do you create a membership site in WordPress? Don’t worry; we’ve got you covered. In this article, we’ll guide you step-by-step through creating your membership site from scratch using ProfilePress, a powerful WordPress membership plugin.
How to Create a Membership Site with WordPress
While numerous membership plugins are available for WordPress, only a few offer everything on the list of must-have features for an effective membership site. ProfilePress is a plugin that stands out for its comprehensive features, customization options, and ease of use. Let’s look at how to use it to create a successful membership site.
Step 1: Install the ProfilePress Plugin
The first step is to purchase and install ProfilePress Pro. To do so, head to the ProfilePress website and buy the plugin.
After purchasing the plugin, download the ZIP file from your account section onto your local computer.
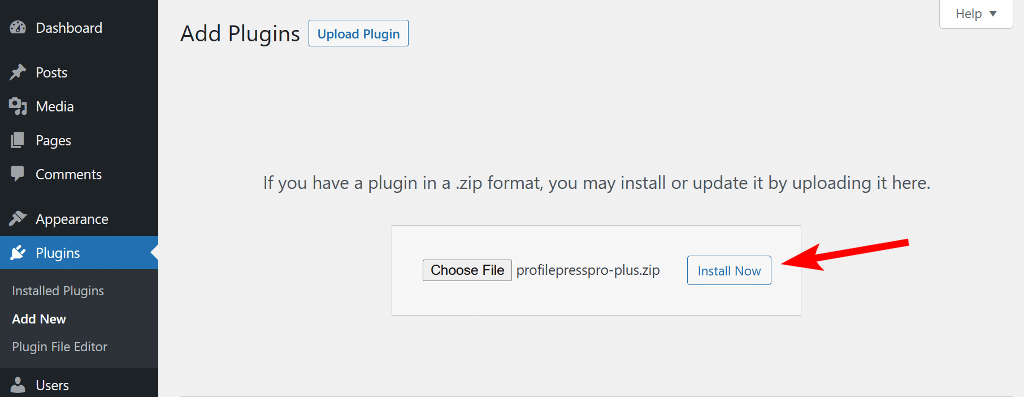
Next, log in to your WordPress dashboard and go to the Plugins page. From there, click the Add New button and Upload Plugin. Next, drag and drop the previously downloaded plugin file, click Install Now, and then Activate.
The next step is to activate your license key, which is essential to unlock features and receive updates for the plugin. To activate your license key, go to the plugin’s settings menu and click on License. Next, insert your license key in the assigned field and click Save Changes.
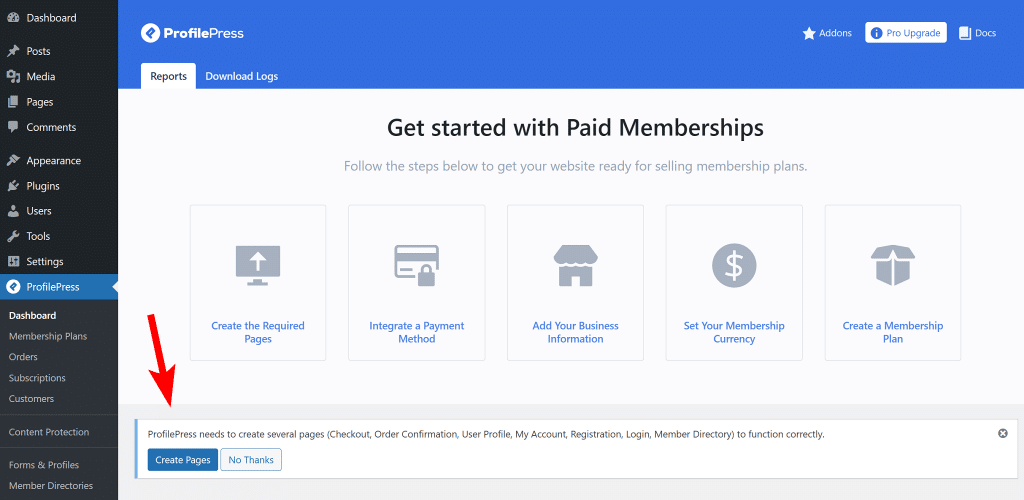
The plugin allows you to create the necessary pages to make the process seamless automatically. Navigate to ProfilePress > Dashboard and click Create Pages at the top.
After these pages are created, you’ll be taken to the plugin’s settings page, where you must select the newly created page next to each name.
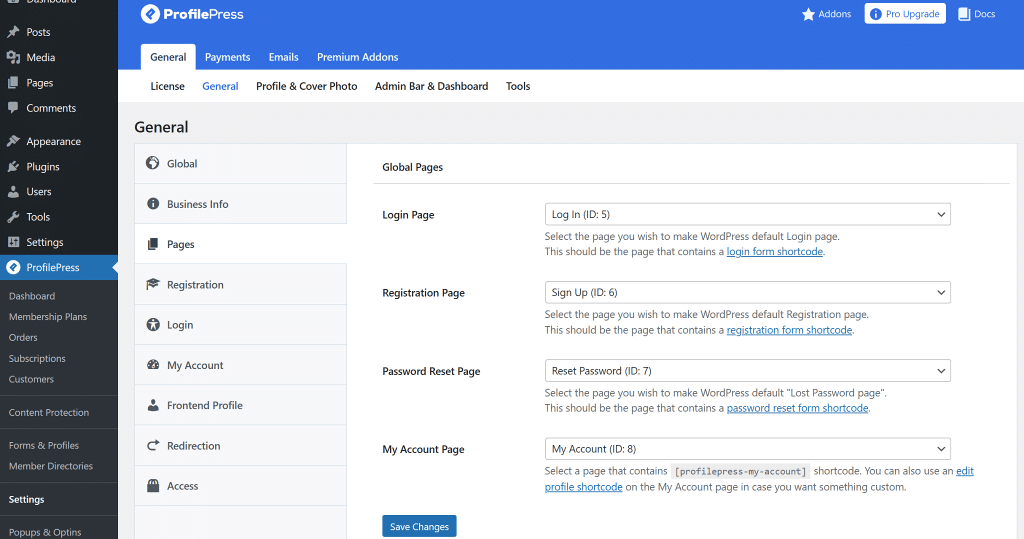
Once done, click the Save Changes button at the bottom.
Now that you have set up the ProfilePress plugin on your WordPress site, the next step is to integrate a payment gateway.
Step 2: Integrate a Payment Method
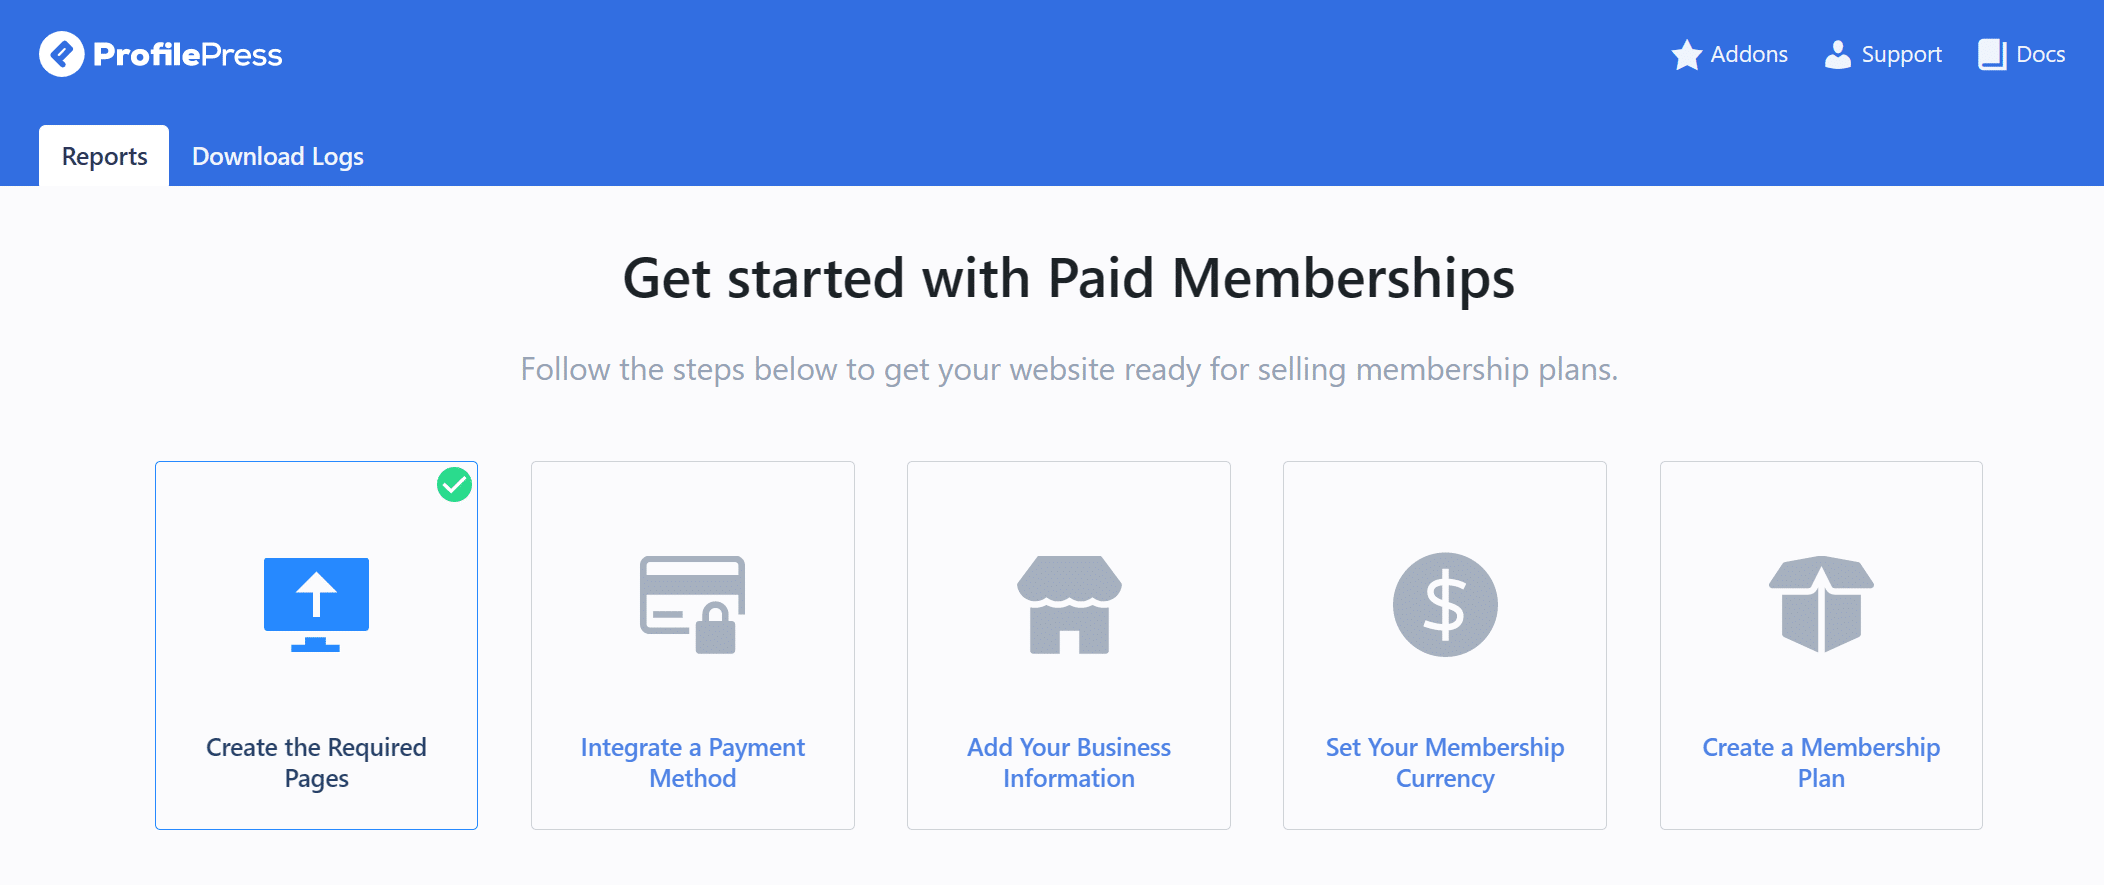
ProfilePress offers a user-friendly 5-step Get Started walk-through within the plugin dashboard to help you create customized membership plans on your website. To access the walkthrough, navigate to ProfilePress > Dashboard and see it at the top. We have already completed the first step, so let’s proceed to the next one.
Connect to a Payment Gateway
Click on the Integrate a Payment Method button to take you to the Payments page. Alternatively, you can navigate to ProfilePress > Settings > Payments to access the same page. ProfilePress supports multiple payment gateways, including Stripe, PayPal, Paystack, Mollie, and RazorPay. For this tutorial, we’ll focus on integrating Stripe.
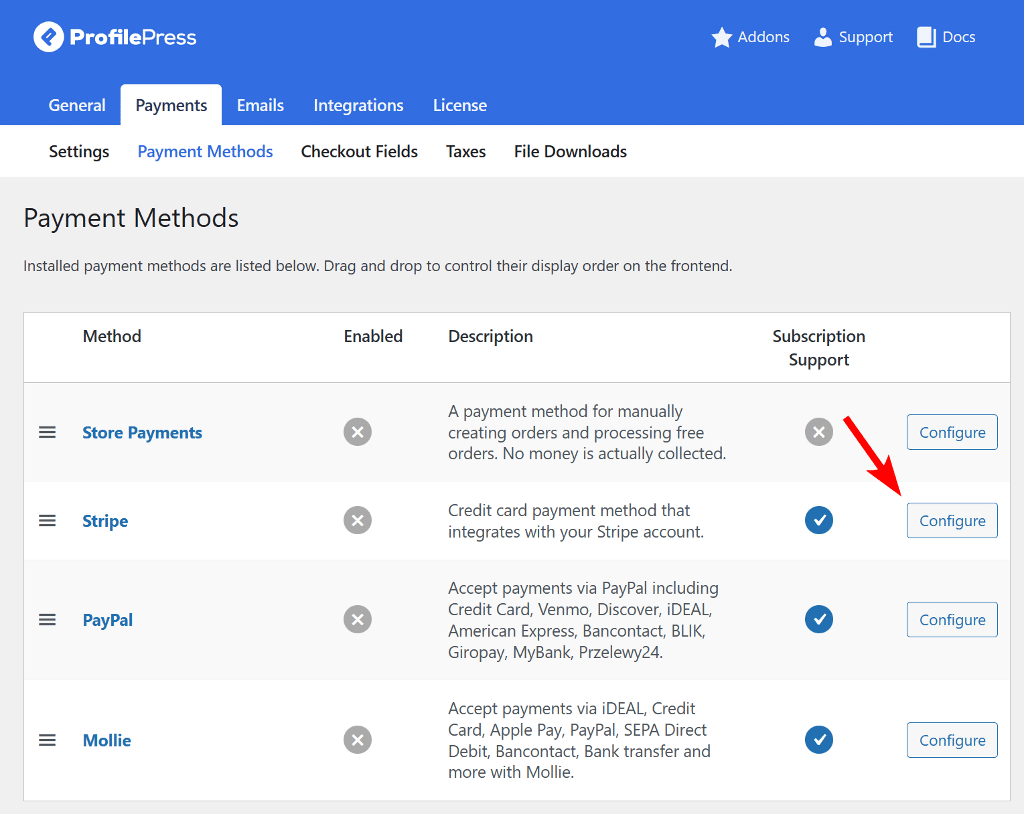
To configure Stripe, click the Configure button next to Stripe’s name. A new page will load, and you need to click the Connect with Stripe option.
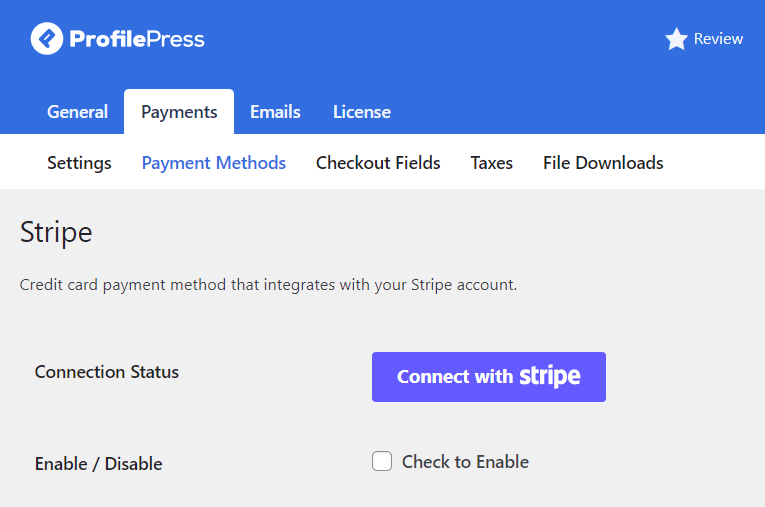
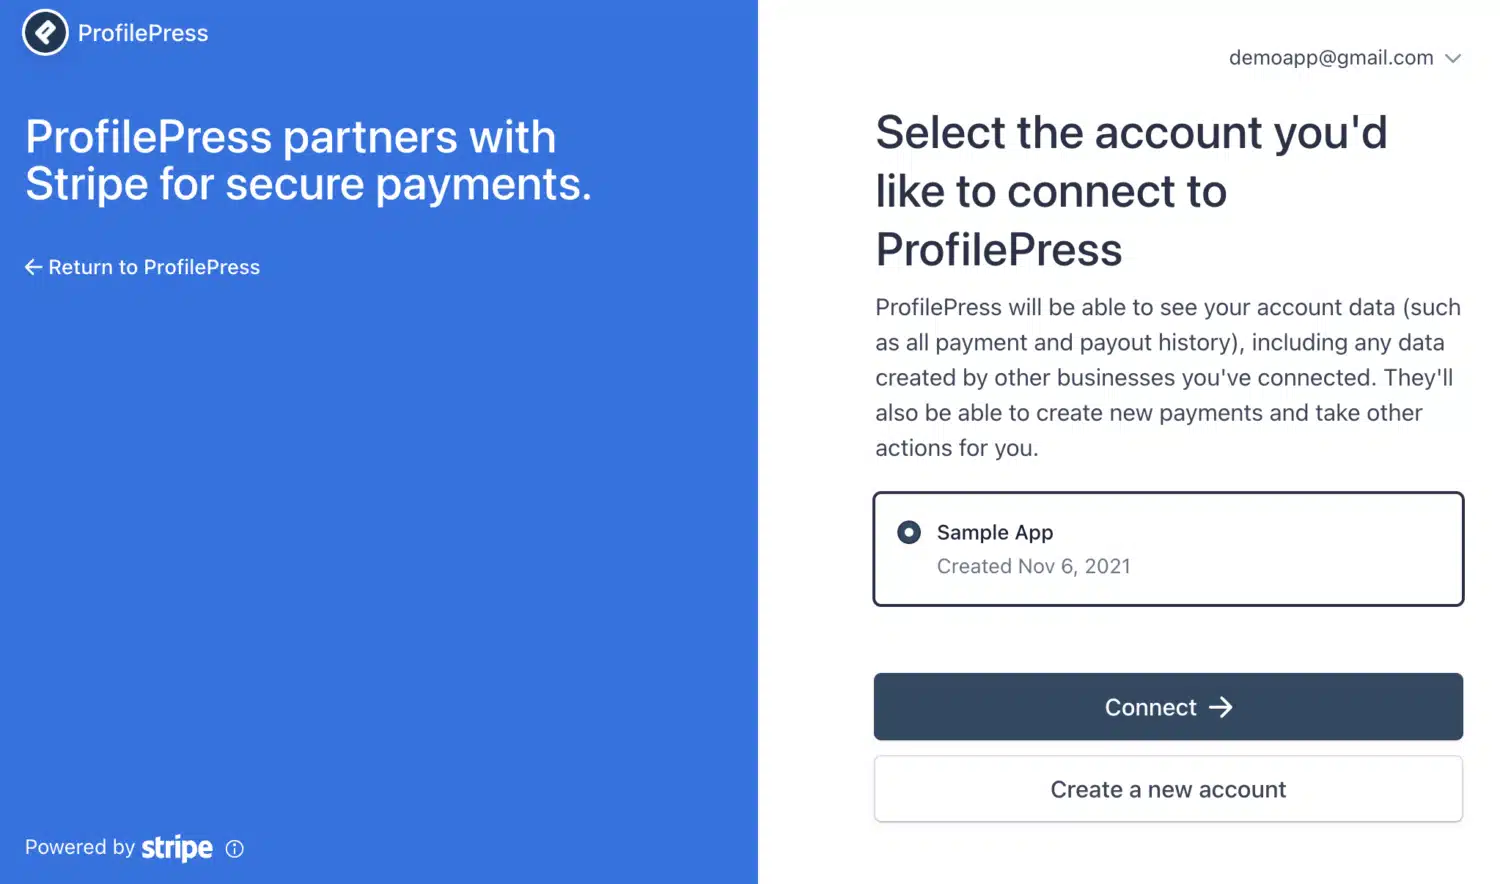
This will redirect you to the Stripe website to create a new Stripe account or log in to your existing account. Once completed, you’ll be taken back to your website.
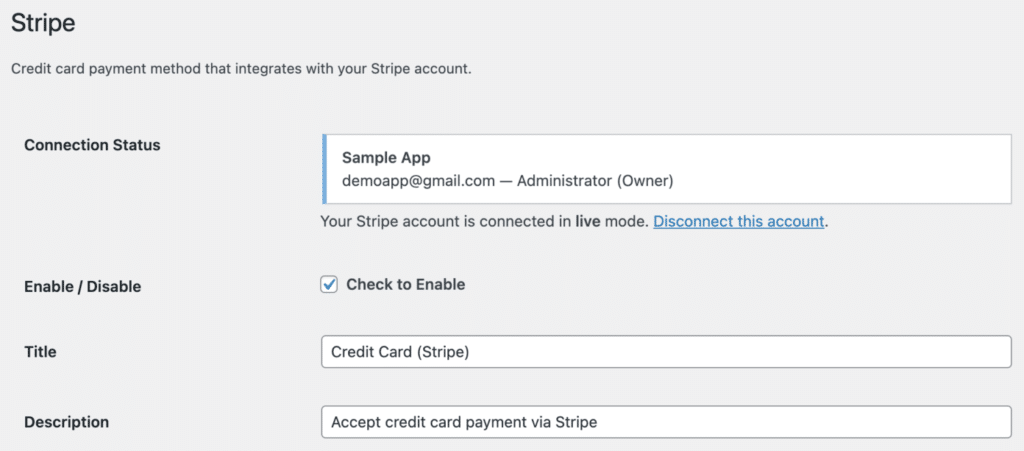
Next, to enable the payment method, check the Enable / Disable option, and customize the Title and Description displayed on your website’s checkout page.
To ensure that ProfilePress can effectively communicate with Stripe, you must set up a webhook. You can check this documentation article to learn how to set up this feature.
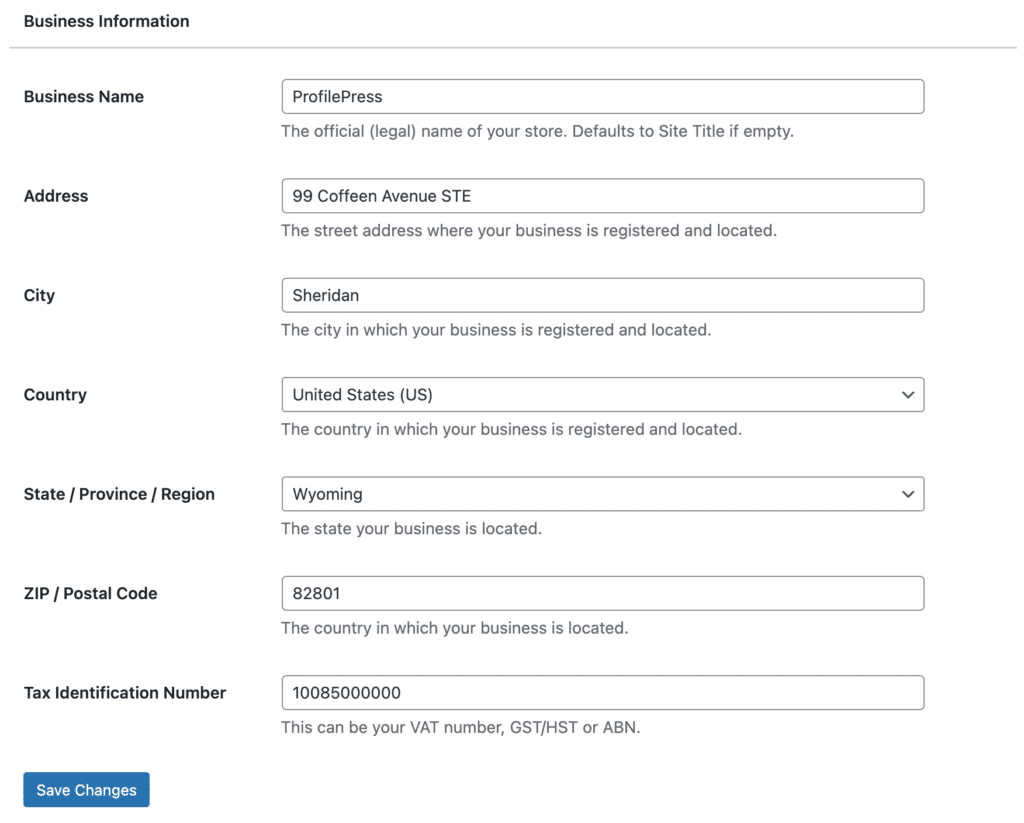
Add Your Business Information
Once that’s complete, go back to ProfilePress > Dashboard and click Add Your Business Information button. Fill in your business name, a complete address, and the tax identification number in the correct fields, and click the Save Changes button at the bottom.
Step 3: Set Up your Checkout Page
ProfilePress allows you to personalize your checkout page by allowing you to select the default currency and choose which fields will be displayed during the checkout process.
First, you need to set the membership currency, and afterward, you can proceed toward customizing the checkout fields. To select your membership currency, navigate to the ProfilePress dashboard page and click the next step button in the getting started walkthrough.
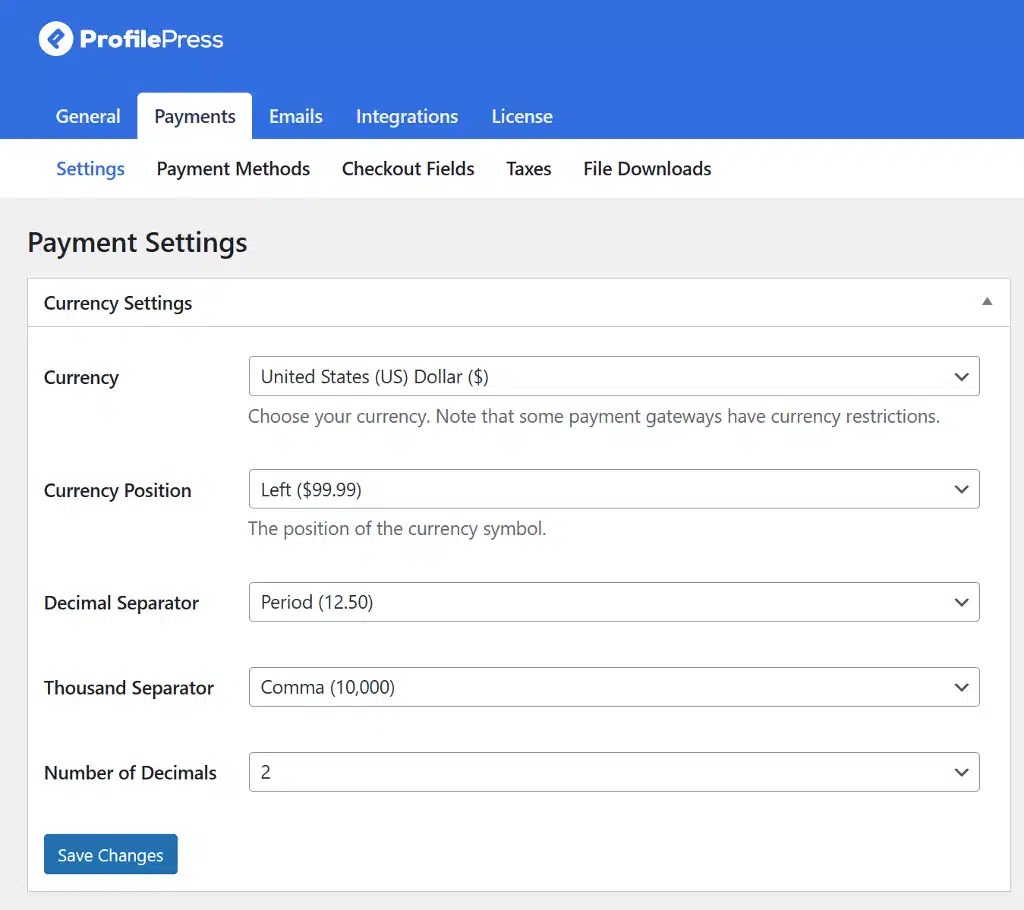
Set Your Membership Currency
The default currency is USD, but you can easily switch to any of the world’s major currencies by clicking the dropdown menu and selecting your preferred option. You can also set the currency position, decimal and thousands separator.
Next, scroll down to set the checkout settings. Here, you can tick the One Time Trials option to prevent users from abusing the free trial option of a plan. You can also edit the “Agree to Terms” checkbox text.
ProfilePress provides two proration methods, Time-based and cost-based calculations. The cost-based calculation involves calculating the cost difference between the current and upgraded plans. As for the time-based calculation, it considers the proration of the remaining time on the current plan to adjust the cost of the new subscription. Select the method that you feel is more appropriate.

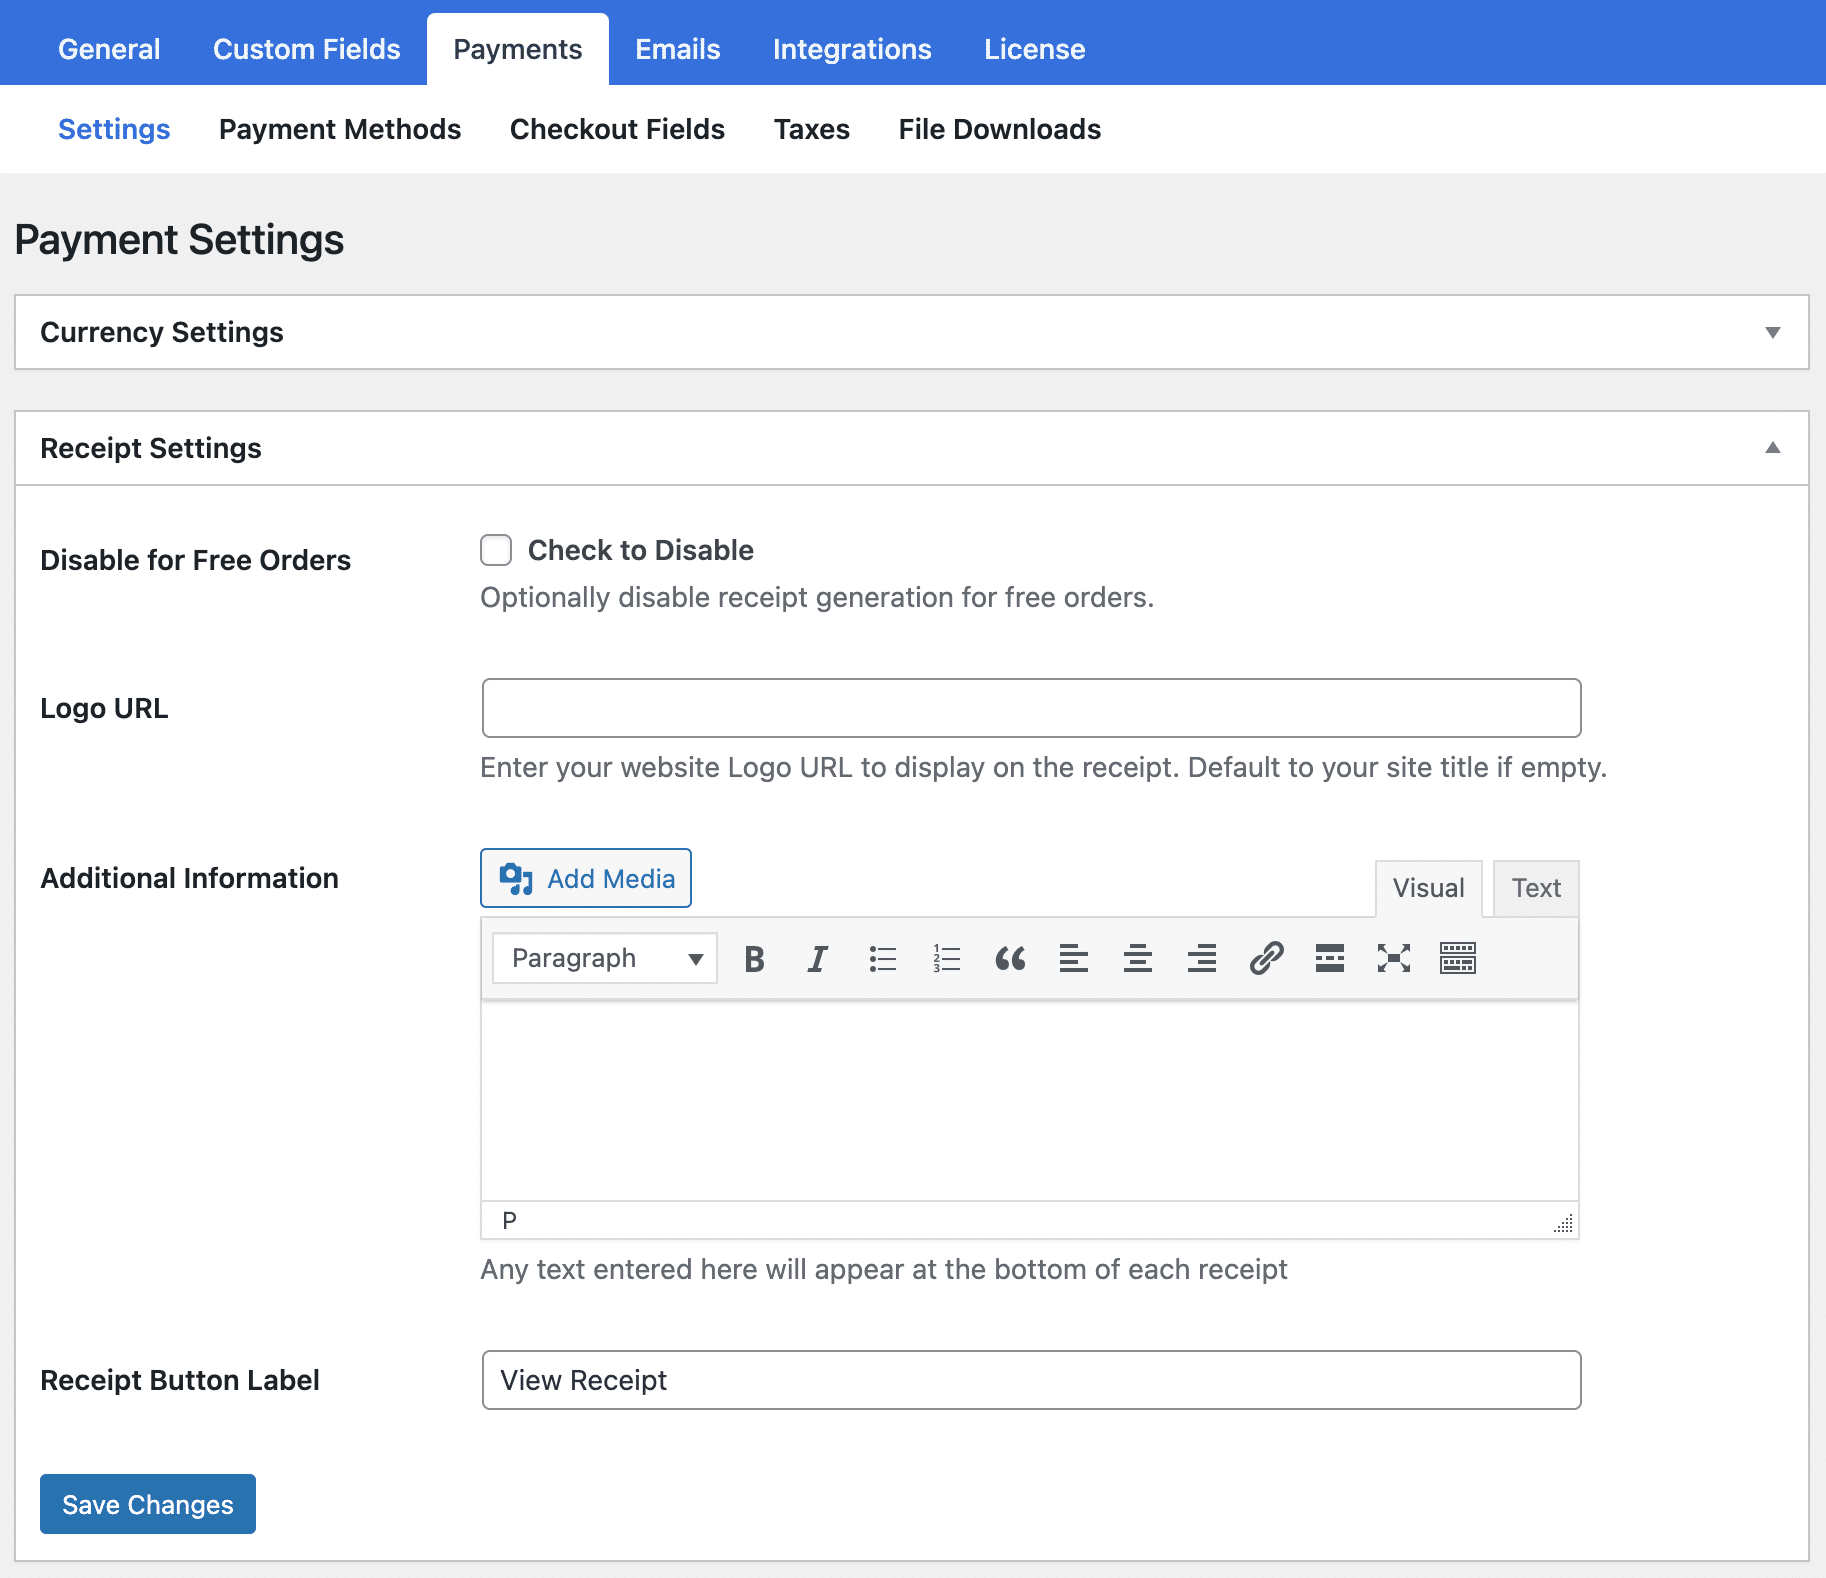
Don’t forget to save your changes and move on to the receipt settings.
Here, you can specify the URL to which customers will be redirected when they click on the logo. You can also customize the thank you message or receipt button label. For free orders, you can disable receipt generation.
After making all the necessary changes, save them by clicking the Save Changes button. Finally, switch to the Checkout fields tab to customize the fields you want to appear on the page.
Edit Your Checkout Fields
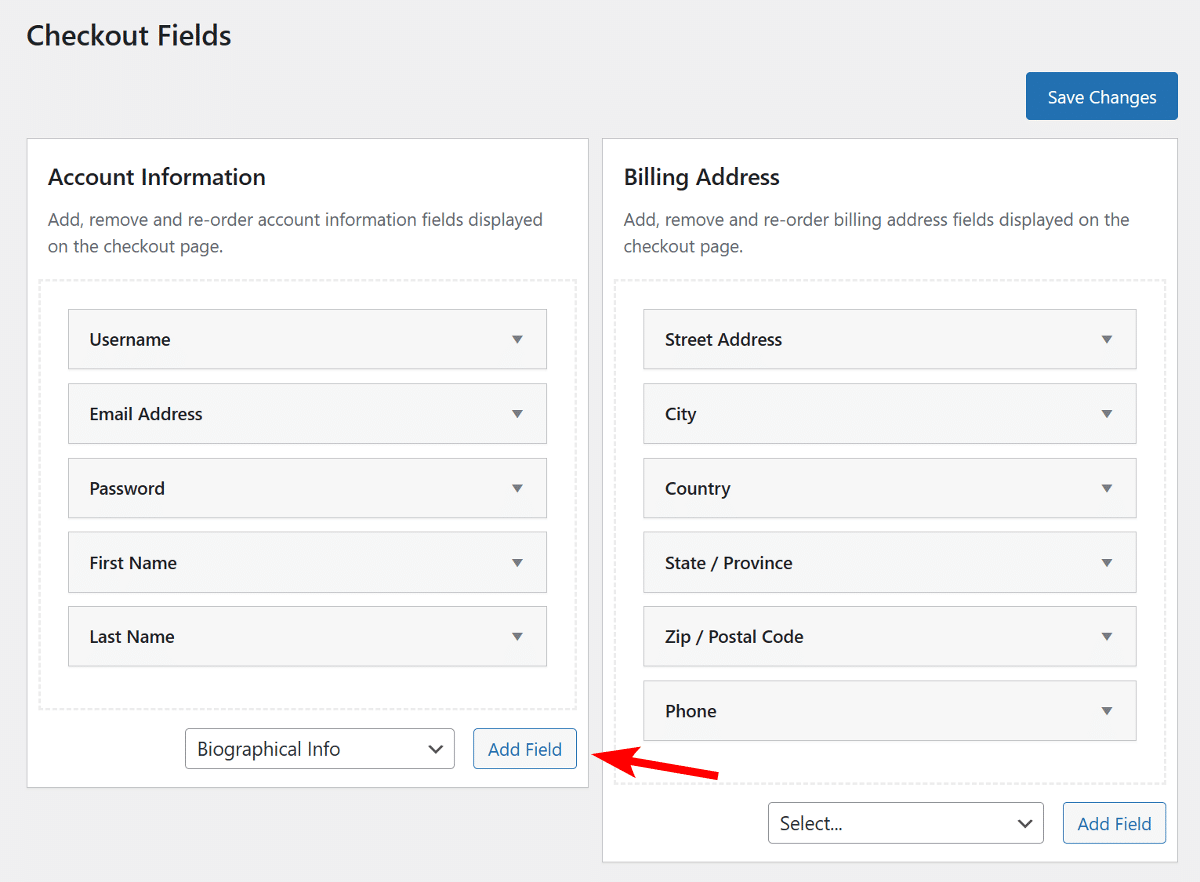
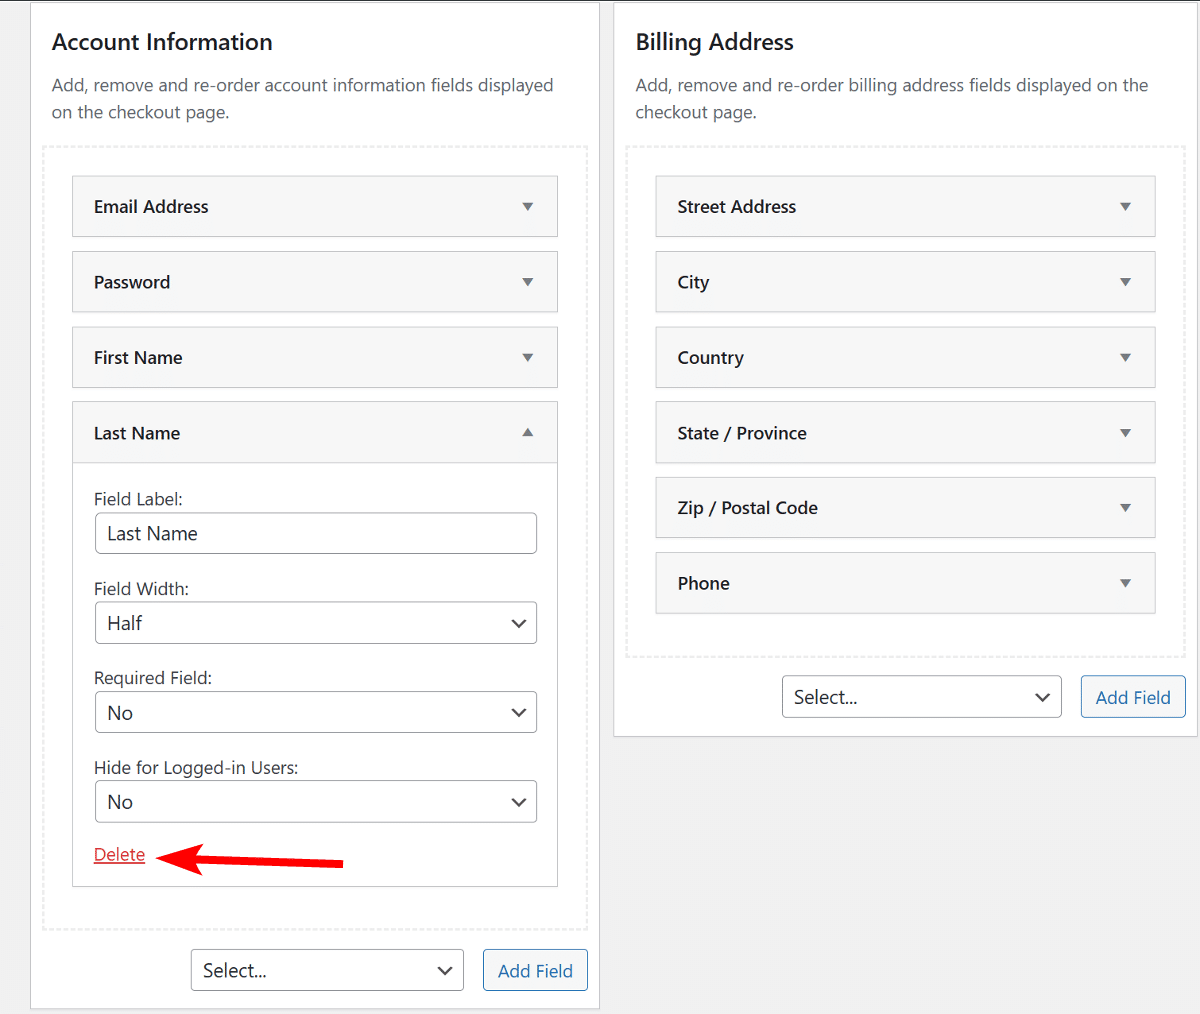
The checkout fields manager lets you add custom fields to the checkout form and modify the order in which they appear.
For each field available in the Checkout fields section, you can customize the field label and width, choose whether to make it a mandatory field, and option hide it from users who are logged in.
To add a new field to the checkout, select it from the dropdown and click the Add Field button. Once the field is added, you can drag it to rearrange the order displayed on the checkout page.
To streamline your checkout form, you can eliminate optional fields like a phone number or last name by expanding the field and clicking the delete button.
Once you have made all the desired modifications, save your changes by clicking on the Save Changes button. Then, you can proceed to the next step and create your membership plans.
Step 4: Create Membership Plans
To create a membership plan in ProfilePress, go to the plugin’s dashboard and click the Create a Membership Plan button in the Getting Started walkthrough. From there, click the Add New Plan button on the page’s bottom.

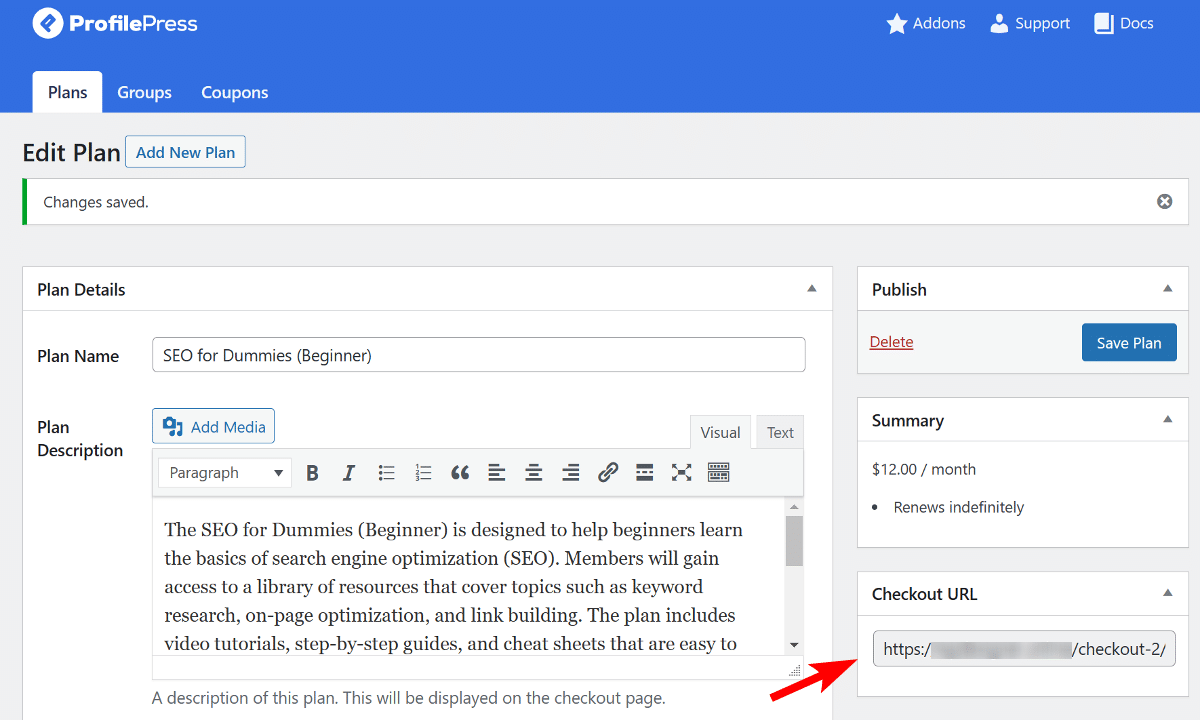
Name your plan and add a short description, ensuring it is simple and easy to understand. Additionally, you can provide a Purchase Note, which is a great place to add a thank you note or usage instructions.

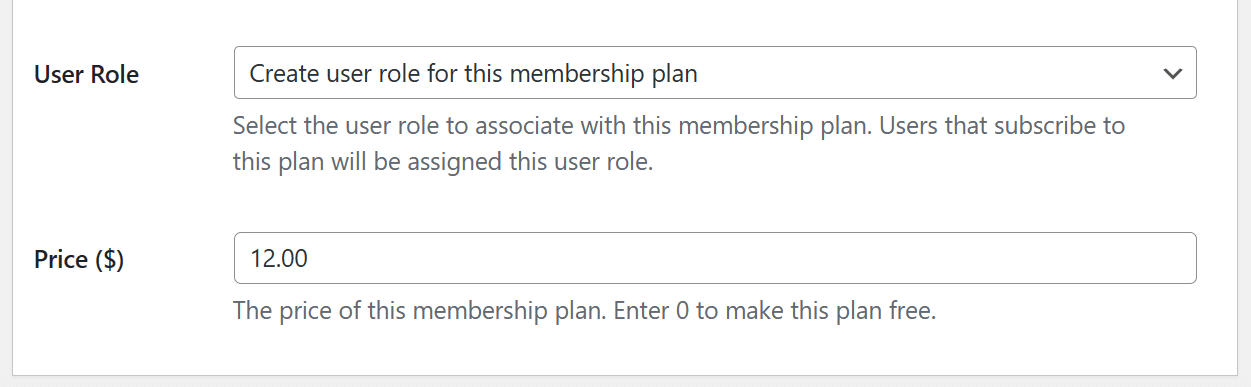
After that, choose the user role linked with the membership plan. For example, selecting “create a user role for this membership plan” is recommended to create and assign a new role to members automatically. The new user role makes it easy to keep track of new members who sign up for membership plans.
Finally, enter a price for your paid newsletter membership plan.
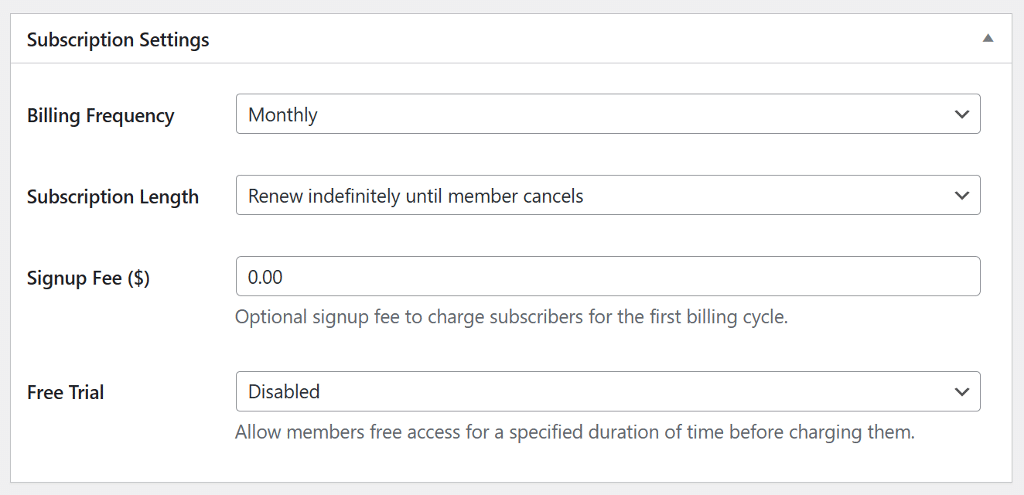
Proceed to the next section, where you can customize your subscription plan by adjusting the billing frequency and duration. Again, you can choose between various billing frequency options such as monthly, weekly, daily, quarterly, every six months, yearly, or a one-time payment option.
You can opt for a fixed number of payments for the subscription duration or keep it set to renew until the user chooses to cancel it automatically. We recommend selecting monthly as the billing frequency and leaving the duration set to renew indefinitely until the user cancels the subscription.
If you wish to charge a one-time fee apart from the membership plan cost, you can set it up in the Sign-up Fee section.
Additionally, suppose you want to provide your users with a free trial of your premium membership. In that case, you can configure the duration of the trial period before they are charged for the subscription. On the other hand, if you prefer not to offer a free trial, you have the option to disable it altogether.
After making all the necessary changes, click the Save Plan button to publish the membership plan. After your plan is published, you’ll receive a checkout link to add anywhere on your website.
You can also create additional membership plans following the steps mentioned earlier.
Create Membership Plan Groups
ProfilePress comes with a feature called Plan Groups which lets users buy a membership plan within a group during the checkout process. This saves them from mistakenly subscribing to multiple plans and only allows them to subscribe to one plan within a Plan Group. This is particularly helpful when you have membership plans across different categories.
The Plan Groups feature also offers the flexibility to upgrade/downgrade between plans within the same group easily.
To create a Plan Group, navigate to ProfilePress > Membership Plans > Groups and click the Add New button.

Enter a descriptive name and select the membership plans to include in the group.
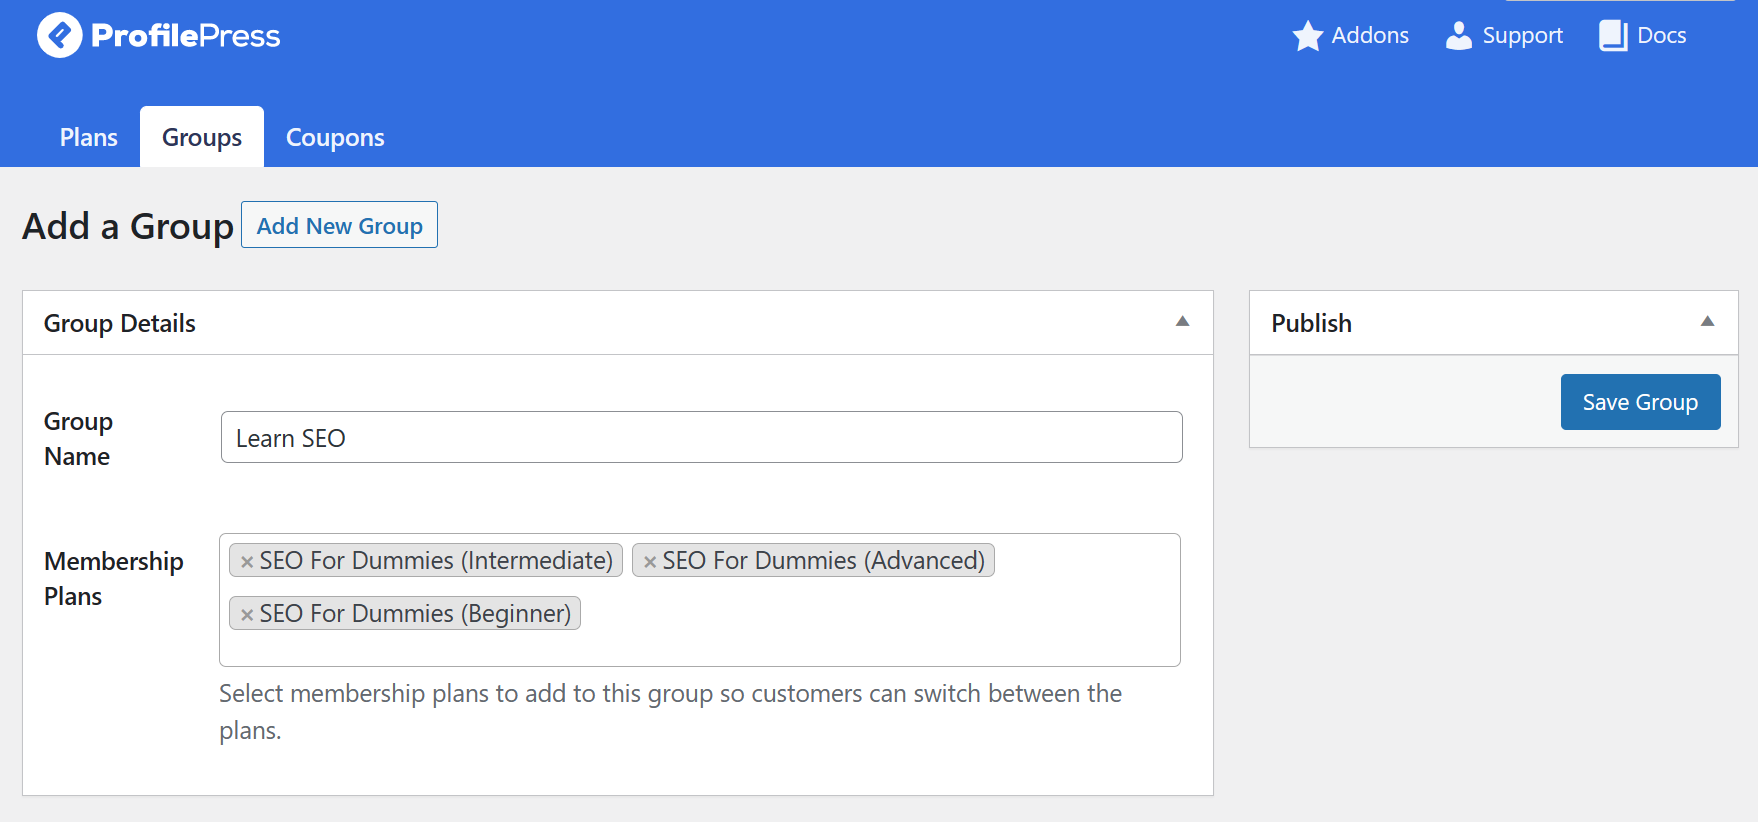
Once done, click the Save Group button to publish it. Like Membership Plan, you’ll receive a checkout link that you can find anywhere on the website.
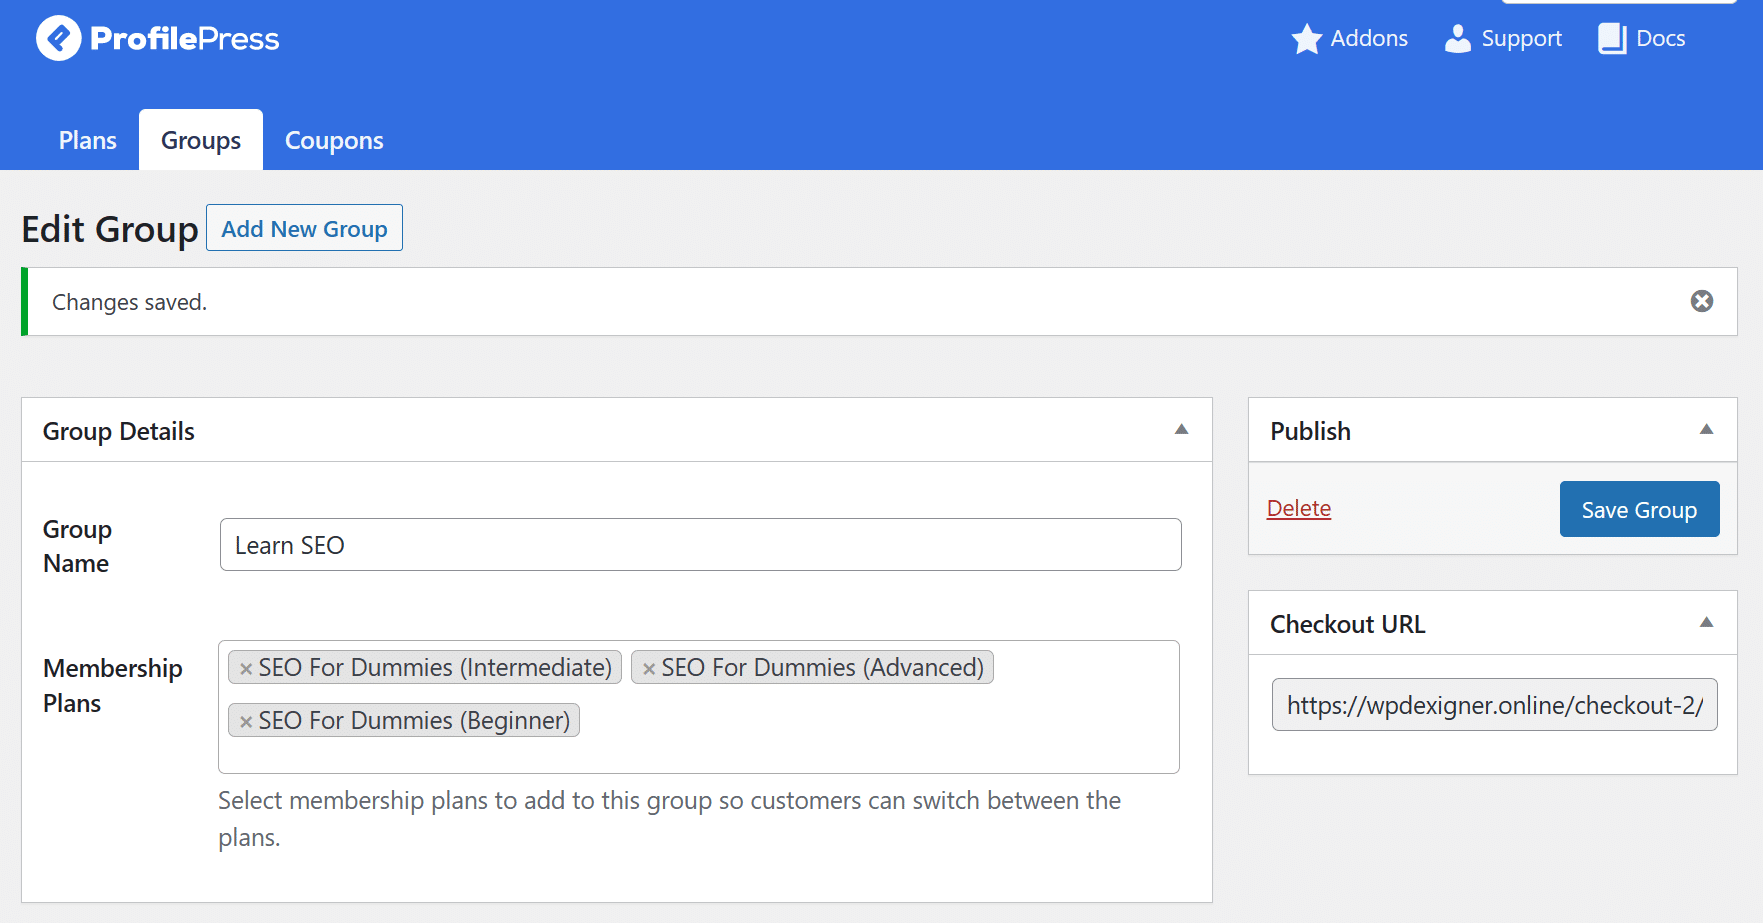
Now that our membership group is live let’s look at how the checkout page will look on the website’s frontend.
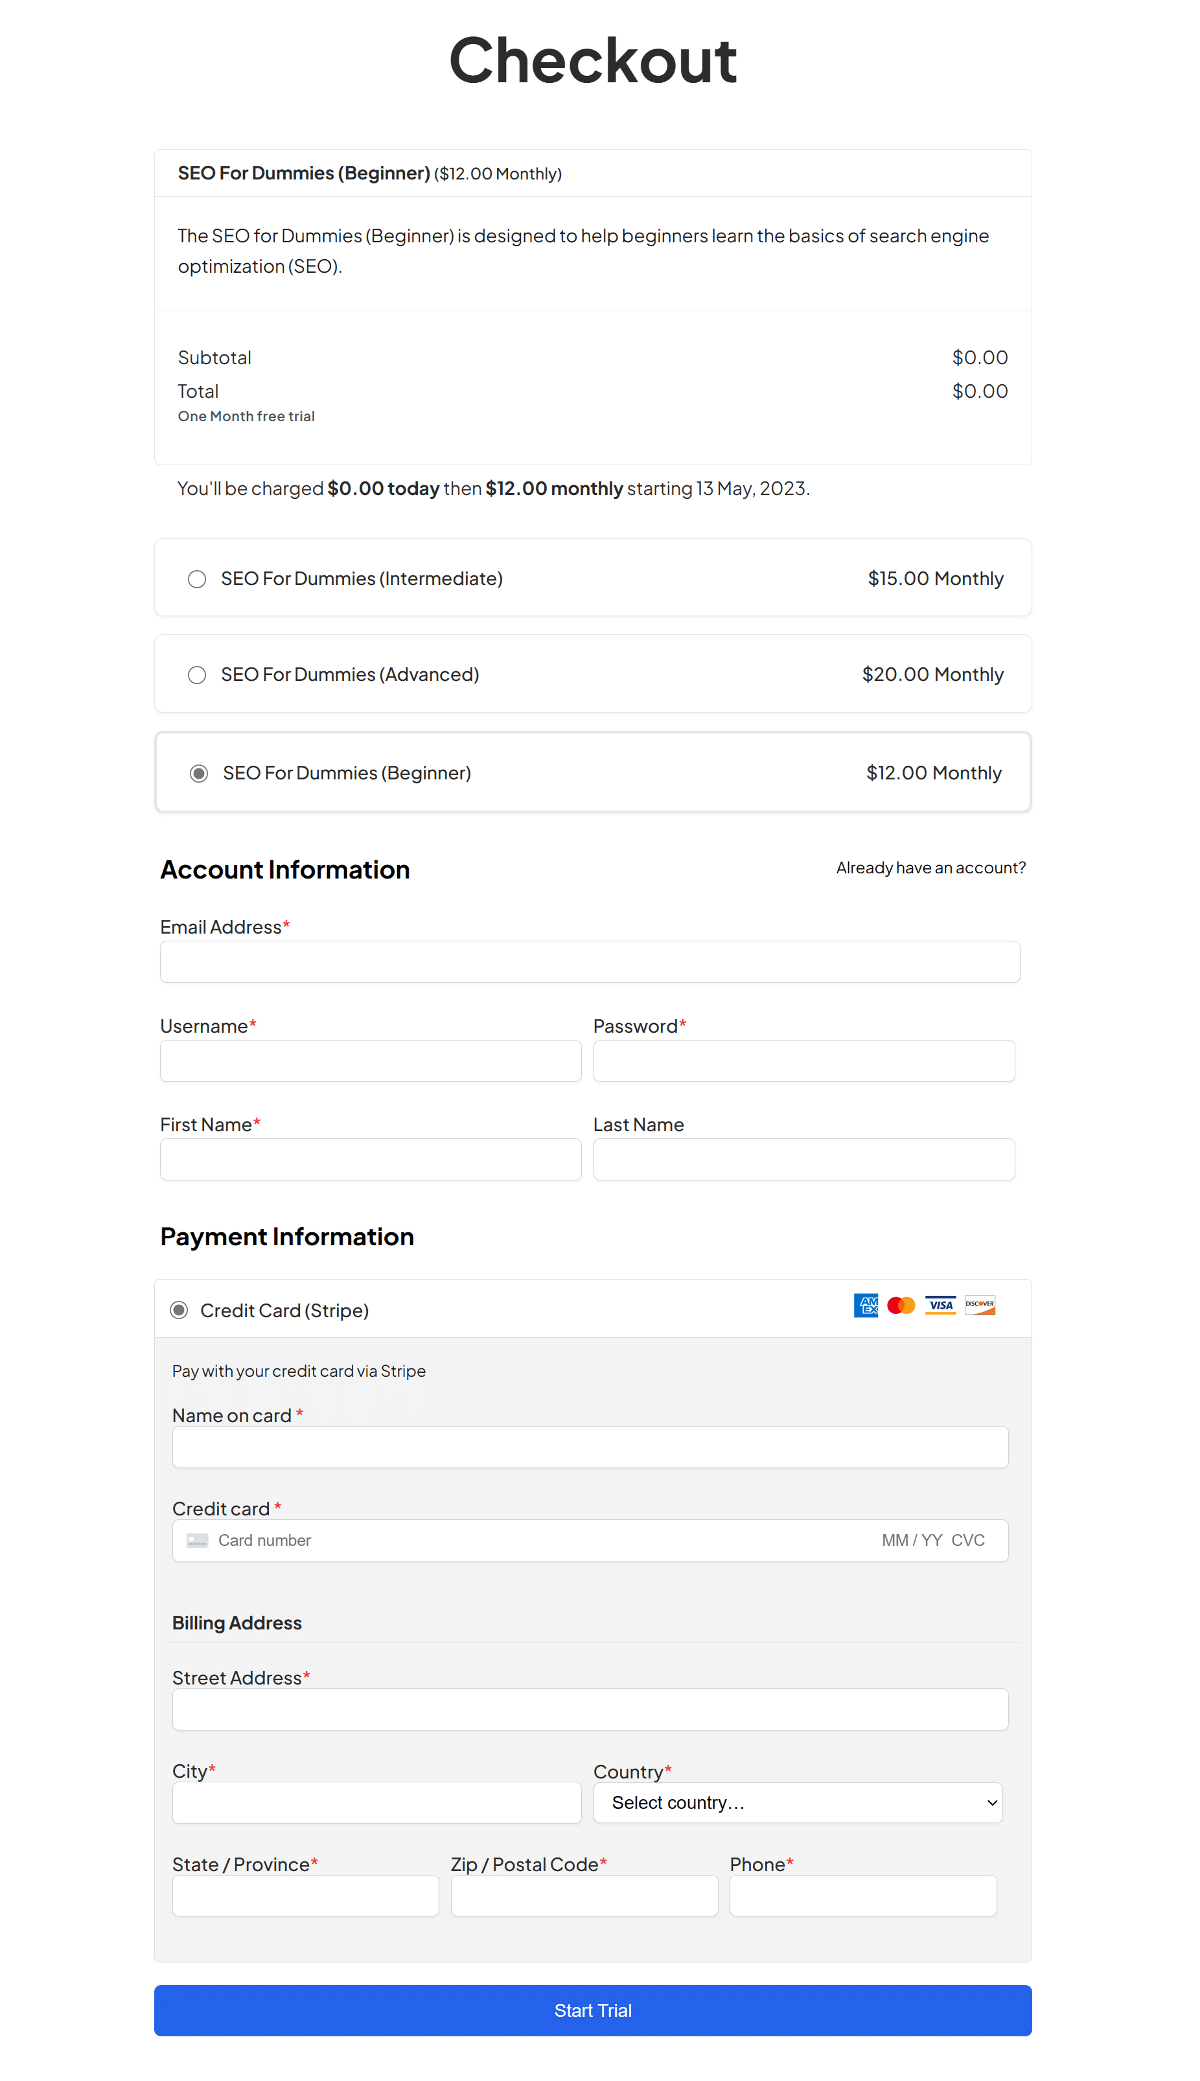
The users are presented with different membership plan options belonging to the same group, making it easy to select the one that best suits their needs.
Step 5: Set Up Content Restriction and Metered Paywall
ProfilePress allows you to implement two different approaches for content restriction. Firstly, you can restrict user access to protected content. Secondly, you can add a metered paywall, wherein users are granted access for a limited time before being prompted to subscribe for full access.
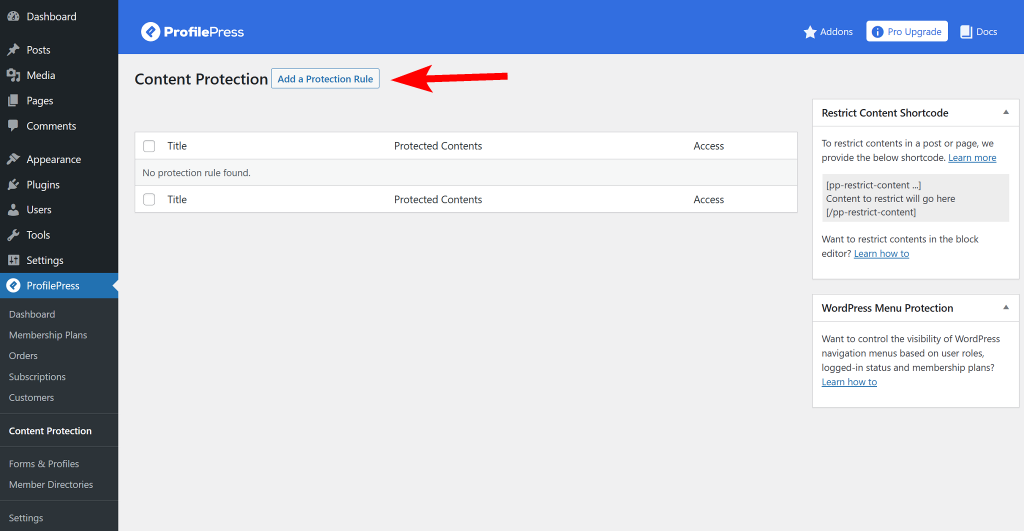
Create a Content Protection Rule
To set up content restriction, go to ProfilePress > Content Protection and click on Add a Protection Rule button at the top.
Give your rule a descriptive name and select the content to protect. ProfilePress offers a broad range of conditions restricting posts to a specific category or tag, archives, format, and more. You can also refine your requirement by using the AND and OR relations.
Next, you must decide who can access the content. Again, there are three options: everyone, logged-in users, and logged-out users.
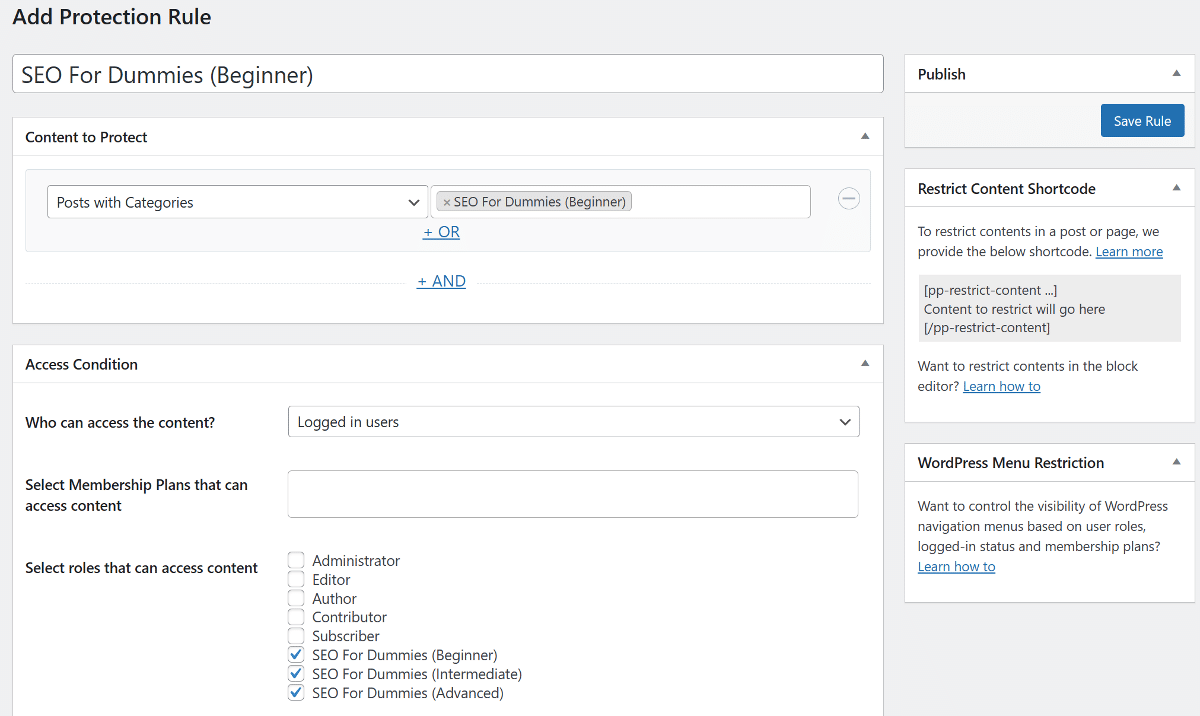
Based on your selection, you will have additional options at your disposal. For example, you can select whether to link the content protection rule to a membership plan or user role. You also have the option to manually choose specific usernames that will be granted access to the content.
Next, specify what happens if an unauthorized user attempts to access the protected content. Then, you can either display a message or redirect the user to another page. For instance, you can show a short excerpt of the post before displaying a restricted message informing users that they do not have the required permissions to access the content and what they can do about it.
ProfilePress lets you edit the message globally, which you can do by clicking the customization link below the dropdown.
After the configuration process, save the content protection rule by clicking the Save Rule button on the right sidebar.
Now, whenever you publish a post assigned to a restricted category, users without the necessary authorization will see a message asking them to register on the website.
But what if we want to allow visitors to view a limited number of posts before restricting access? Let’s take a look at how to achieve that.
Add Metered Paywall to the Website
Metered Paywall is a premium addon you need to enable from the addons page. To do so, navigate to ProfilePress > Addons and look for Metered Paywall in the list. Once you locate it, toggle the button to enable it.
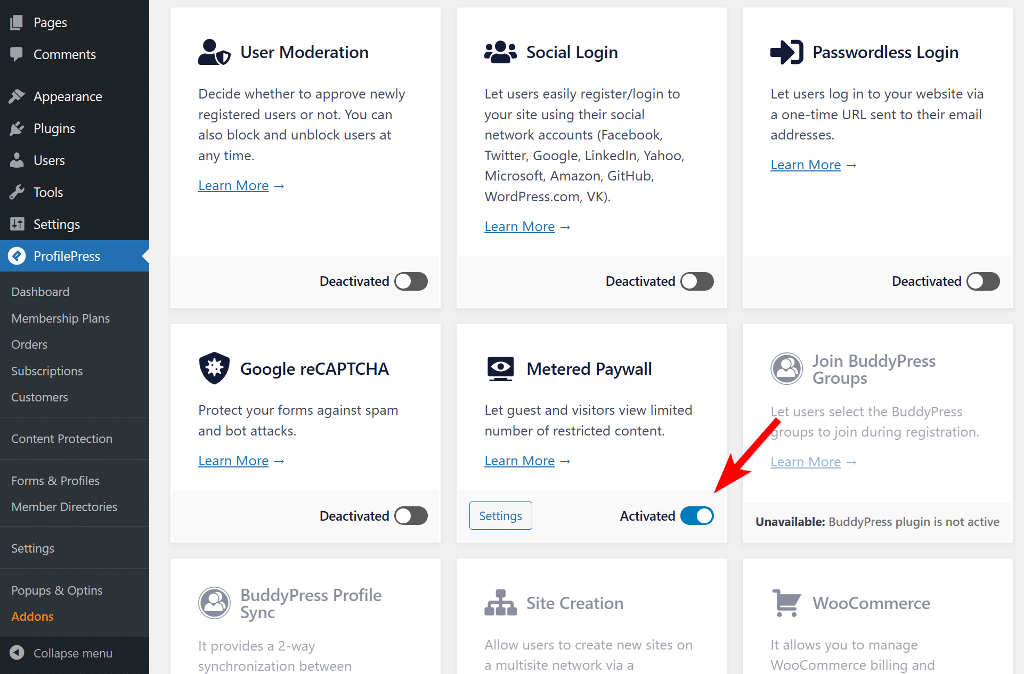
Next, click the Settings button to be taken to the configuration page. Alternatively, you can access it by navigating to ProfilePress > Content Protection and switching to the Metered Paywall tab.
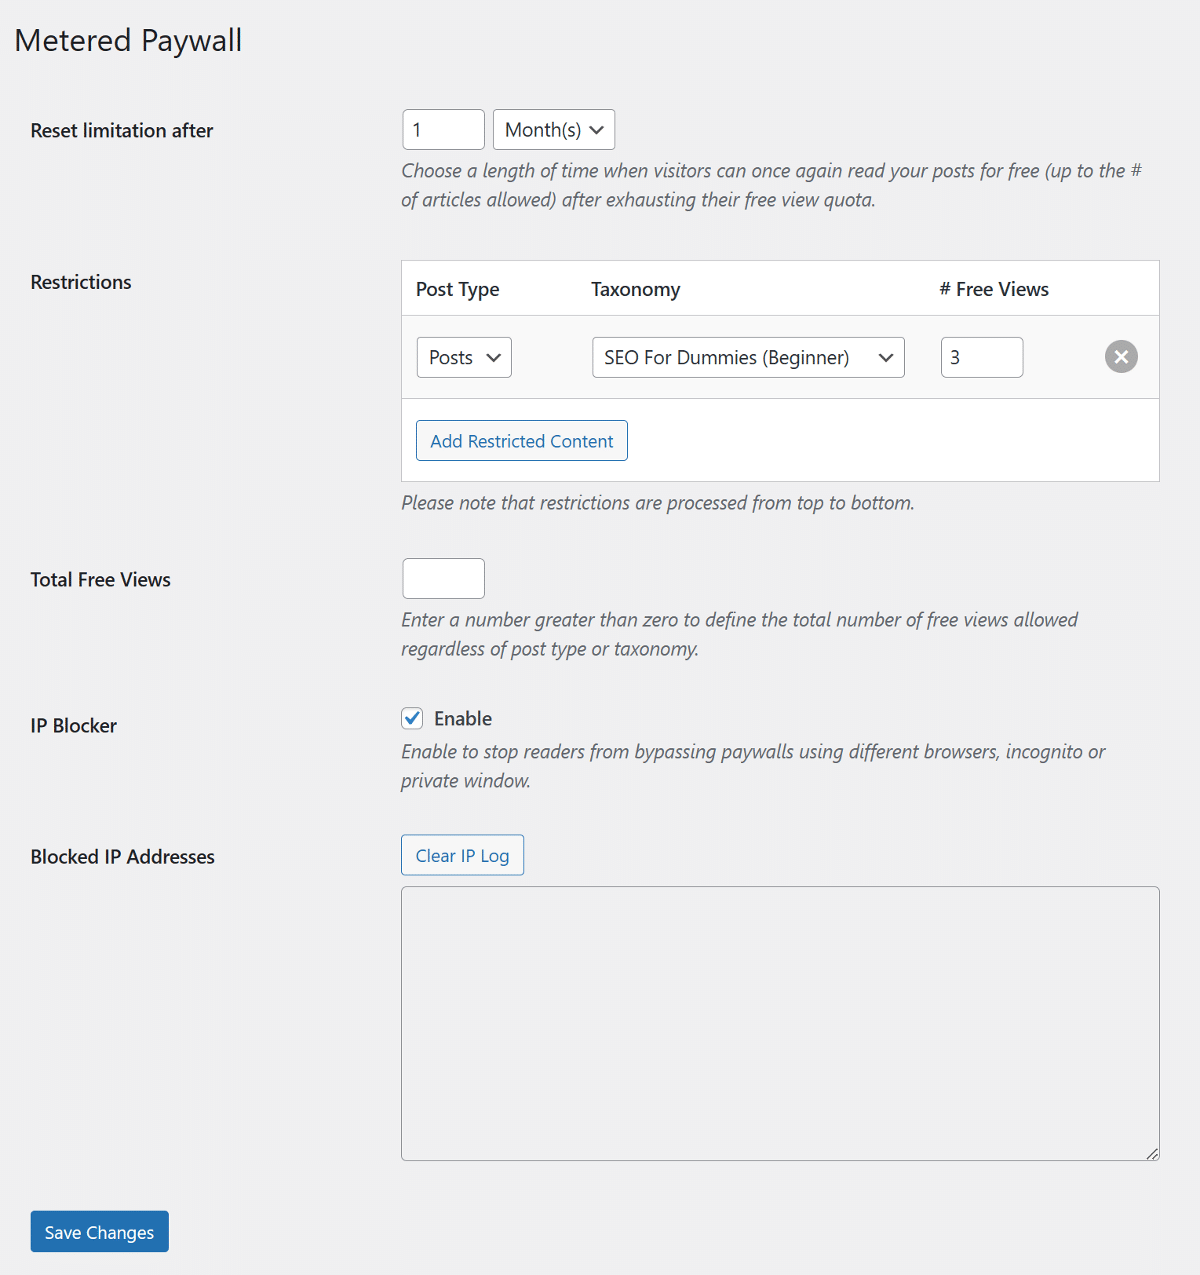
The first setting is the Reset limitation, which lets you define how long before a restricted user can once again view protected content for free after hitting their limit. You can set the value in hours, days, weeks, months, and years depending on your specific requirements.
Next is the Restriction setting, which allows you to specify the types of posts and taxonomy that can be viewed for free, along with the number of free views permitted per user. To implement content restrictions for our membership plans, select it in the restriction settings.
You can enter the value in the Total Free Views option to apply a single free view limit for all content types and taxonomies. Next, enable the IP Blocker setting to prevent visitors from bypassing the free view limit. This will track their IP address and block access if they attempt to view content in a private or incognito window.
Once you have made the necessary changes, save them by clicking the Save Changes button. Then, with the content restriction and free view limit in place, let’s move on to adding a register and login feature to the website to allow visitors to access gated content.
Step 6: Create Custom Registration and Login Forms
ProfilePress, by default, creates login and registration forms that are highly customizable. To edit the default forms, navigate to ProfilePress > Forms & Profiles, and under the Login tab, click the Edit button.
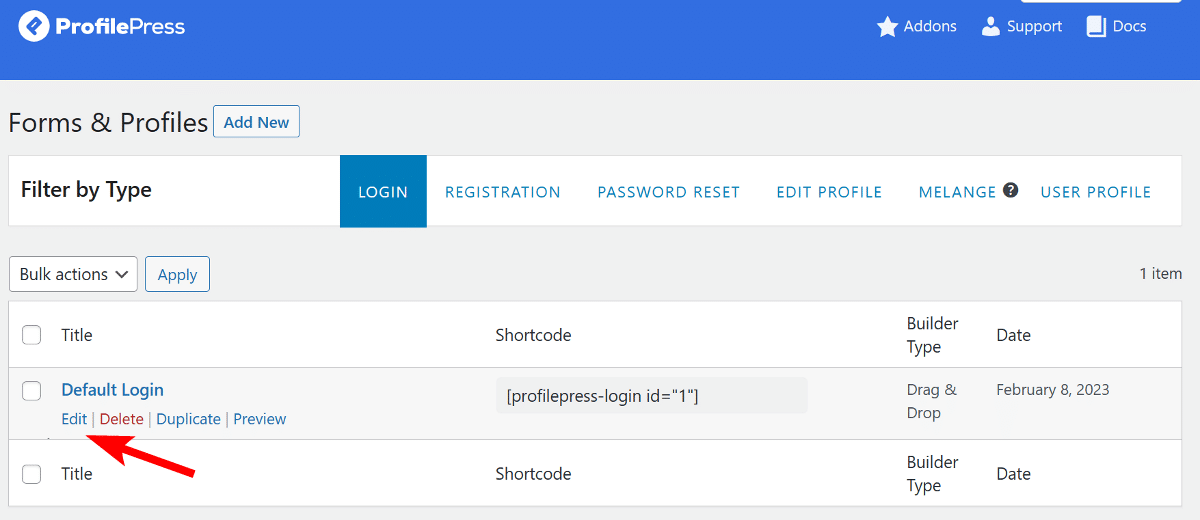
You can also create a new form and choose from the available premade form templates.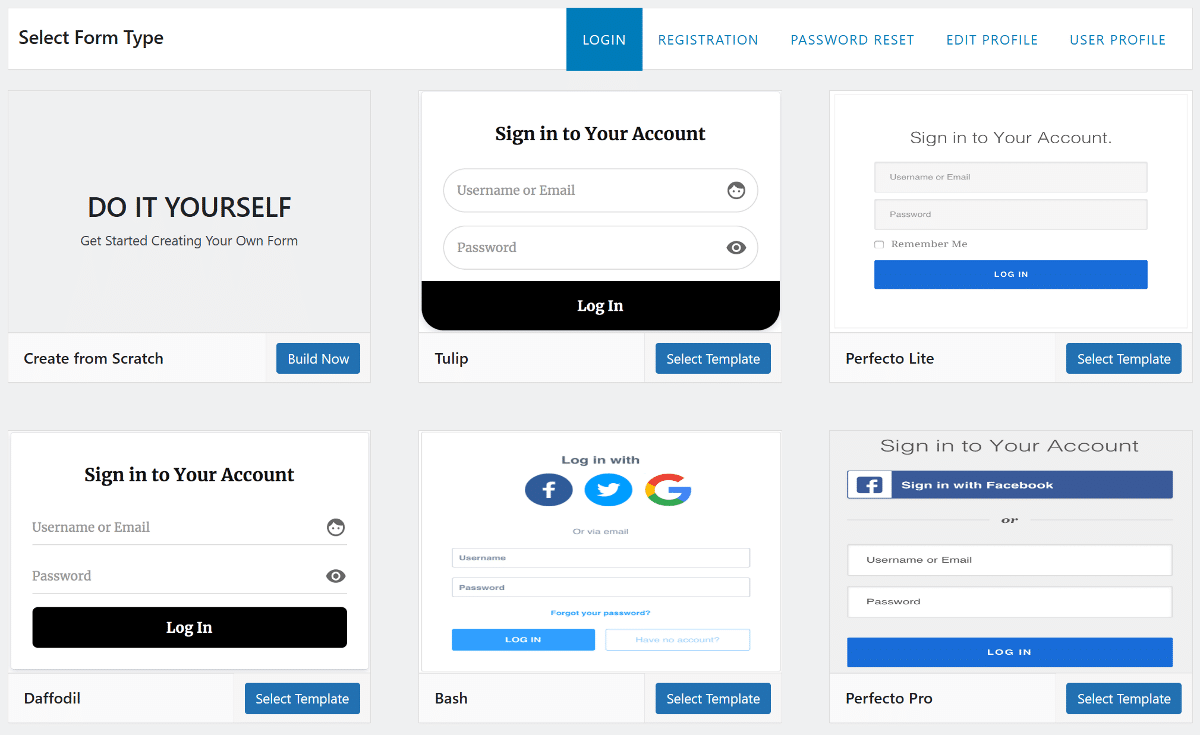
For this tutorial, we’ll edit the default forms.
Edit Login and Registration Forms
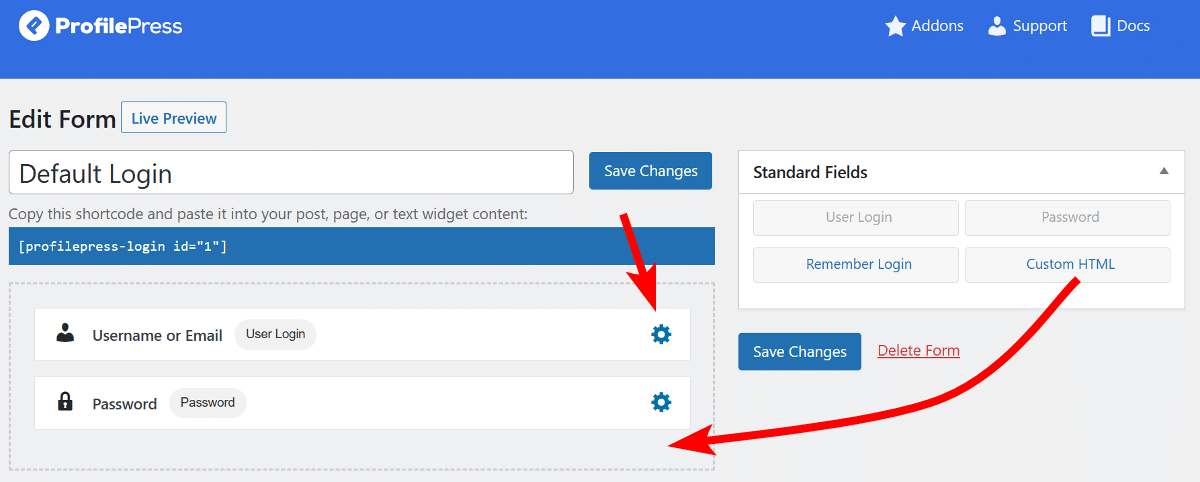
Clicking the Edit link will load the drag-and-drop form builder with available form fields on the right sidebar. You can add new fields or edit the existing ones by clicking on the gear icon.
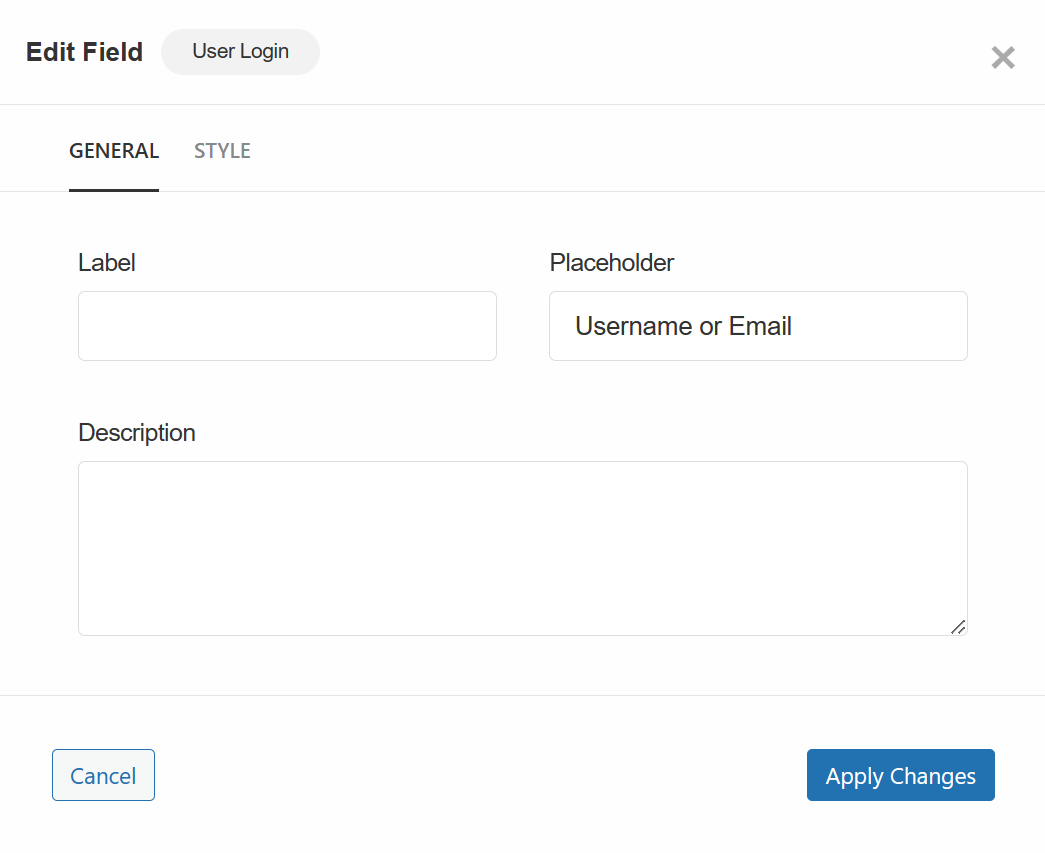
When editing form fields, you will have two tabs available for customization: General and Style. The General tab lets you add a label, placeholder, and brief field description.
By switching to the Style tab, you can adjust the width, add an icon, control the label position, and customize the description behavior of the field. Additionally, you can add CSS classes to the field to make further tweaks as needed. Once your modifications are complete, click the Apply Changes button to save your work.
As you scroll down the page, you will see the Form Settings box, which offers a range of additional styling options. Once all your changes are done, don’t forget to click the Save Changes button.
Similarly, you can also edit the registration form, which comes with even more custom fields.
Enable Registration and Add Login/Registration Links to the Header
By default, the WordPress user registration option is disabled. You can easily enable it by navigating to Settings > General and checking the box next to “Anyone can register” under the Membership section.

To make it convenient for users to access restricted content, adding login and registration links to the website header is essential. You can do this by going to Appearance > Menus and creating a new menu. Next, expand the ProfilePress links section and add the Login and Sign Up links to the header menu.
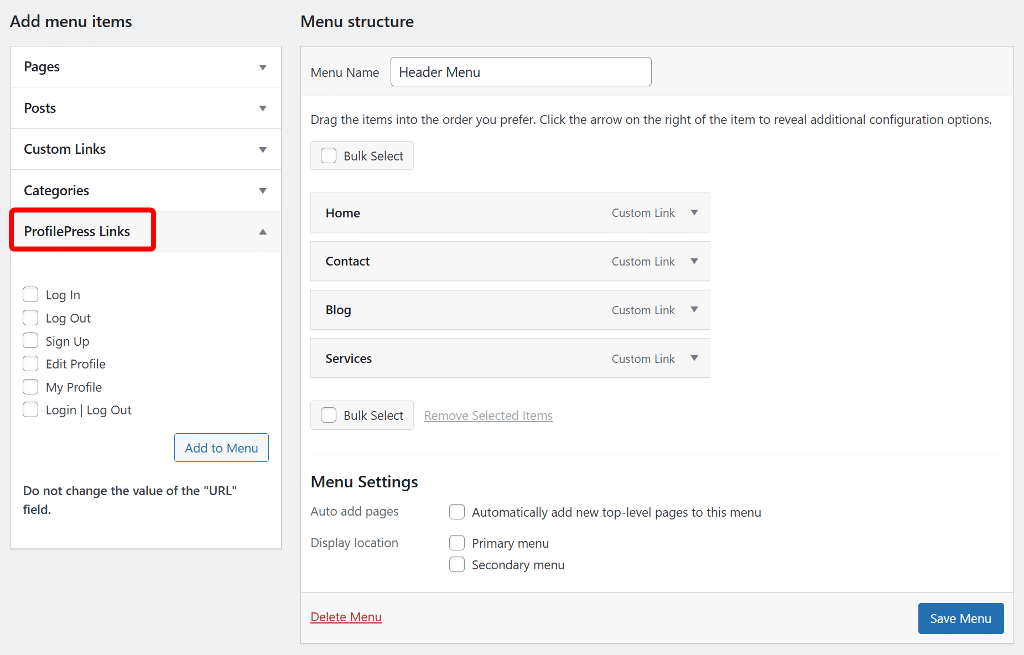
Lastly, don’t forget to click the Save Menu button to apply your changes. Now, navigate to the website’s front end and check if the links we added work correctly.
That’s it! You now have a fully functional WordPress membership website with different plans, content restrictions, and user registration functionality.
Conclusion
Creating a membership site using WordPress is a great way to monetize your website and build a community around your content. By following the steps outlined in this article, you can easily set up a WordPress membership site that offers value to your subscribers while generating revenue for your business.
Remember to choose a suitable WordPress membership plugin that meets your needs, create compelling content to attract and retain members, and set up your site’s pricing and payment options. Finally, don’t forget to promote your membership site through your existing channels and social media platforms to attract new subscribers.
By implementing these strategies, you can create a successful membership site that provides value to your subscribers and helps you achieve your business goals. Keep experimenting with new ideas and features to keep your site fresh and engaging, and continue to engage with your members to ensure their satisfaction and loyalty.
What are you waiting for? Purchase the ProfilePress WordPress membership plugin today.