Do you want to use WordPress Content Locker on your website?
A WordPress content locker enables you to restrict access to content on your website. This can include blog posts, downloadable materials, pages, software, and more until your users complete a specific action.
While content lockers can be useful, they can also become irritating to visitors if not used thoughtfully.
One way to balance this is by selectively using content lockers and providing access to some free content. Ideally, you should use content lockers to protect high-quality or premium content that will add significant value to your visitors. This may include ebooks, online training, software tools, members’ forums, and more.
Why Use Content Lockers?
Utilizing a content locker on your WordPress website can provide several benefits, depending on your end goal. The following are some of the most popular benefits of using a content locker:
1. List Building: Content lockers are commonly used for list-building purposes. By locking high-quality content and requiring users to sign up for your email list to access it, you can grow your email list quickly.
2. Social Media Engagement: Content lockers also effectively increase social media engagement. You can lock your content and offer it in exchange for social shares and followers, which will help you grow your social media following and drive traffic to your website.
3. Monetization: A content locker is an excellent way to monetize your website. Many website owners put their content behind a paywall and require visitors to subscribe to a membership plan or purchase a product to gain full access to the content. Paid subscriptions for valuable content such as ebooks, software, training, or articles can generate considerable revenue.
Setting up Content Lockers in WordPress
The WordPress platform does not come with an in-built content-locking feature, so we will need to employ the help of a content-locking plugin to be able to restrict content on our website.
We will learn how to use the MailOptin plugin to lock content for email list building and how to use the ProfilePress plugin to lock premium paid content.
Using MailOptin for WordPress Content Locking
If you’re looking for a way to turn your site visitors into subscribers, MailOptin is a great option.
It’s a comprehensive WordPress content locker that lets you create and customize opt-in boxes on your site.
With MailOptin, you can restrict access to specific content and prompt visitors to take certain actions before viewing it. The simple form builder allows you to design appealing pop-up lightboxes that can be displayed under specific conditions.
With MailOptin, you can easily set up content locking on your WordPress site. Let’s get started by installing and activating this helpful tool.
Step #1: Install and activate the MailOptin plugin
The first step is installing the MailOptin plugin, which you can easily do from your WordPress dashboard.
You will need to purchase a MailOptin License and install the MailOptin plugin. To do that, head to the MailOptin website to purchase a suitable license plan.
After purchasing your copy of the MailOptin Plugin, you will receive a confirmation email with a link to download the plugin zip file and your license key. You can also download the plugin from your account page on the MailOptin website.
Once you have downloaded the plugin, login to your WordPress admin dashboard, and navigate to the Plugins page; click on the “Add New” button and click “Upload Plugin“. Upload the zip file and install and activate the plugin on your WordPress site.

Next, activate the plugin by providing the license key previously sent to your email.

Step #2: Create and customize your opt-in form
With the MailOptin plugin installed on your site, navigate to MailOptin > OptinCampaigns and click the Add New button.
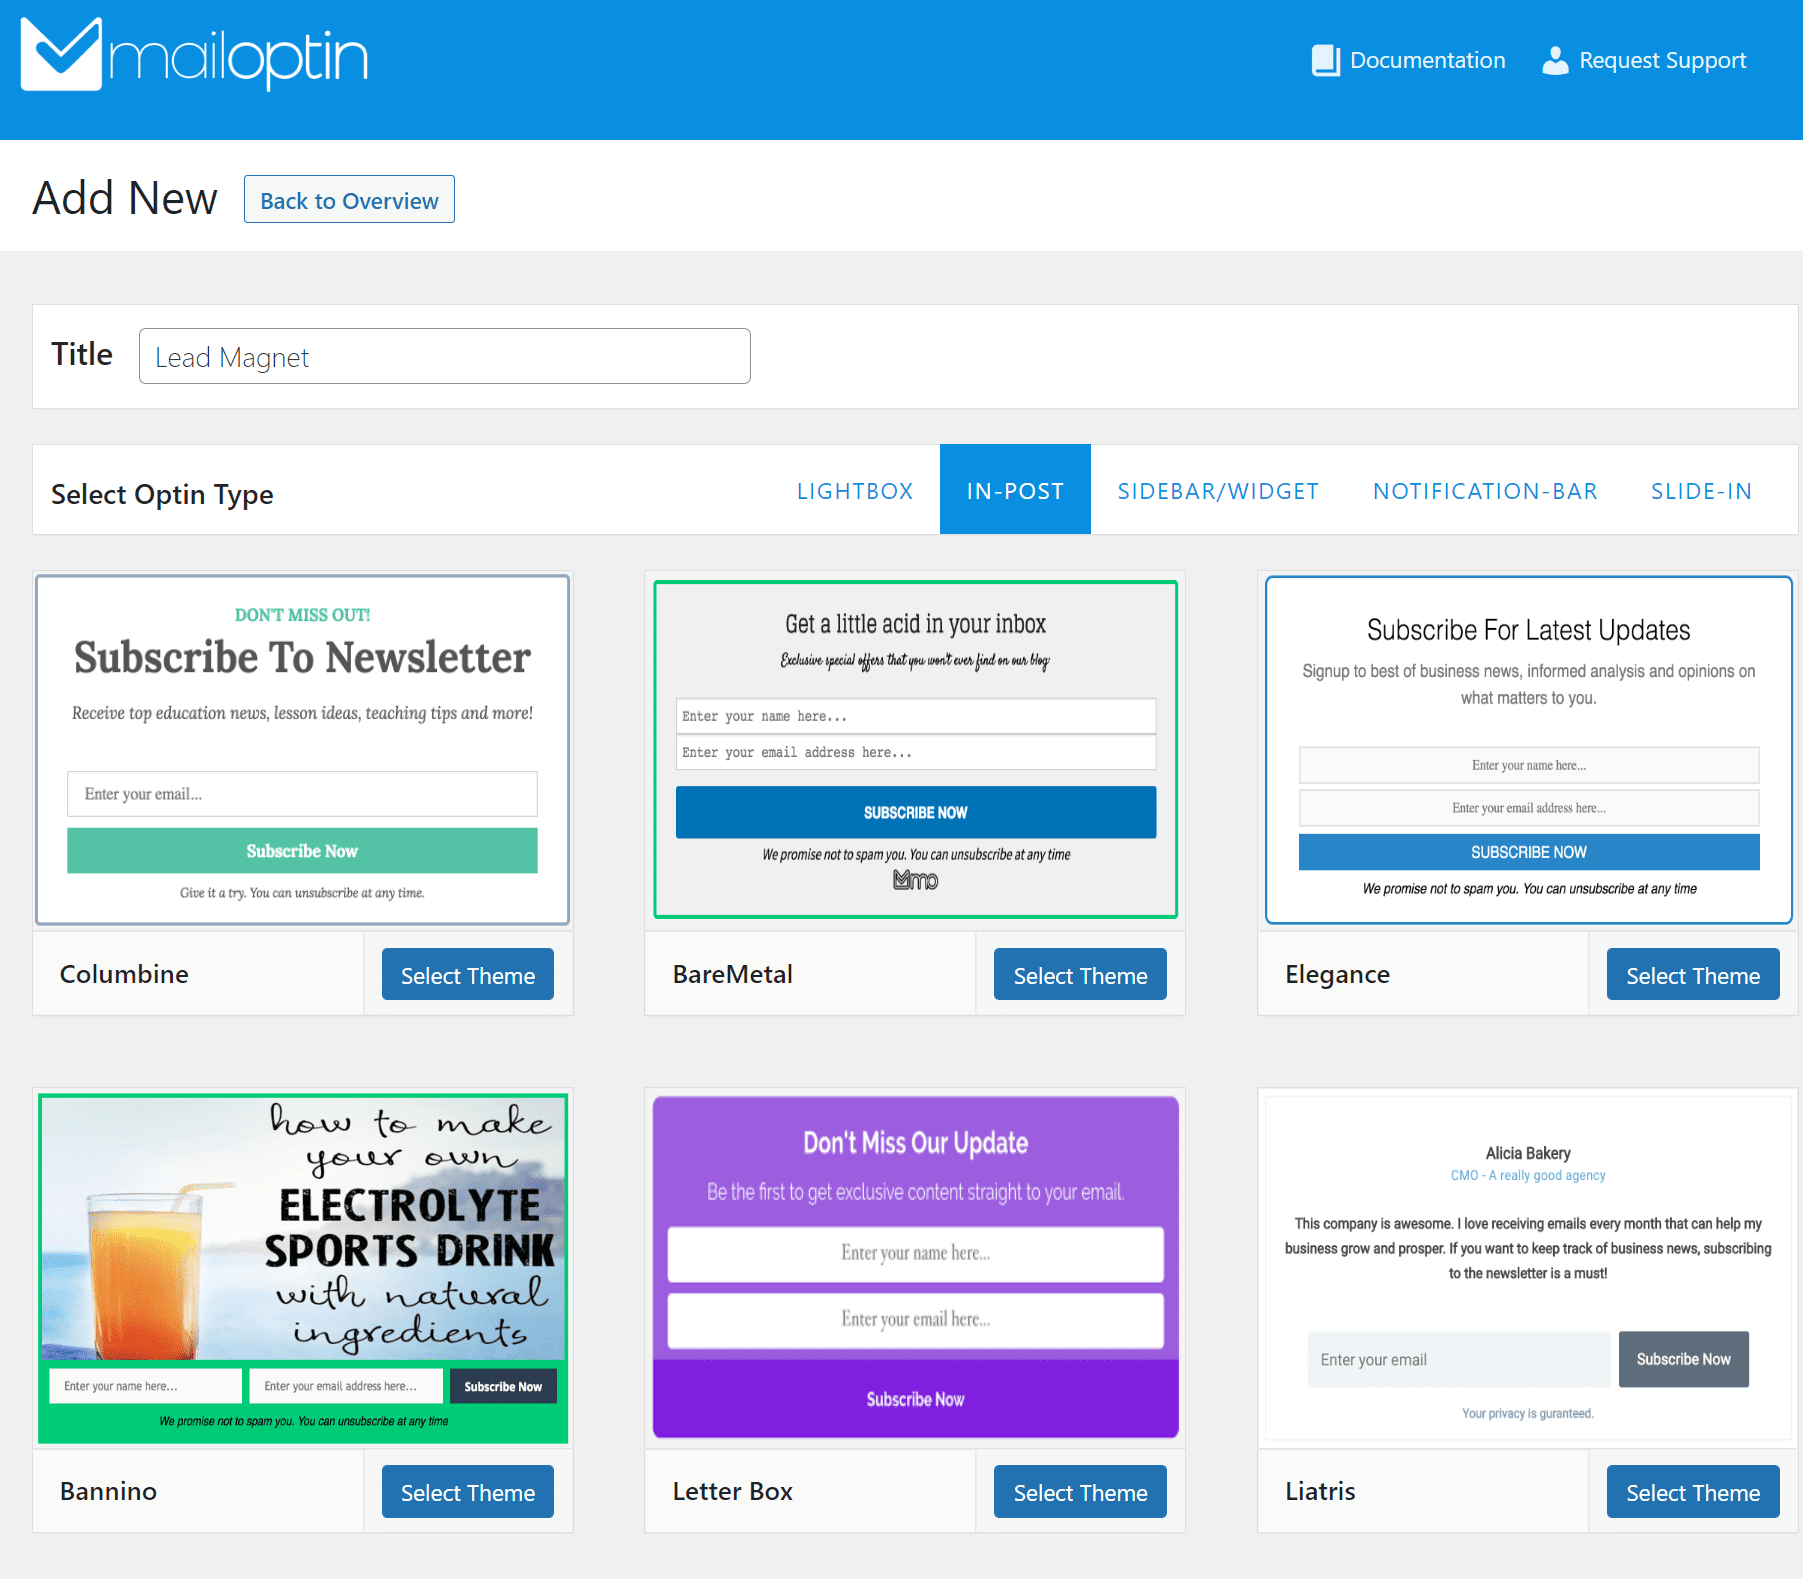
Enter a name in the Title field and select In-Post from the Select Optin Type section.
Next, select the template you want to start customizing. We’ve decided to go with the Letter Box theme for this example. Once you click on the Select Theme button, you will automatically be redirected to the customization page.
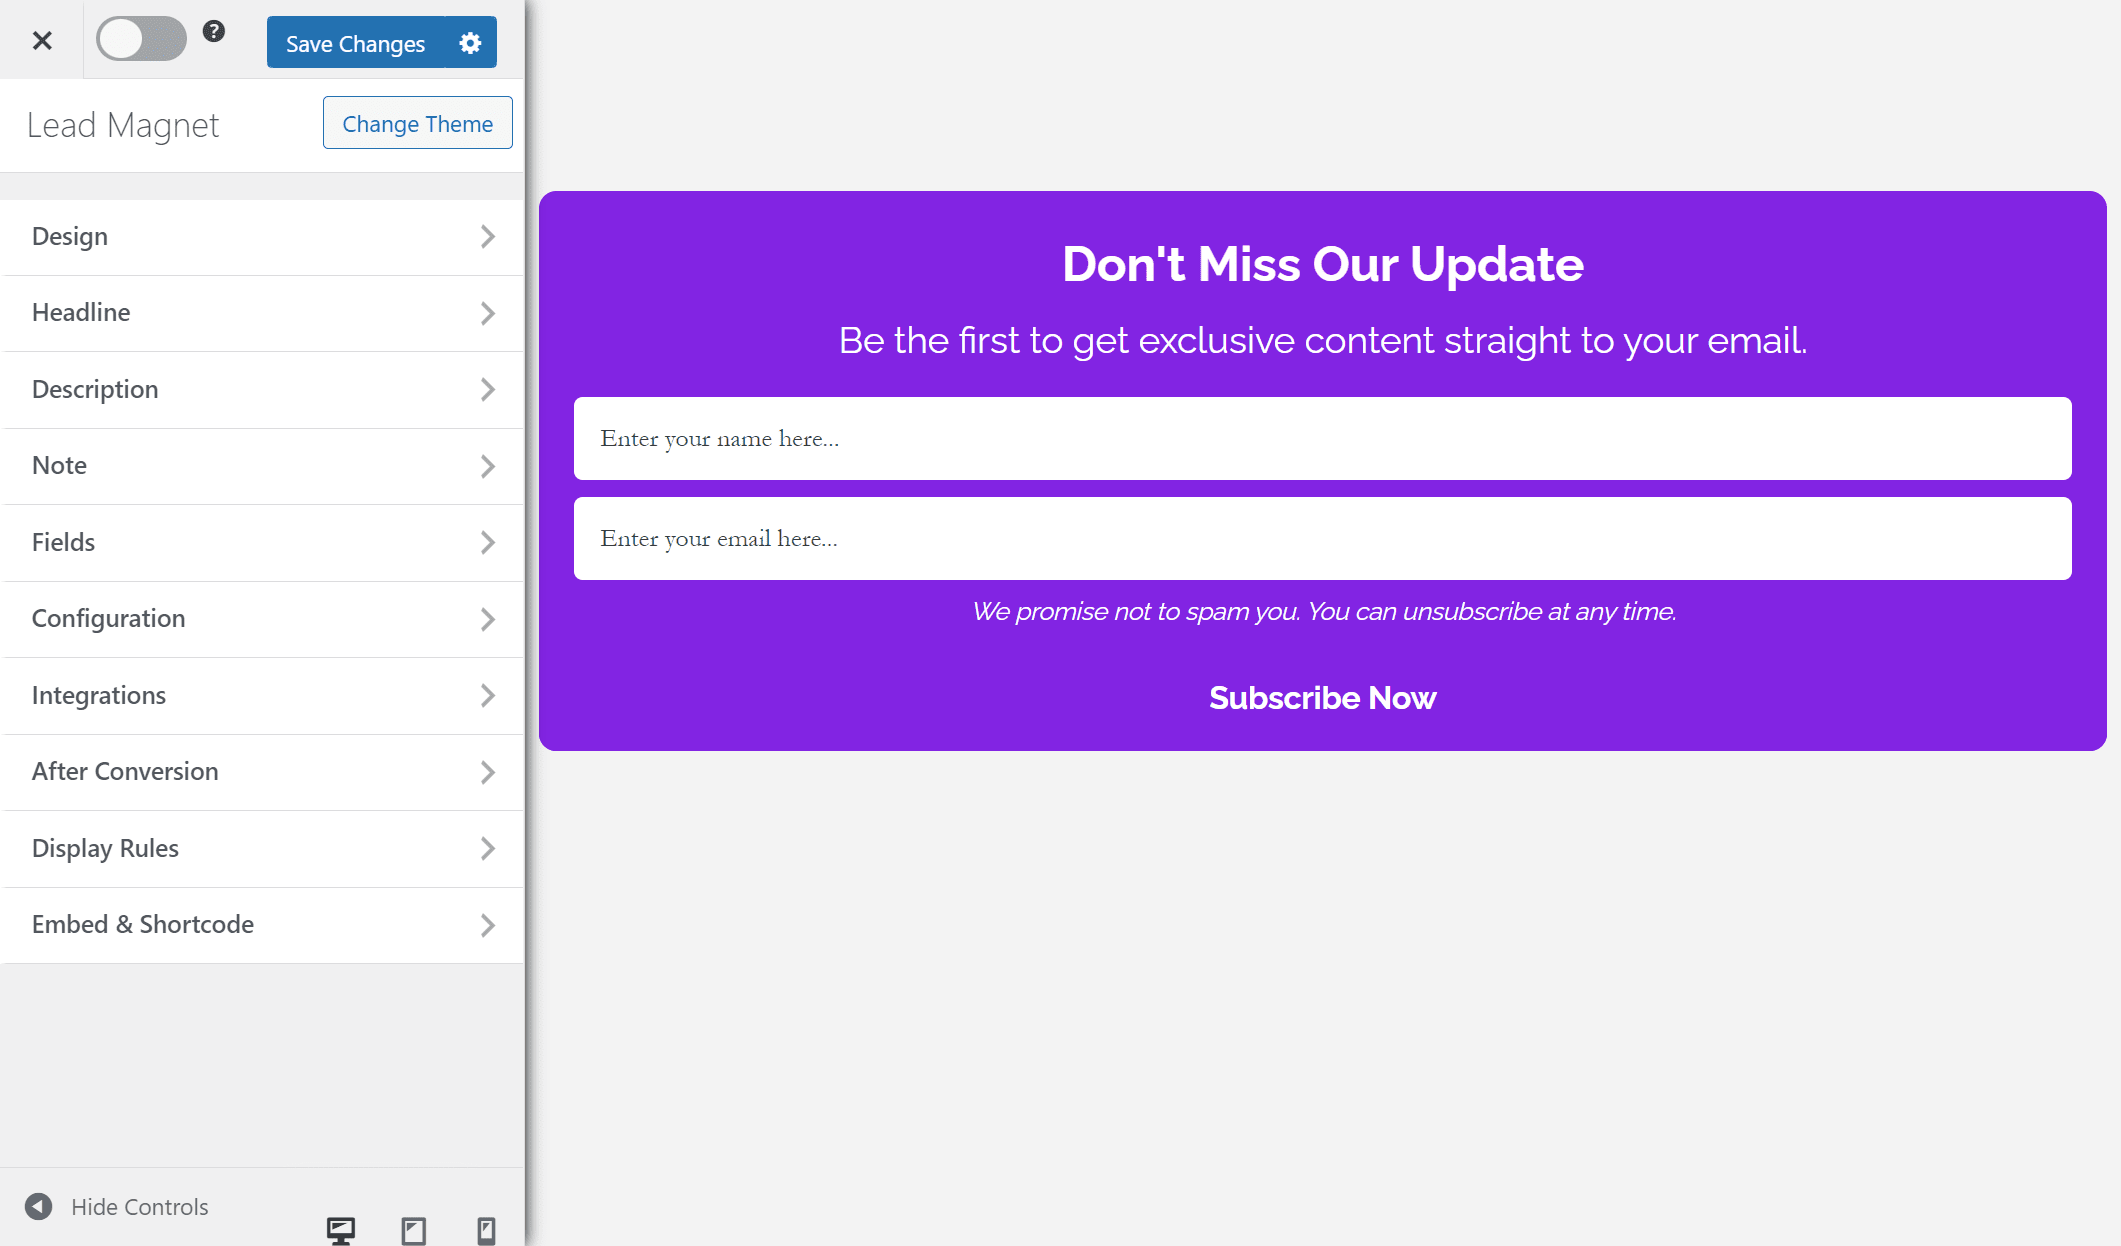
Using the options available on the form editing page, you can customize the opt-in form appearance and feel on the front end of your WordPress site.
Click on the Design tab to customize the background color of your opt-in form. You can customize the typography using the Headline and Description menus and set text colors.
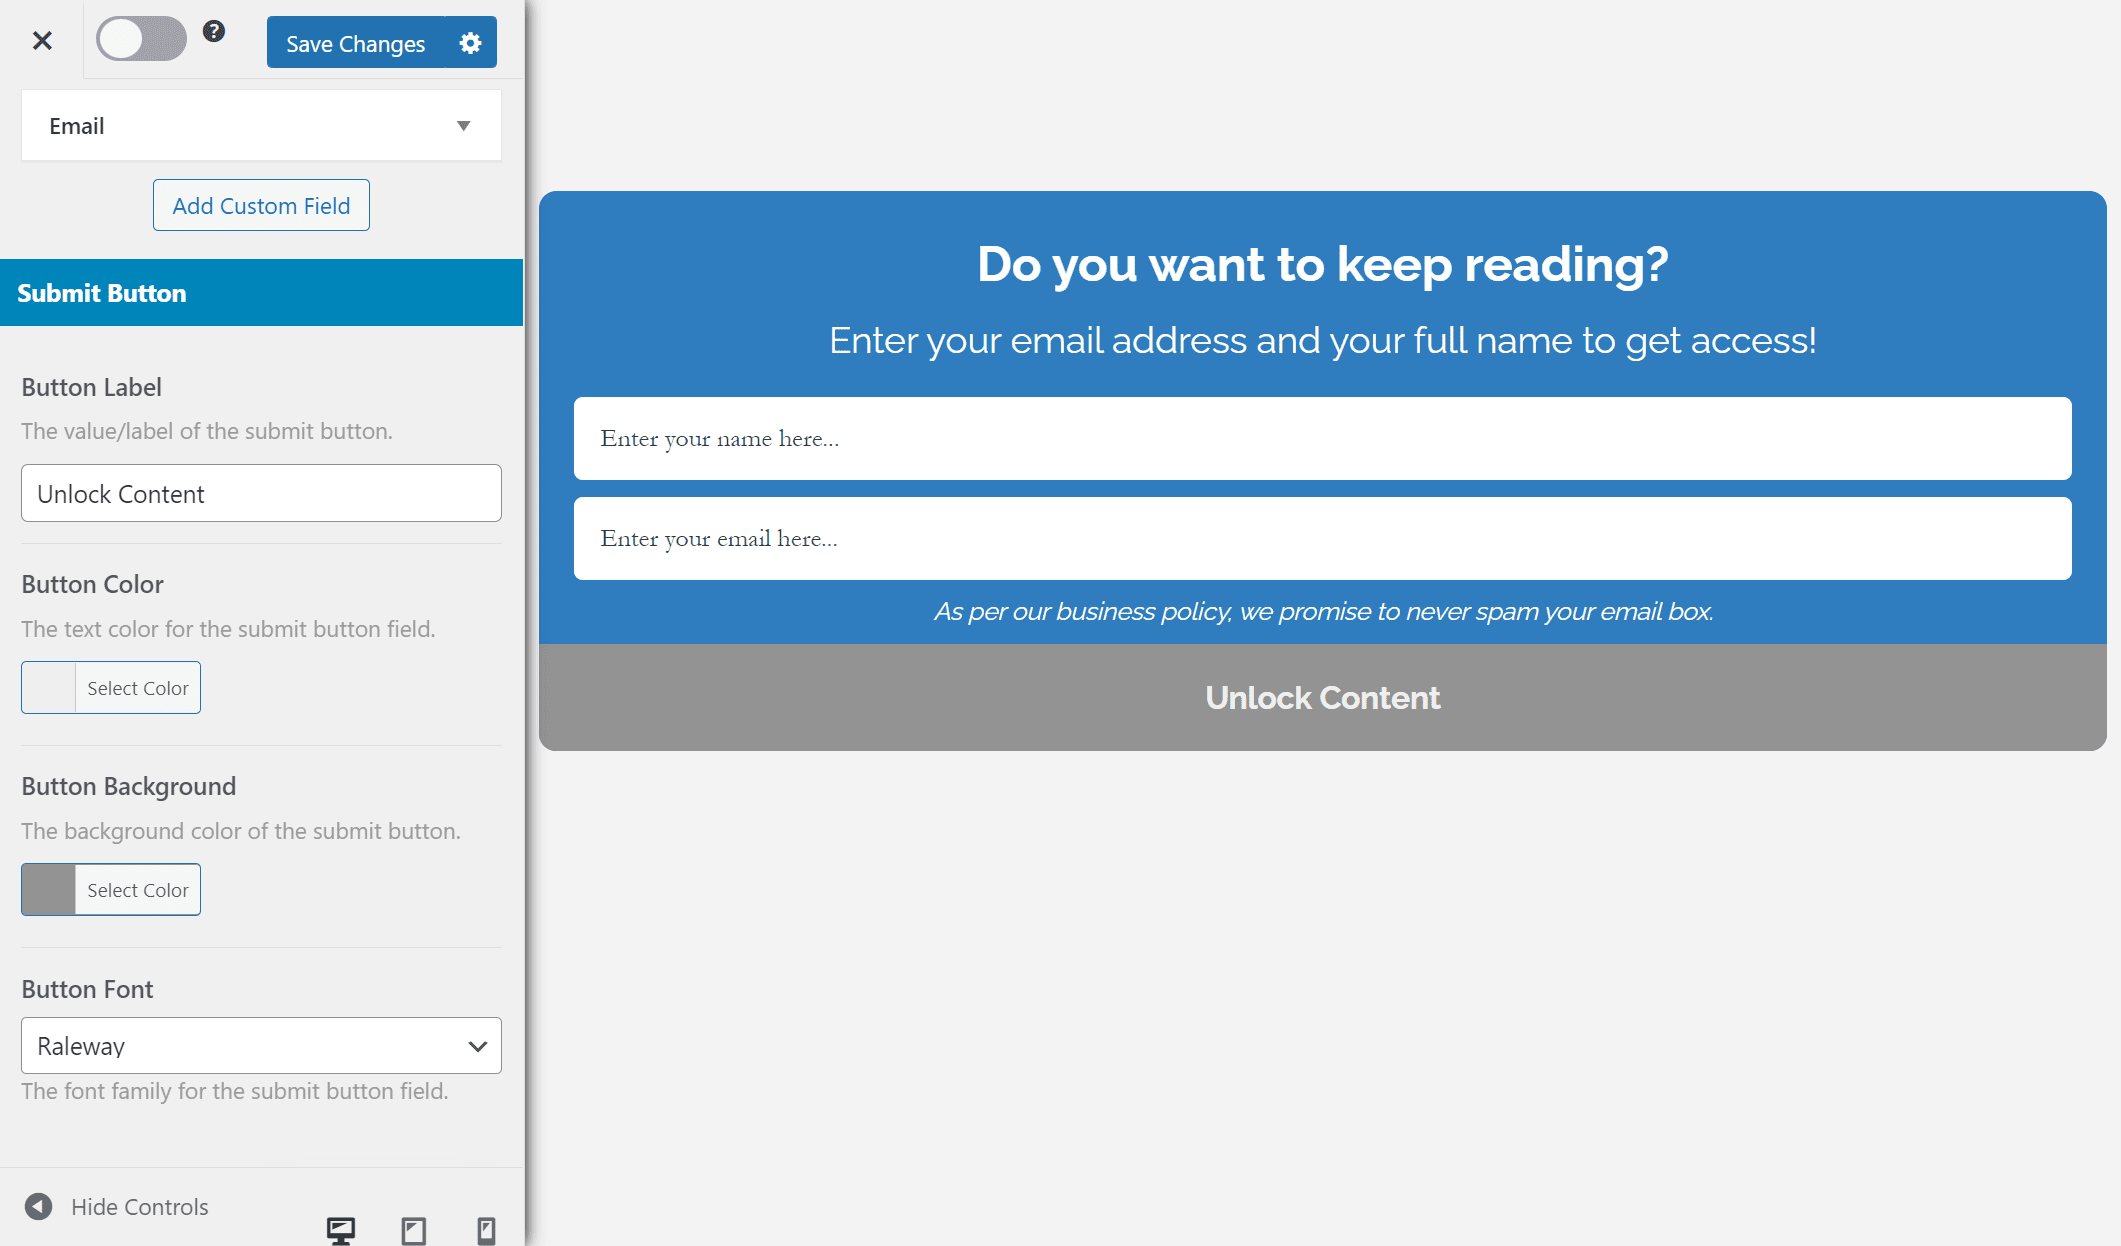
It’s also essential to display custom button text for the content locker to look professional and relevant to your audience.
Go to the Fields section and scroll down to the Submit Button section. Enter the custom text using the Button Label text field and set the button color.
Step #3: Create a WordPress content locker
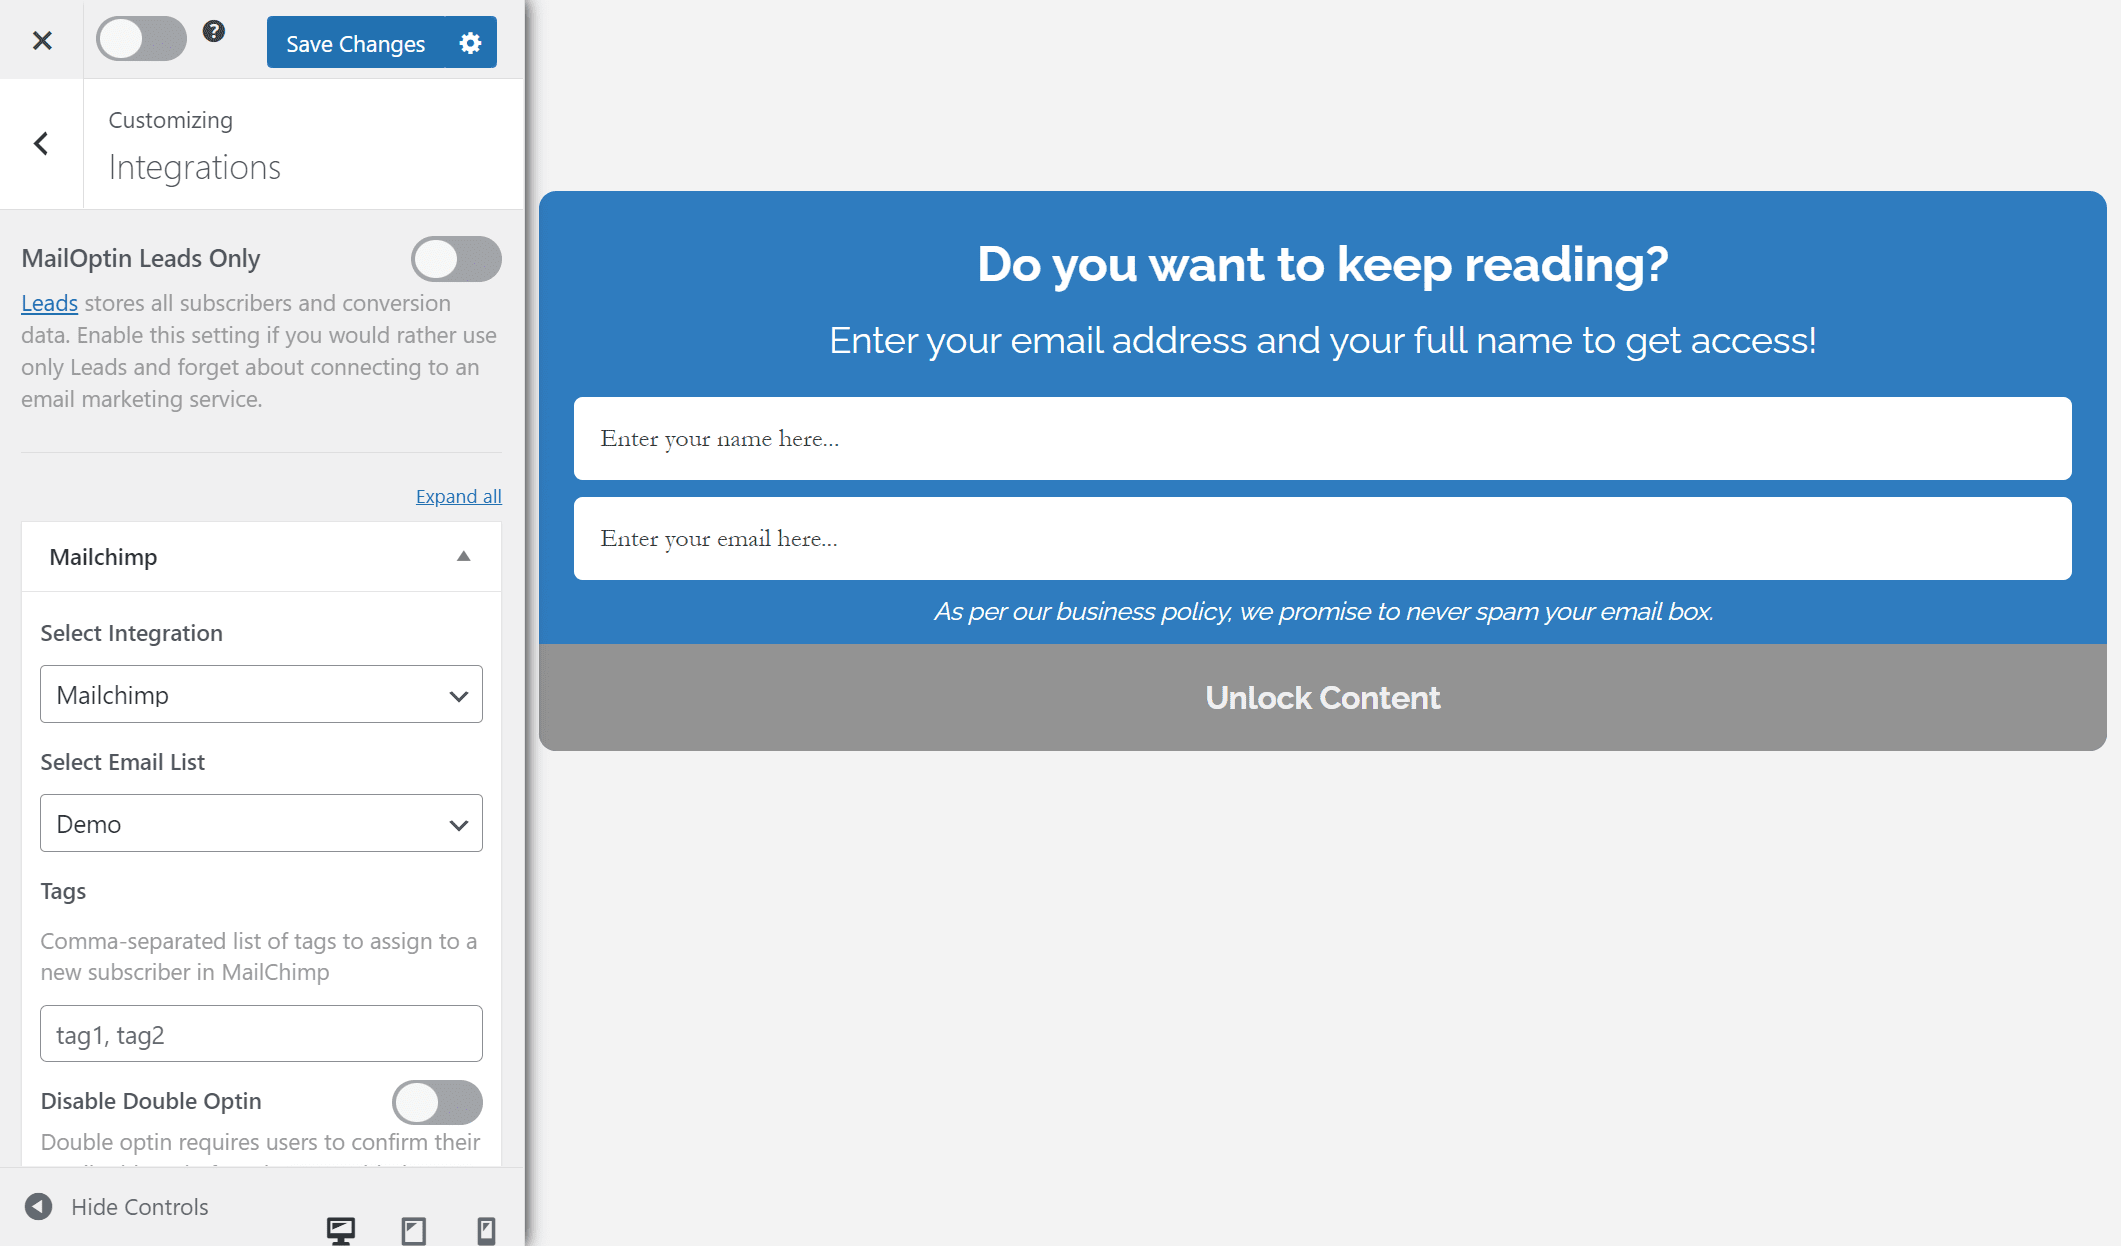
With your opt-in form looking precisely how you want it, click the Integrations button and select your email service provider using the Select Integration dropdown menu. As an example, we’re using Mailchimp.
Click the Configuration button and select the Lock Content Below Optin checkbox.
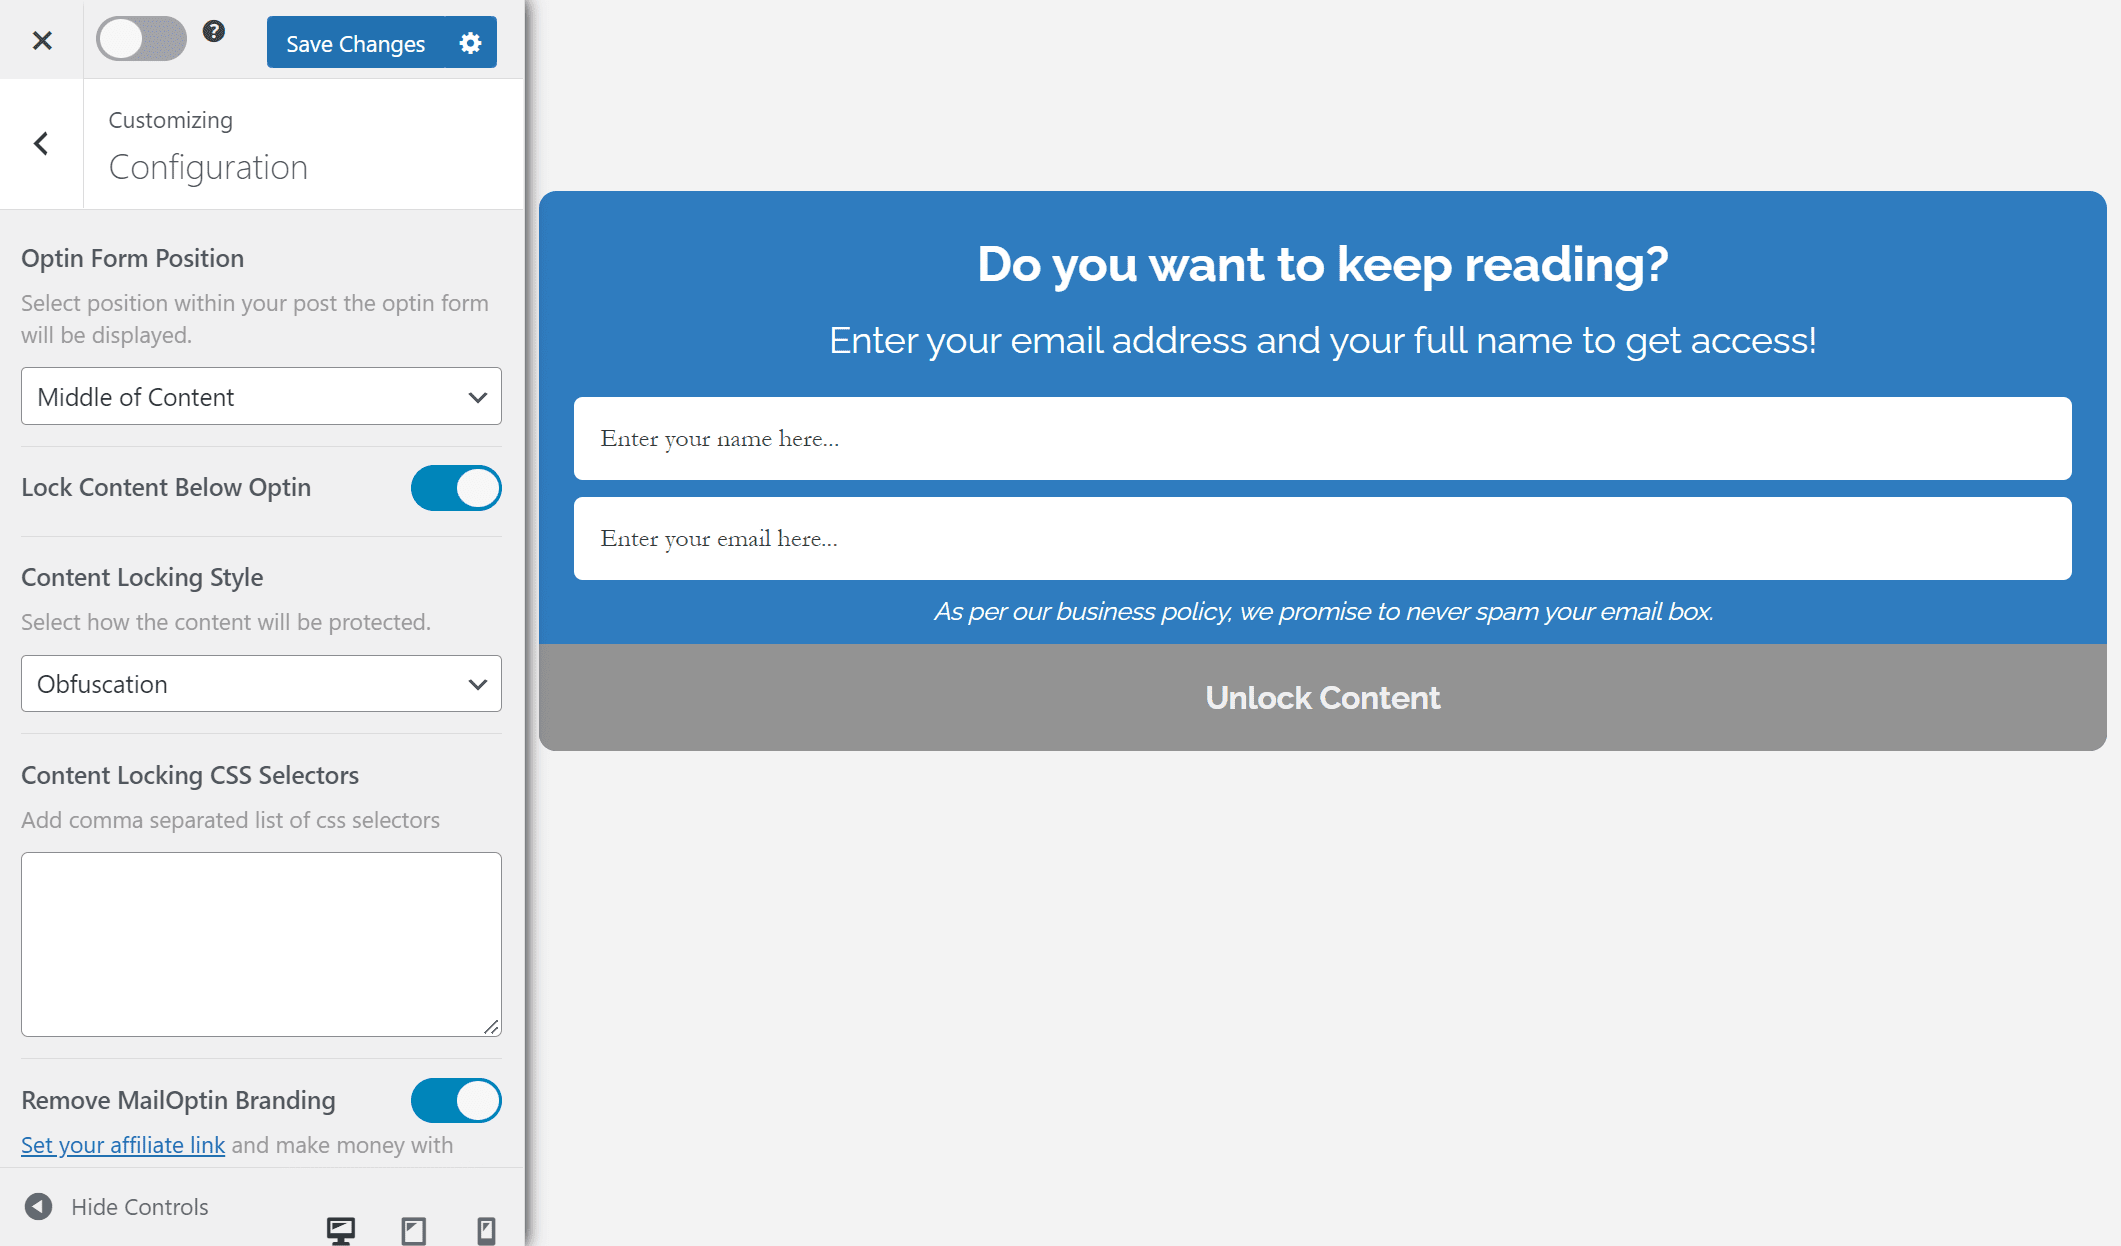
You will see new options appear. For example, you can select how the content locking style will display the restricted content and add custom CSS selectors.
Once you’re done, click on the Save Changes button and remember to activate the opt-in form using the checkbox next to the Save Changes button.
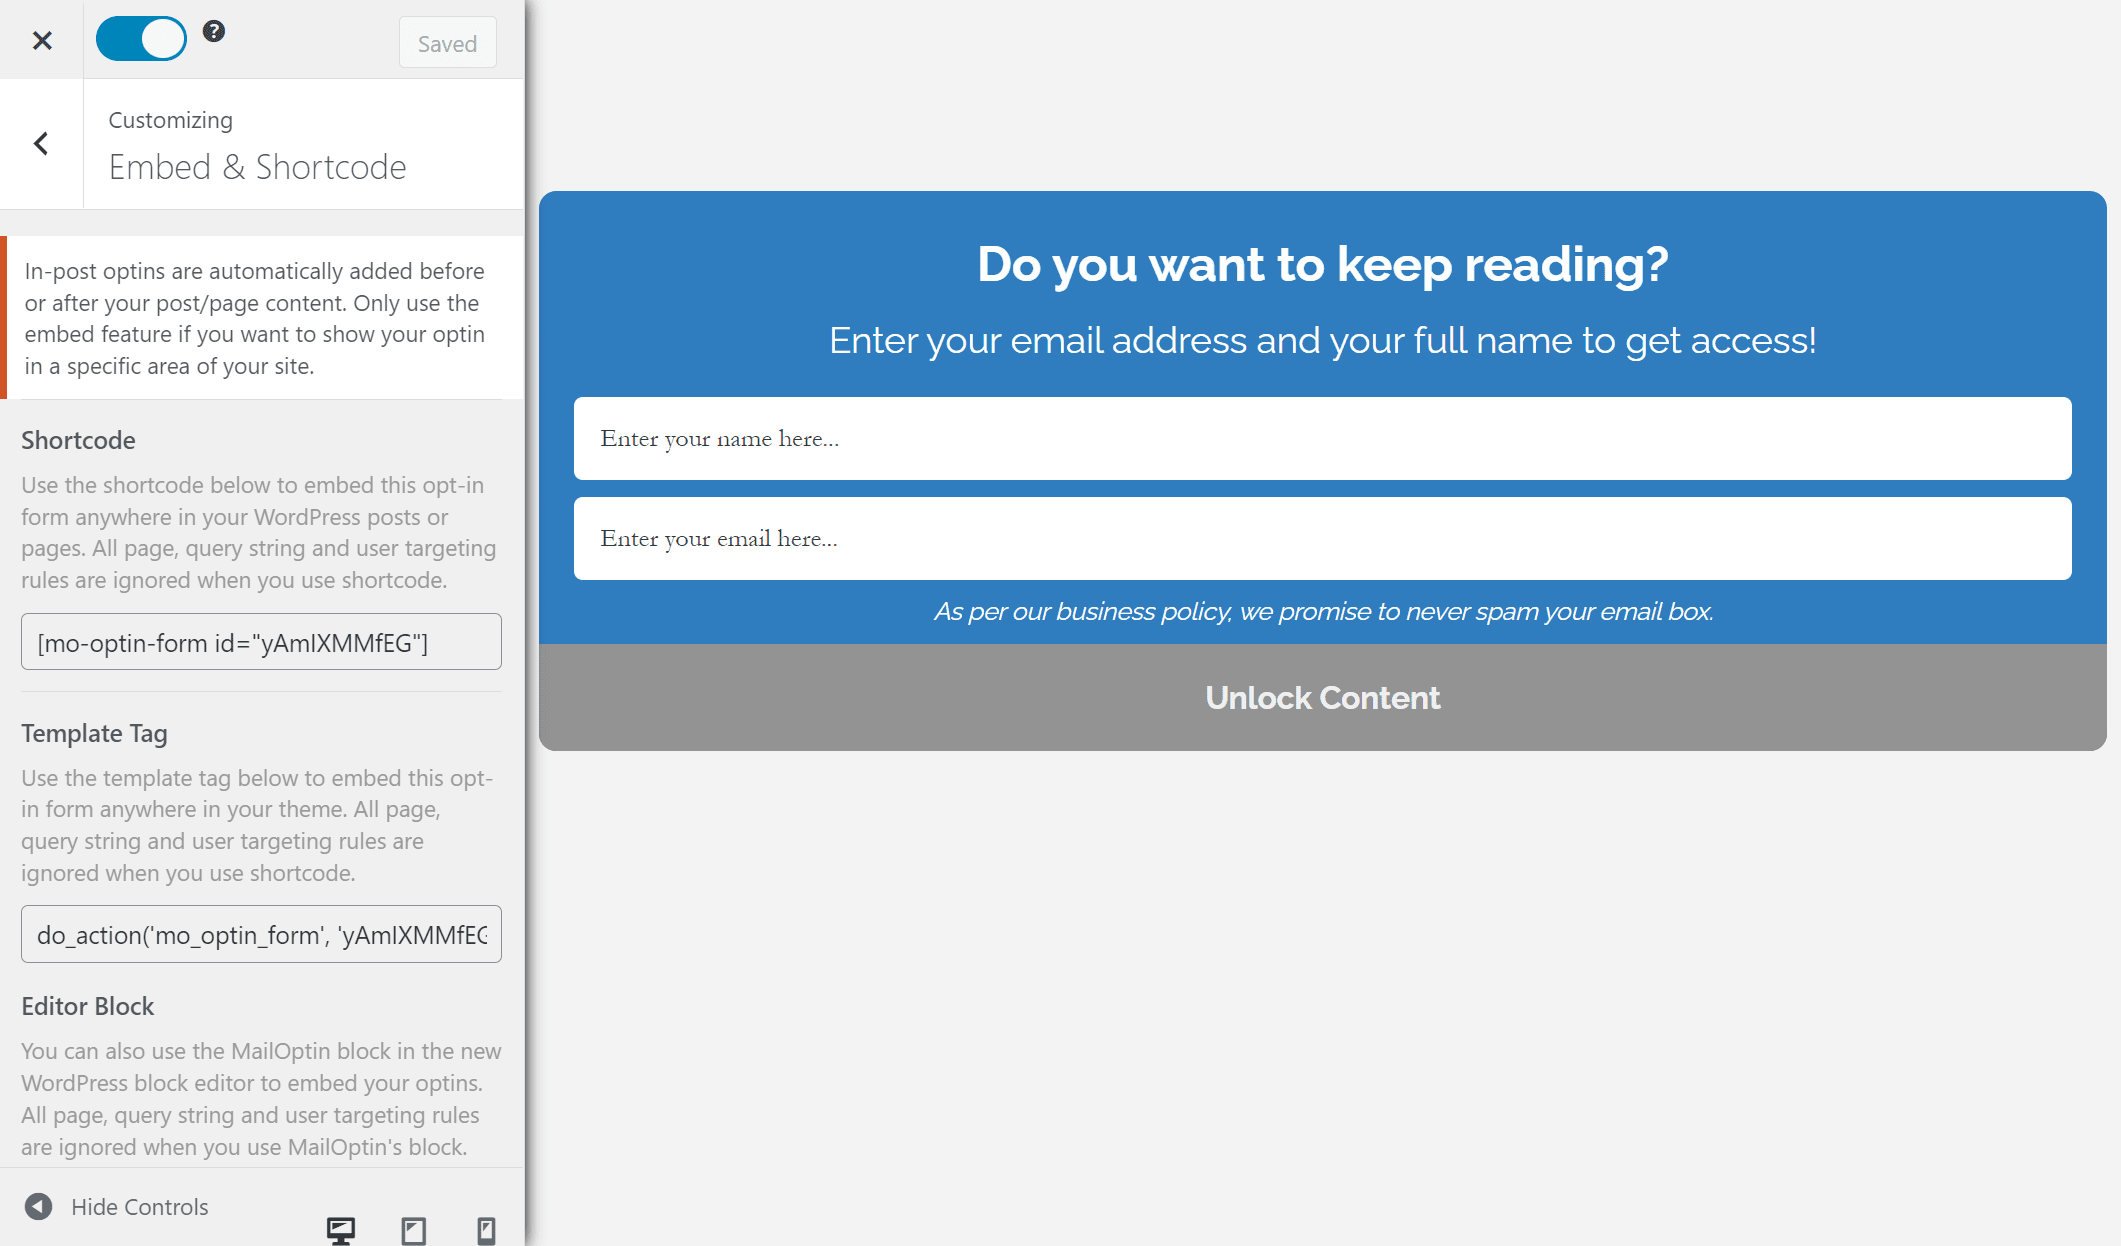
Before leaving the form customization page, click the Embed & Shortcode menu and copy the shortcode for the opt-in form. Also, disable the Show Optin Globally checkbox using the Display Rules > Page Targeting menu.
Next, navigate to the page or post to which you want to add a content locker and paste the shortcode exactly where you want the content lock to appear.
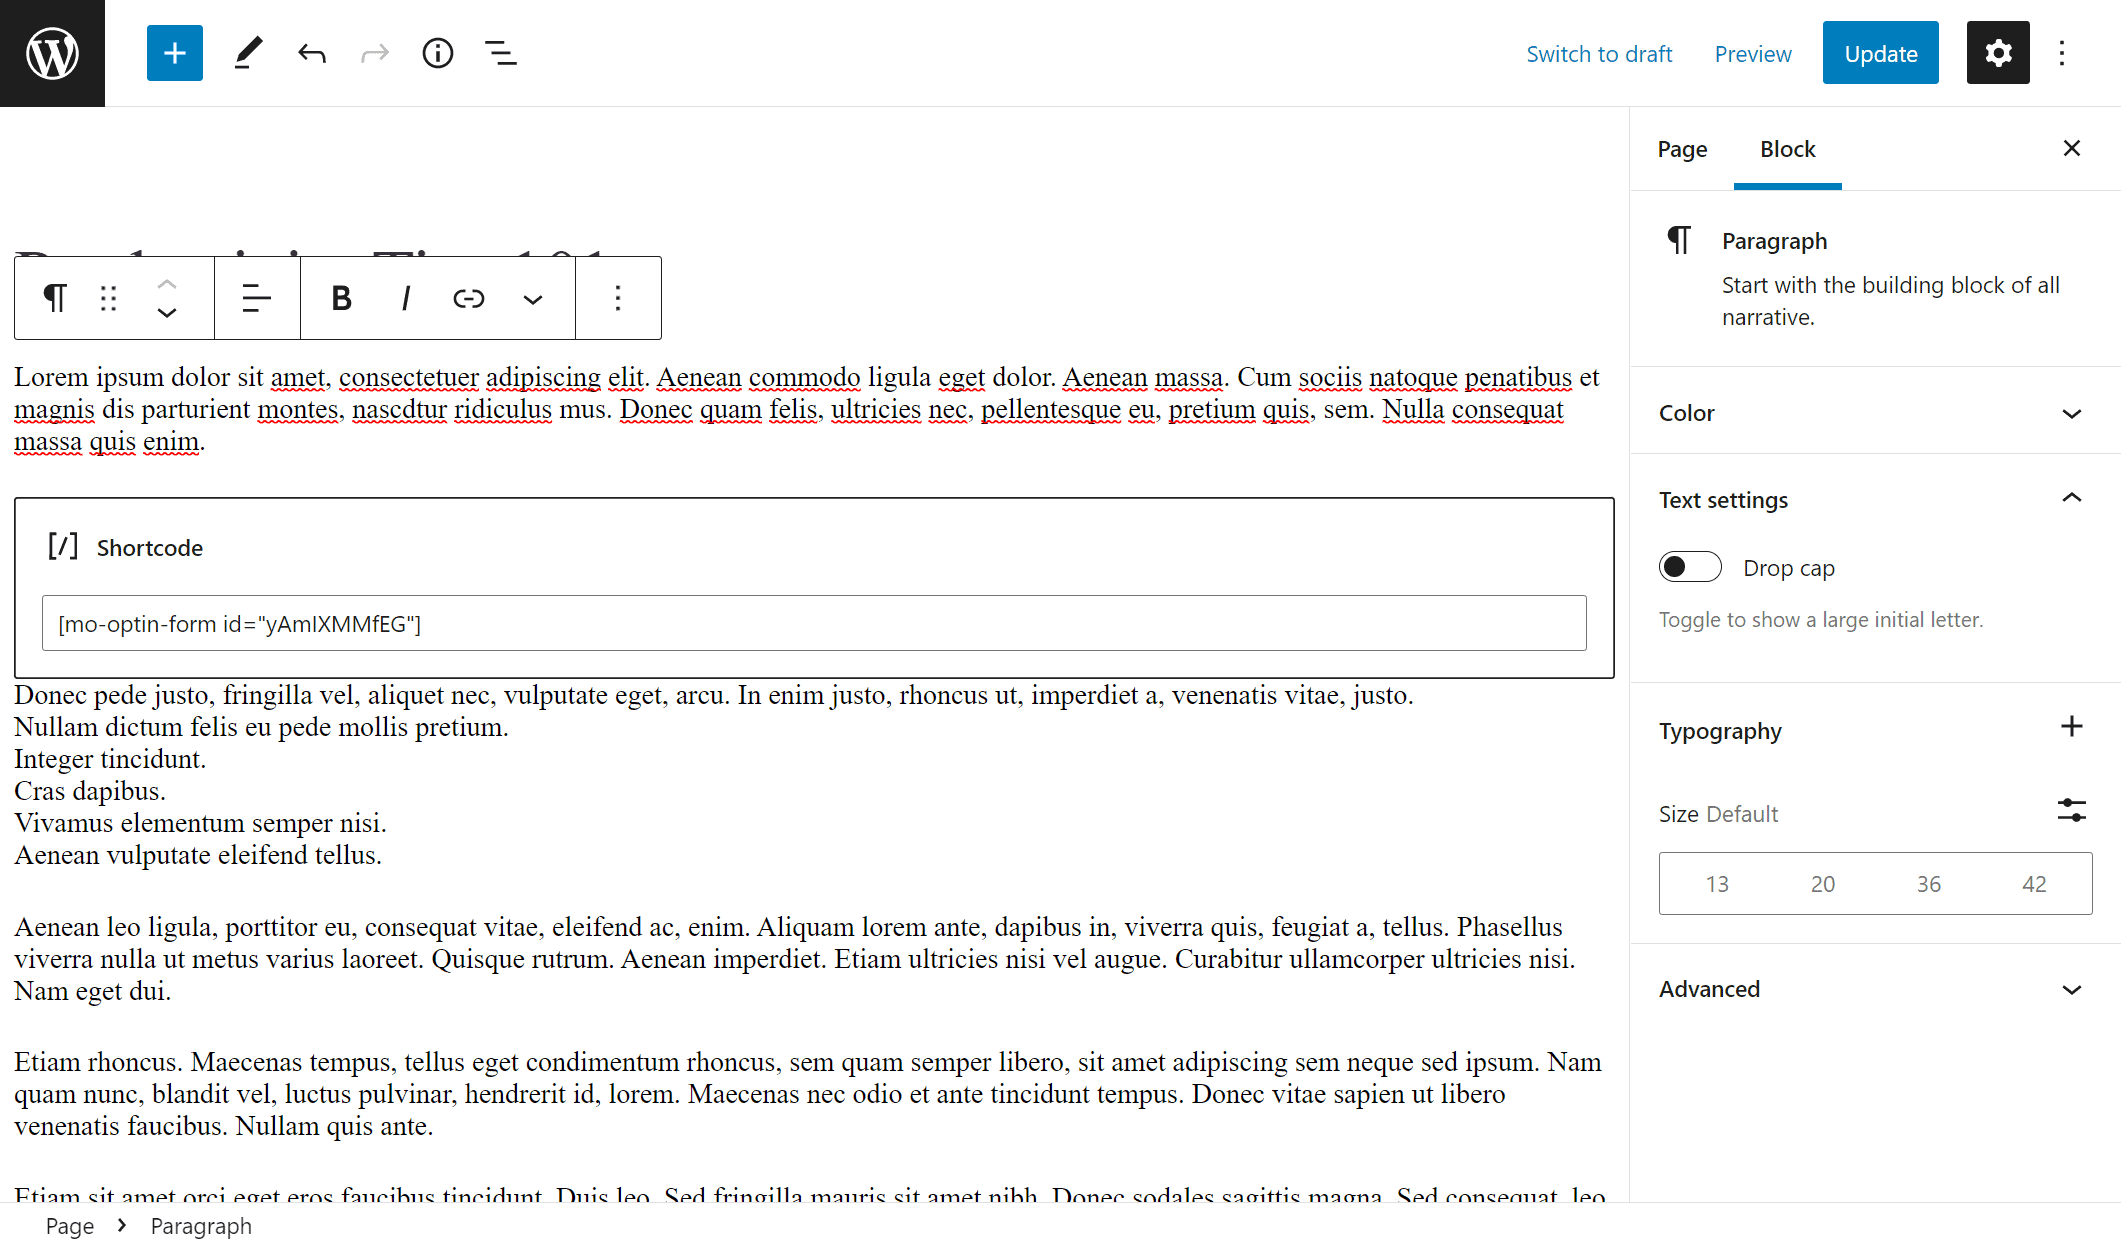
Make sure to click on the Update button to save the changes.
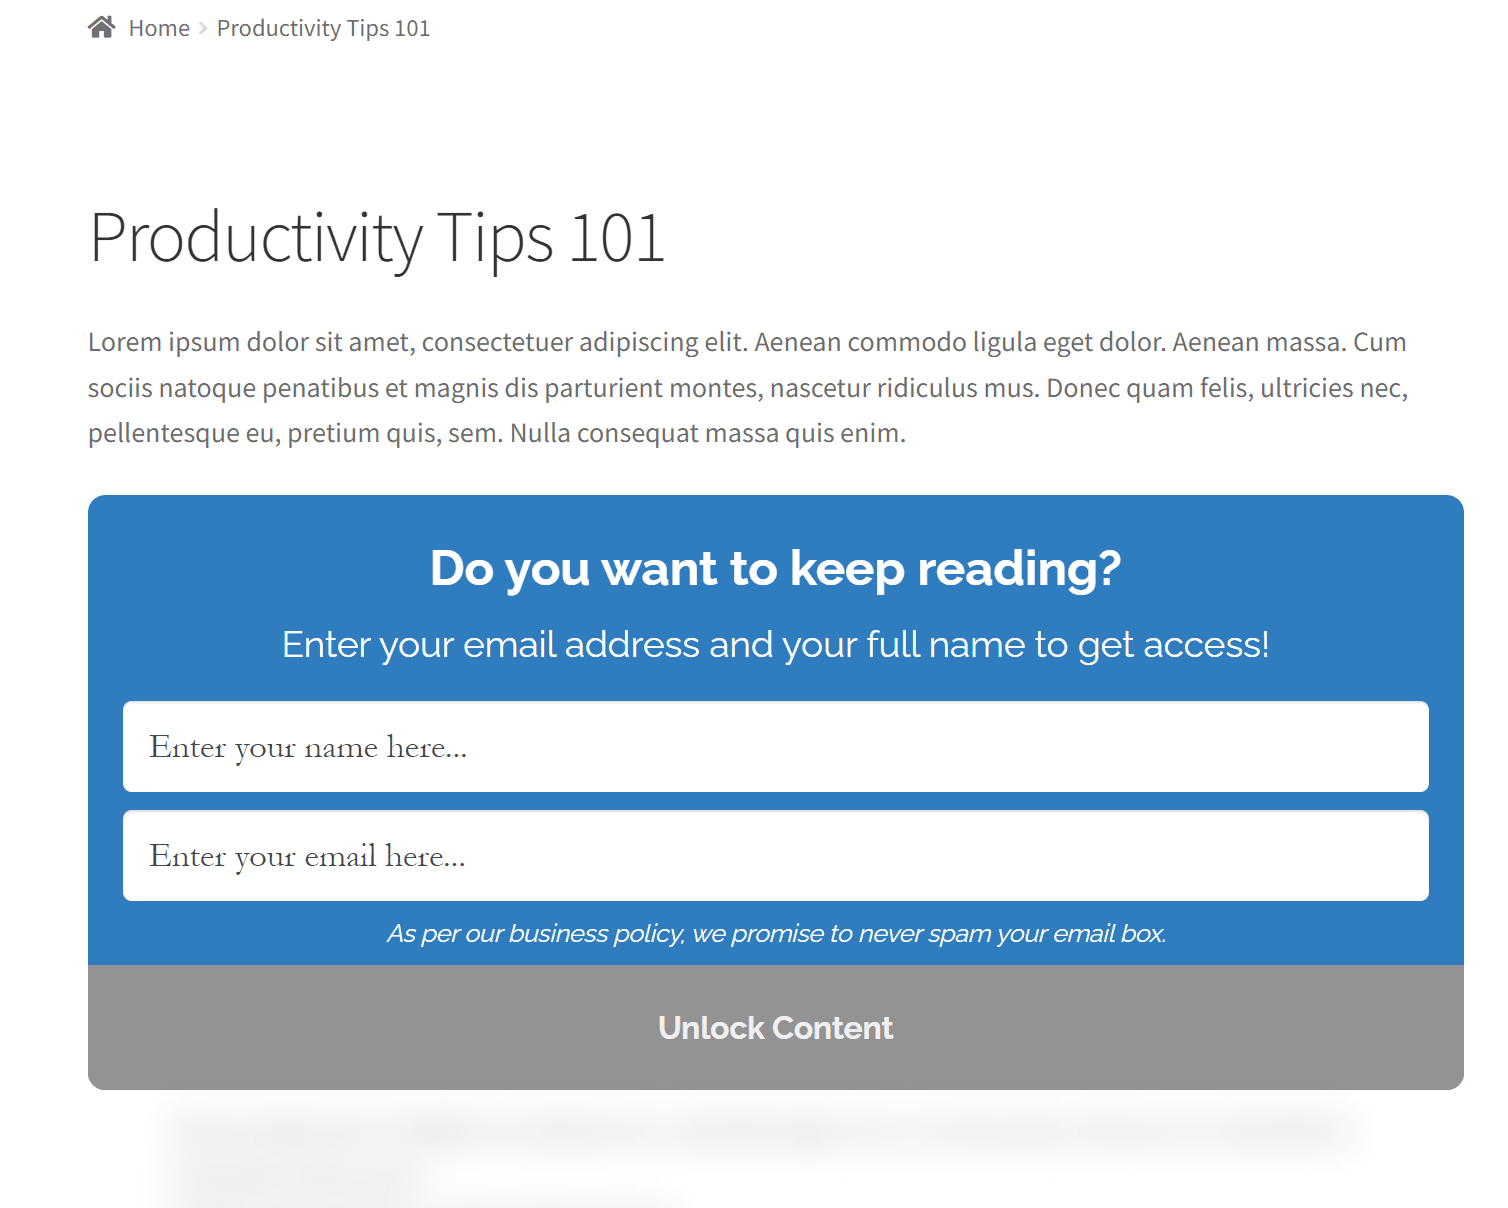
As you can see, the content has been locked right from where we placed the shortcode. Now, site visitors will have to enter their email addresses and name before they can have full access to the premium content on the WordPress site.
How to Setup ProfilePress WordPress Content Locker
ProfilePress is a top-notch WordPress membership plugin that empowers you to sell digital products, develop membership sites, and secure website content.
This plugin boasts many features, including a content-locking function, seamless payment gateway integrations, a user-friendly drag-and-drop form builder, and many more essential tools for website and business owners.
In the sections below, I will show you how to install and activate ProfilePress, set it up, and use it to lock Premium Paid content on your WordPress site.
Install and Activate ProfilePress
The first step in the process will be to install and activate the ProfilePress plugin. You will need to purchase a ProfilePress Pro License and install the ProfilePress plugin. To do that, head to the ProfilePress website to purchase a suitable license plan.
After purchasing your copy of the ProfilePress Plugin, you will receive a confirmation email with a link to download the plugin zip file and your license key. You can also download the plugin from your account page on the ProfilePress website.
Once you have downloaded the plugin, login to your WordPress admin dashboard, and navigate to the Plugins page; click on the “Add New” button and click “Upload Plugin“.
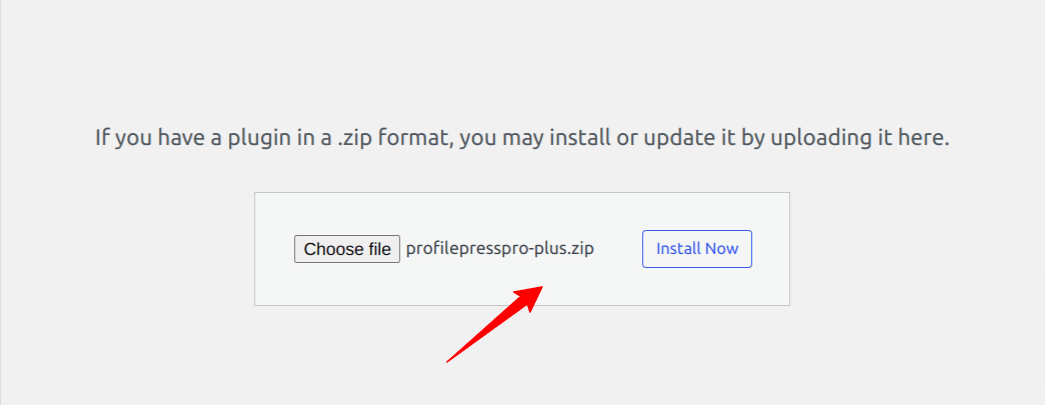
Next, click “Choose file” to select the previously downloaded plugin zip file. Click “Install Now.”
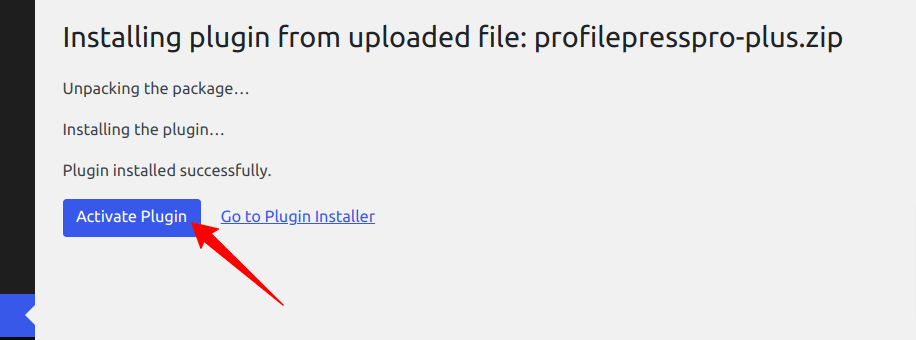
After installation is complete, click the Activate Plugin button.
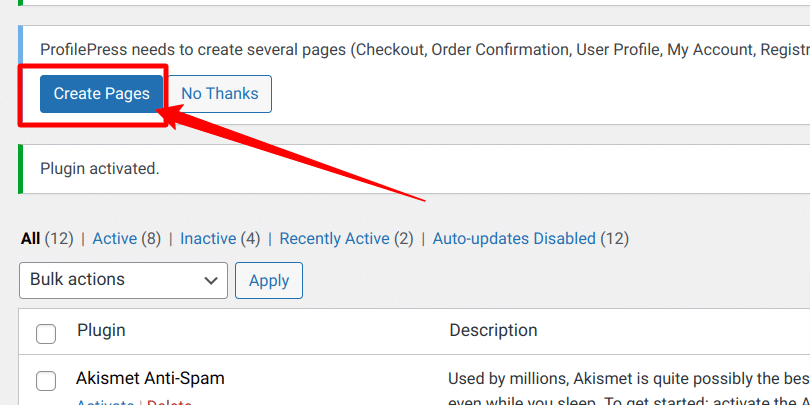
At the top of the page, you will see a notification that says, “ProfilePress needs to create several pages,” Click on the “Create Pages” button to complete the plugin setup.
Creating a Content Locker
With ProfilePress, you can secure different types of content on your WordPress site. This includes pages, posts, child pages, child posts, categories, tags, and more.
You can limit access to specific user groups like paid membership subscribers, logged-in users, logged-out users, or everyone.
To get started, Navigate to ProfilePress > Content Protection and click the Add a New Protection Rule button.
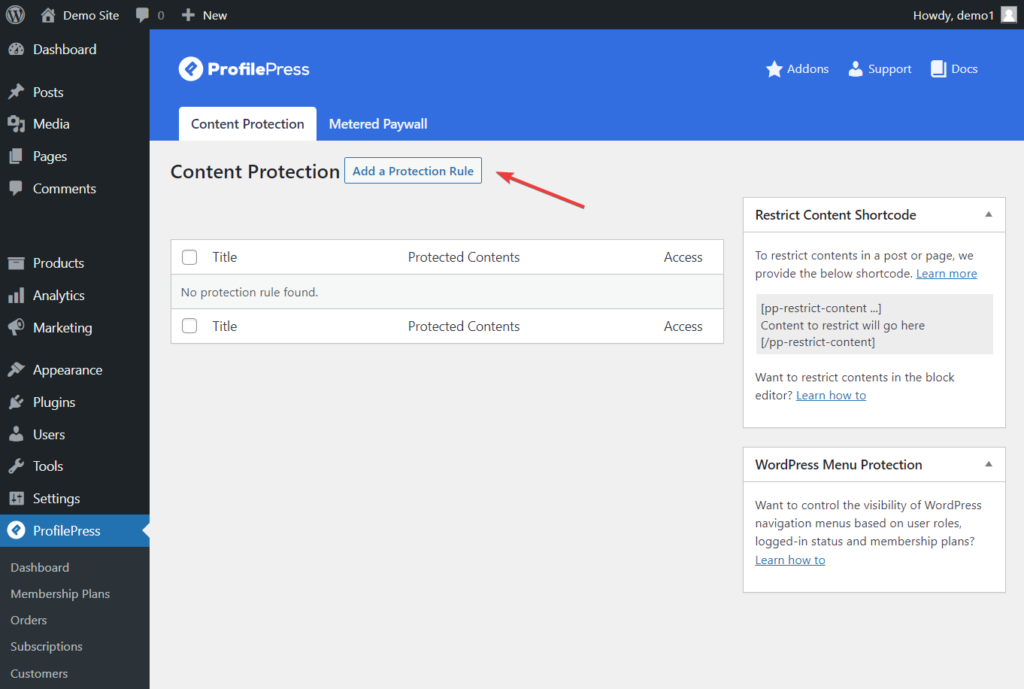
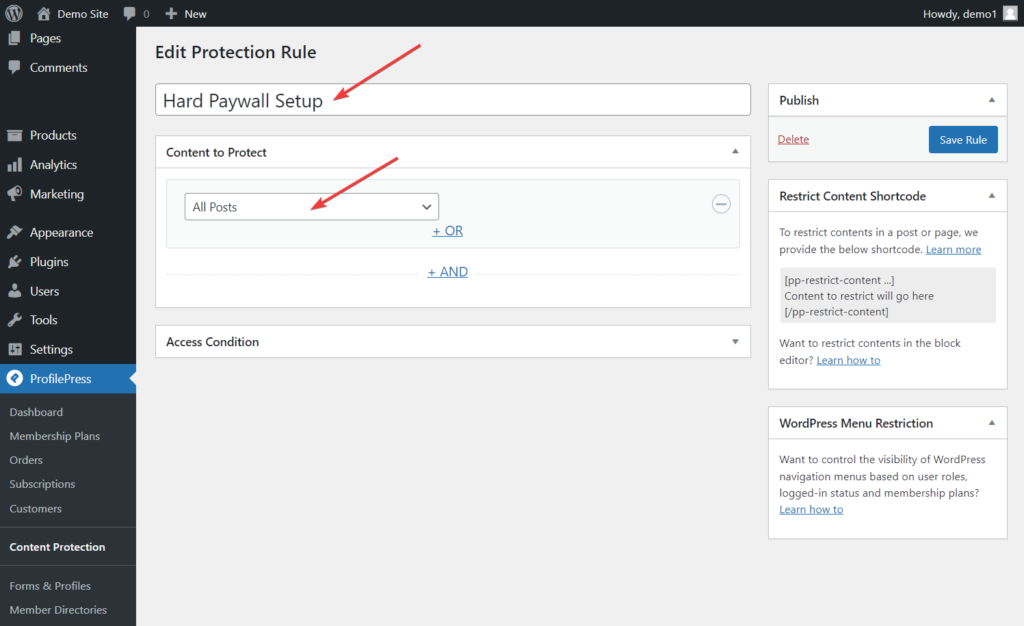
When you click the button, you will be taken to the Protection Rule editing page, where we will configure the behavior of our content locker.

Enter a descriptive title for the rule you create, select the content you protect, use the logical OR/AND to set the rules, and use the access condition to select who can access the content.
The Access Condition section allows you to assign who can access the content you want to protect, such as:
- Everyone (all users will have access to the content),
- Logged-in users (only those who are logged in can access the content)
- Logged-out users (only those who are not logged in to your website can access the protected content).
The Logical AND rule only kicks in when all grouped conditions are true, and the Logical OR rule happens when one of the conditions in a group is true.
In the screenshot above, we used the OR logic, where the protection rule will kick in when anyone accesses either of the selected post or pages. Of course, this means you want everyone to access the selected post and page.

The rule above will restrict posts on your site that belong to the “premium” category and “Paid members” tag to logged-in users only.
Next, you must go to the Access Condition section on the rules editing page to configure who can access the premium content.
In the Access Condition section, select Logged in users from the dropdown menu against the “Who Can Access the Content?” option.

You can show unauthorized users the global restriction message, a custom message, or the post excerpt or redirect them to a specific page.
As soon as you select the Logged in users option, several new options appear in the Access Condition section.
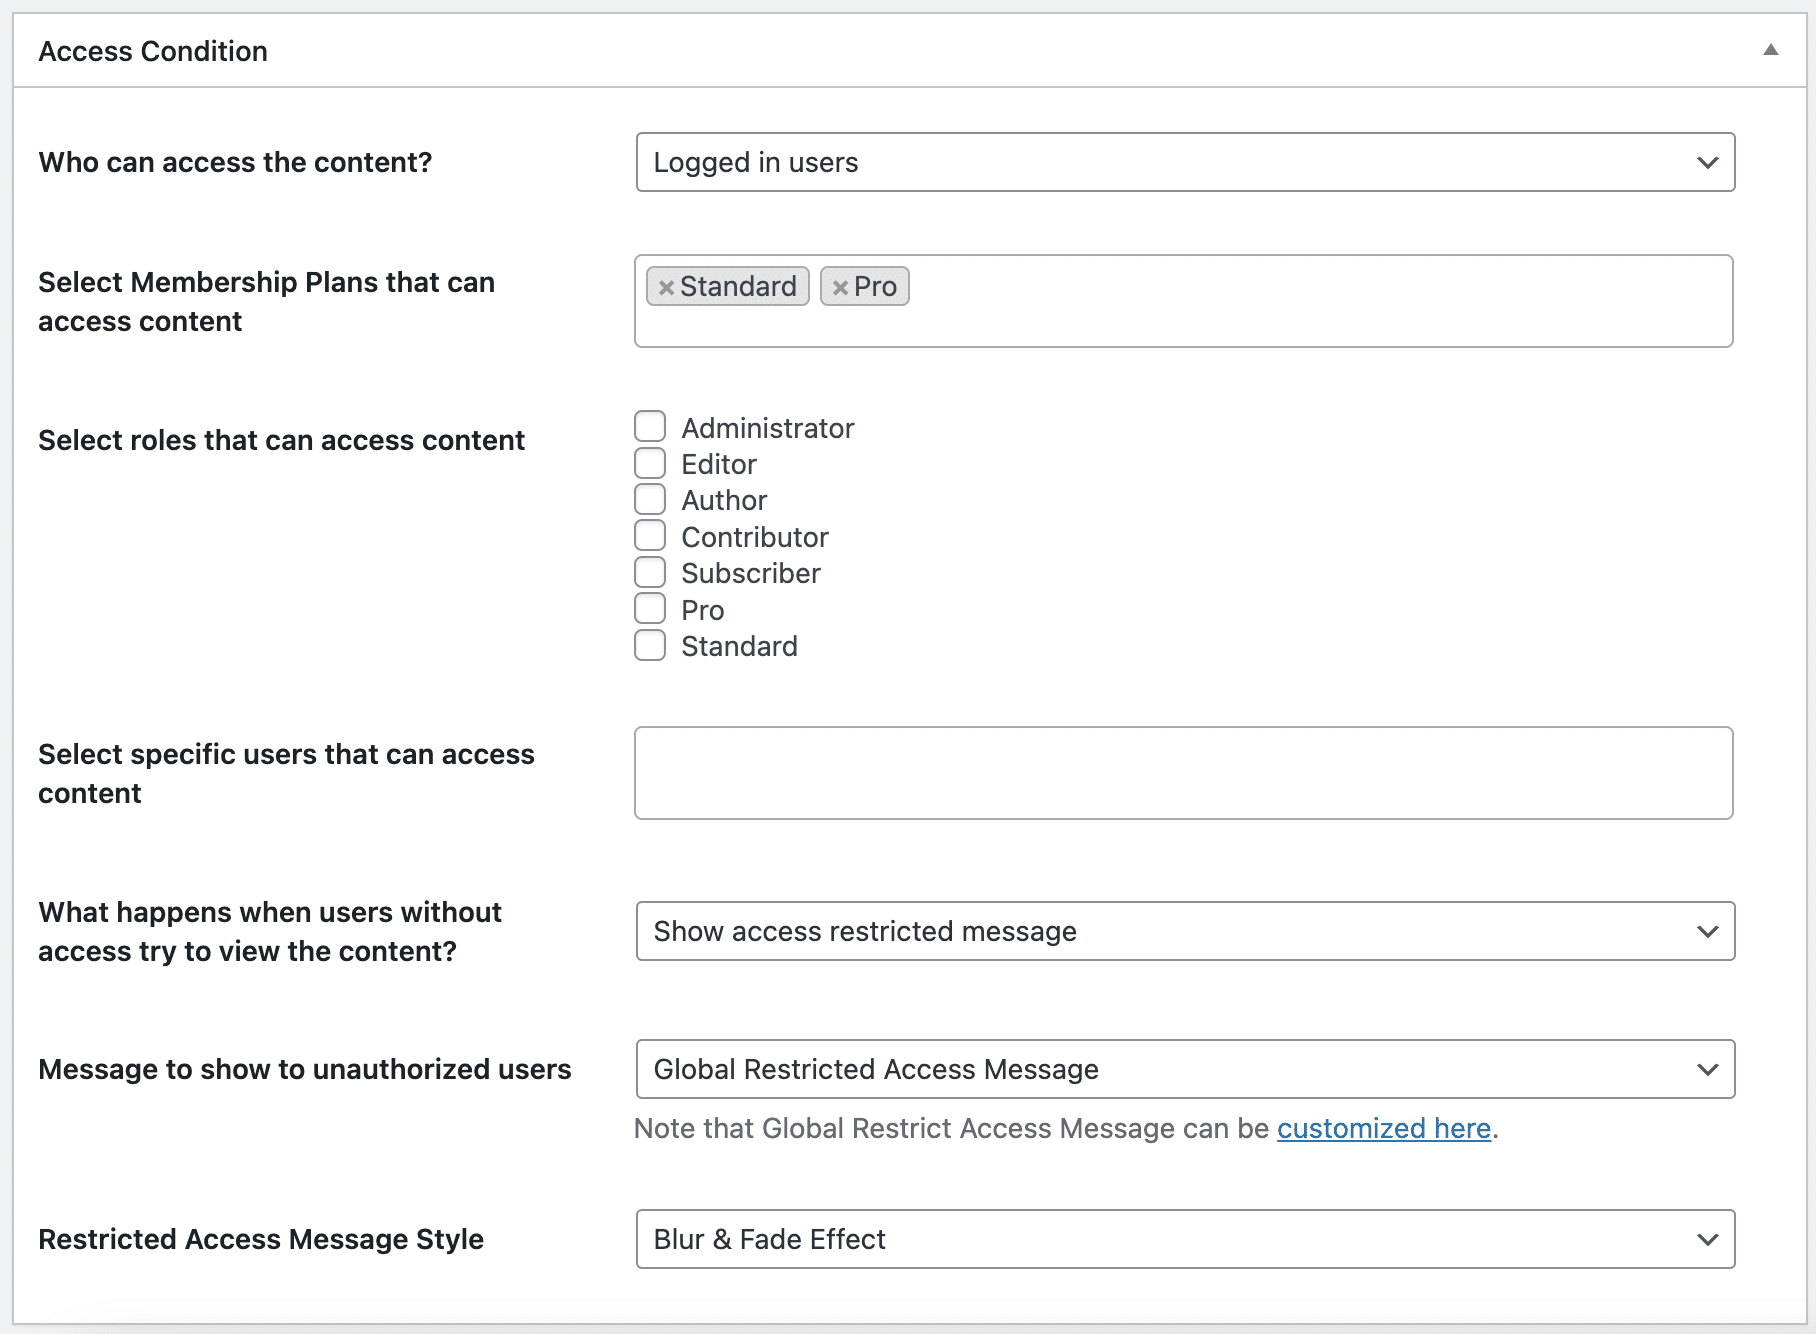
Next, select the Restricted Access Message Style Option and select Blur & Fade Effect from the dropdown menu. Next, under Message to Show to Unauthorized Users, select the Post Excerpt + Global RestrictedAccess Message.
Hit the Save Rule button to save your setting.
Click on the customized here link, as shown in the image above, to add a custom message for your content lock. This message should inform the visitors that they need to become premium members to access the full content.
Now, if we visit any of the posts that are locked based on the rules set above, we will see a notification as shown below.

By completing this setup, we have successfully added content locking to all posts in the premium category, which paid subscribers or selected user roles can only access.
Note that you can create as many content protection rules as you want. You can also deactivate/activate any rule from the Rules listing page.
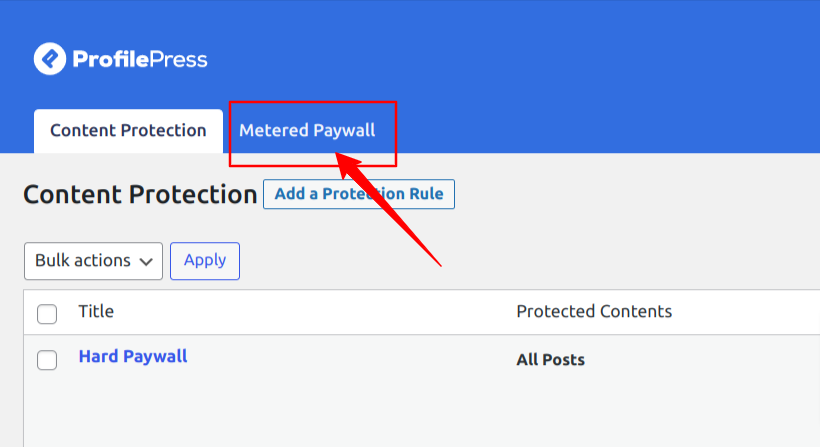
Setup Metered Content Lock with ProfilePress
ProfilePress has an additional feature called metered paywall, which allows visitors to access all content but requires payment after a certain number of views.
For example, visitors can read two free articles daily, but after that, all content is inaccessible until they subscribe to a membership plan.
Activating the Metered Paywall Addon
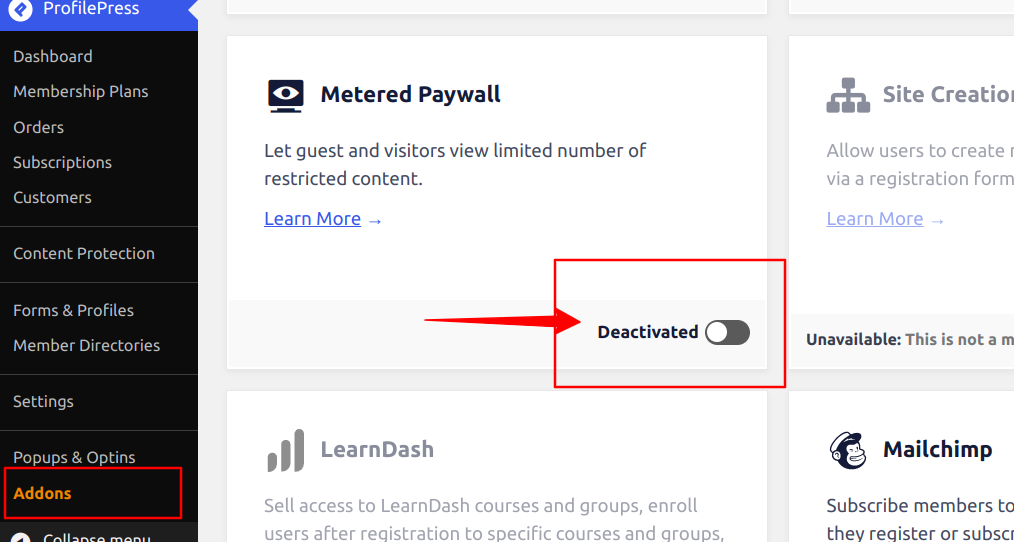
Before starting metered locking content on our WordPress website, we need to activate the paywall addon available in the ProfilePress plugin.
Navigate to ProfilePress > Addons and toggle on the Activate button in the Metered Paywall section.
After activating this addon, we will have to go through four steps to set up the metered content lock:
- Restricting content
- Setting up a metered paywall
- Preventing abuse of the paywall
- Adding countdown slider
i. Restrict Content
First, restrict your WordPress site content by following the guidelines below.
Navigate to ProfilePress > Content Protection and click the Add a New Protection Rule button.
Add a Title on the next page, and select All Posts from the dropdown menu under Content to Protect.
Scroll down to the Access Condition section, and from the dropdown menu against the Who Can Access the Content option, select Logged in users.
As soon as you select the Logged in users option, several new options appear in the Access Condition section.
Firstly, go to the “Select Membership Plans That Can Access Content” field and add the membership plan you created in the step above.
You might also want to select additional Roles to access the content besides paid members with an active subscription. You could select the Administrator and Editor roles.

Tip: Whichever user role you select, choose Administrators because you want admins to access your site’s content.
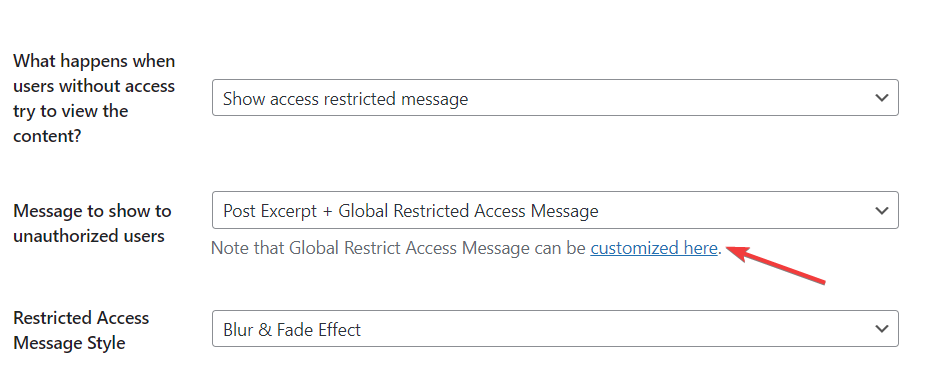
Next, go to the Restricted Access Message Style Option and select Blur & Fade Effect from the dropdown menu. Next, under Message to Show to Unauthorized Users, select the Post Excerpt + Global RestrictedAccess Message.
Hit the Save Rule button to save your setting.
Click on the customized here link, as shown in the image above, to add a custom message for your content lock. This message should inform the visitors that they need to become paying subscribers to access the full content.
Alternatively, you can select “Post Excerpt + Custom Message” as the Message to show to unauthorized users if you don’t want to use the global restricted message.
When all is done, hit the Save Rule button and proceed to the second step, which involves opening the Metered Paywall settings page beside the Content Protection menu tab at the top.
ii. Set Up Metered Paywall
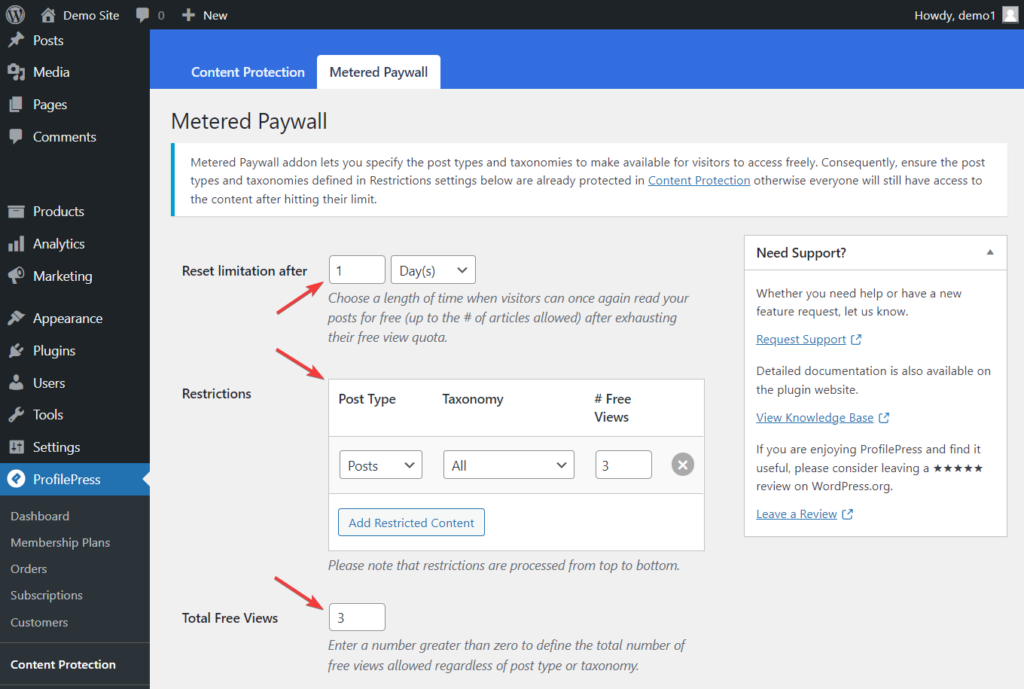
You need to modify the first three options on the Metered Paywall page. Let’s take a look at each option and try and understand what they mean:
- Reset limitation after allows you to choose a length of time when visitors can once again read your posts for free.
- Restrictions allow you to choose which post types you plan to restrict and how many posts, pages, or custom post types you will offer for free.
- Total free views allow you to define the number of posts a visitor can view for free. This is a global setting, and it will override the previous setting on free views.
Hit the Save Changes button to save the modifications.
iii. Preventing Abuse of the Paywall
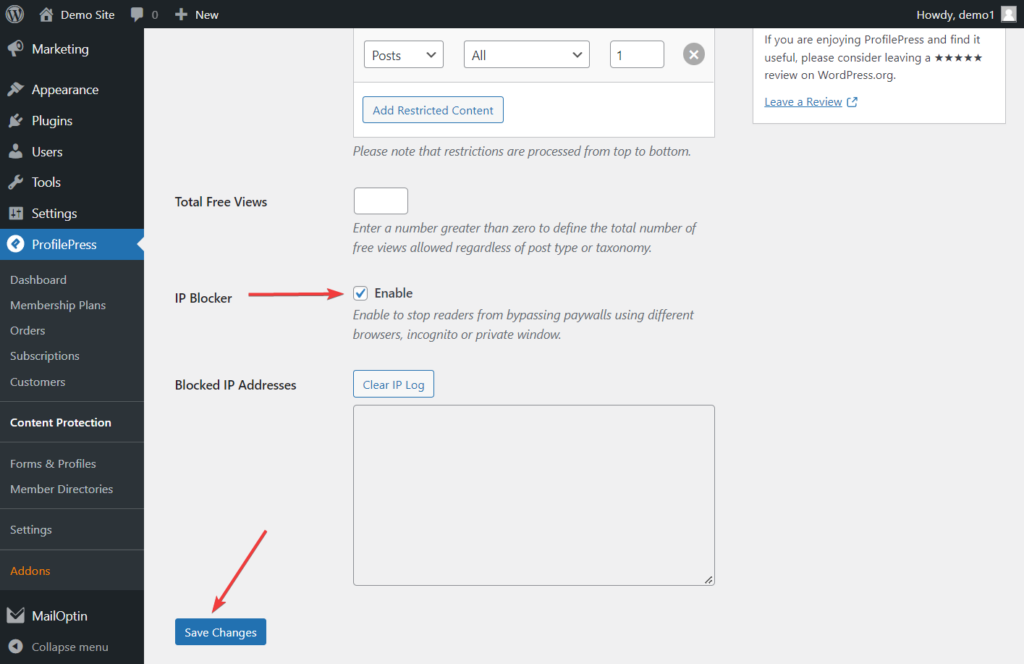
Once you’ve established a metered paywall, it’s crucial to safeguard your exclusive content from being accessed via an incognito browser.
ProfilePress offers an IP Blocker feature that prevents readers from circumventing your paywalls by recording each visitor’s IP address.
Even if visitors use their free article meter and switch to an incognito mode, private window, or another browser, they will still be prevented from accessing your content and prompted to subscribe.
To set this up, go to the Metered Paywall > IP Blocker and select the Enable option to enable the feature. Then, hit the Save Changes button before exiting the page.
iv. Add a Countdown Slider
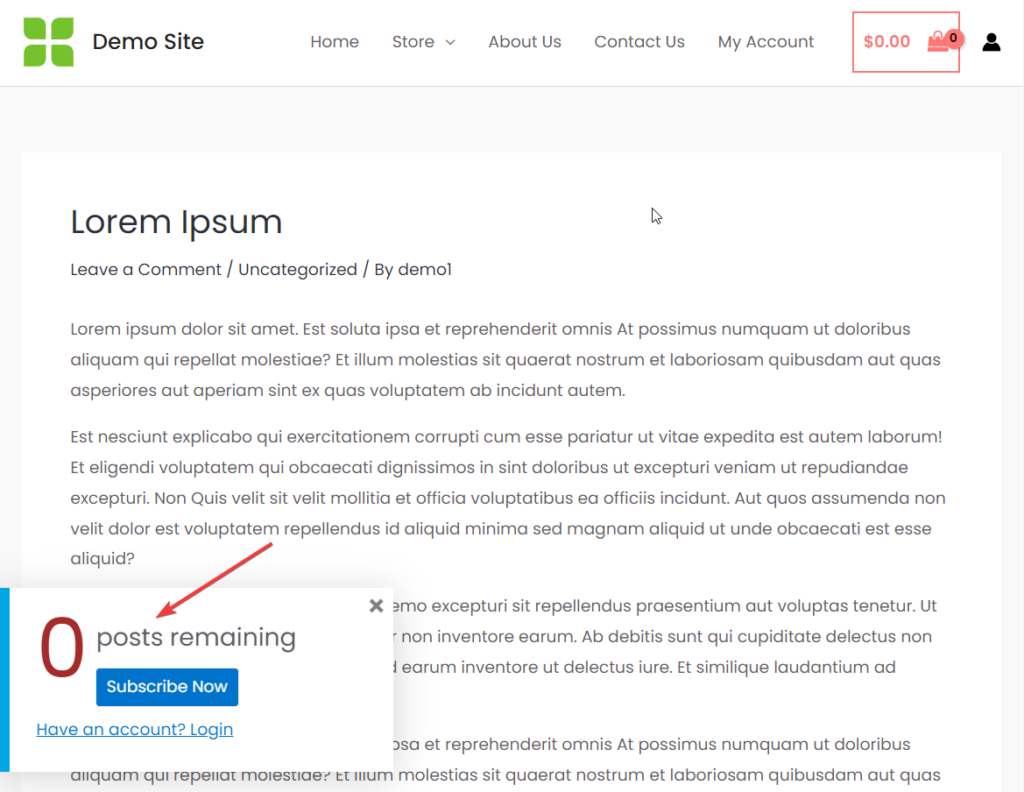
The Metered Paywall addon can display a customizable slide box on restricted content to let guests and non-members know how many views they have left before they are required to subscribe. This feature can be seen on popular websites like The New York Times and Medium, allowing visitors to read a few premium articles for free before asking them to sign up for a subscription.
When a user views restricted content, a notice slides in from the bottom left of the screen after a few seconds alerting them to how many free articles they have remaining.
Open the Metered Paywall option on your WordPress dashboard and go to the Countdown Slidebox section.
Select the Enable option and add the link to your pricing or checkout page in the Button Link option. Visitors will use this link to go to a page where they can sign up and make payments.
You can change the button text and message and log in to the text if you need to.
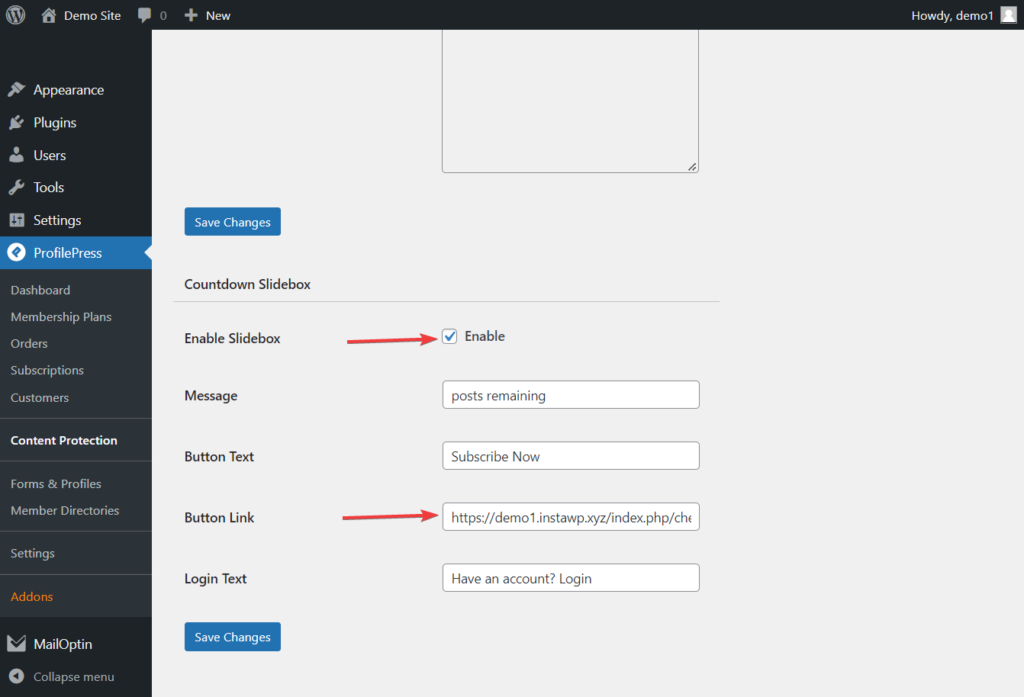
When you are ready, hit the Save Changes button, and the countdown slider will be added to your WordPress site.
That’s it. You have now completed the setup of a metered content lock on your WordPress website.
Final Words
If you own a WordPress site and want to restrict access to certain content, you can use a WordPress Content Locker. These lockers allow you to require visitors to perform specific tasks, like subscribing to your email list, sharing your article on social media, or paying a subscription fee, to unlock the content.
This article explores the benefits of content lockers and provides instructions on adding them to your WordPress site. We compare the features of two popular content lockers, MailOptin and ProfilePress, and help you choose the best one based on your goals.
If you want to increase your email subscribers, MailOptin is the way to go. If you plan to offer paid content, then ProfilePress is the better option. By following the steps outlined in this article, you’ll be able to set up a WordPress content locker on your site in no time.