Are you looking to restrict WordPress user registration to invitation-only?
One common challenge faced by many WordPress site managers is controlling user registration to ensure that only trusted individuals gain access to their valuable content or services. The solution? User registration with invitation codes.
Since WordPress doesn’t provide built-in functionality for creating invitation codes, you’ll need to add this feature to your site manually. The easiest way to enable user registration with an invitation code is by the ProfilePress membership plugin.
This article will guide you through the steps required to set up this feature and explore its benefits. Whether running a membership site, an e-commerce platform, or a community forum, integrating invitation codes can be a game-changer, allowing you to manage and grow your online community while ensuring that only the right individuals have access.
Benefits of Invitation Codes in WordPress Registration
- Enhanced Security: Invitation codes add an extra layer of security to your registration process. By requiring a code to sign up, you can significantly reduce the chances of unauthorized or spam registrations. This is particularly important for websites that host sensitive information or paid services.
- Controlled Access: Invitation codes allow you to control who can join your website. You can limit registration to a select group of individuals, ensuring that only those you trust or want to engage with your content can become members. This is especially useful for exclusive communities or membership-based websites.
- Simplified User Sign-Up Process: With invitation codes, the registration process can be more straightforward for users. They receive an invitation with a code, enter it during registration, and gain access with minimal hassle. This can lead to higher user satisfaction.
Now that you know the benefits of using invitation codes in WordPress registration, it’s time to learn how to implement it using ProfilePress.
What is ProfilePress?

ProfilePress is a powerful WordPress membership plugin that simplifies user management, registration, and profile editing. It offers an array of features to enhance the user registration process, including the ability to register users using invitation codes. Below are some of the features of ProfilePress.
- Limit the number of times an invitation code can be used for registration.
- Set an expiration date for invitation codes, making them invalid after the specified date.
- Allow users to subscribe to specific membership plans by registering with a unique invite code.
- Bulk Code Generator.
- Provides user registration and login forms.
- Enables automatic registration and login redirects.
- User dashboard.
- Provides a member directory.
- Drag-and-drop form builder.
- Includes pre-built templates.
- Social logins supported.
- Allows access control and content restrictions.
- Supports various payment methods.
- Provides support for both physical and digital products.
- Coupons and discounts functionality.
- PDF receipts.
- Optimized checkout.
- And more.
Install and Activate ProfilePress Plugin
To begin, you need to buy a ProfilePress license. Go to the ProfilePress website and select the pricing plan that best fits your needs.
Once you have made the purchase, you will receive a confirmation email containing a link to download the plugin zip file and your license key. Alternatively, you can download the plugin from your account page on the ProfilePress website.
After downloading the plugin, access your WordPress admin dashboard, go to the Plugins page, and click the “Add New” button.
From there, select “Upload Plugin” and click “Choose file” to locate the previously downloaded plugin zip file. Finally, click “Install Now” to complete the process.
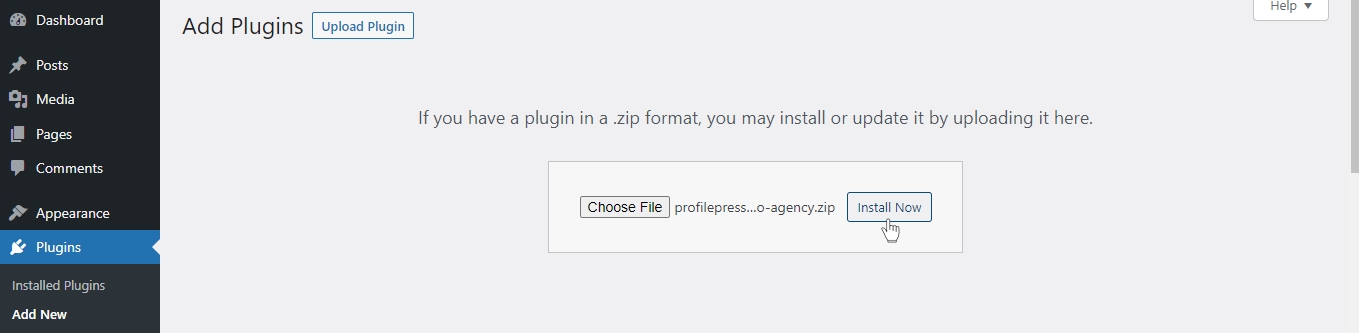
After installation is complete, click the Activate Plugin button.

You’ll see a notification at the top of your WordPress dashboard page saying, “ProfilePress needs to create several pages to function correctly.” Click on the “Create Pages” button to complete the plugin setup.

Having accomplished this task, we have successfully finished setting up the ProfilePress plugin on our WordPress site.
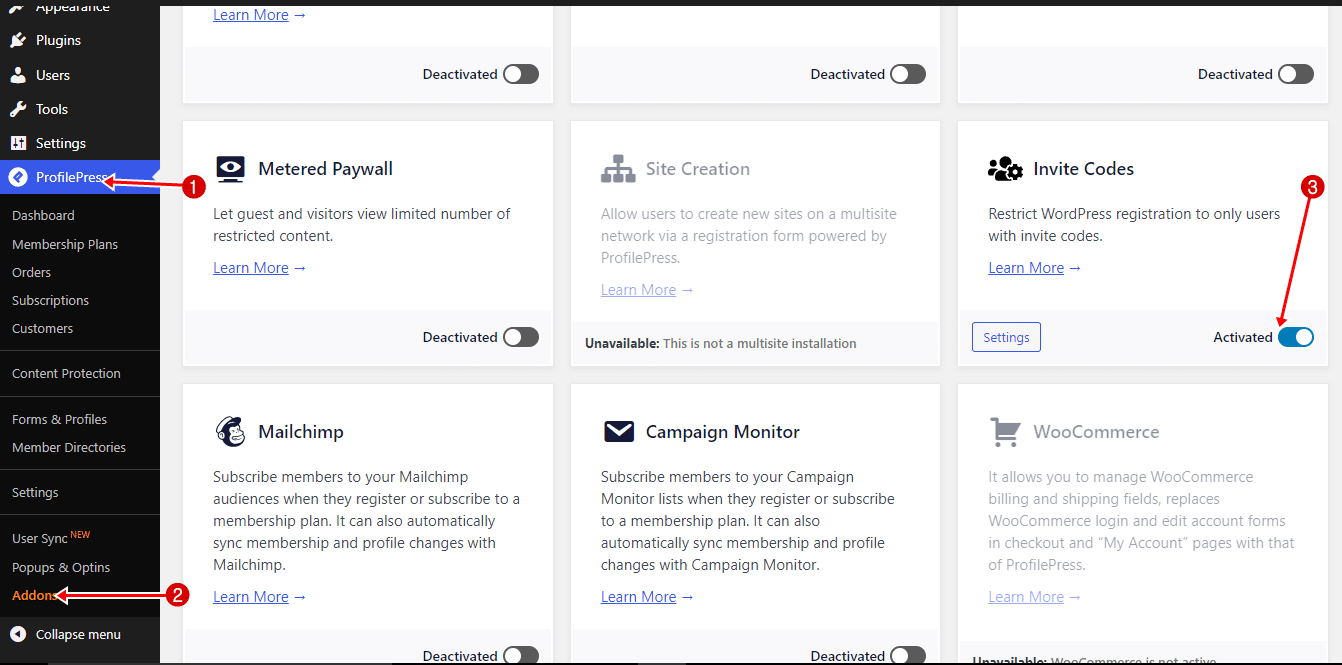
Activating and Setting the Invite Codes Addon
After installing and activating ProfilePress on your site, the next step is to activate the Invite Codes addon by going to ProfilePress >> Addons.
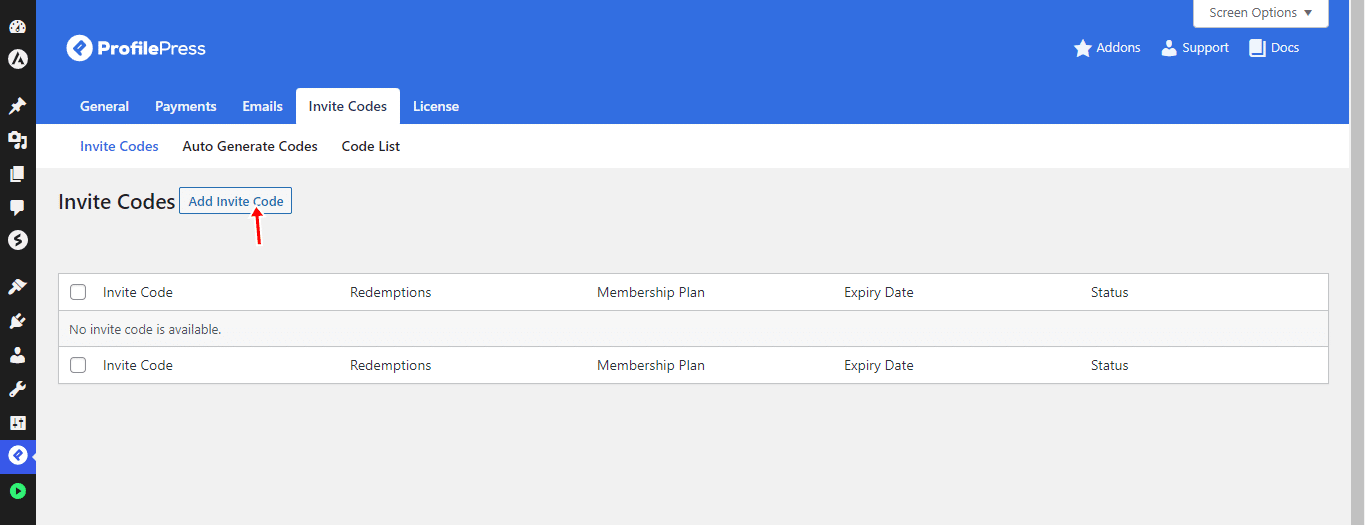
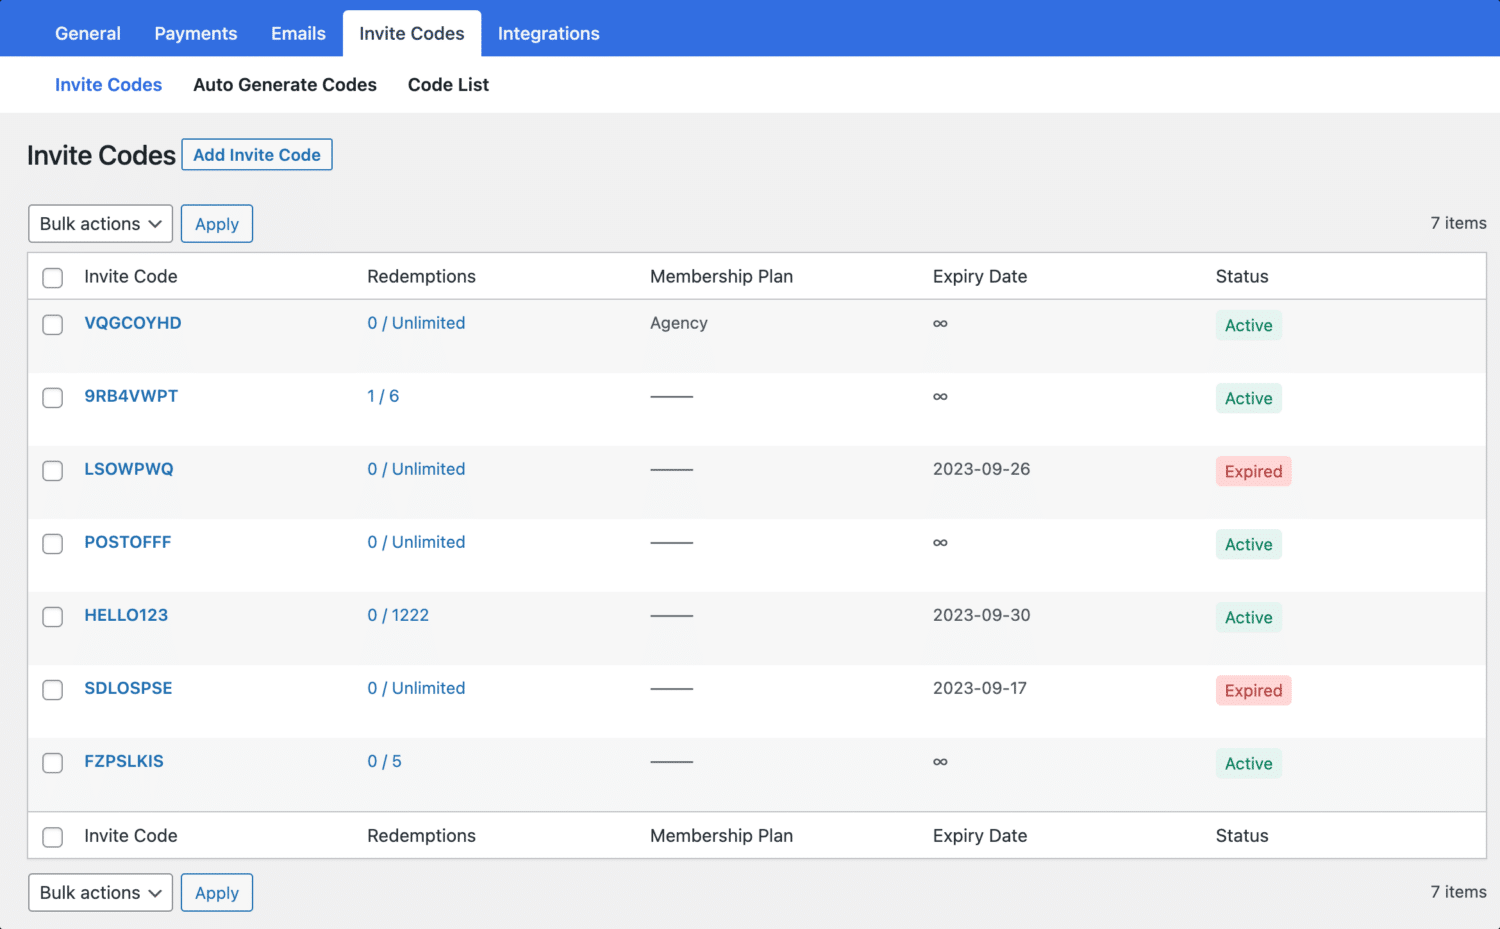
The following step involves setting up the Invite Codes Addon. To accomplish this, go to ProfilePress >> Settings >> Invite Codes and click the ‘Add Invite Code’ button.
In the new page that opens up, you’ll find options for the invite code, usage limit, expiry date, and membership plan. These options allow you to configure your invitation codes:
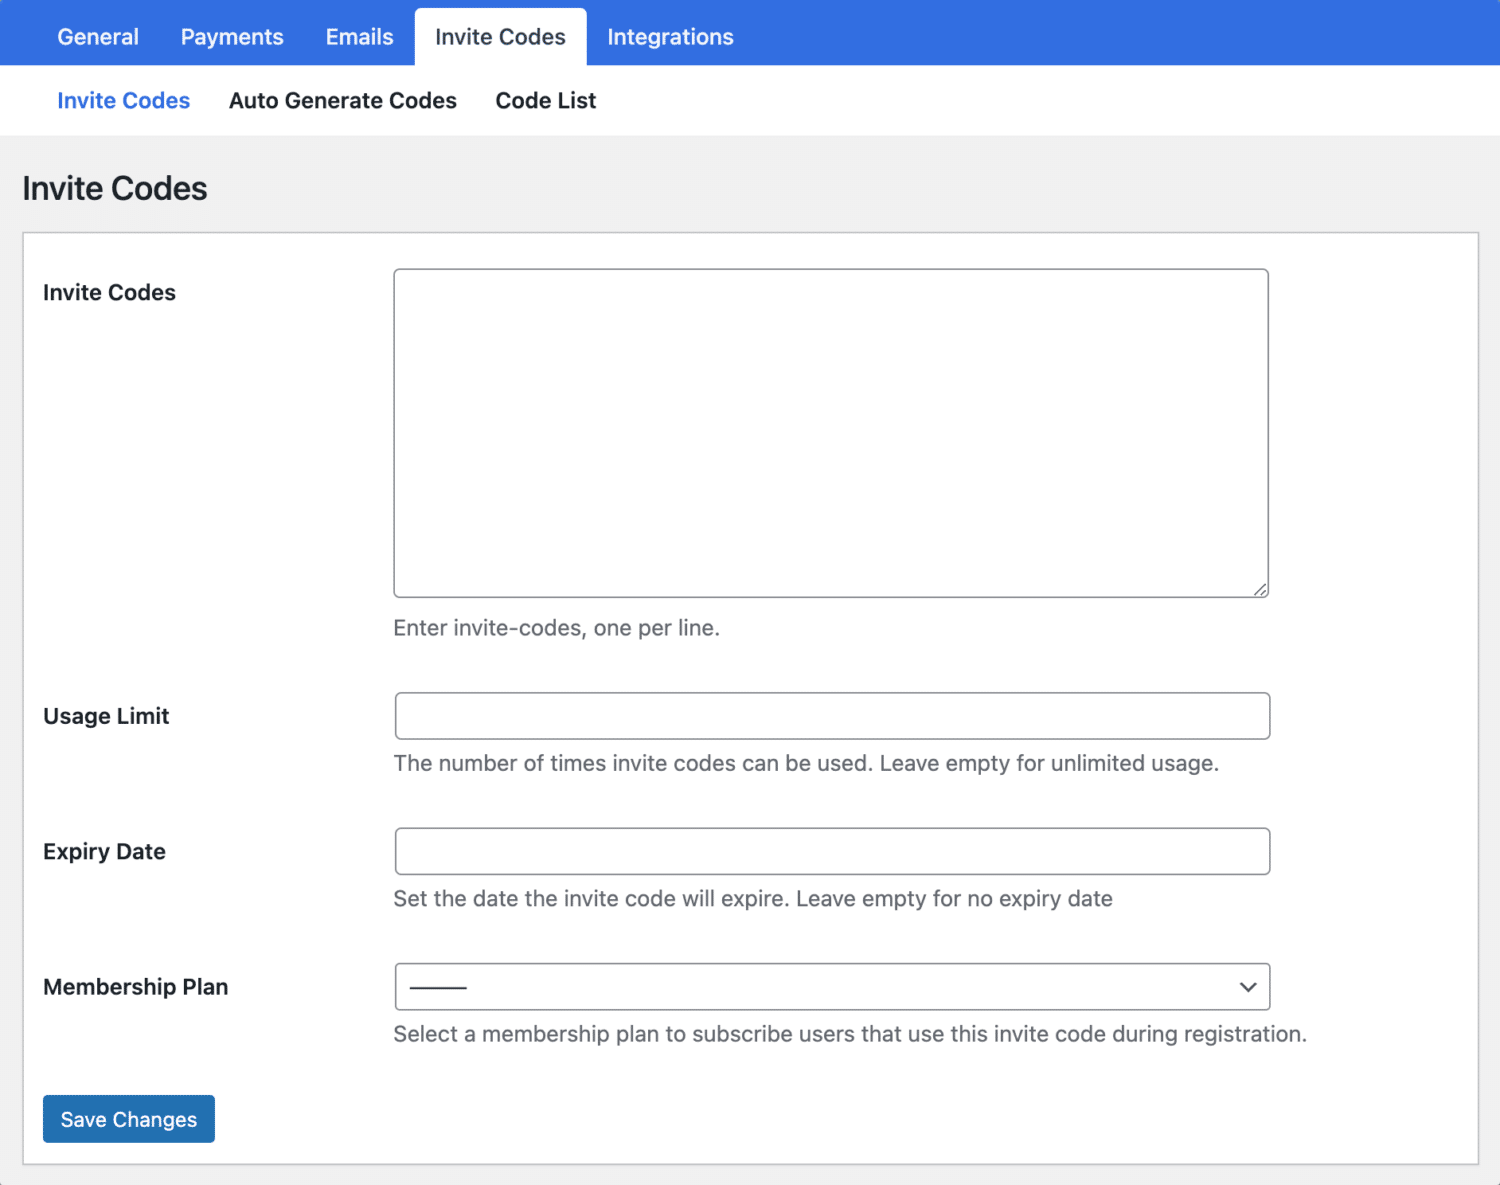
Invite code: This allows you to enter as many invite codes as you want to create. (Note: Enter invite codes one per line.)
Usage Limit: This allows you to set the number of users who can use the code. If you leave this box empty, it means the invite code can be used without limitations.
Expiry Date: This allows you to specify the expiration date for the invitation codes.
Membership Plan: This allows you to choose the membership plan to subscribe users who use the invite codes.
When you are done, click the ‘Save Changes’ button, and you will be redirected to a page where you can view your current invitation codes.
If you’d like to create a bunch of invitation codes all at once, you can do this by clicking on the ‘Auto Generate Codes’ option in the menu.
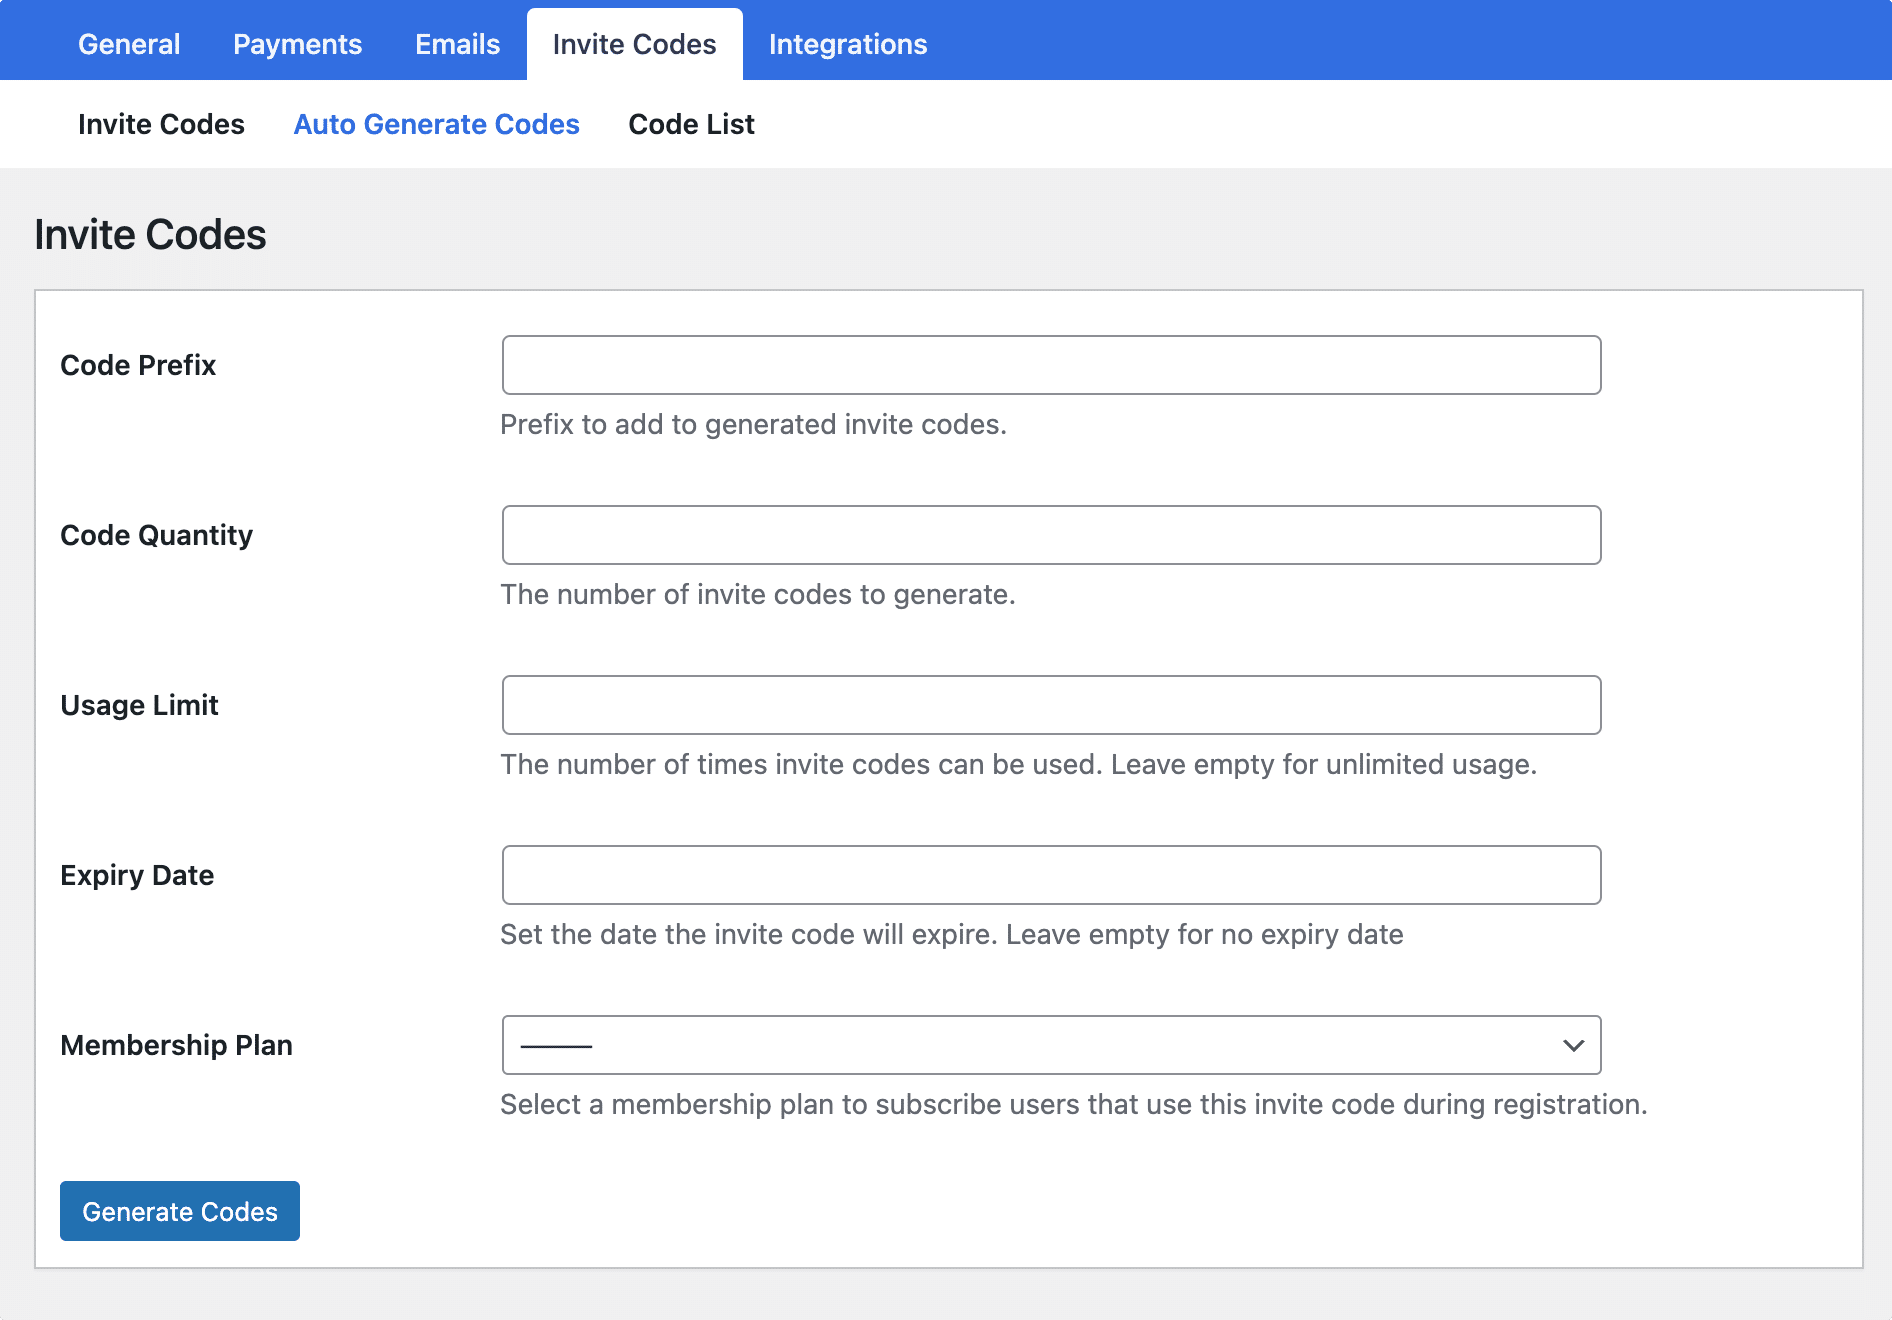
To use this feature, enter your desired code prefix, specify the number of codes you wish to create, set the number of times you want the code valid, input the expiration date, and choose the desired membership plan.
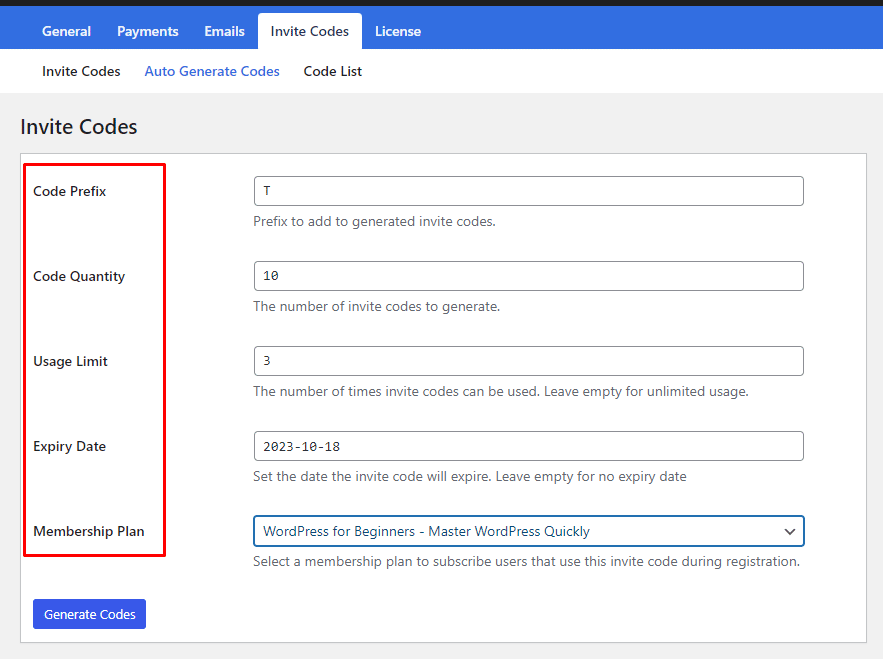
Next, click the Generate Codes button to generate your codes.
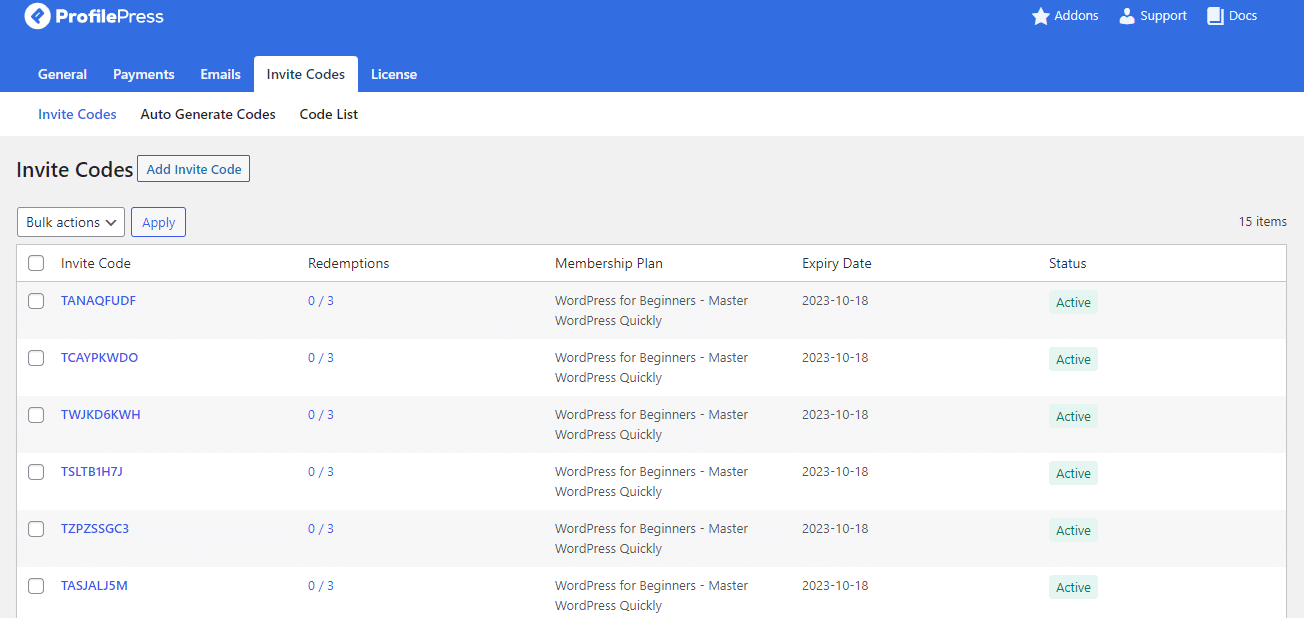
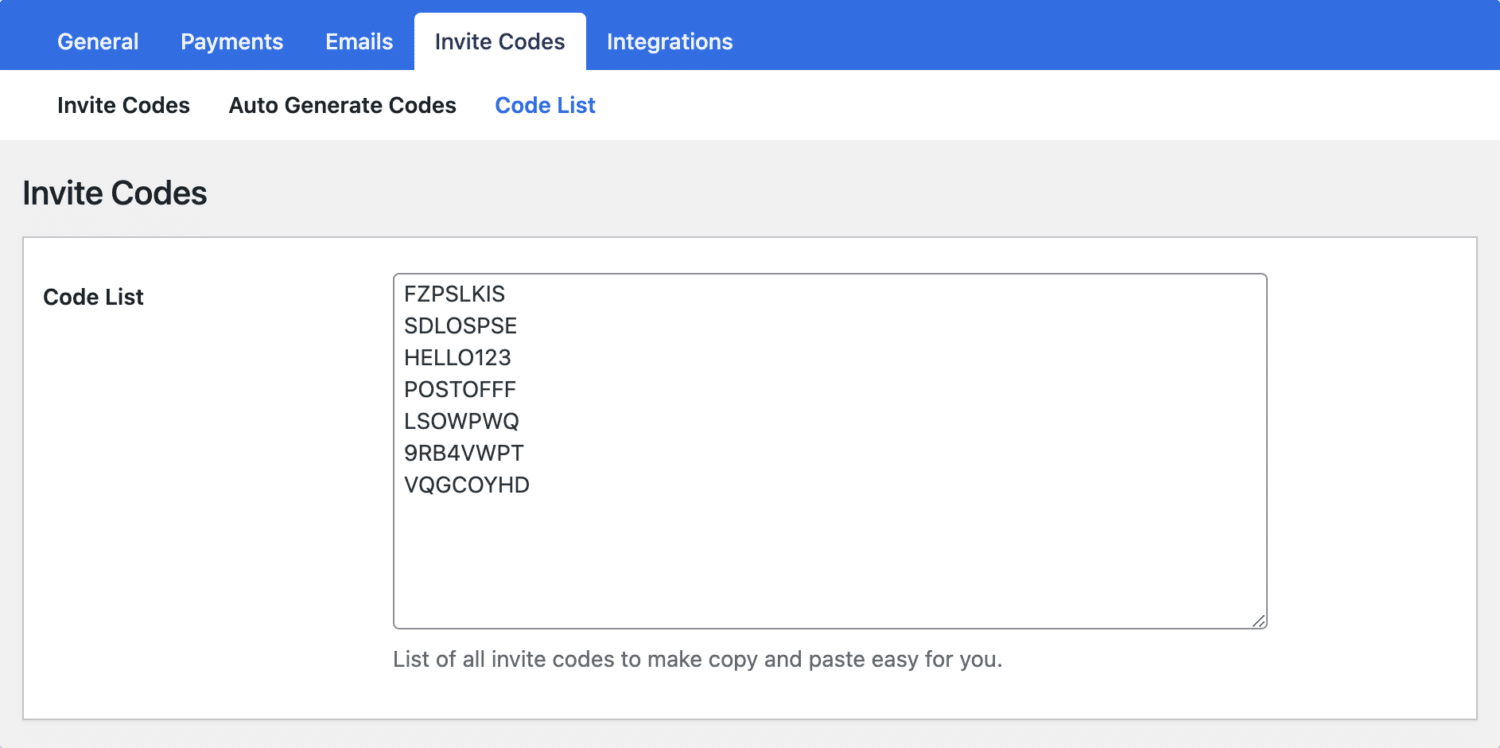
If you want to send invite codes to your users or subscribers so they can use and share them, the ‘Code List’ page provides an easy way to copy all the generated invitation codes.
After activating and setting up the Invite Codes Addon, the next step is to set up a registration form that works with the invite codes.
Integration with Registration Form
We need to create a custom registration form that includes the invitation code field. Here’s how to do it:
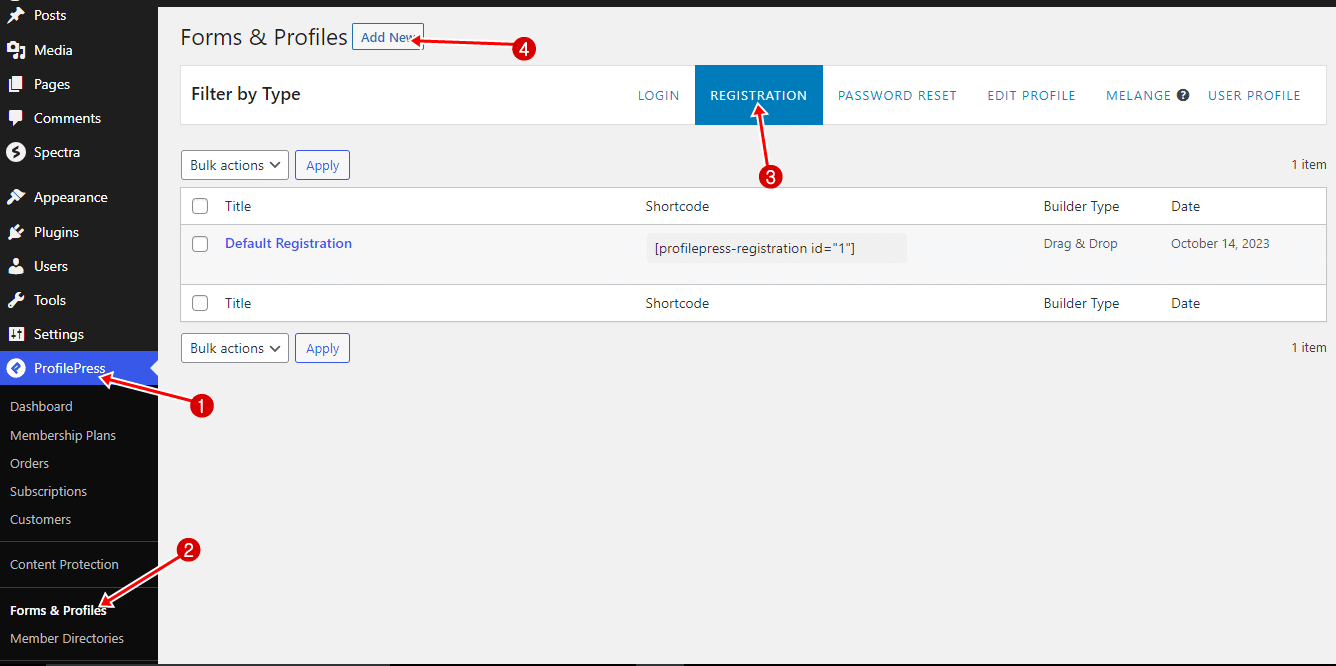
Navigate to your WordPress dashboard, select ProfilePress, and click Forms & Profiles. Next, click on the Registration tab and then on Add New.
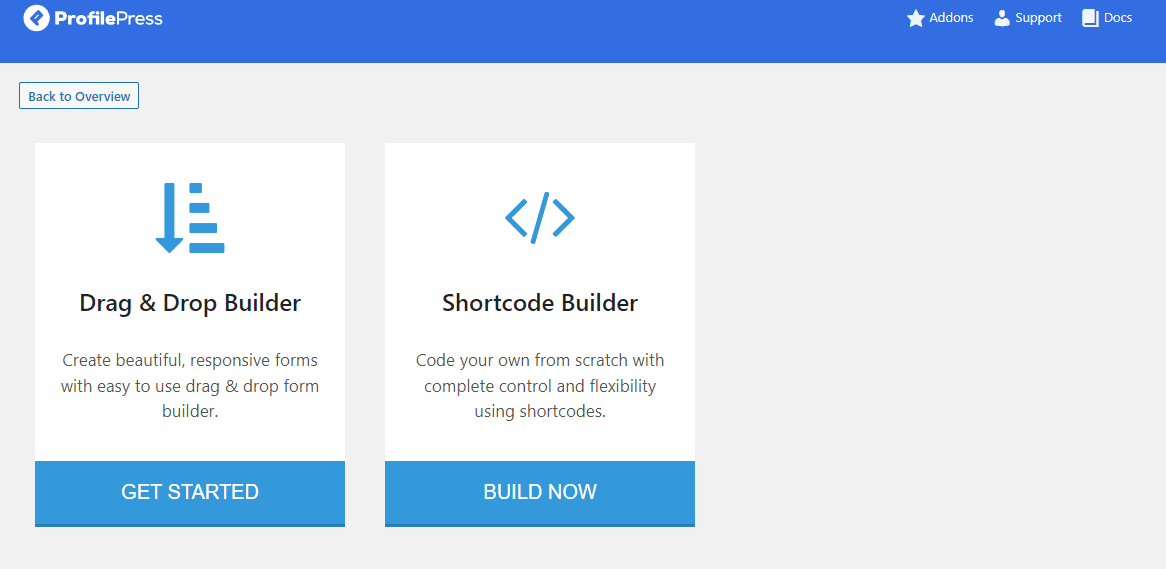
Next, you will be presented with a page that allows you to choose between Drag & Drop Builder and Shortcode Builder.
If you are using the drag-and-drop builder, after choosing the fields you want to include in the form, drag the Invite Code field to your preferred location in the form builder.
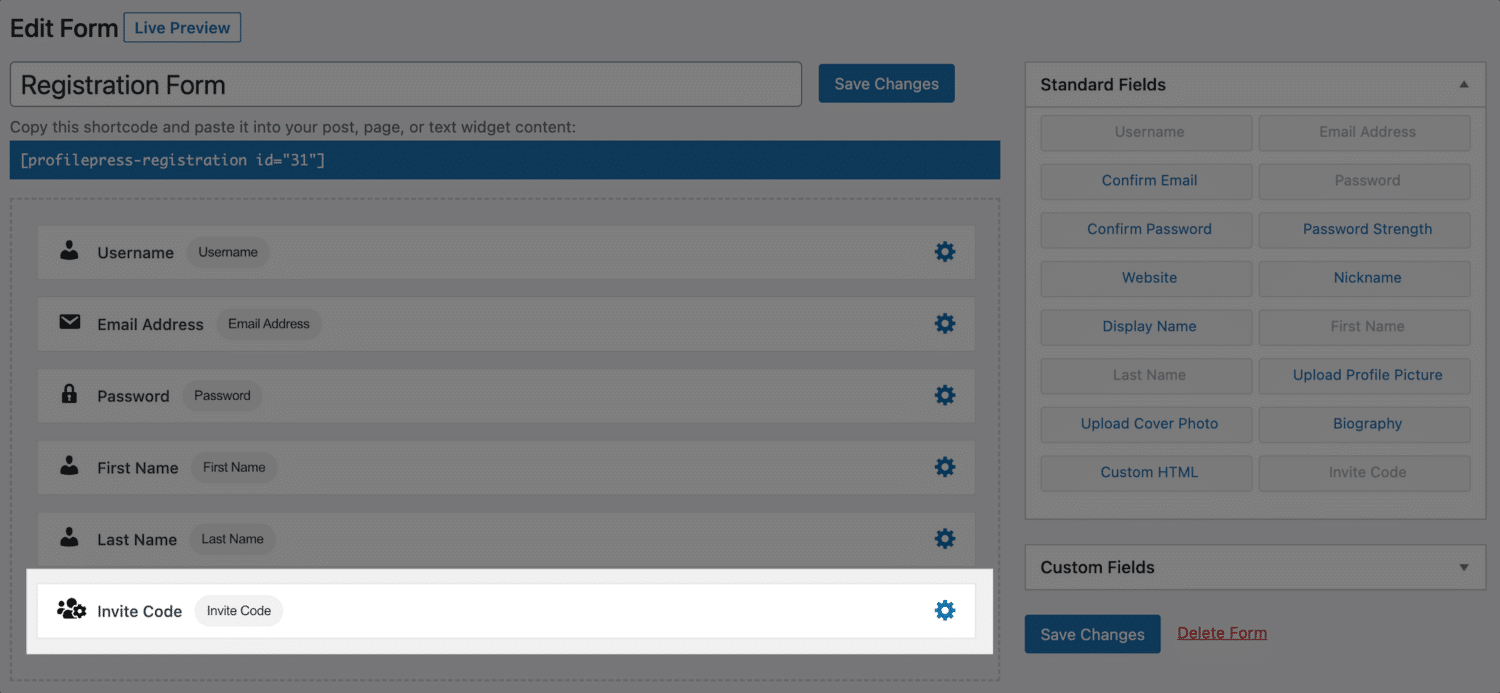
And if you are using the shortcode builder, add the [pp-invite-code] shortcode.
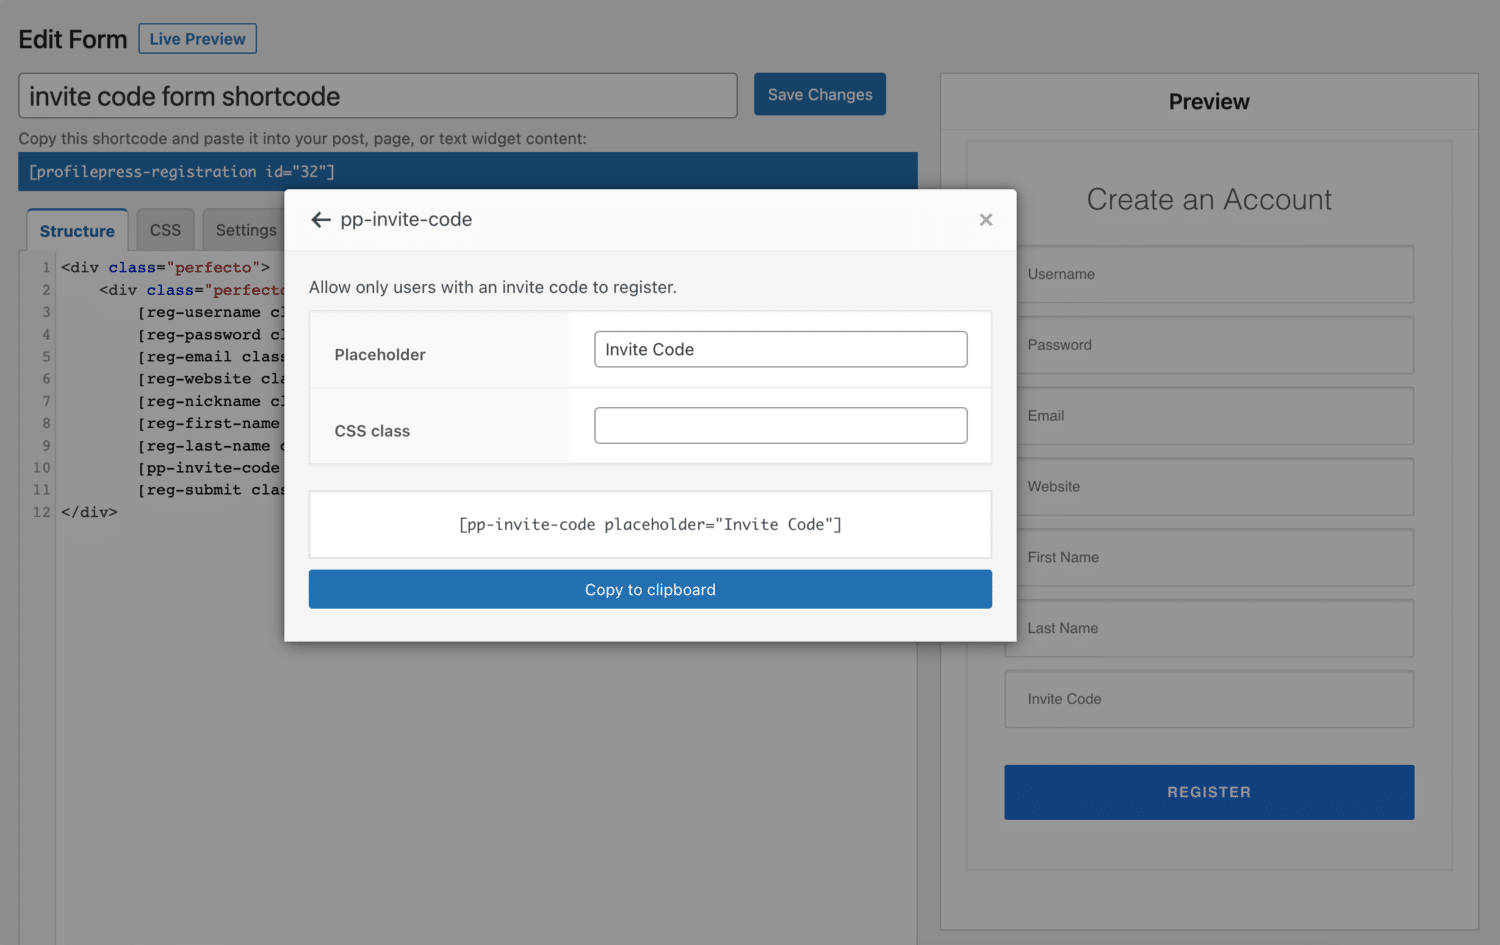
When you are done creating the registration form to your preferences, click on Save Changes.
Creating the WordPress User Registration Page
The next step is to make your registration form visible on a specific page.
To get started, copy the shortcode of the registration form.
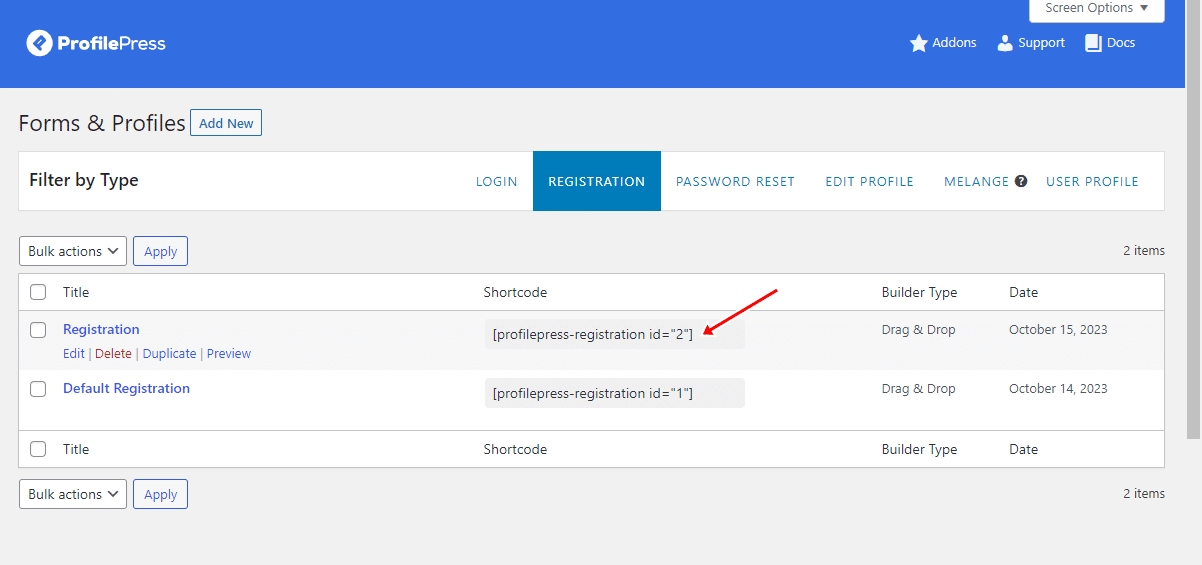
Afterward, go to the ‘Pages’ section of your WordPress dashboard, click ‘Add New,’ and give the page a name, like ‘Registration.’
If you use the WordPress block editor, insert a shortcode block by clicking on the plus icon, then paste the copied ‘Registration Form’ shortcode into the block.

If you use the WordPress classic editor, paste the shortcode into the text editor. Afterward, click the ‘Publish’ button to make your newly created Registration page live on your website.
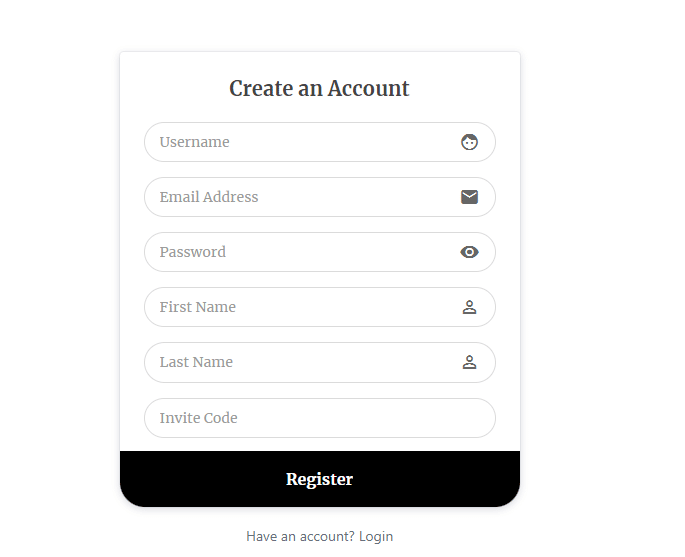
We have successfully created a registration page allowing users to register on your website with unique invitation codes.
Here’s how the registration page looks on our demo site.
Conclusion
Using invitation codes to register users in WordPress offers numerous advantages for website owners. By implementing this feature, you can maintain control over who can register on your site, ensuring that only authorized individuals gain access.
ProfilePress plugin simplifies this process, making it easy to create custom registration forms, generate invitation codes, and restrict access to authorized users. By following the steps outlined in this article, you can effectively allow your users to register on your WordPress website using invitation codes.