Would you like to display an announcement bar on your WordPress website?
In the bustling online landscape, capturing the attention of your website visitors is crucial. Whether you’re sharing important updates, promoting a limited-time offer, or directing users to specific content, an announcement bar can be a powerful tool in your WordPress arsenal.
An announcement bar, prominently displayed at the top of your website, is a dynamic and eye-catching way to convey essential information to your audience without disrupting their browsing experience.
But how can you seamlessly integrate this feature into your WordPress site, especially if you lack extensive coding knowledge? Fear not, as this article is your comprehensive guide to effortlessly adding an announcement bar to your WordPress website.
From choosing the right plugin to designing an attention-grabbing message, we’ll walk you through step-by-step, ensuring that your announcements receive the spotlight they deserve.
Elevate your website’s engagement and user experience as we delve into the world of announcement bars in WordPress using the MailOptin plugin.
MailOptin Announcement Bar Plugin
MailOptin is a WordPress plugin designed to help website owners and marketers build and grow their email lists. It offers a range of features, such as creating eye-catching opt-in forms, pop-ups, slide-ins, and other lead-generation forms to capture visitor emails.
MailOptin also provides tools for automating email marketing campaigns, segmenting subscribers, and integrating with popular email marketing services, making it easier for businesses to engage with their audience and convert website visitors into loyal subscribers and customers.
How to Install and Activate MailOptin Plugin
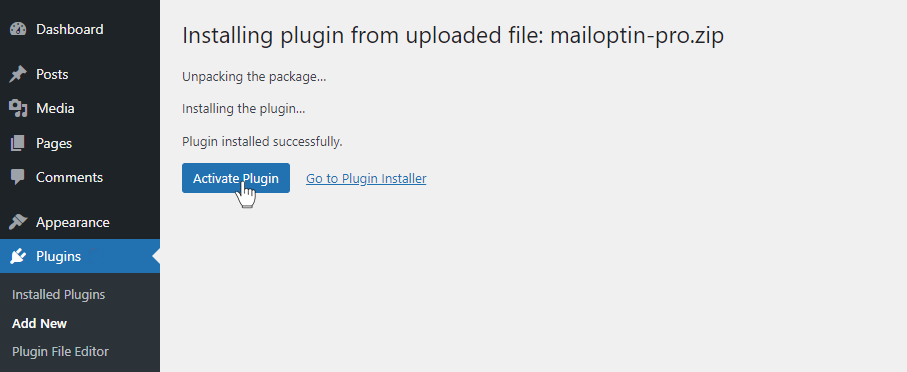
To begin, you will need to purchase a MailOptin license and install the plugin on your WordPress website.
Login to your WordPress admin dashboard and navigate to the Plugins page; click the Add New button and Upload Plugin. Next, click Choose File to select the downloaded plugin zip file. Click Install Now.

After installing the plugin, activate it by clicking ‘Activate Plugin’.
How to Display Announcement Bar Using MailOptin
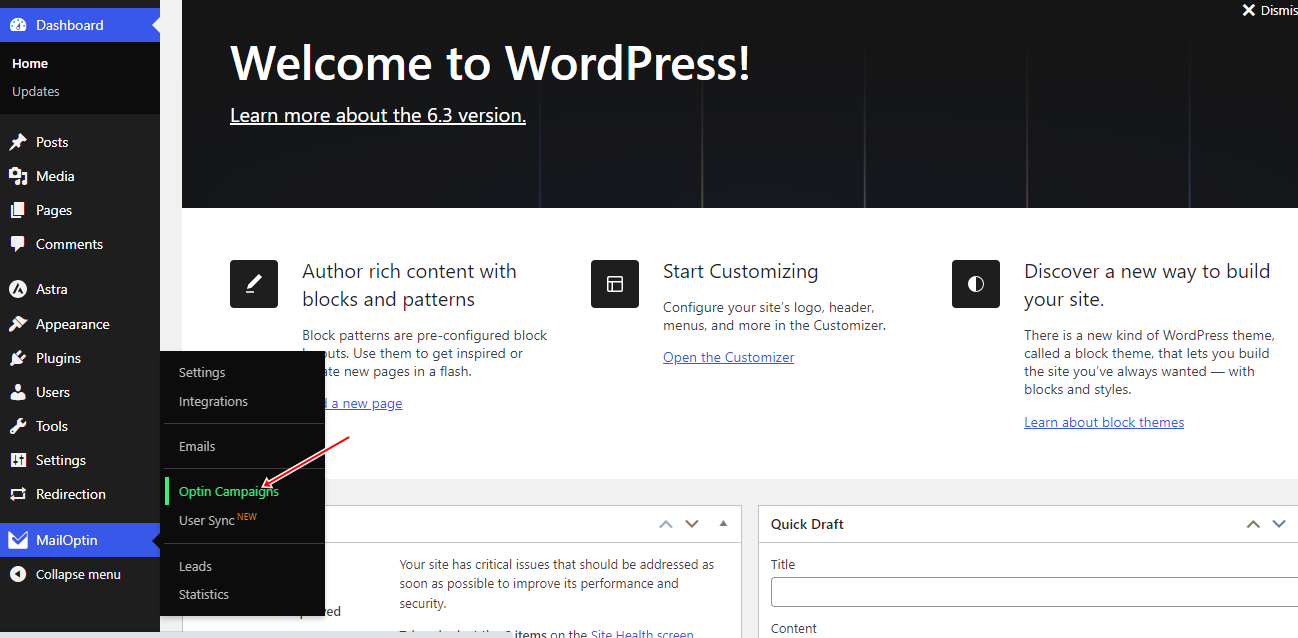
To use MailOptin notification bar features, go to MailOptin in your WordPress dashboard and navigate to the ‘Optin Campaigns’ section.
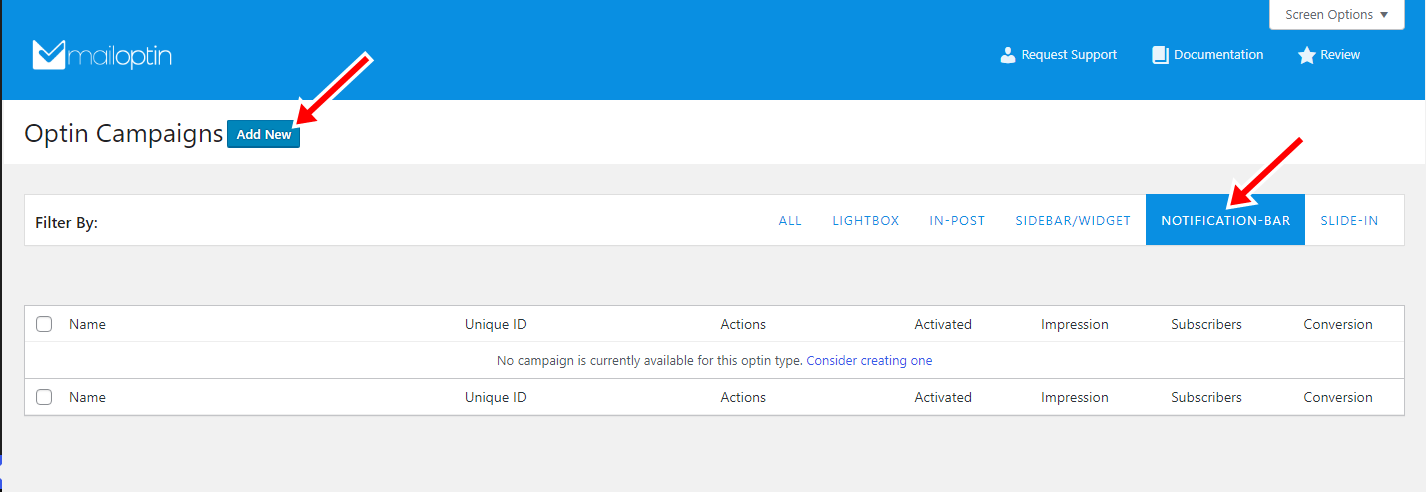
Then, click the notification bar tab. Next, click the ‘Add New’ button at the top of the page.
First, you will see a field to name your notification bar. Choose any name you like. Then, select a theme.
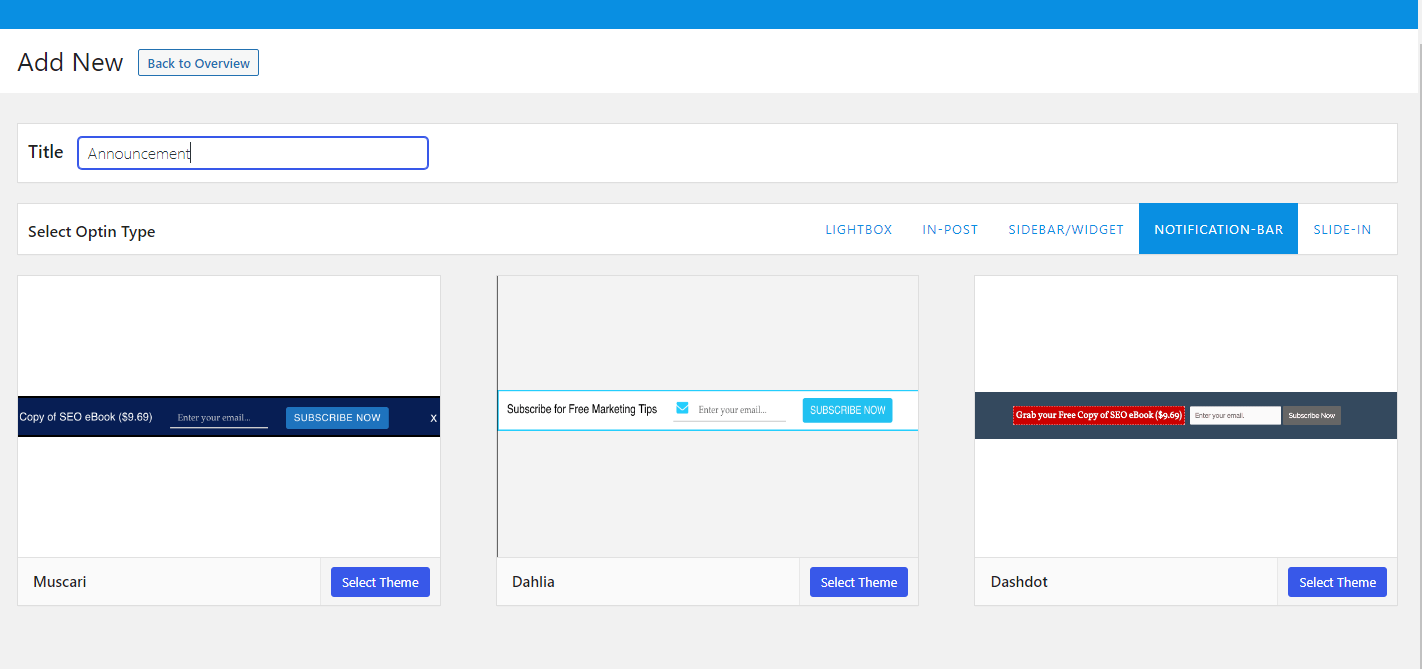
For this guide, we’ll use the Muscari theme, so click on the ‘Muscari Theme’, and you will be redirected to the builder page.
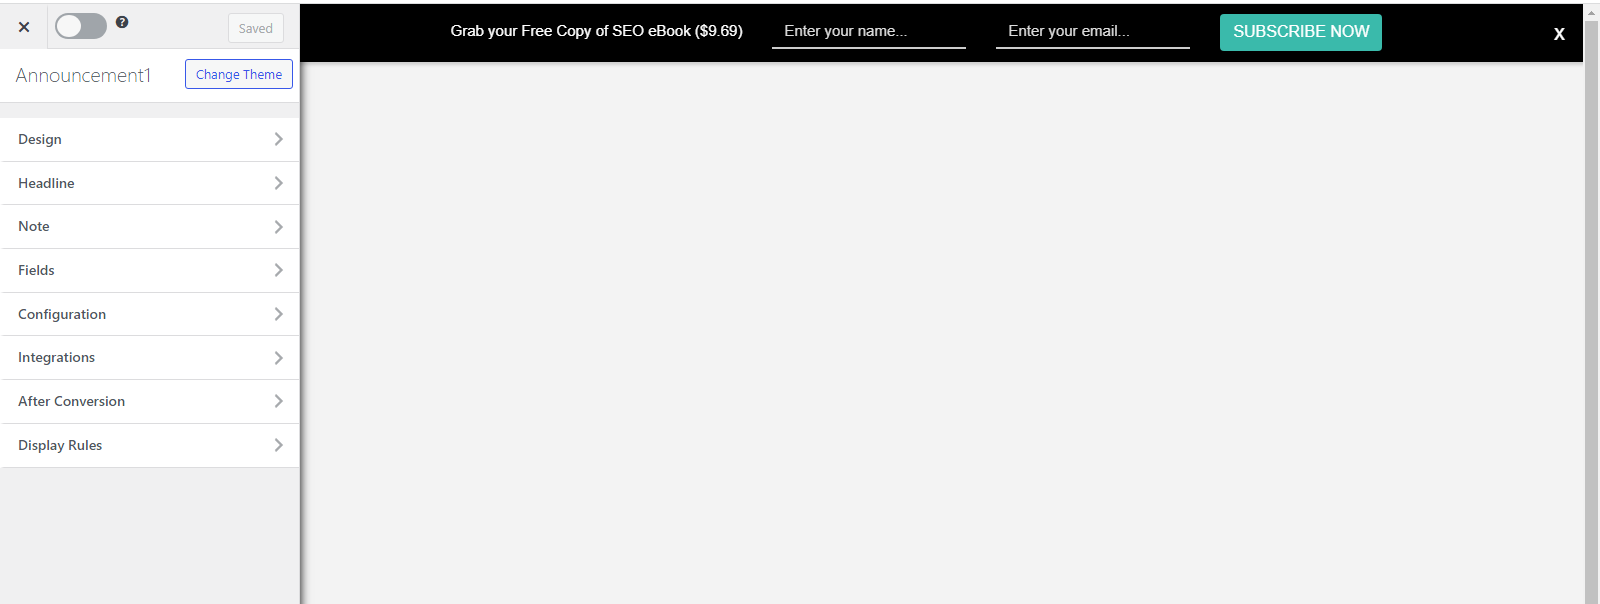
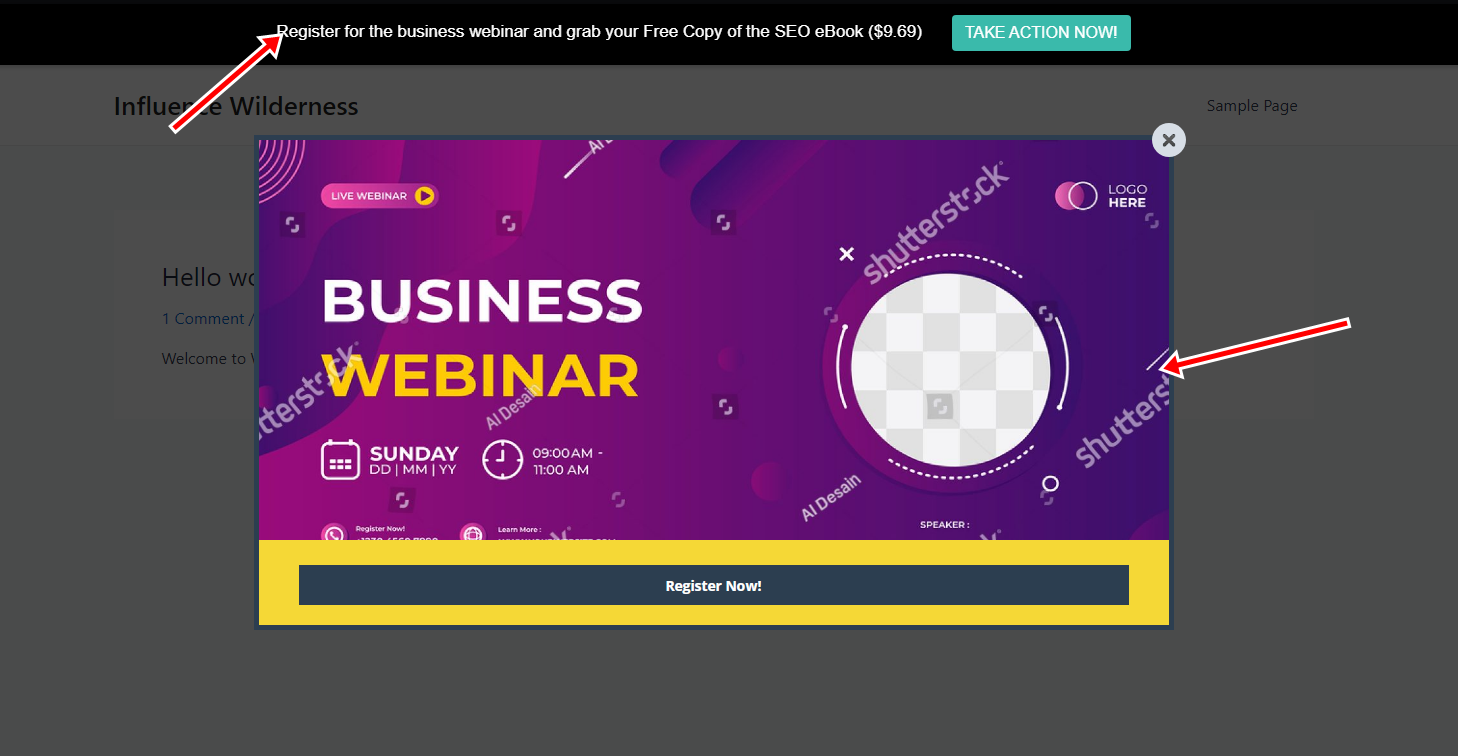
We will edit the content of the notification bar and configure it to display at the top of your website’s Front Page, Archive, and Search Pages. Additionally, we will add a call-to-action (CTA) button.
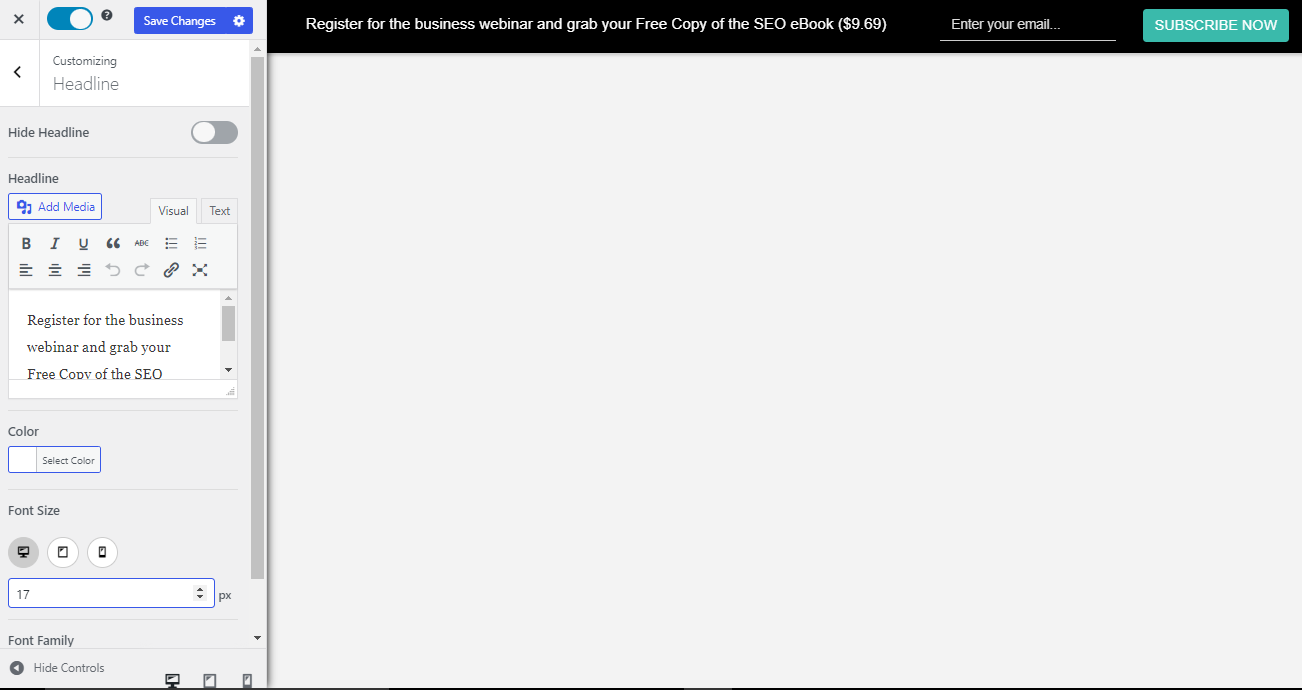
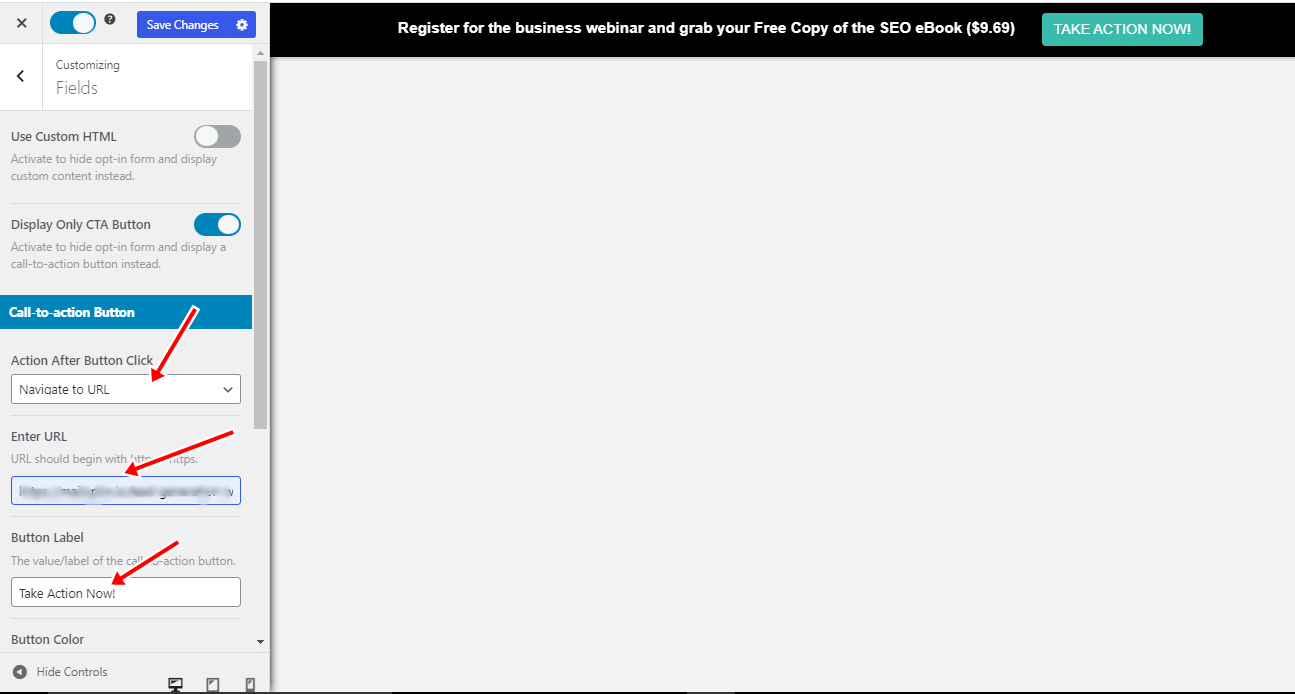
To edit the content, navigate to the headline section of the builder and insert the text: ‘Register for the business webinar and grab your Free Copy of the SEO eBook ($9.69)’.
Set the color to white and the font size to 17px.
Click on ‘Fields’ and enable ‘Display Only CTA Button.’ This will reveal a set of controls, including button actions and options to customize the button.
Actions are available when the call-to-action button is clicked. They are ‘Navigate to URL,’ ‘Reveal Optin Form,’ ‘Close Optin,’ and ‘Close Optin and Reload Page.
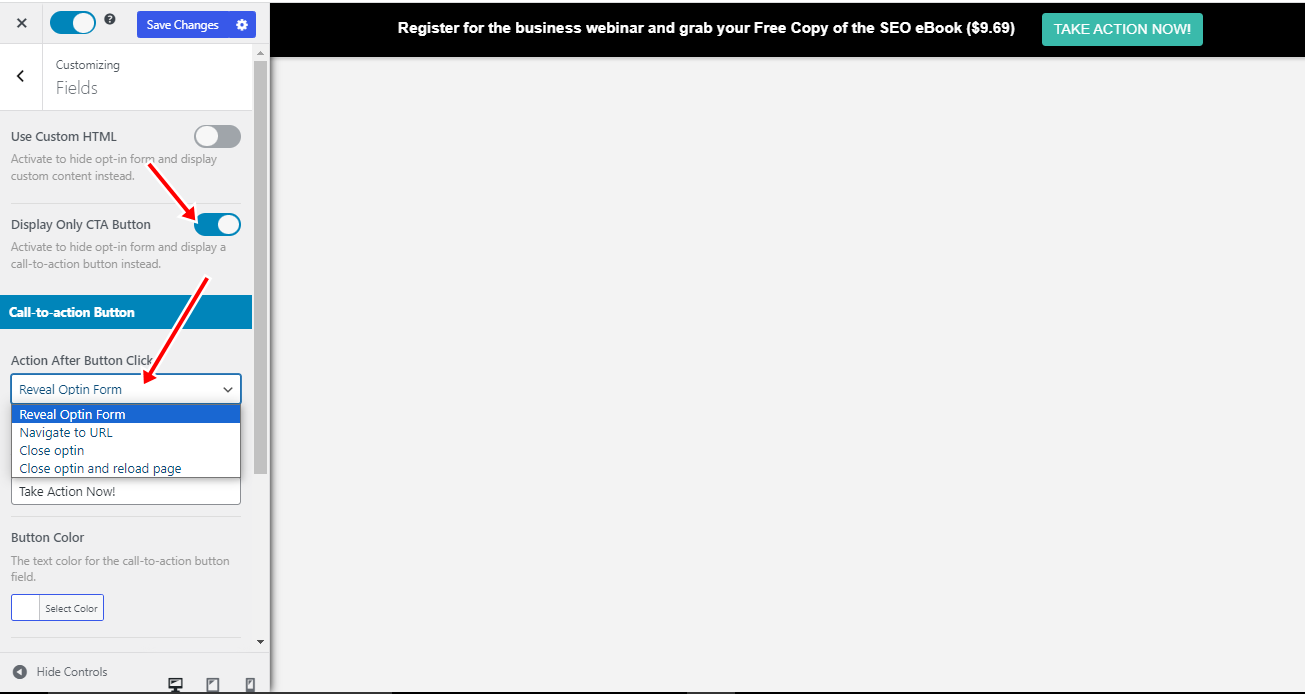
To direct your visitors, readers, or users to another web page, we can utilize the ‘Navigate to URL’ option. This will lead them to the page where they can register for the business seminar and receive the free ebook.
To accomplish this, choose the ‘Navigate to URL’ option, then enter the URL in the displayed tab.
Next, name the button. For this example, we are naming the button ‘Take Action Now!’
Next, navigate to the configuration section and set the bar position to ‘top.’ Additionally, explore other customization options in this section, such as sound effects, cookie duration, etc.

To display the notification bar on the Front Page, Archive, and Search Pages, head to the display rule section and choose ‘page targeting.’ Afterward, activate the corresponding rule.
Save the changes, and there you have it: This announcement will be displayed at the top of your website.
Conclusion
The MailOptin plugin revolutionizes how you communicate on your WordPress website through its user-friendly interface and powerful features. With the ability to seamlessly integrate eye-catching announcement bars, MailOptin empowers users of all levels to convey important messages effectively, promotions, or calls to action.
Its precise targeting options and conversion-focused tools ensure that you capture attention and drive engagement and lead generation, making MailOptin a must-have tool for optimizing communication strategies and enhancing visitor interaction on your WordPress site.
Elevate your website’s impact today with MailOptin and effortlessly connect with your audience in a visually appealing and impactful manner.
Get MailOptin WordPress plugin today.