Are you searching for a solution to integrate WordPress with CRM & email marketing platforms?
FuseWP is an excellent plugin that connects your WordPress site to various popular email marketing software, marketing automation tools, and CRM.
After users register on your WordPress website, FuseWP automatically subscribes them to your CRM and email list based on their user roles. If a user updates their profile information or changes their email address, their profile in your email marketing software and CRM will also be updated to reflect the changes. Additionally, if their account is deleted from your website, they will be automatically unsubscribed.
FuseWP also supports various e-commerce, Learning Management Systems, membership, forms, and registration WordPress plugins that allow users to register and update their profiles from your website frontend.
Features of FuseWP
FuseWP is a premium WordPress plugin with impressive features that stand out. Here, we’ll take a closer look at some of its key features.
WordPress User Sync
FuseWP simplifies synchronizing WordPress users with your email marketing software and CRM.
FuseWP integrates with your favorite email marketing and CRM platforms such as Mailchimp, ActiveCampaign, Constant Contact, Campaign Monitor, Brevo (Sendinblue), AWeber, etc.
E-commerce, LMS & Membership Sync
FuseWP is an excellent tool that harmonizes your user data across various platforms. It enables you to synchronize customers and members across different WordPress e-commerce, Learning Management Systems (LMS), and membership plugins based on their purchased product, enrolled courses, and subscribed membership plans, as well as their membership and subscription statuses.
Whether you run an e-commerce platform, an online course platform, or a membership-based website, FuseWP helps you maintain data accuracy.
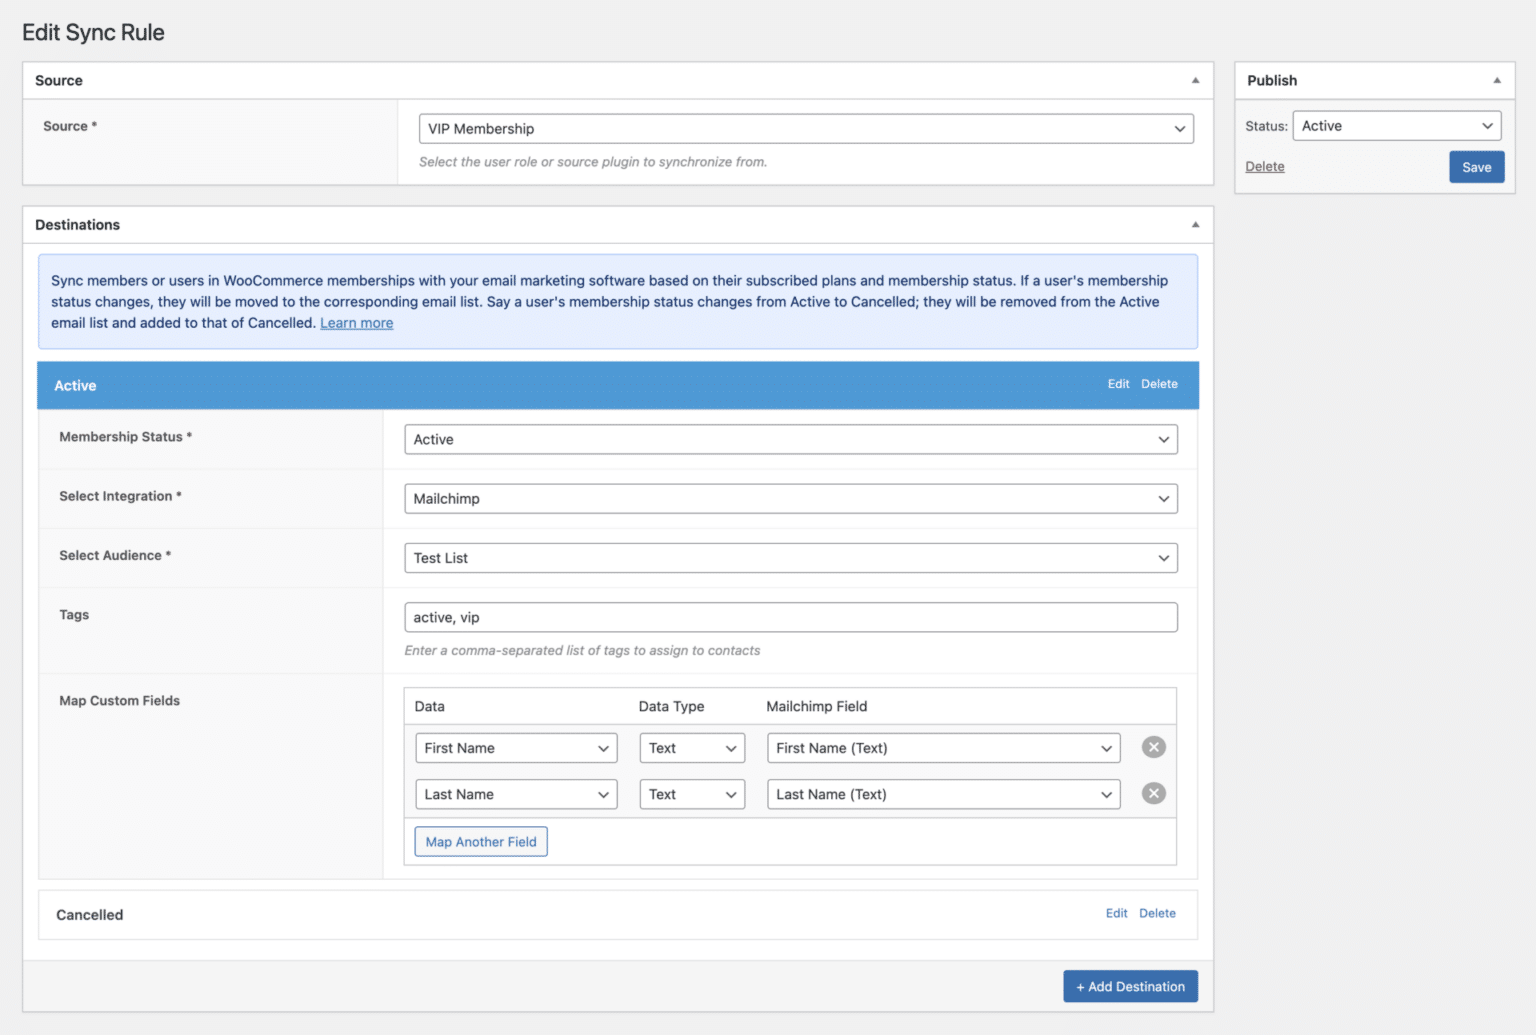
FuseWP supports many plugins, including WooCommerce Subscriptions, WooCommerce Memberships, MemberPress, LearnDash, Paid Member Pro, etc.
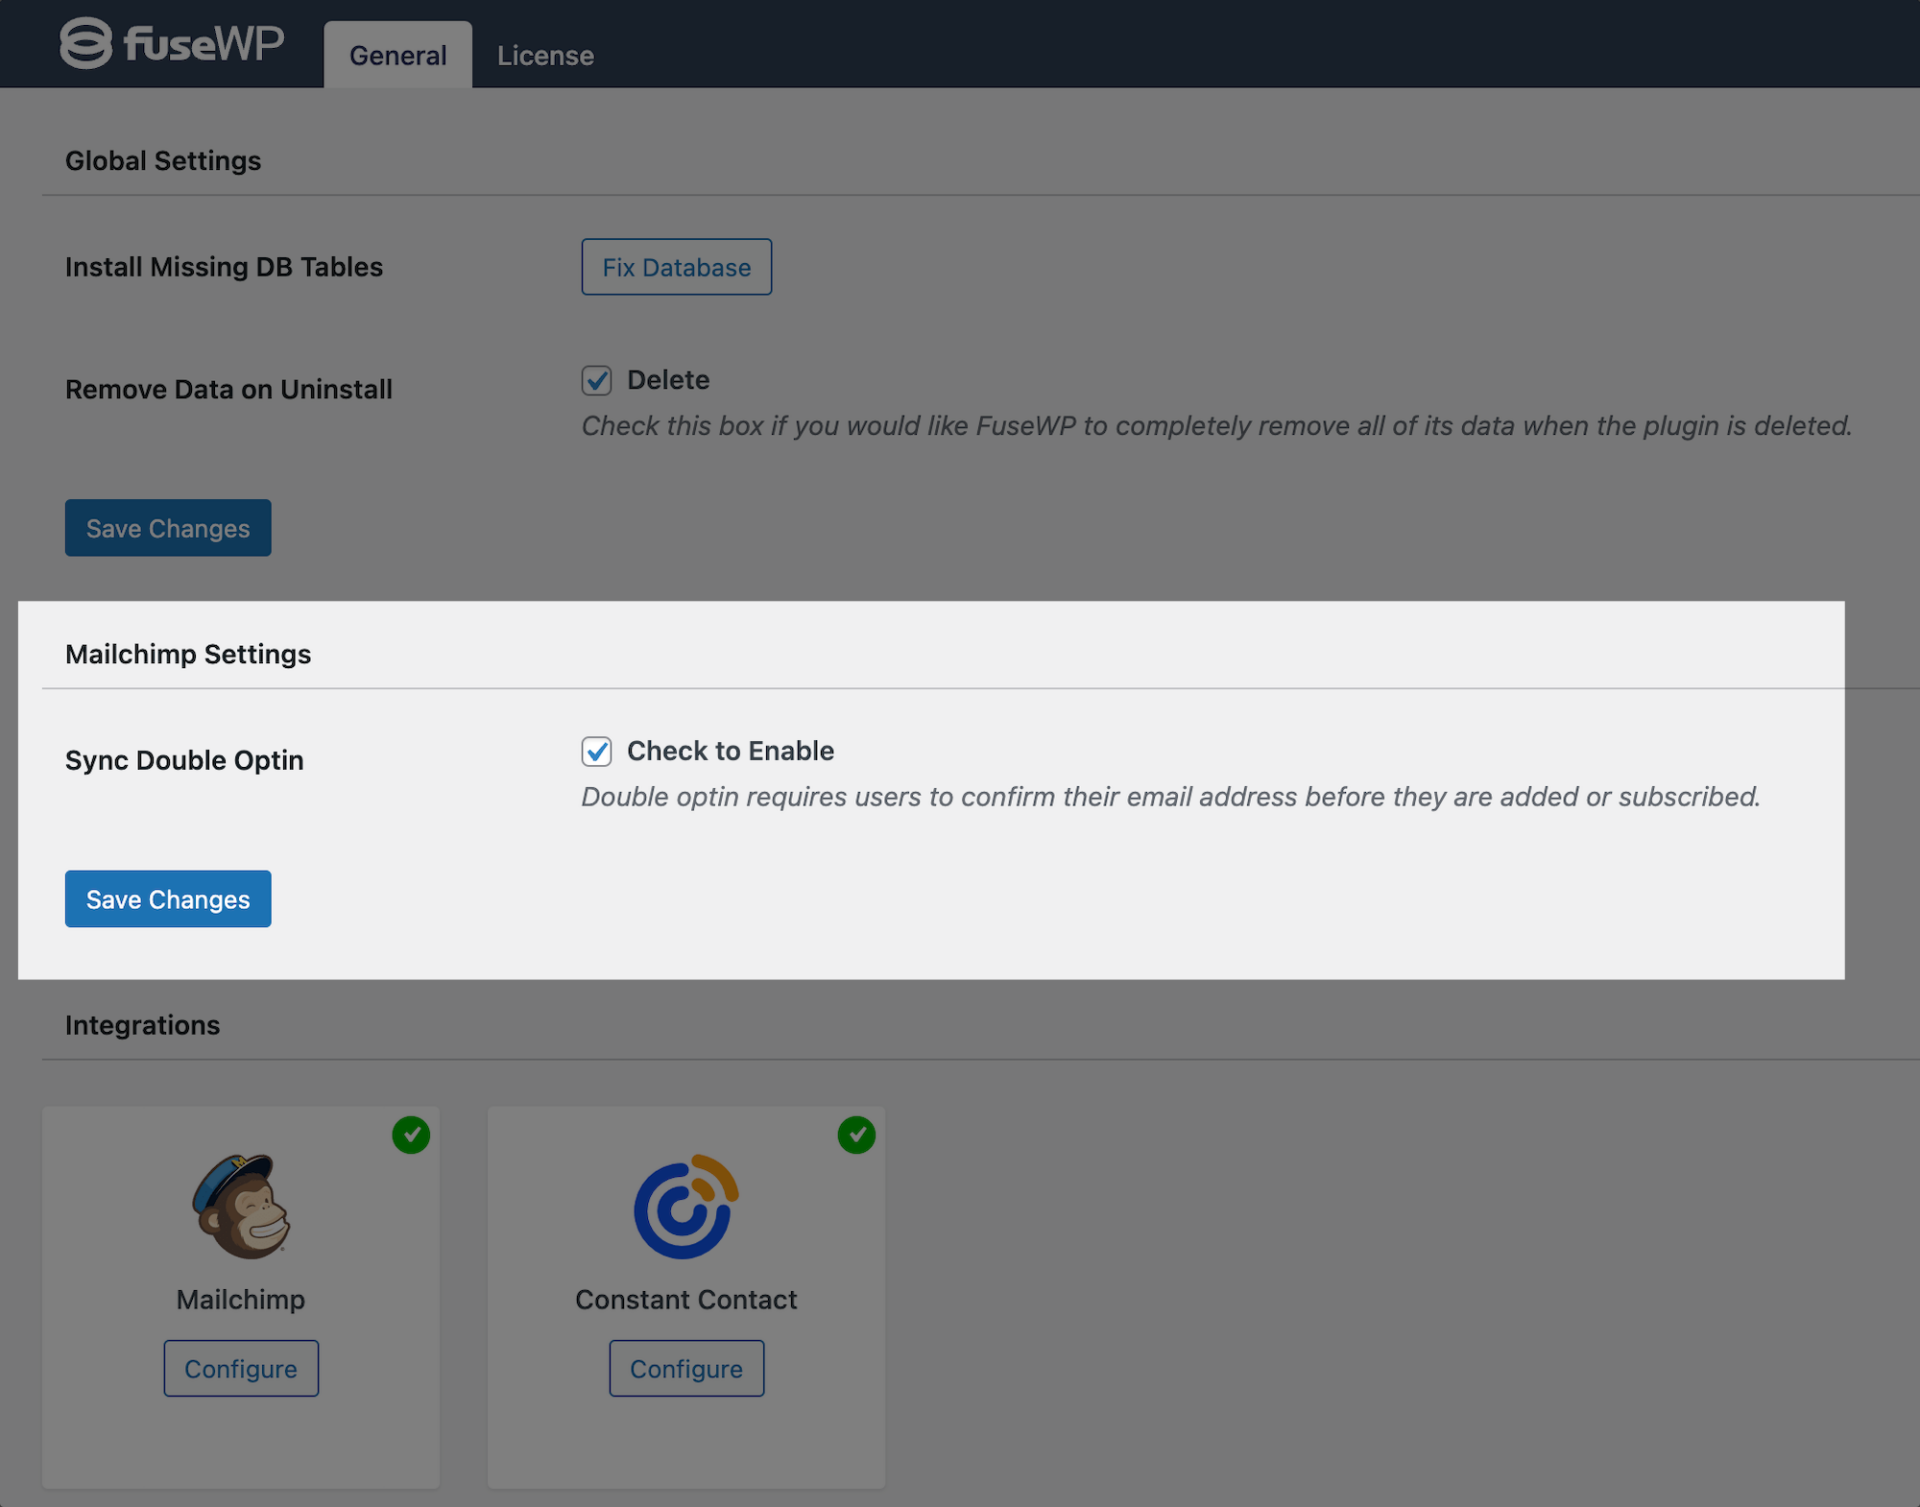
Double Opt-in Control
FuseWP offers the flexibility to toggle the Double Opt-in feature on and off. This feature requires users to confirm their subscription before officially joining your email list, contact list, or audience.
Please note that the availability of this feature depends on your chosen email marketing platform. Unfortunately, if your platform does not support Double Opt-in, you won’t be able to enable it.
Custom Fields Mapping
With FuseWP, you can map user profile information to custom fields or attributes in your email marketing integration. This means you can define specific attributes or fields within your email marketing integration that align with your unique needs and objectives.
Benefits of Using FuseWP
Using the FuseWP plugin offers numerous benefits, which include:
- User-Friendly: One of FuseWP’s most notable features is its user-friendliness. It has been meticulously designed to cater to users of all levels, including business owners who may not possess extensive technical expertise.
- Seamless Integration: FuseWP excels in providing a seamless integration experience. It offers an excellent interface that simplifies connecting your WordPress site to your email marketing software and CRM systems.
- Data Synchronization: Data consistency and accuracy are paramount for successful marketing and CRM activities. FuseWP excels in data synchronization. It automatically subscribes WordPress users to your email list based on their user roles upon registration, and any updates users make are automatically synchronized with your email marketing software and CRM. Additionally, FuseWP supports syncing with other membership, e-commerce, and LMS plugins.
- Custom Field Mapping: FuseWP offers the valuable feature of custom field mapping. You can map user profile information to custom fields or attributes in your email marketing integration. This level of customization allows you to capture and utilize data in a way that aligns perfectly with your objectives.
Installing FuseWP Plugin in WordPress
To begin, you will need to purchase a FuseWP license. Head to the FuseWP website to select a suitable license plan and make your purchase.
After purchasing, you will receive an email containing your plugin download link and license key. Download the plugin using the provided link.
Now that you have the FuseWP plugin downloaded to your computer, the next step is to install it on your WordPress website.
Login to your WordPress admin dashboard and navigate to the ‘Plugins’ page. Click the ‘Add New’ button, then select ‘Upload Plugin.’
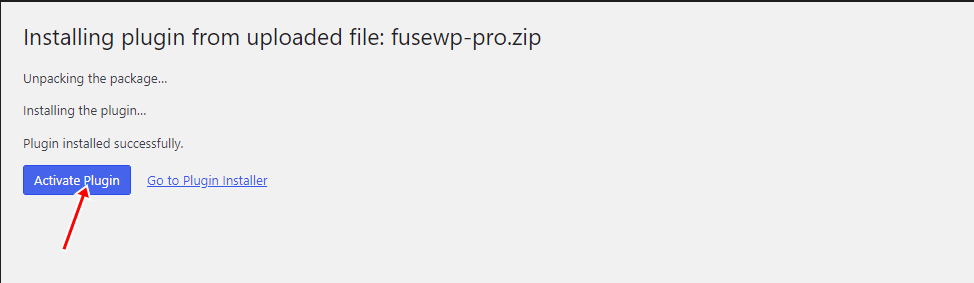
Next, click ‘Choose File’ to locate and select the plugin zip file you downloaded earlier. Once selected, click Install Now.

Wait a few seconds for the installation to complete. Once the plugin is installed, click ‘Activate Plugin’ to enable it on your site.
Integrating FuseWP with Your CRM
This section will guide you through integrating FuseWP with an email marketing platform.
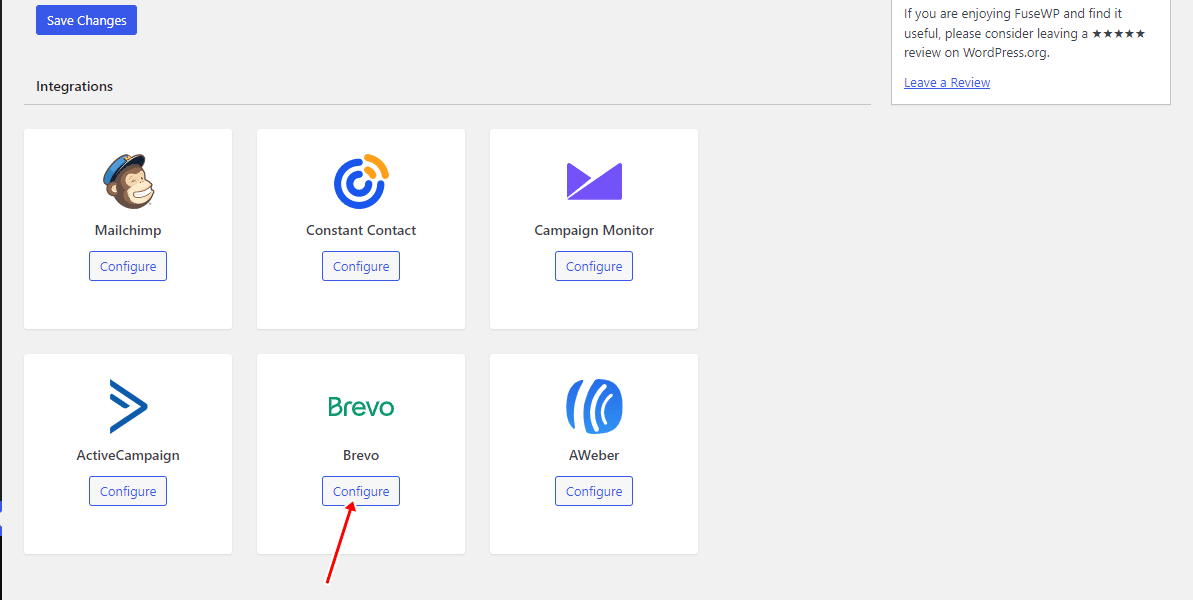
To get started, Click ‘Settings’ on the FuseWP dashboard menus and proceed to the ‘Integration’ section, where you will integrate with Brevo Email marketing software.
Click the “Configure” button in the Brevo section to reveal the modal settings.
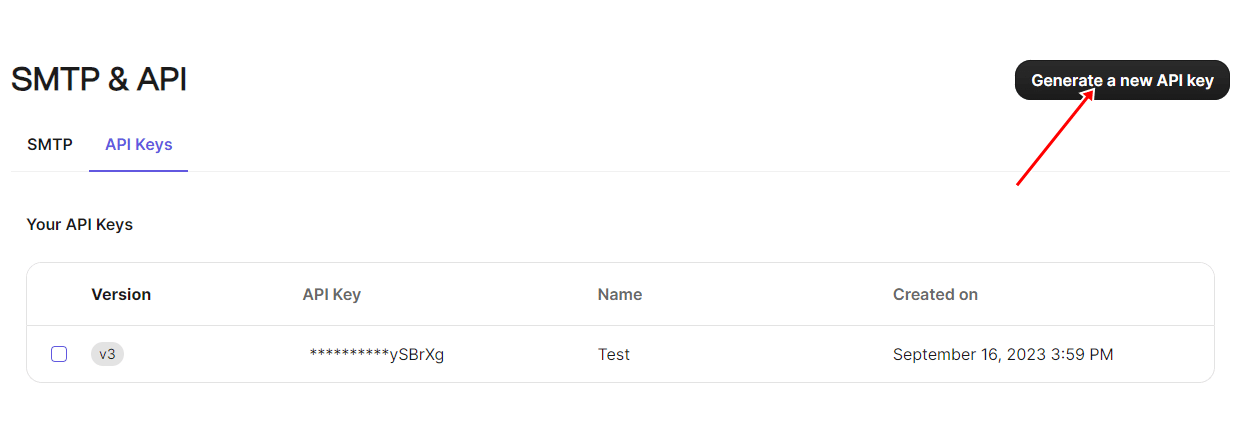
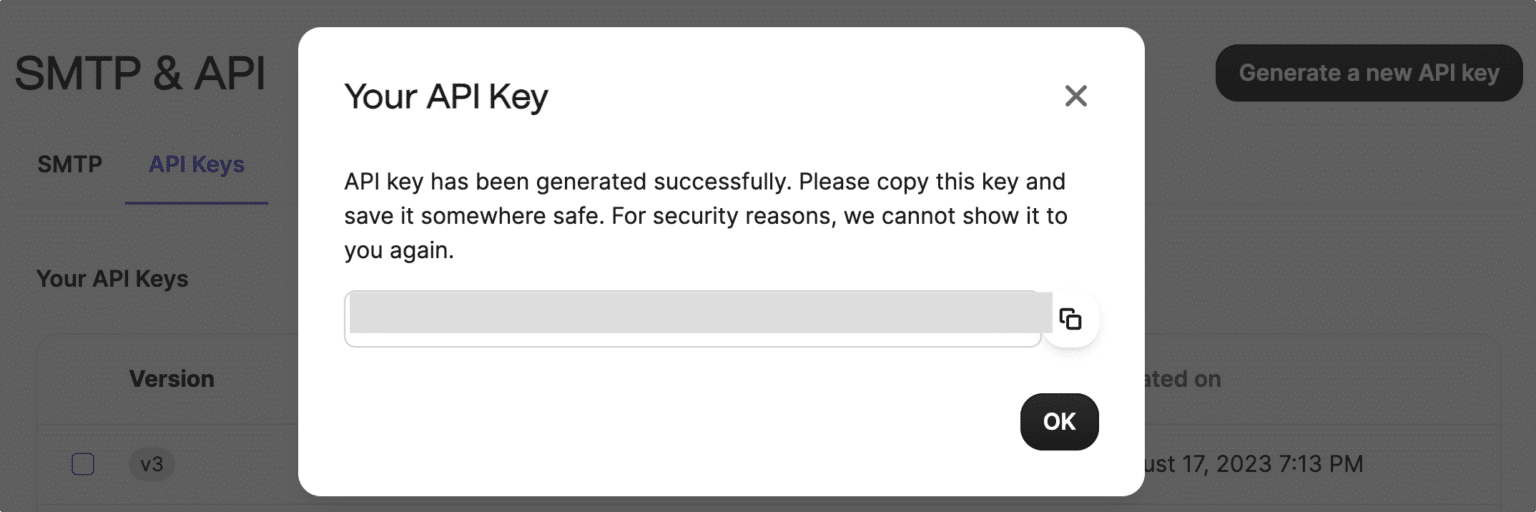
Next, you will be asked to enter the API Key. To obtain this, log in to your Brevo account dashboard and navigate to Your account name > SMTP & API >> API Keys.
Click Generate a new API key.
Enter a name for the API key and click ‘Generate.’
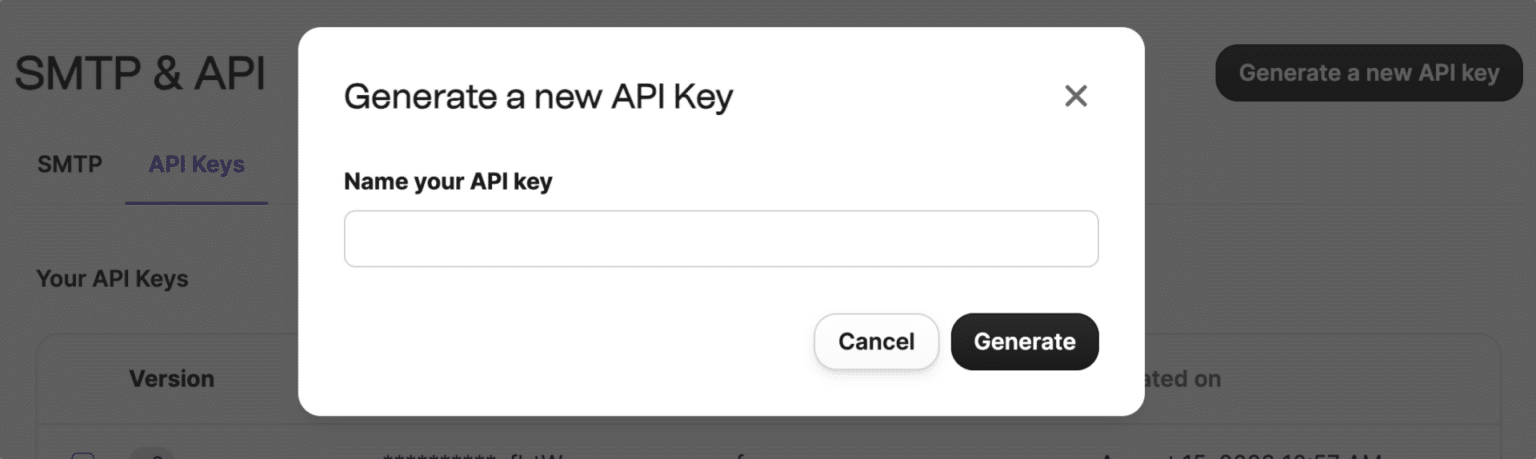
Once your API key is generated, copy and store it in a secure location. Please note that your API key is only visible during this step. If you lose it, you will need to create a new one.
You have now successfully created a new API key. Next, return to FuseWP to paste the API key.
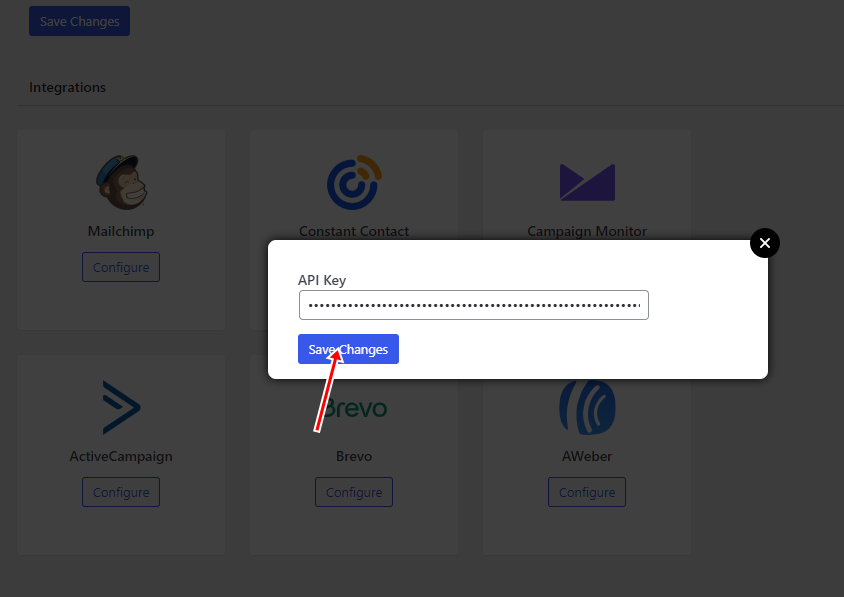
Congratulations, you have successfully connected FuseWP to Brevo. The process is similar to integrating other email marketing platforms and CRMs.
Double Optin Control
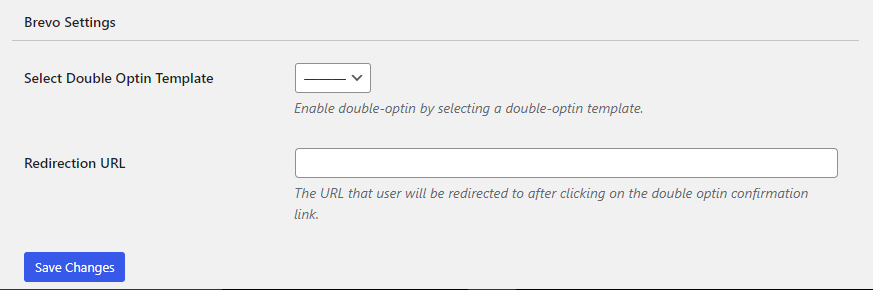
Now that we have integrated Brevo with FuseWP, we can enable the Double Optin Control because Brevo supports it.
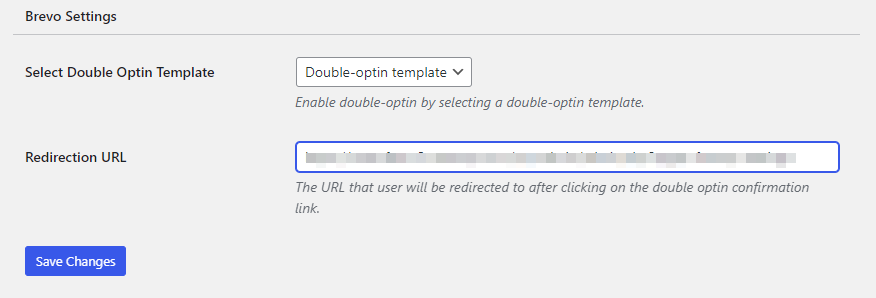
To do this, go to the FuseWP settings page and scroll down to Brevo Settings.
Next, you will be asked to select a Double Optin template and enter a redirection URL.
Don’t have any double-optin templated in your Brevo account?
How to Set Up Double Opt-In Template
In your Brevo account, go to Campaigns >> Templates and click the “New Template” button.
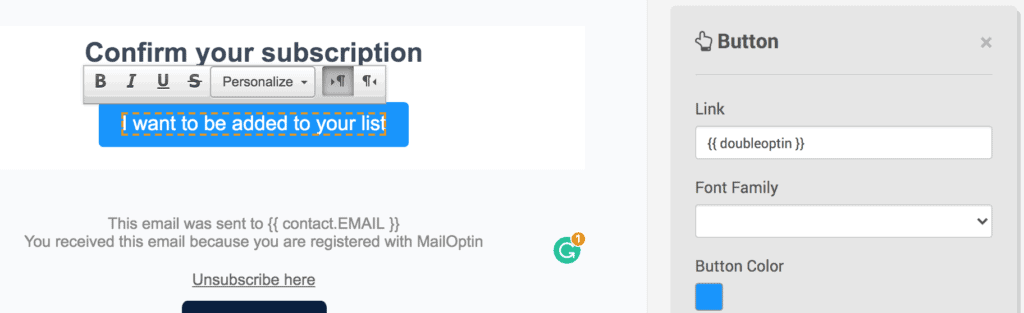
Fill out the template creation form. Open “Advanced Options” and add the tag “optin” to the template.
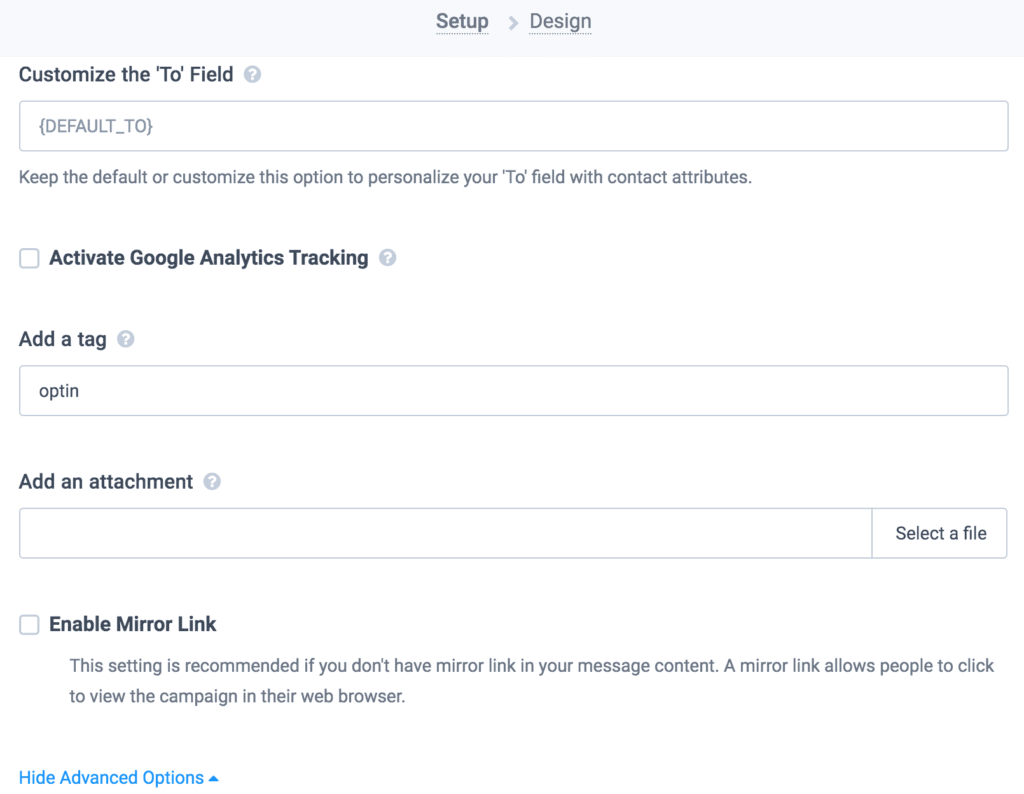
Finally, edit the template as desired and add the confirmable link to the template using the merge tag {{ doubleoptin }}
After completing this step, return to FuseWP and choose the Double Optin template you’ve recently created.
With this step completed, I’ll guide you through synchronizing your website users with Brevo and demonstrating how to create custom fields.
Setting Up WordPress User Sync
Now, navigate to ‘User Sync’. This feature lets you connect your WordPress users to email marketing software, such as Brevo, which we have already connected.
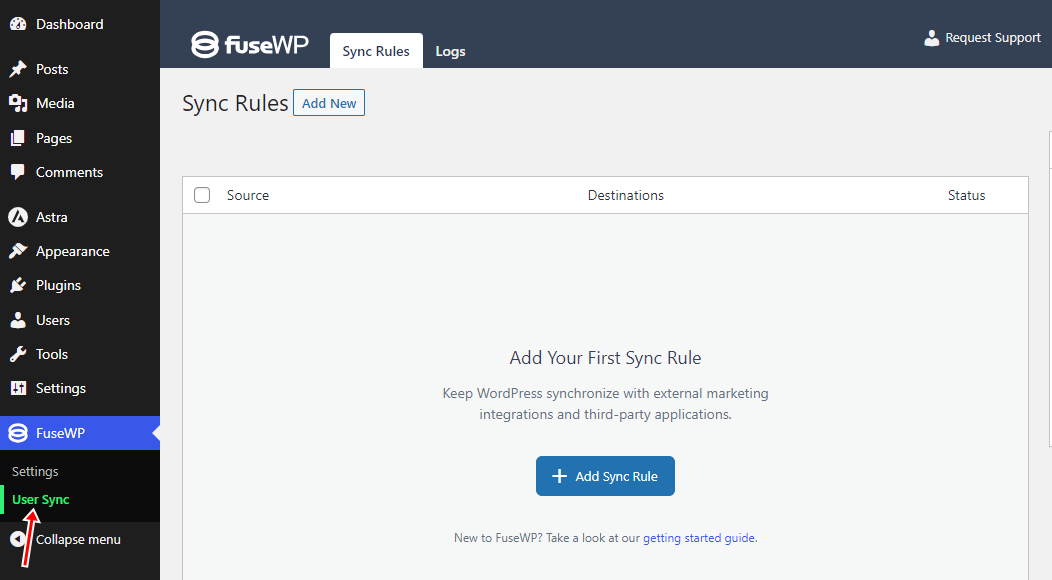
Click on ‘Add Sync Rule.’
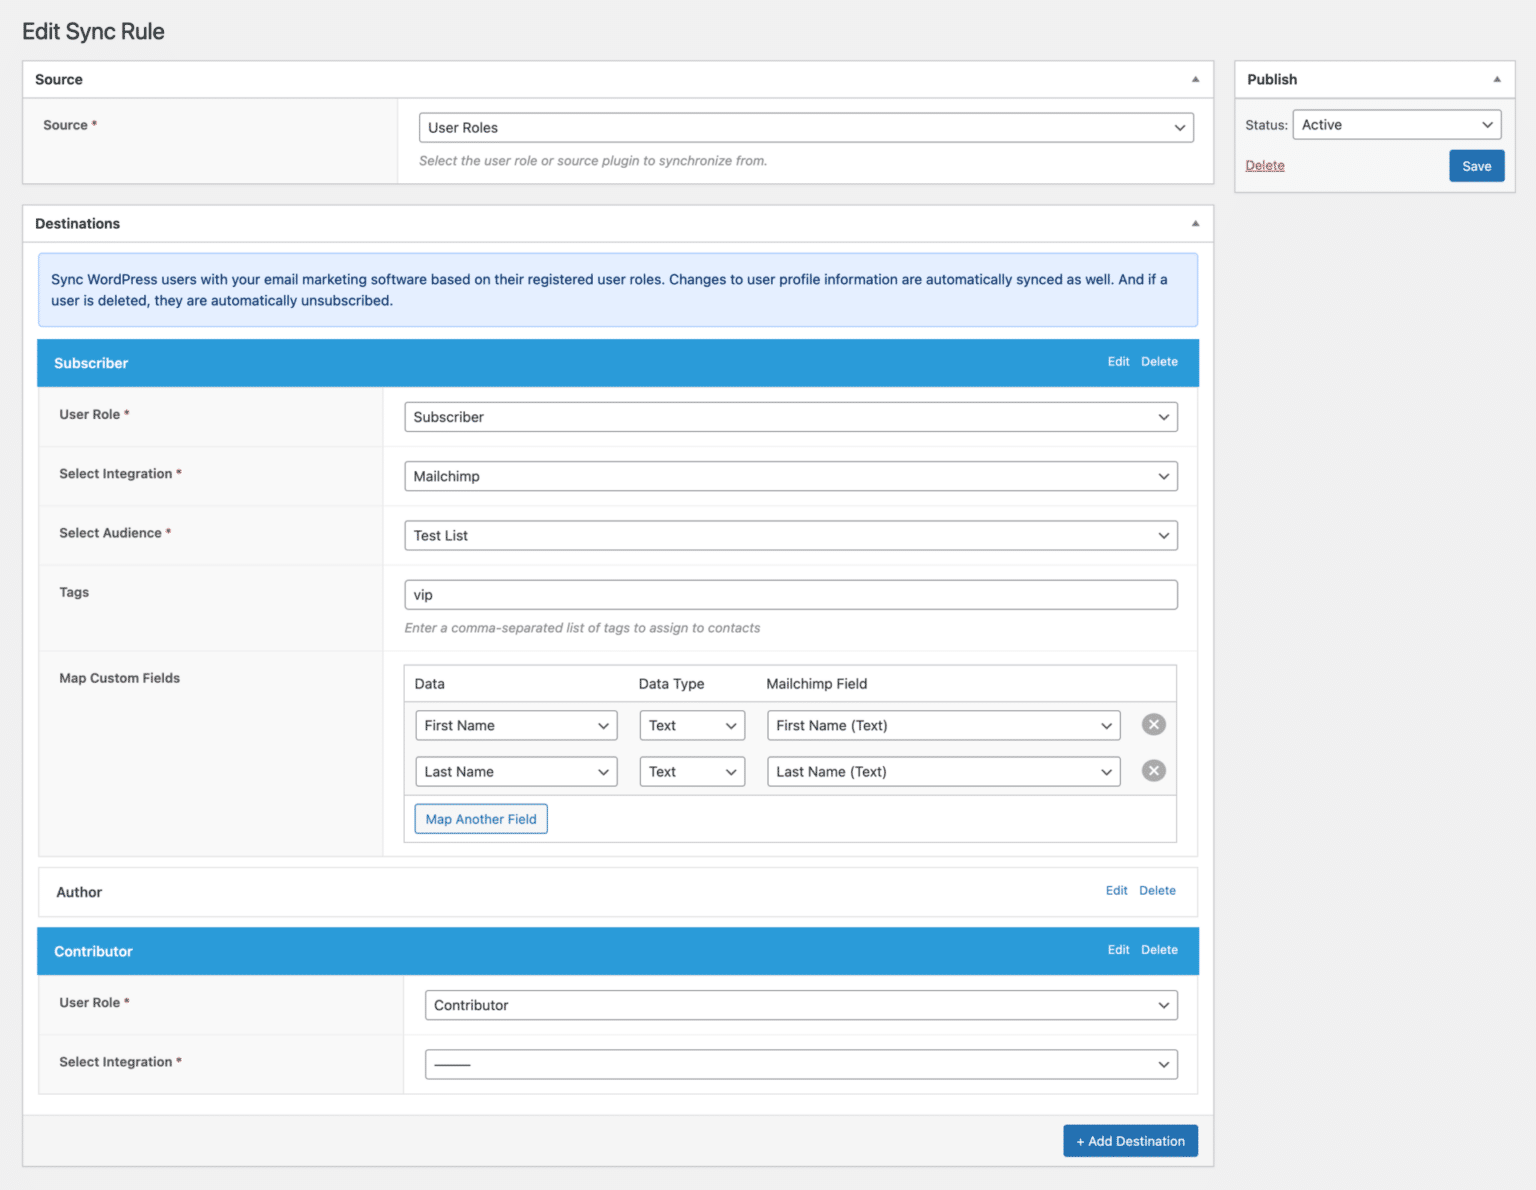
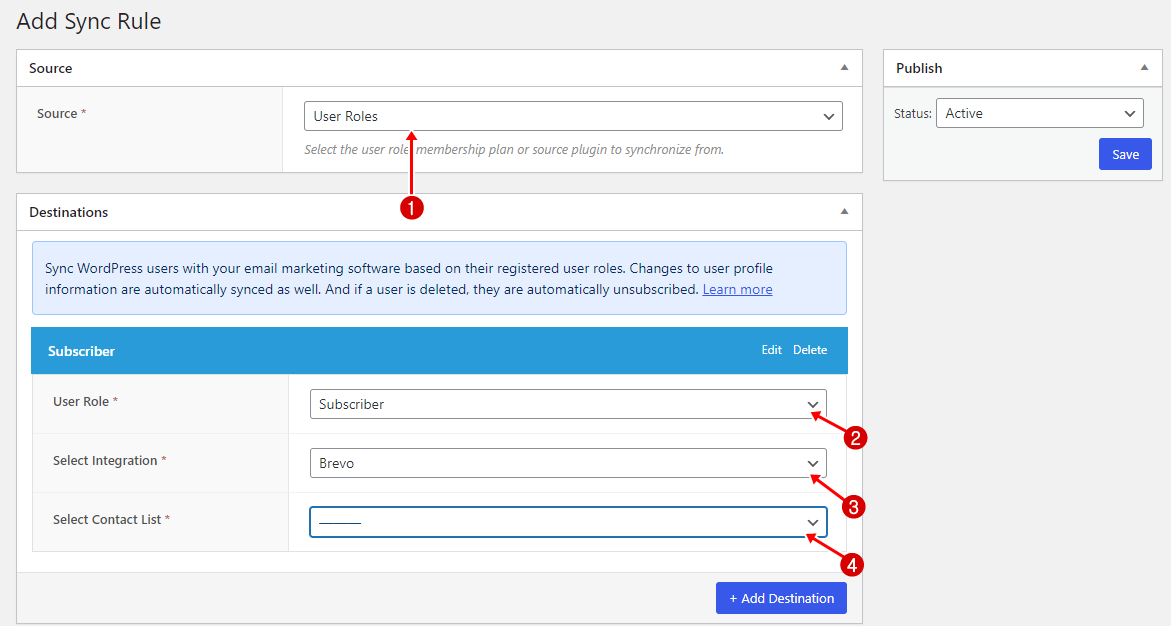
The first option lets you choose the source, which can be a plugin, a user role, or a membership plan. For this example, we are selecting ‘User Roles.’
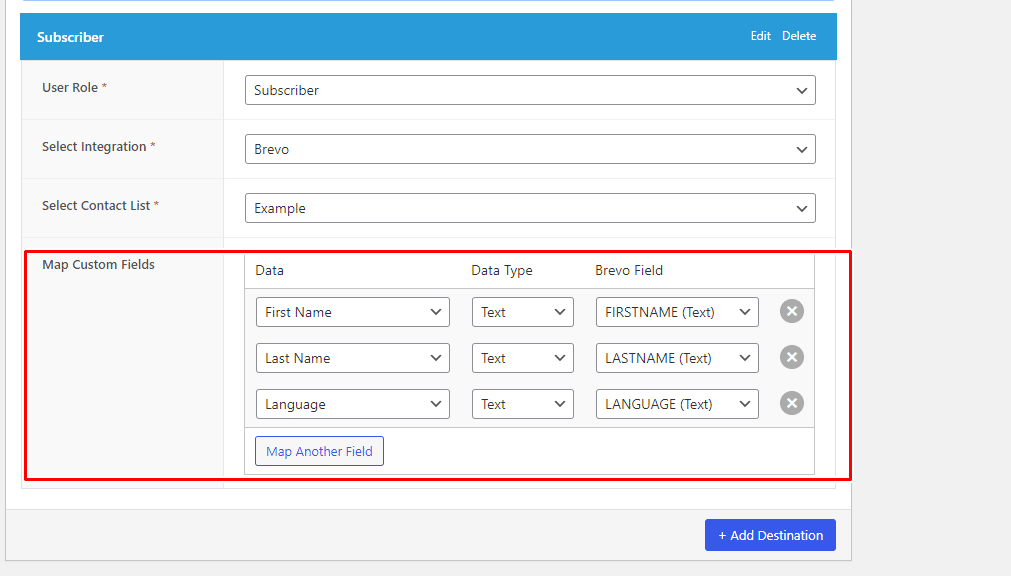
Under ‘Destination,’ add the user role you want to synchronize. In this case, we are choosing ‘Subscriber.’
Next, select ‘Integration’ and choose ‘Brevo.’
Now, ‘select contact list’.
Once you select your desired contact list, a new section named ‘Map Custom Field’ will appear. This section allows you to create your desired fields. For this example, we will create two unique fields: ‘ Registration Date’ and ‘Website URL’.
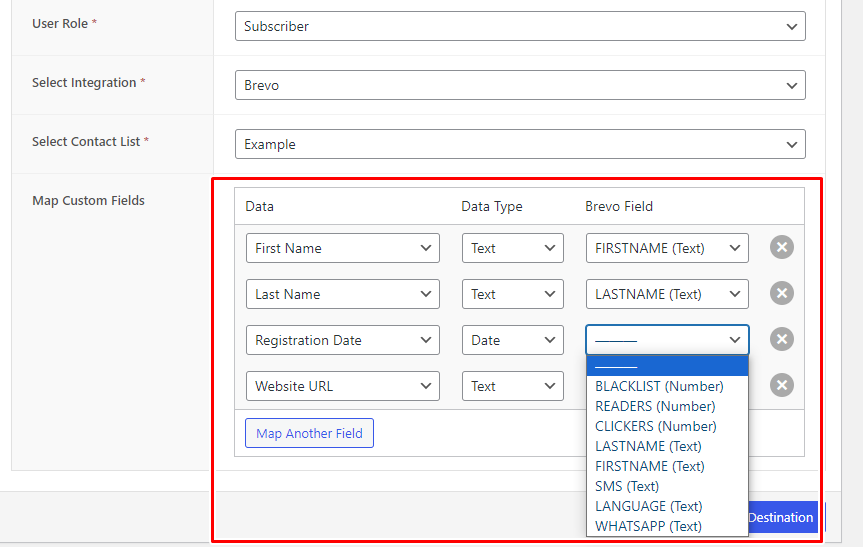
As shown in the screenshot above, no fields are available on the Brevo side to match the two unique fields I created. The next step is to create custom Brevo fields corresponding to the ‘Registration Date’ and ‘Website URL’ fields I created.
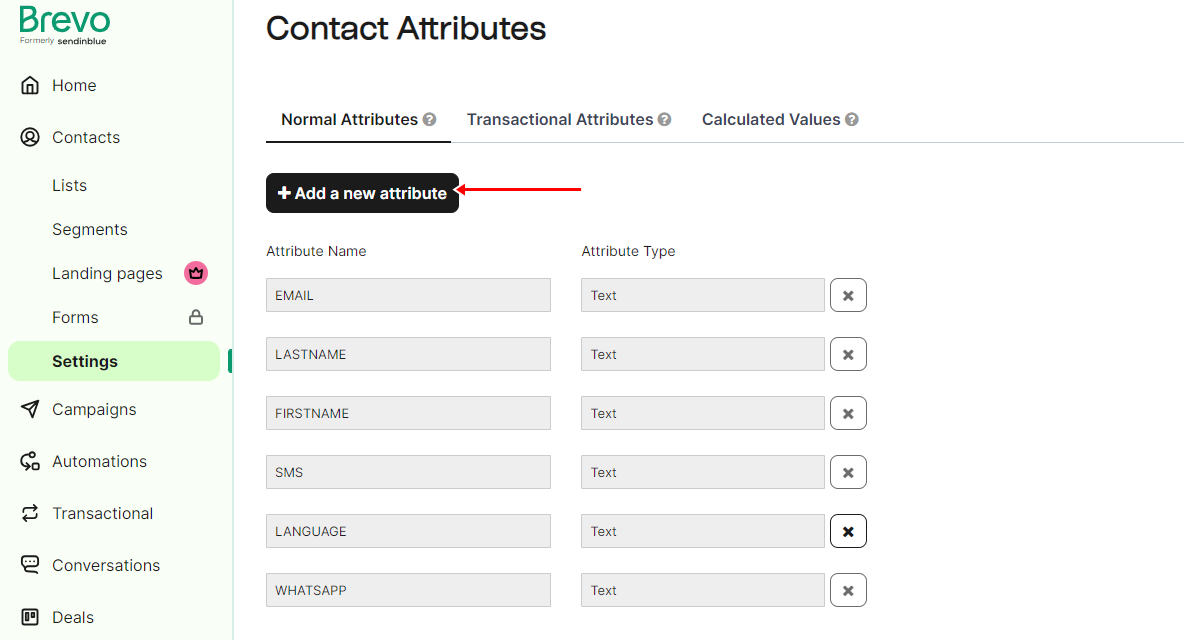
To do this, log in to your Brevo account and go to ‘Contacts’> ‘Settings’> ‘Contact Attributes.’
Under the ‘Normal Attributes’ tab, click ‘+ Add a new attribute’ at the bottom of the page.
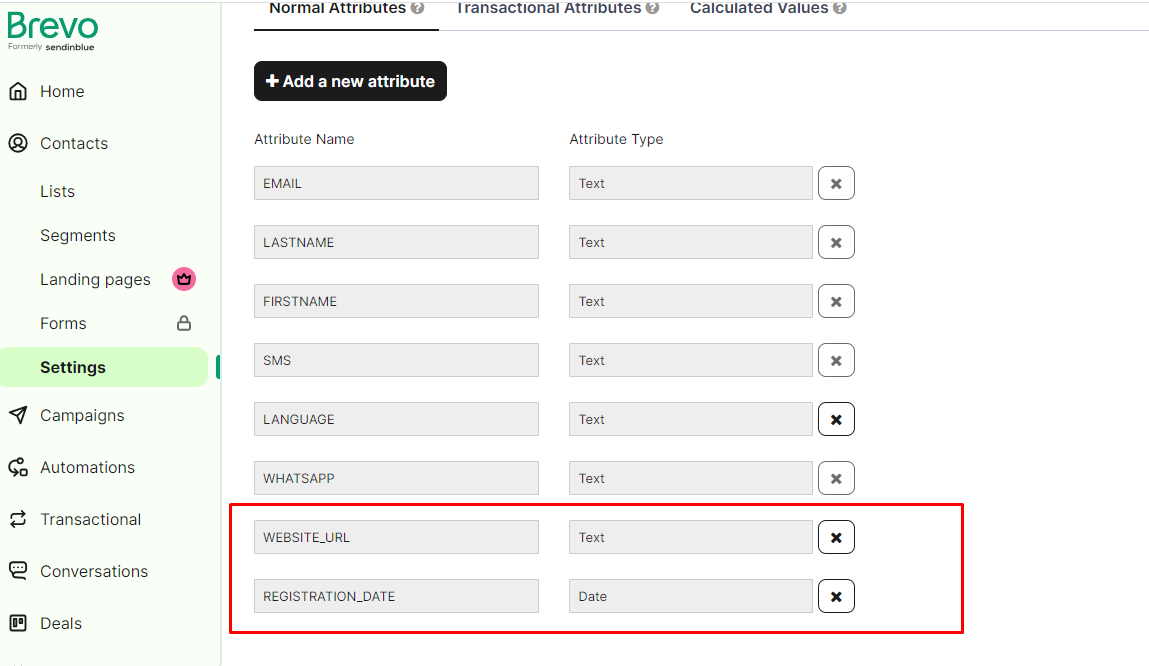
Provide a name for your contact attribute. Select the type of contact attribute you want to create.
Click ‘OK.’ Your custom contact attribute has now been successfully created.
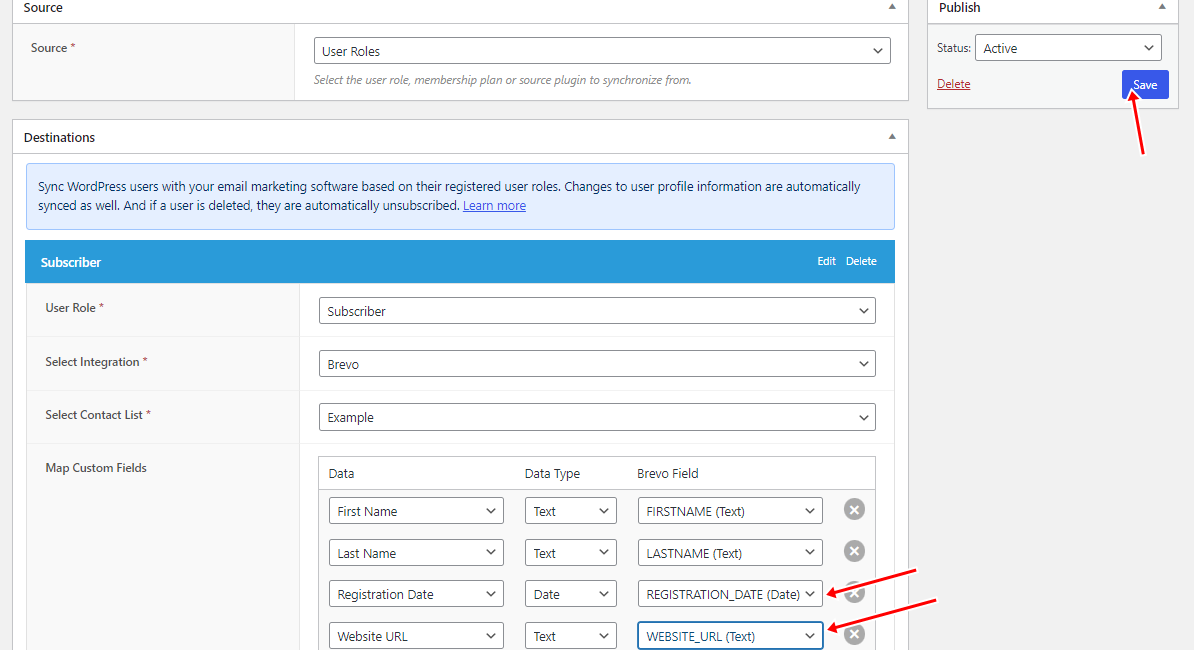
Return to FuseWP to complete the setup, then click ‘Save’ in the ‘Publish’ section.
Test Out User Sync
This section will put the User Sync we’ve configured to the test. Head to the ‘Users’ tab and click ‘Add New.’
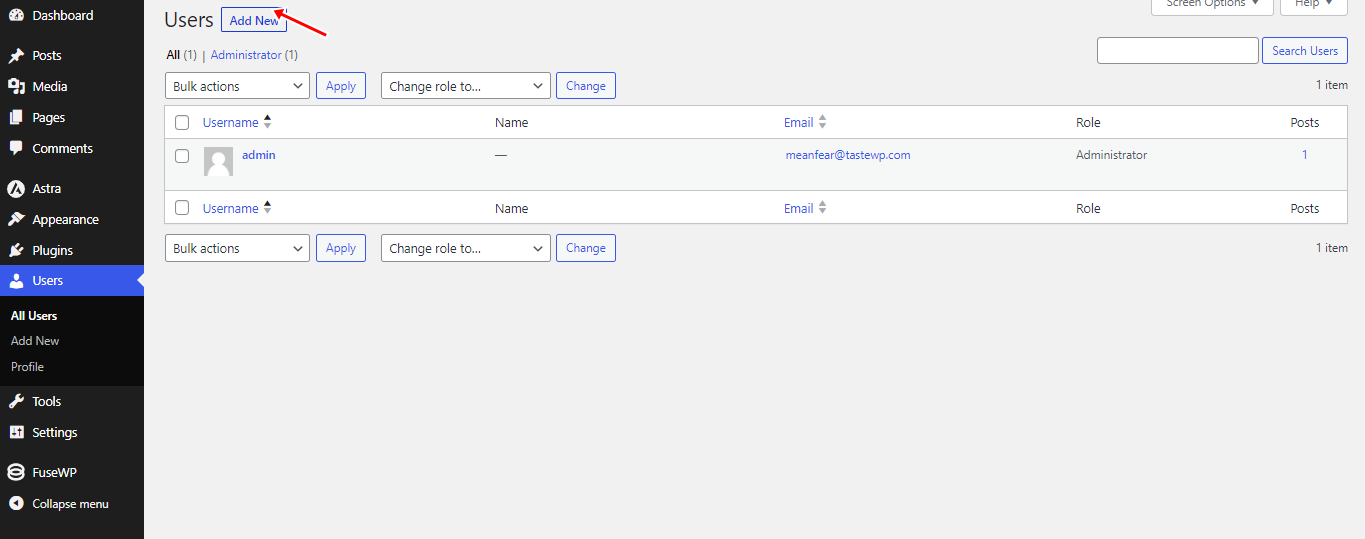
Enter the user information and assign their role as ‘subscriber,’ then save the newly created user account.

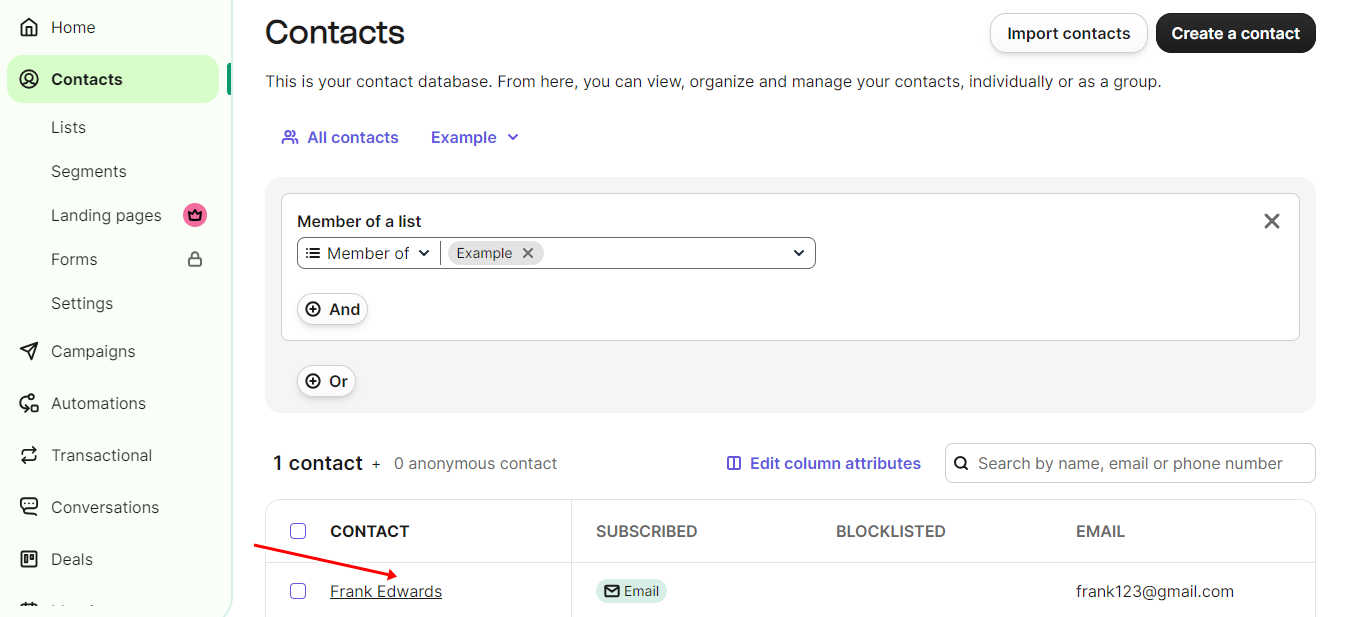
When you access your Brevo account, you’ll notice that this new user has been automatically included in your contacts.
When users update their profile details or modify their account email addresses, these changes are synchronized with Brevo. Additionally, if users choose to delete their accounts, they are automatically unsubscribed.
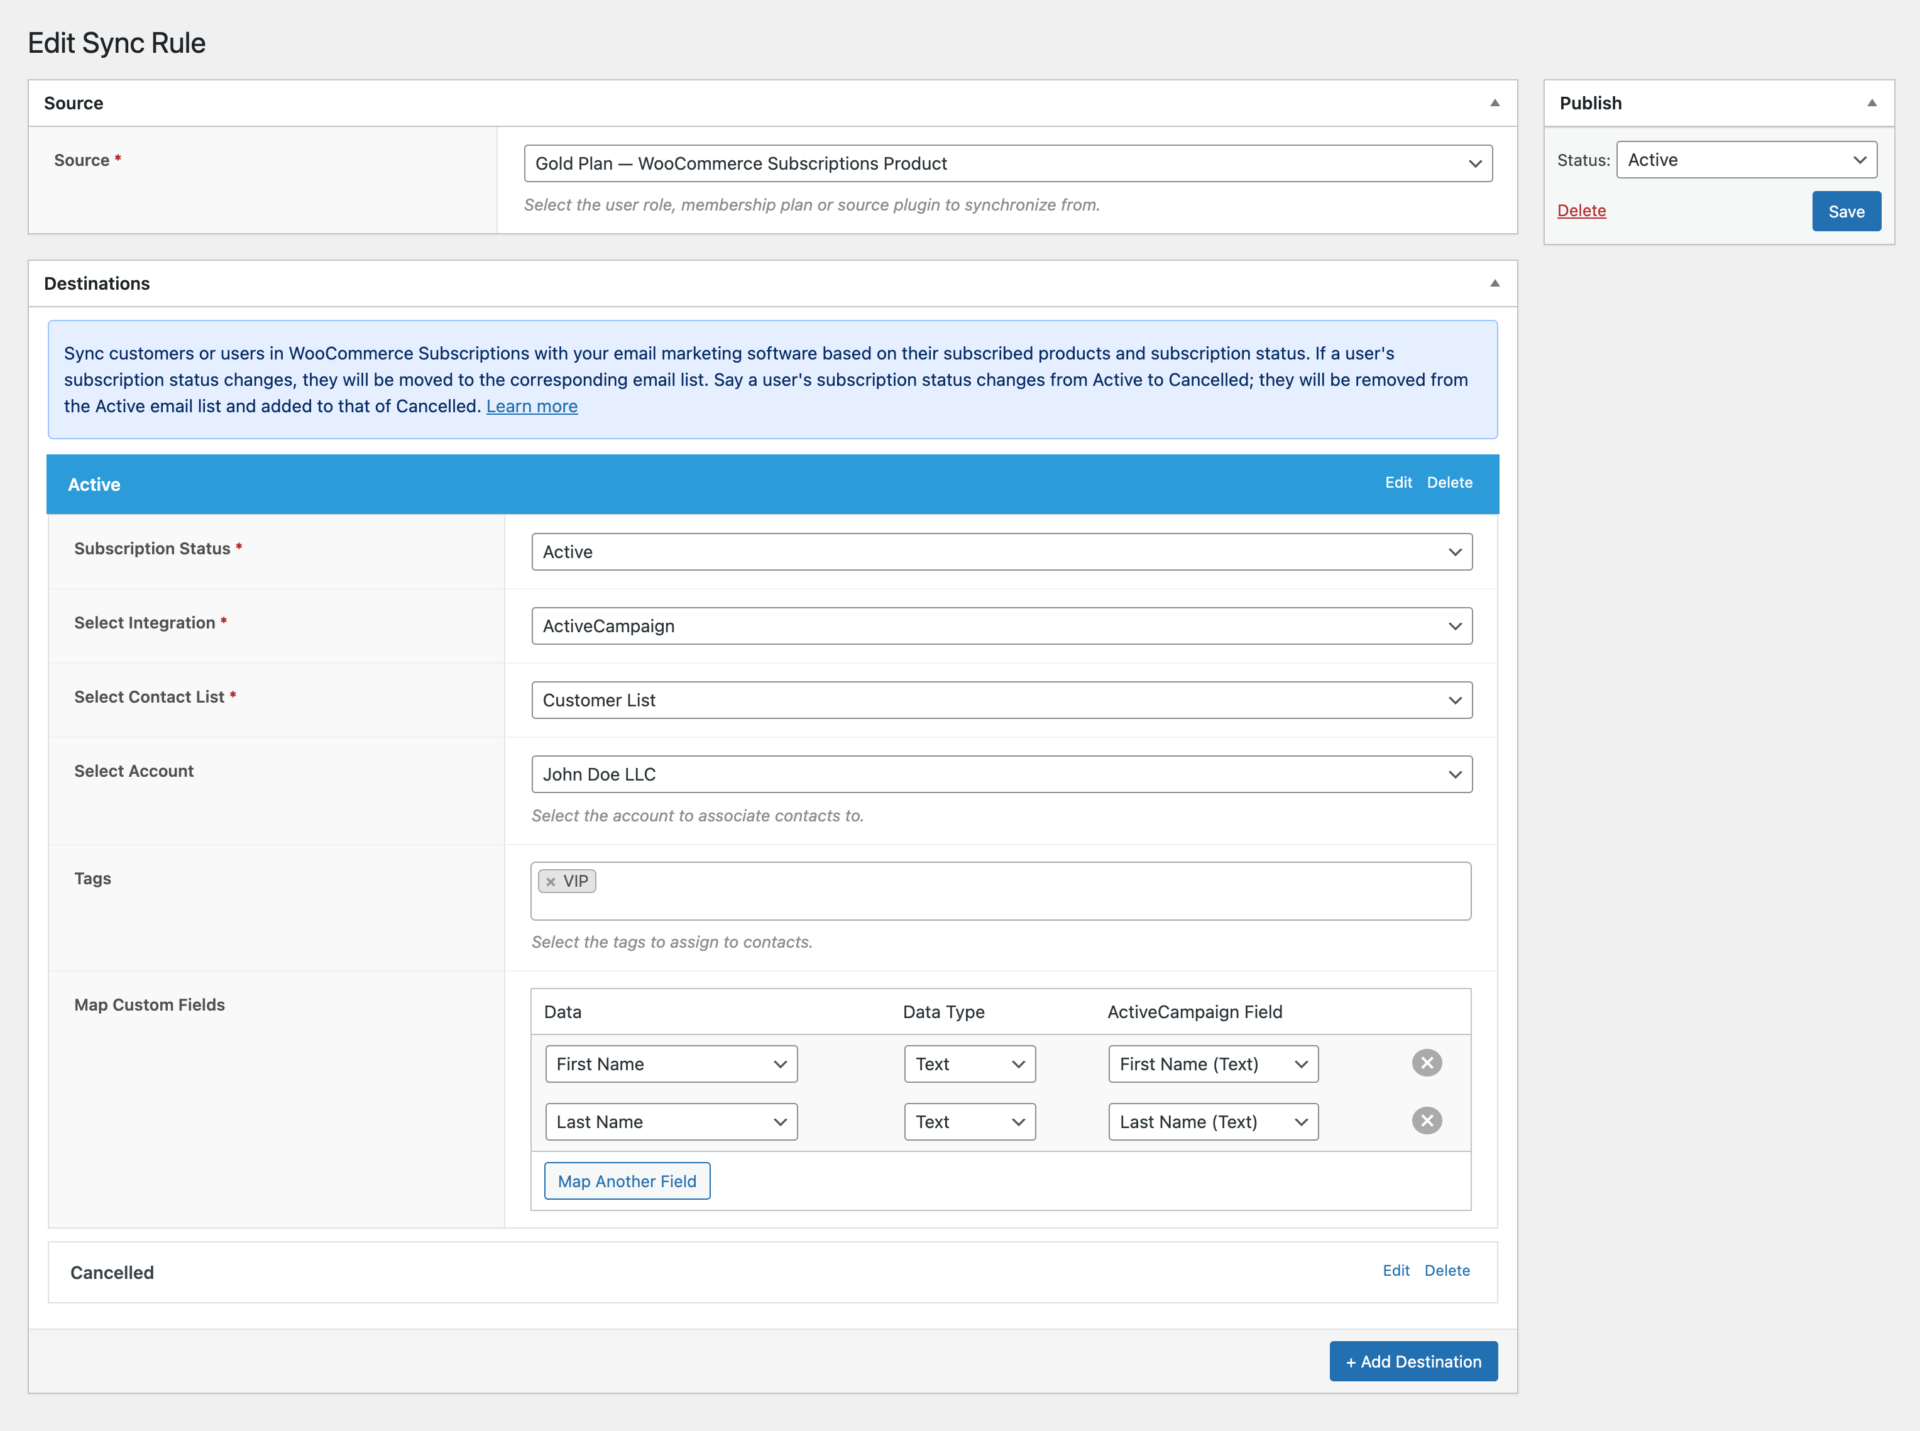
The steps above are also applicable when you want to sync users in LMS, membership, and e-commerce plugins with FuseWP with support for Mailchimp, ActiveCampaign, Constant Contact, Campaign Monitor, AWeber, and Brevo (Sendinblue), etc.
Conclusion
FuseWP is a top-notch plugin that connects your website with your email marketing software and CRM. Its user-friendly features and intuitive interface make the integration process a breeze.
By automating your marketing and improving your customer relationship management, FuseWP can help you increase sales and leads. You can reach your target audience with the right message at the right time.
If you are looking for a WordPress plugin to integrate your CRM and email marketing platforms with WordPress, FuseWP is an excellent option.