Are you looking to create a WordPress popup form?
WordPress popup forms are a great way to capture leads and grow your email list. They can be used to promote your products or services, announce new blog posts, or simply get in touch with your visitors.
Creating a WordPress popup form can enhance the user experience by reducing the steps required to fill out a form and boosting your conversion rates.
With a popup form, users can quickly fill out the form directly on the page they are on without having to navigate to another page, thereby minimizing friction.
Why Use a WordPress Popup Form?
Popups are an excellent tool for generating leads, personalizing the user experience, engaging visitors, and increasing conversion rates on your website.
With popup forms, you can build your email list, make announcements, display offers, and share targeted ad messages.
How to create a WordPress Popup form with MailOptin
Creating a WordPress popup form can be done in several ways. The best approach is to use a plugin.
In this article, we’ll utilize MailOptin, regarded as the most optimal choice.

MailOptin is a plugin for WordPress that allows website owners to create and manage email opt-in forms, popups, notification bars, scroll-triggered boxes, and more.
It offers a user-friendly interface and a range of customization options, including templates, design options, and automation features. MailOptin also includes analytics to help website owners optimize their email marketing campaigns.
Overall, MailOptin is an effective plugin for enhancing engagement, increasing conversions, and expanding email lists on WordPress websites.
How to Install and Activate MailOptin Plugin
To begin, you will need to purchase a MailOptin license and install the plugin onto your WordPress website. To do that, head to the MailOptin website to purchase a suitable license plan.
Upon purchasing, you will receive an email containing your plugin download link and license key. Additionally, you can obtain the plugin by accessing your account page on the MailOptin website.
Now that you have the MailOptin plugin downloaded to your computer, the next step is to install it onto your WordPress website.
Login to your WordPress admin dashboard and navigate to the Plugins page; click the Add New button and Upload Plugin.
Next, click Choose File to select the previously downloaded plugin zip file. Click Install Now.
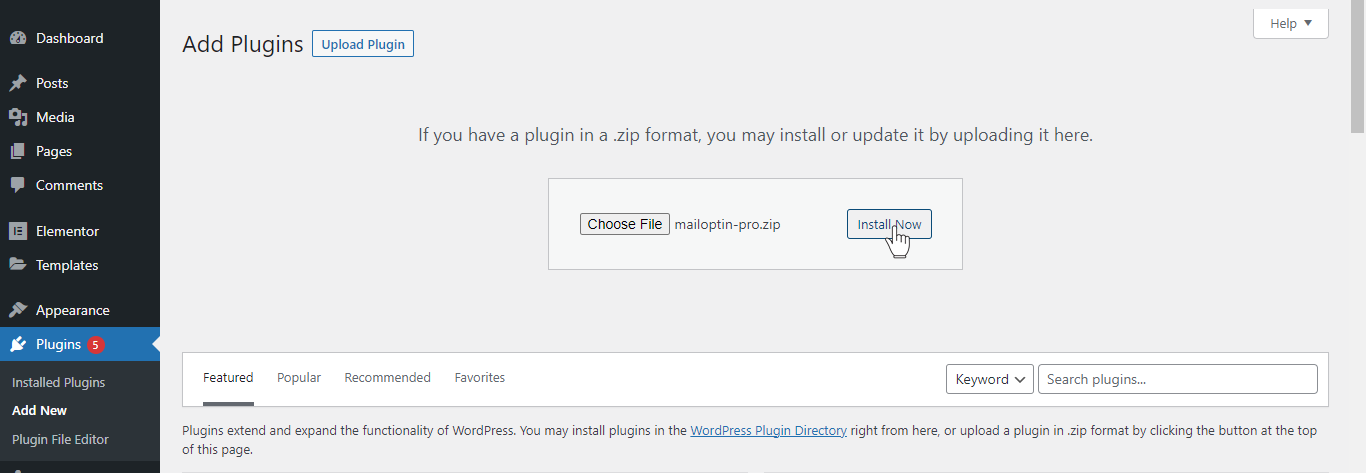
Wait a few seconds for the installation to be completed. Once the plugin is installed, click on Activate Plugin to activate it on your site.

Creating a Popup Form in WordPress
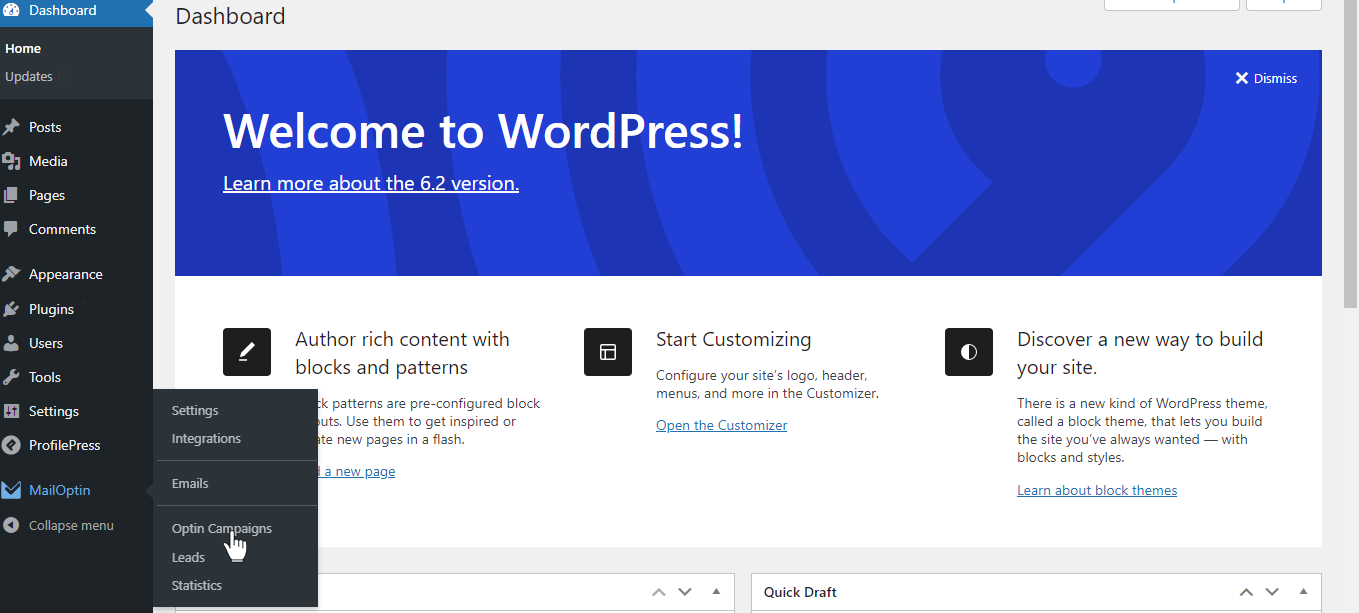
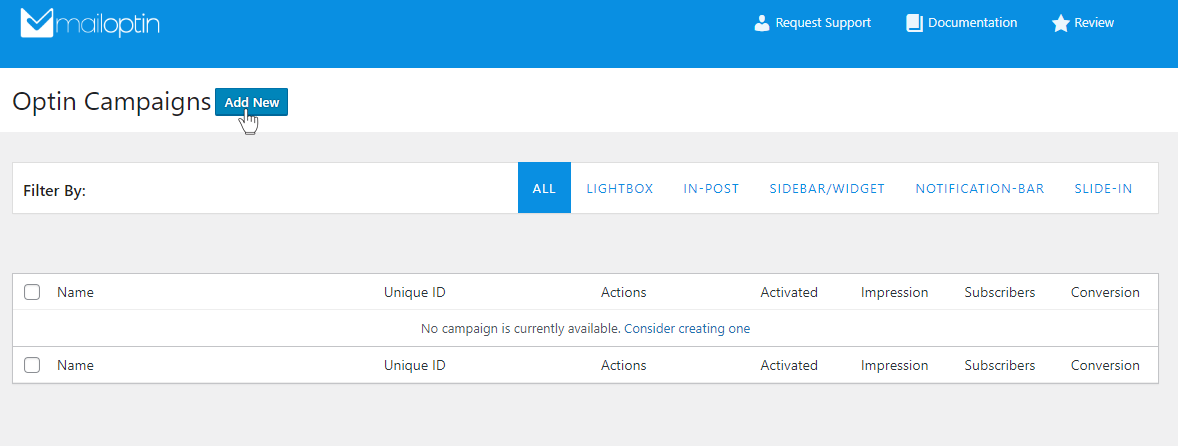
Access the WordPress dashboard and go to MailOptin > Optin Campaigns
Then, click the Add New button at the top of the page.
Following that, you will be presented with a field where you can input a name for your Popup Form. This can be a name of your choice, such as “Subscribe” or any other name that aligns with the purpose or message of the form. Then select Lightbox optin type.
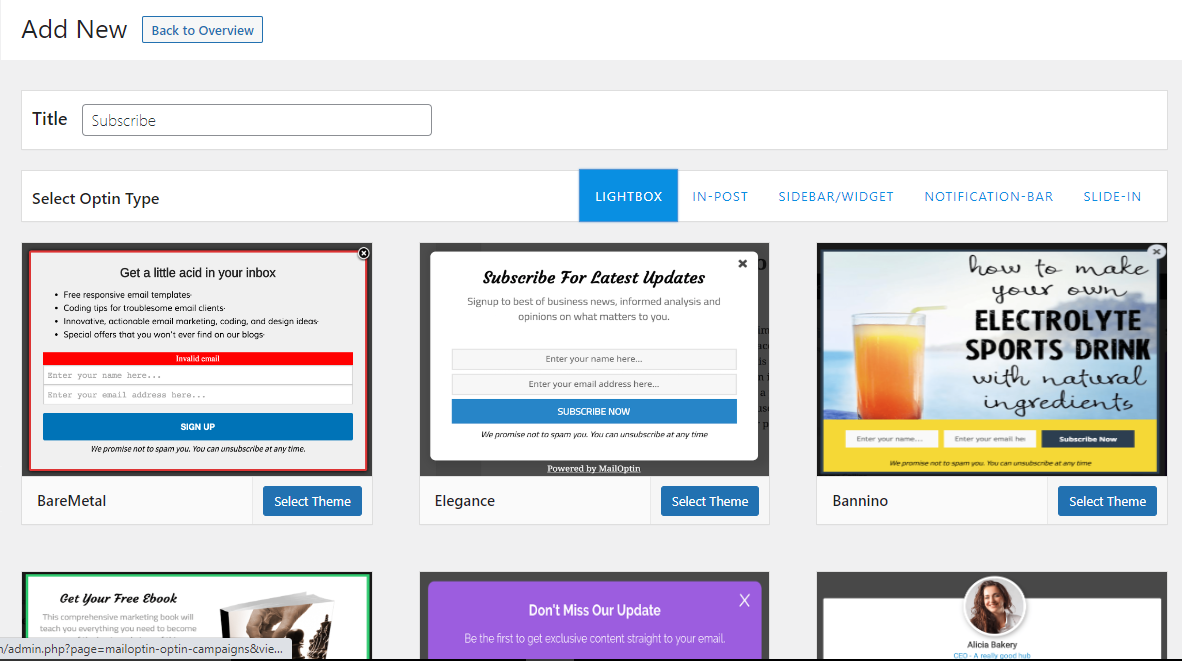
MailOptin has various pre-designed popup themes you can browse through and choose from. These themes are professionally designed to provide an aesthetically pleasing and engaging user experience that can effectively capture the attention of your website visitors.
Click on the lightbox theme you desire to use, and you will be redirected to the form builder.
For this guide, we’ll use the Elegance theme, So click on the elegance theme.
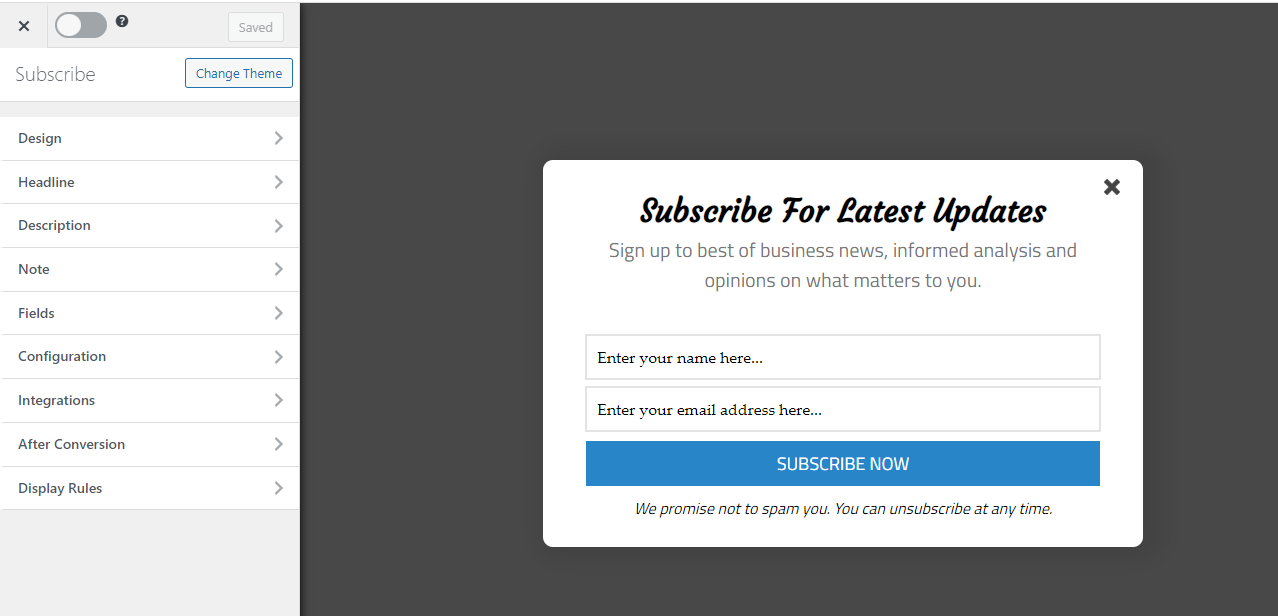
On the left side of the Popup Form Builder, various sections offer the necessary tools to personalize our popup form. These sections include
Design
The design section of the form builder allows us to modify the Optin width, Display Effect, Background color, and Border color. It also allows us to add custom CSS to further the style.
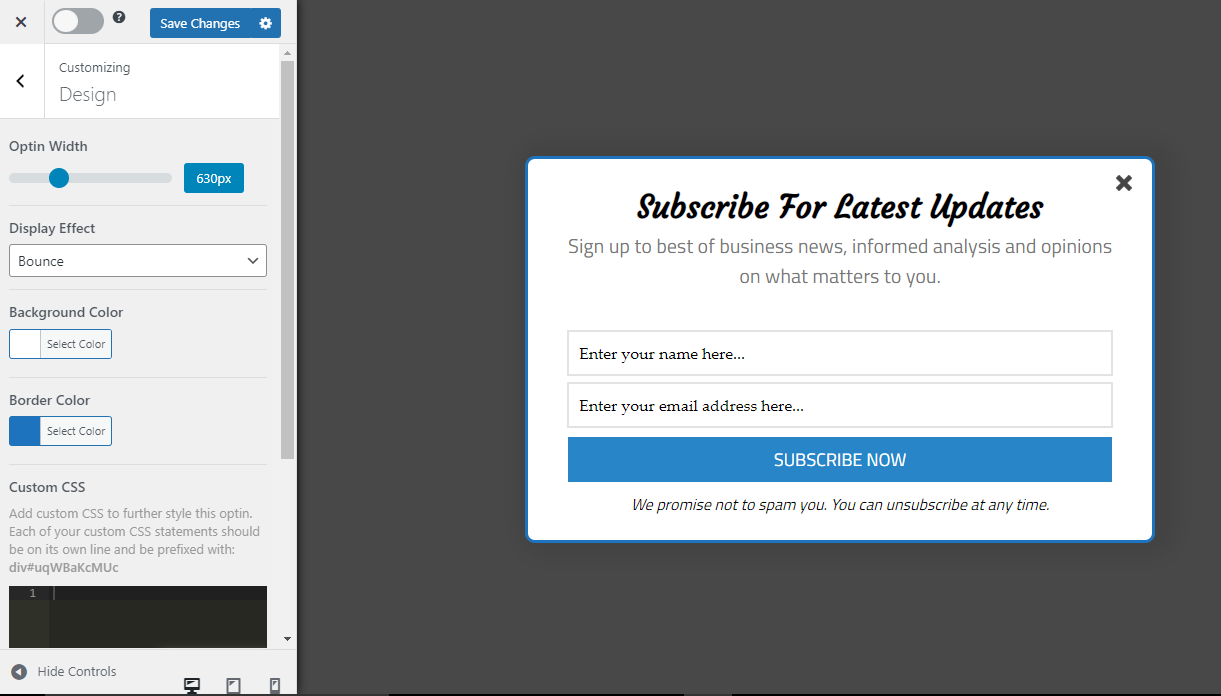
Additionally, you can apply a Display effect, such as a “Bounce” effect, that will give the form a dynamic and attention-grabbing entrance animation.
To further customize the appearance of the form, you can also set the Background color to “White” and the Border color to “Blue“, which can help to create a visually appealing contrast and enhance the overall aesthetic appeal of the form.
MailOptin allows you to see a live preview as you make these modifications. You can keep tweaking it until you create a design that suits you.
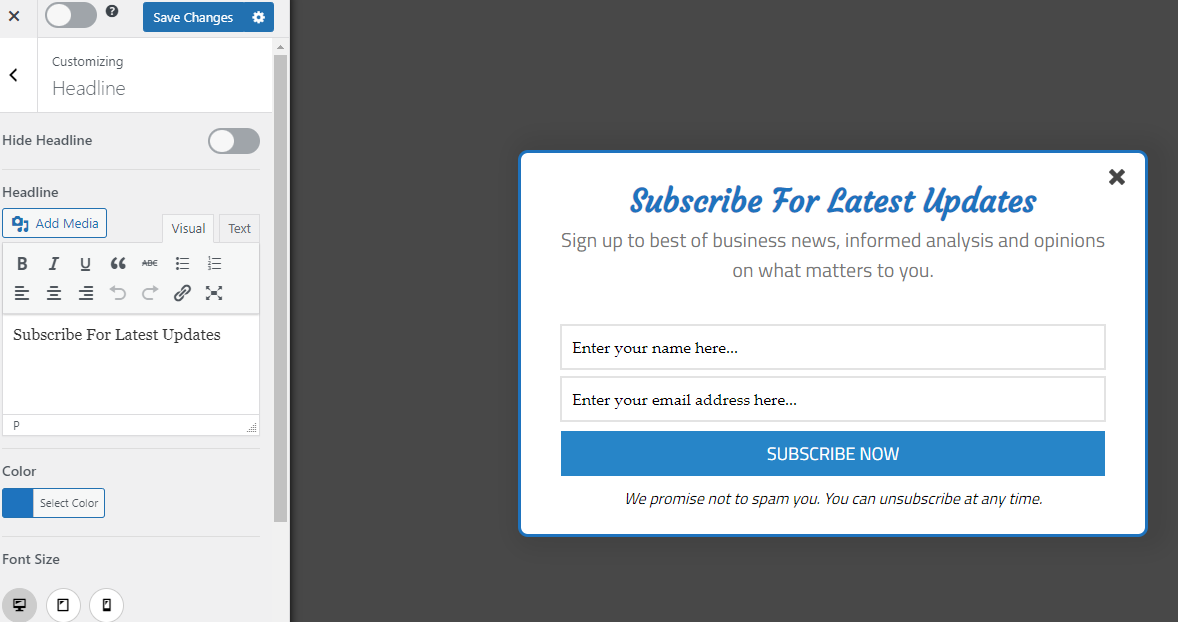
Headline
Under the headline section, you can hide the headline section from your popup form, modify the headline text, adjust the font size and font family, change the text color, and add media to your popup form.
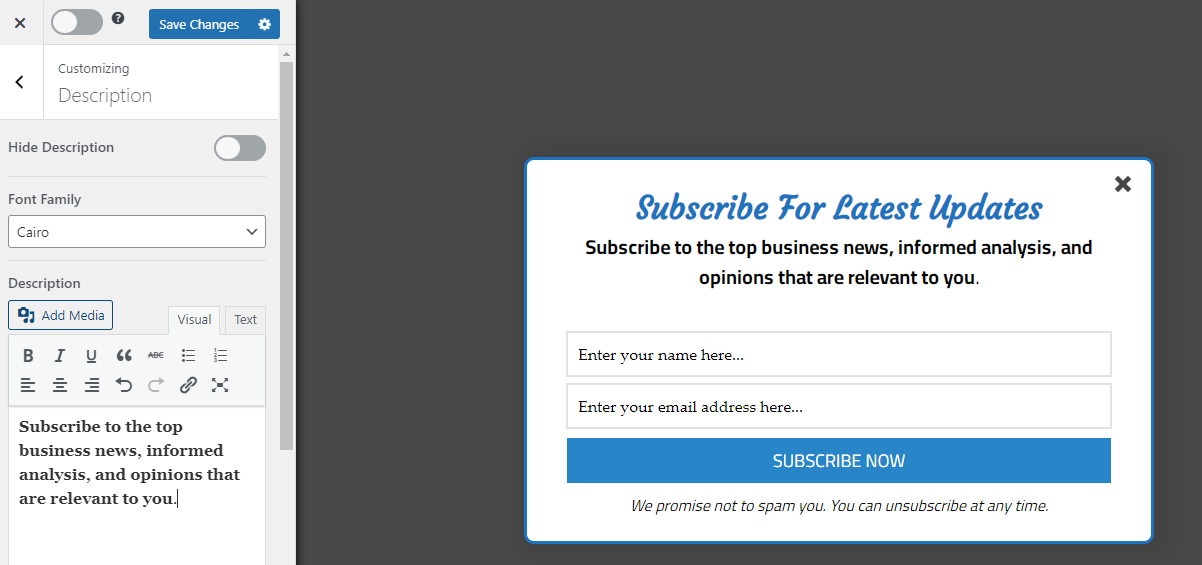
Description
Within the description section, you can hide the description section from your popup form, edit the description text, modify the font size and font family, change the text color, and insert media into your popup form.
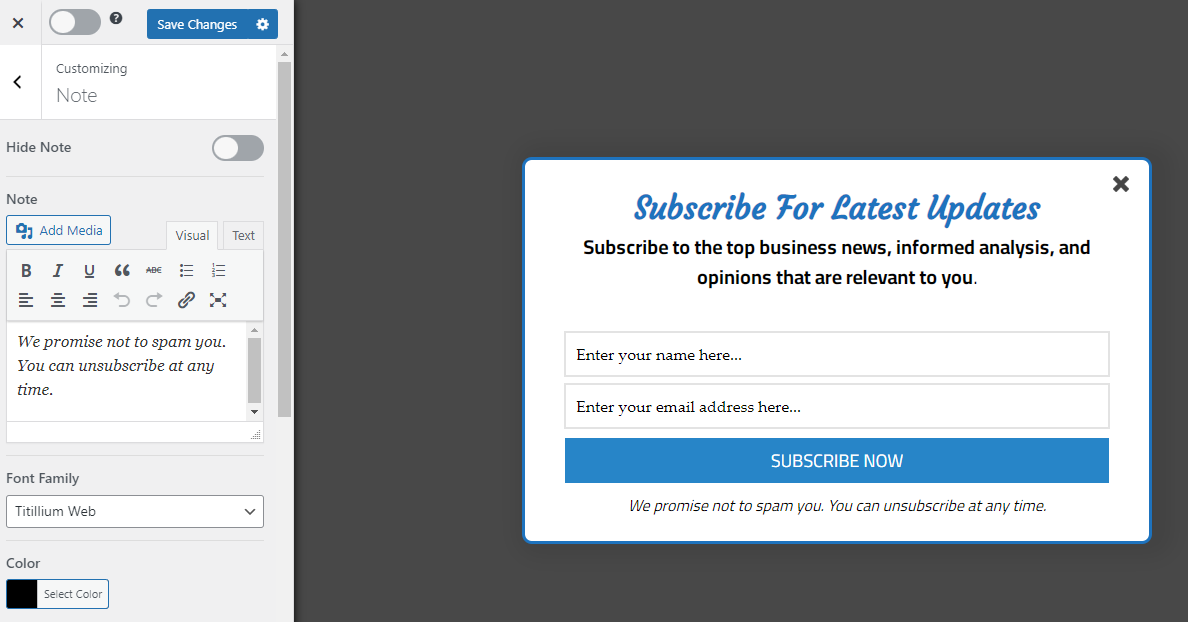
Note
In the note section, you have the option to hide the note section from your popup form, add media, modify the text color, size, and family, activate close Optin on click (which enables the opt-in form to close when the “note” is clicked), and allows an acceptance checkbox.
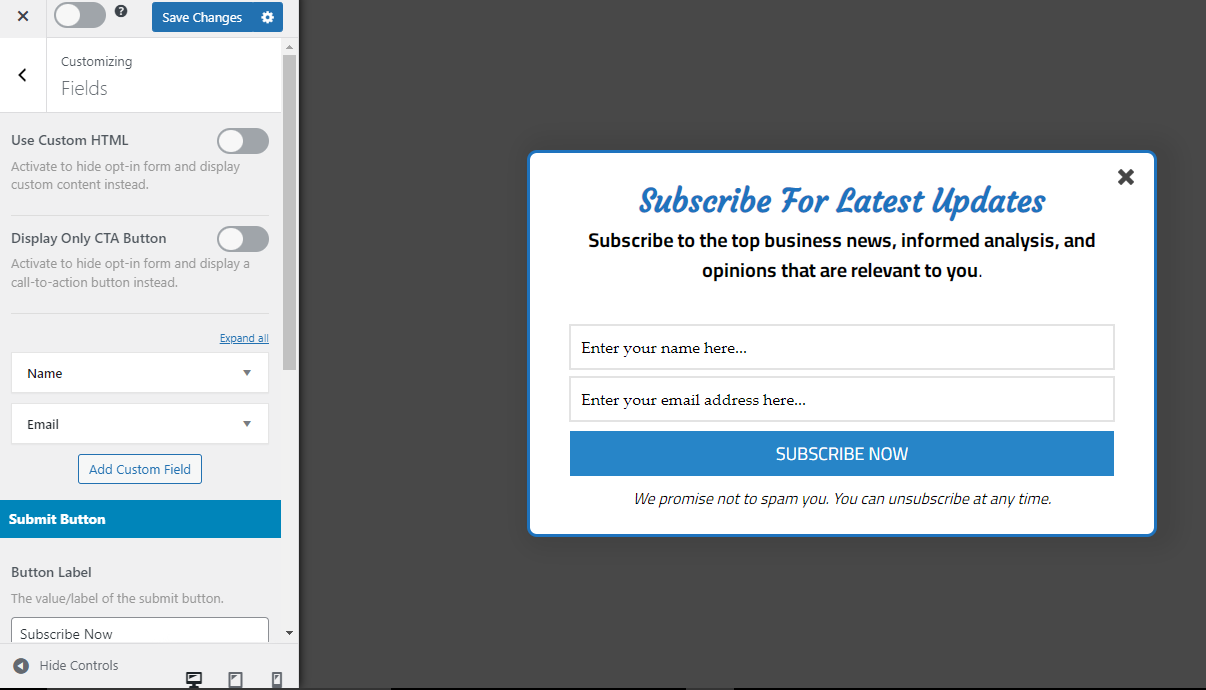
Fields
The field section of MailOptin provides an array of customizable options. In addition to inputting custom HTML, replacing opt-in forms with CTA buttons, and modifying the title, color, background, and font of the fields, there are other options to tailor your pop-up form to your preferences.
With the ability to add custom fields, make fields required, and edit the submit button, MailOptin’s field section can be fully leveraged to make your pop-up form unique and engaging for your visitors. These features give you complete control over the design and functionality of your pop-up form.
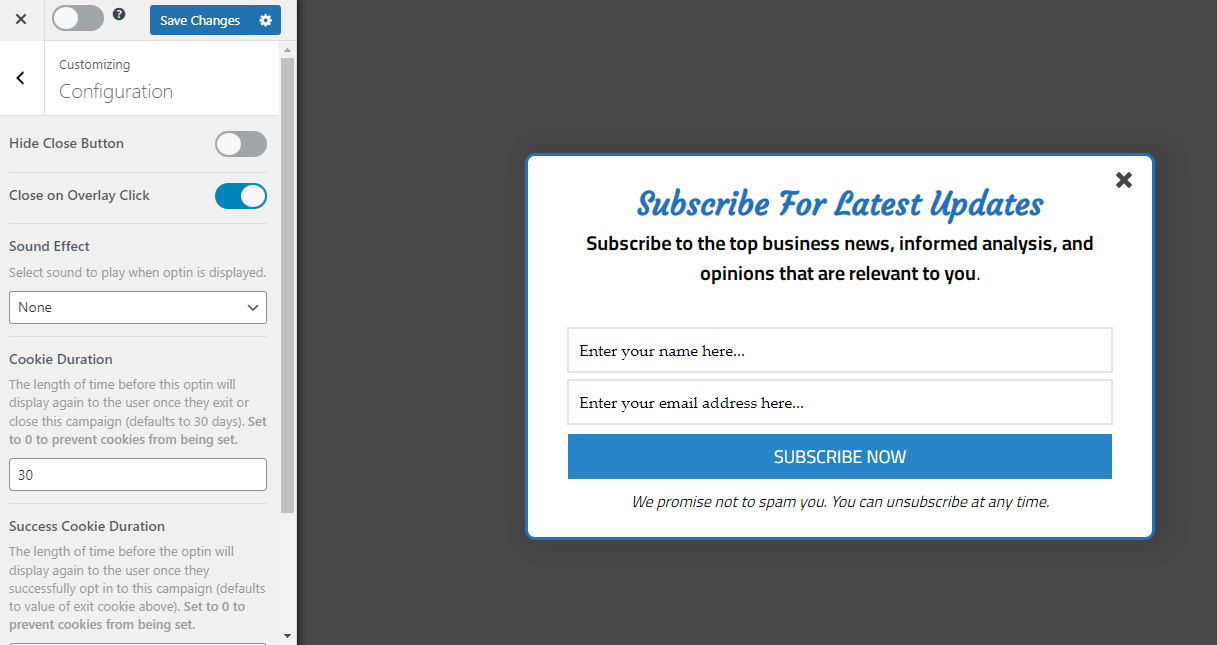
Configuration
In the configuration section, you can hide the close button, enable closing the overlay when clicked, choose the sound that plays when the popup form is displayed, set the cookie duration, set the success cookie duration, and remove the MailOptin branding.
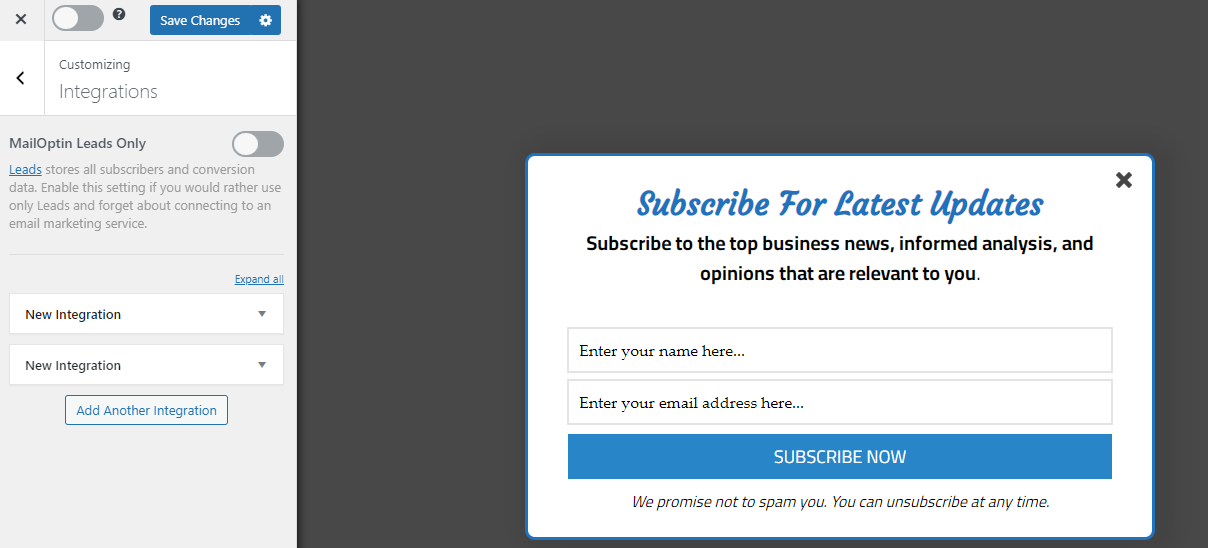
Integrations
The integrations section of MailOptin allows you to connect with your email marketing service provider.
MailOptin is compatible with various popular email marketing software and CRM, including Mailchimp, Drip, AWeber, ConvertKit, MailerLite, Constant Contact, GetResponse, Sendy, Campaign Monitor, ActiveCampaign, Sendinblue, Klaviyo, Sendlane, Mailjet, HubSpot, Ontraport, Moosend, MailPoet, Zoho CRM, Keap Max Classic (Infusionsoft) and CleverReach.
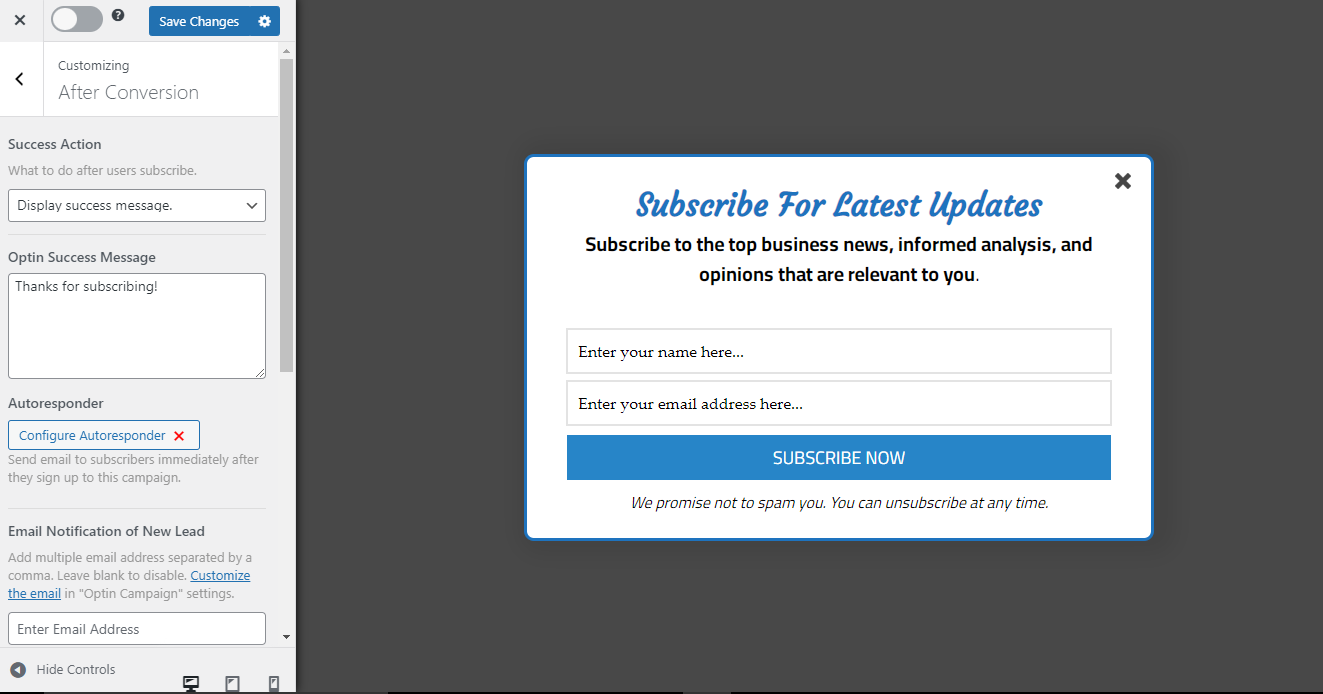
After Conversion
In this section, you can select the action to be taken upon successful completion, enter the Optin success message, set up an autoresponder, enable email notifications for new leads, and access the Success Triggered Script tab.
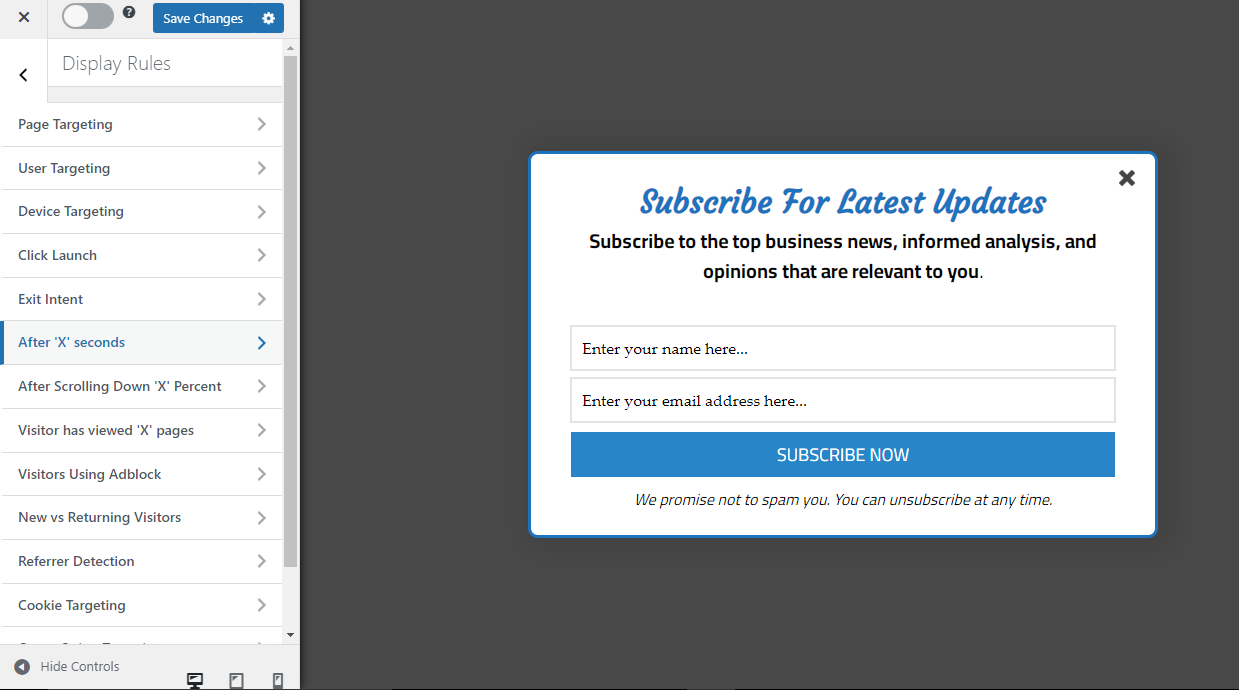
Display Rules
Timing is everything when it comes to Popup forms. Therefore, this section of MailOptin plays a significant role in enabling you to display popup opt-in forms precisely when a user is likely to take action and become a subscriber.
You can set triggers such as exit intent, scroll triggers, time on site, and pageviews to ensure that your popup form is displayed at the optimal time to capture the user’s attention and encourage them to sign up.
Let’s briefly look at the configuration available within the Display Rules section.
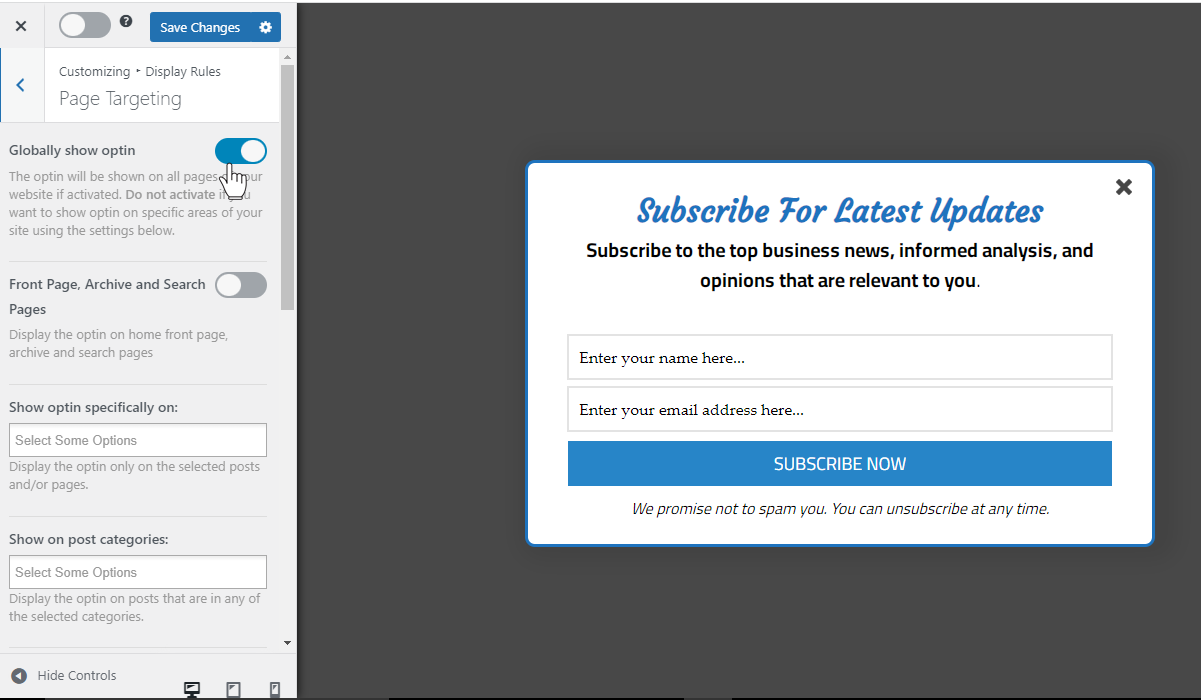
Page level targeting:
This allows you to control the pages, posts, categories, and custom post types where the Optin form will be included or excluded for display.
If you want the Optin to be displayed everywhere (all pages) on your site, check the “Globally show Optin”.
User Targeting:
Allows you to control who should see the Popup form.
Device Targeting:
This feature enables you to specify a particular device to target. For instance, you can display the popup form exclusively on the desktop view while concealing it from the mobile and tablet views.

MailOptin’s Display Rule section has other triggers to cause the Popup form to display, including click launch, exit intent, referrer detection, cookie targeting, scroll trigger, time on site, and the number of page views.
How To Publish Your WordPress Popup Form
Once you have made all the desired customizations to your Popup form, the next step is to activate it to start functioning as intended.
To do so, you need to navigate to the top right-hand corner of the screen, where you will find a switch that needs to be toggled to the right position. This action will signal to the system that you are ready to make your Popup form live.
It is important to note that before exiting the settings page, you should save all changes to your Popup form. This action will ensure that all your desired customizations are saved, and your newly activated Popup form is correctly configured.

At this moment, our WordPress popup form has been successfully activated based on the specific targeting and triggering rules that have been configured to meet our unique needs and preferences.
Below is a preview of our popup.

Conclusion
Popup forms are a highly effective tool for growing your email list, increasing engagement, and boosting conversions. By offering visitors a valuable incentive in exchange for their email addresses, you can generate more leads and turn those leads into paying customers.
MailOptin plugin provides an easy and effective way to create customizable WordPress popup forms.
Following the steps outlined in this article, you can create and activate a popup form tailored to your specific needs and preferences, complete with targeting and triggering rules that ensure optimal performance.
With the right strategy in place, MailOptin popup forms can be a powerful tool to boost your website’s engagement and drive meaningful results.
What are you waiting for? Take action now and get the MailOptin WordPress plugin today.