Do you want to open or trigger a WordPress popup display when a user clicks a button or link on your website?
When it comes to online marketing, one of the most effective ways to capture your audience’s attention is through popups. Popups can help you promote your products, grow your email list, and even provide a better user experience.
This article will focus on creating a WordPress popup on link and button click. This popup is triggered when a visitor clicks on a specific link or button on your website, making it an excellent way to increase engagement and conversions.
What is an On-Click Popup in WordPress?
An ‘On Click’ popup is triggered by a user clicking on a specific element on a website, such as a link or a button. When the user clicks on the designated element, the popup appears on the screen, often with a call-to-action (CTA) message or form.
On-Click popups are an effective way to capture a visitor’s attention and drive engagement and conversions, as they require an active action from the user to trigger the popup. This type of popup can be used for various purposes, such as promoting products or services, growing email lists, or providing additional information or resources to the user.
Benefits of Creating On-Click Popup
The on-click popup is a popular way for website owners to capture their audience’s attention and drive conversions. By appearing when a user clicks on a specific element on a website, such as a button or a link. Some of the benefits of creating On-Click Popups on your website are:
Improved User Engagement: On-Click Popups can improve user engagement by providing additional information or resources that the user may have missed otherwise. By appearing when the user has already shown some level of interest in the content or product, On-Click Popups can help to keep the user on the website for longer and increase their overall engagement.
Personalized Messaging: On-Click Popups can be highly targeted and personalized, allowing you to show users a specific message or offer based on their behavior or interests. This level of personalization can increase the relevance of the popup and make it more likely that the user will take the desired action.
Increased Conversions: Ultimately, the goal of any marketing strategy is to increase conversions. On-Click Popups can help to achieve this goal by providing a clear and compelling call-to-action (CTA) that encourages the user to take the desired action, such as subscribing to a newsletter or purchasing a product. Using On-Click Popups strategically, website owners can increase conversion rates and drive more revenue.
Easy to Implement: Creating On-Click Popups has never been easier, thanks to WordPress plugins like MailOptin. You can create and customize a popup that matches your website’s design and branding with a few clicks. This ease of implementation makes On-Click Popups a valuable tool for website owners who want to improve engagement and conversions without spending much time or resources.
Having understood the benefits of using a WordPress On Click PopUp, let’s learn how to make one!
Creating an On-Click Popup in WordPress
The easiest way to create an on-click popup is by using MailOptin. It is a user-friendly WordPress popup plugin that serves as a powerful lead generation and email automation software and offers an efficient means of creating on-click popups.
With MailOptin, you can easily design and customize your popups and set triggers to make them appear when visitors click a link or button.
Install and Activate MailOptin Plugin
To get started, you’ll need to purchase a MailOptin license and install the plugin on your WordPress site. To do that, head to the MailOptin website to purchase a license plan.
Upon completing your purchase, you will receive a confirmation email with a link to download the plugin zip file and your license key. You can also download the plugin from your account page on the MailOptin website.
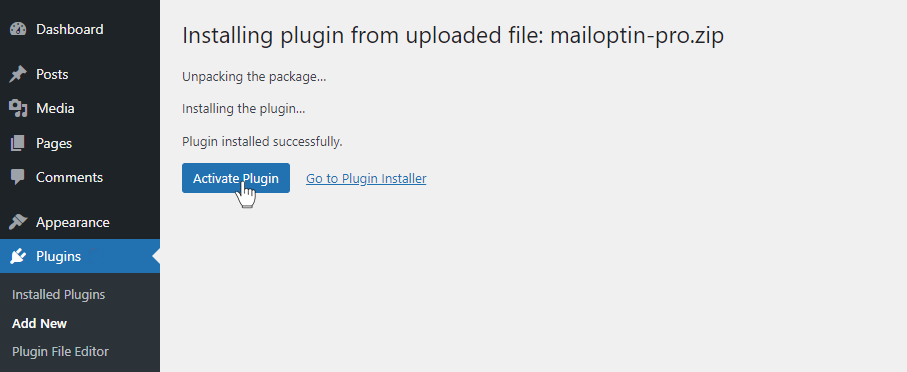
Now that you have the MailOptin plugin downloaded to your computer, the next step is to install it onto your WordPress website.
Login to your WordPress admin dashboard, navigate to the Plugins page, click the Add New button, and click Upload Plugin. Next, click Choose File to select the previously downloaded plugin zip file. Click Install Now.

Wait a few seconds for the installation to be completed. Once the plugin is installed, click on Activate Plugin to activate it on your site.
Once the plugin is activated successfully, you will now need to enter your license key to activate the premium features of MailOptin, giving you access to a wide range of options and customization settings.
From the dashboard left side menu, click on MailOptin, then go to the plugin settings page and click on License, then type or paste the license key given to you when you purchased the plugin in the field and click Save Changes.
Now that we have set up MailOptin on our WordPress Website, it’s time to move on to the next step.
Creating an On Click Popup
MailOptin Click Launch feature enables you to display an On-Click Popup whenever a visitor or user of your website clicks on a link or button. This feature can only be used with lightbox, slide-ins, and notification bar optin forms.
In this section, we’ll demonstrate how to create an On-Click Popup utilizing the MailOptin Click Launch feature, available within the lightbox optin forms.
To begin, access the WordPress dashboard and go to MailOptin > Optin Campaigns.

Then, click the Add New button at the top of the page.

Next, you’ll see a box where you can type in a name for your Popup Form. You can choose any name you like, such as “Subscribe” or any other name that fits the purpose or message of the form. Then select Lightbox optin type.

MailOptin offers many ready-made popup designs for you to look at and pick from. These themes are professionally designed to make your website attractive and exciting so visitors will notice and engage with them.
Click on the lightbox theme you desire to use, and you will be redirected to the form builder.
For this guide, we’ll use the Elegance theme, So click on the elegance theme.
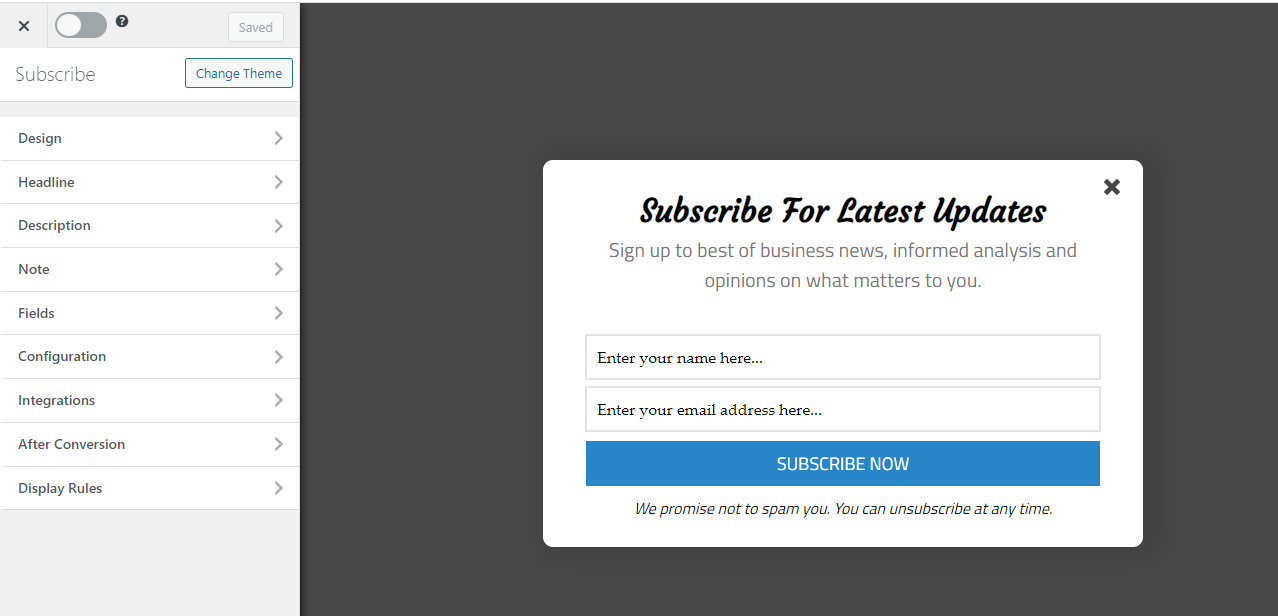
On the left side of the Popup Form Builder, various sections offer the necessary tools to personalize our popup form. These sections include Design, Headline, Description, Note, Fields, Configuration, Integration, After Conversion, and Display Rules.
We’ll concentrate on the Display Rules Section to make an On Click popup.

Click on “Click Launch” and activate the rule.

Once finished, copy any shortcodes or HTML code and paste it onto the page or post where you want to provide an On Click Popup form.
Remember to turn on the opt-in form (by moving the switch from the top-left corner to the right) and save your changes.

Let’s go over the shortcodes and HTML code available in detail
Simple Shortcode
The shortcode is like this:
[mo-click-launch id="SXwniuqHRR" link="Click Me!"]“SXwniuqHRR” is the unique identifier for the opt-in, and “Click Me!” is the text for the link that you can modify if you want.
Here is how to implement the simple shortcode on a page using the WordPress block editor:
Copy the simple shortcode > then go to the page you want to insert the popup > Click on edit > In the WordPress block editor, add a “Shortcode” block. You can find this block by searching for “Shortcode” in the block inserter or scrolling through the “Widgets” category.

Next, add the Shortcode block by dragging it to the desired section of your page. Once you’ve added the Shortcode block, a field will appear where you can enter your shortcode.

Paste the copied simple shortcode into the shortcode block. Then save your changes and preview the page.

Note: “Click Me!” is the label or anchor text, and you can change it.
Advance Shortcode
This shortcode allows you to make elements besides a link trigger an optin display, such as images, call-to-action buttons, videos, and even shortcodes from other plugins that output some form of content.
Say you want to make a button or an image trigger an opt-in form display when clicked. Here’s how the advanced shortcode can be used.
Button:
This example assumes your theme has a button shortcode:
[mo-click-launch id="SXwniuqHRR"]
[button type="button" label="Click Me!"]
[/mo-click-launch]
Image:
[mo-click-launch id="SXwniuqHRR"]
<img src="https://mailoptin.io/img/smiley.gif" alt="Smiley face">
[/mo-click-launch]
You can even use it for links similar to the simple shortcode above like so:
[mo-click-launch id="VJSIJmCgLN"]Click Me![mo-click-launch]HTML Code
By utilizing the HTML code, you can incorporate your OnClick popup into your website using an HTML link.
If you are uncomfortable using shortcodes or have personal reasons to prefer using the HTML link, feel free to use it.
Here is the code:
<a href="#" class="mailoptin-click-trigger" data-optin-uuid="SXwniuqHRR">Click Me!</a>Here is how to implement the HTML code on a page using the WordPress block editor:
First, you should copy the HTML code. Next, navigate to the page where you wish to add the popup. Then, select Edit.
In the block editor, add a “Custom HTML” block. You can find this block by searching for “Custom HTML” in the block inserter or scrolling through the “Widgets” category.

Once you’ve added the Custom HTML block, you’ll see an area to enter your HTML code. Then, paste the HTML code you copied into the block.

You can change the label/anchor text “Click Me!” by removing click me! And replace it with the label/anchor you want. For instance, let’s change it to “Get More Info”.

Now save your changes and preview the page to see how the HTML code will be displayed on the front-end of your website.

Trigger a Popup on Clicking a WordPress Navigation Menu
MailOptin has a feature that allows you to trigger an opt-in or open a popup by clicking on a WordPress navigation menu item. This functionality will enable you to deliver targeted content or capture user attention more interactively and dynamically. All you need is a class for the opt-in that includes the opt-in’s UUID.
Follow these steps in setting up a popup triggered by a WordPress menu click:
Activating Click to Launch
Navigate to the Display Rules section of your opt-in and activate the Click Launch rule.

Getting the Unique User ID
When the Click Launch is activated, the next step is to add a CSS class to the menu item with the opt-in’s Unique User ID (UUID). The ID can be found in the Click Launch window. In the image below, the UUIID is “SXwniuqHRR”.

Adding the CSS Class
Access the WordPress admin panel and navigate to the theme customization tab. In this article, we will demonstrate the process using the Astra theme.

Select the Customize option, which will open a new window. From there, navigate to the Menus section and click on it.

In the menu item settings, locate the menu item to which you want to attach the popup. This could be an existing menu item or a new one.
Next, add a custom link.

Type “#” in the URL field, type your preferred label for the menu item, and next, add this CSS class with your opt-in’s UUID.
mailoptin-click-trigger-SXwniuqHRRReplace “SXwniuqHRR” with your optin’s UUID and save the menu.
When you are done, click on Publish to save your changes
Note: In case you cannot see the CSS Classes field, you will need to enable it through the Screen options on the left side of the screen.

Conclusion
Having On Click popups on your website is a great way to increase how long users stay on a page. It also allows them to interact with your website differently than they usually would.
This article has provided a comprehensive guide on creating a WordPress popup on link and button click using MailOptin, allowing you to leverage the power of popups to captivate your audience’s attention.
MailOptin plugin has a user-friendly solution that lets you create and customize popups, choose when they appear based on link and button clicks and effectively get your audience’s attention.
So what are you waiting for? Get MailOptin Plugin today!