Are you getting traffic but have few email subscribers? Are your visitors leaving your website before you can convert them to subscribers?
According to research, over 60% of users will leave a website almost immediately when they arrive, and over 70% of people who leave your website will never return. This is a lot of people who could have become a subscriber or customer.
But do not fret because we have a solution for you. With an Exit Intent popup, you can convert abandoning website visitors, grow your email list, and improve conversion rates.
In this article, you will learn about exit intent popups, their importance, and how to add them to your WordPress site easily.
What is an Exit Intent Popup?
Exit intent popups appear on the screen when a visitor attempts to leave a website. Exit intent popups will detect a visitor’s intent to leave your website by monitoring the cursor and then show a popup message on the screen to convert these visitors before they leave your website.
The message displayed to the user could be a signup form, a special offer, a freebie download, or an invitation to an event or training. The more enticing the offer, the higher your chances of converting your site visitors and growing your email list.
Why Do You Need an Exit Intent Popup for WordPress?
Before we dive into the process of adding exit-intent popups to our site, let’s look at why you need an exit-intent popup on your website.
- Boost Conversions – Exit intent popups are great for boosting conversion rates and capturing abandoning visitors. If your popup message and offer are compelling enough, then you will get to convert many of these passive visitors into leads or customers.
- Reduced Cart Abandonment – Do you have an online store with many cart abandonments? That is people who start the buying process but never complete it; with an exit intent popup, you can entice your customers to return to complete their purchase by offering them a discount or coupon just before they leave your website.
- Attention Grabbing – Exit intent popups are had to miss by your visitors. They instantly grab their attention before they are gone forever. With an exit intent popup, you can be sure that each abandoning visitor will see your message just before they leave your site, and this can help you to boost your email optin rates and grow your sales.
Let us now look at how to add an exit-intent popup to a WordPress site.
How to Add Exit Intent Popup to a WordPress Website
So far, we have learned about exit intent popups and why we need them on our website. Next is to see how to add these popups to a WordPress site.
To add an Exit Intent popup to your site, you will need the help of an email marketing plugin such as MailOptin.
MailOptin is one of WordPress’s most popular Lead Generation & newsletter plugins. It gives you all the tools you need to grow and automate your email list. It allows you to create, customize, and showcase professional opt-in boxes on your WordPress site. It is straightforward to use and comes loaded with many useful features.
MailOptin comes with an exit-intent technology that tracks visitors’ behavior and mouse movement on your site and detects the exact moment visitors are about to leave. If you are ready to capture abandoning visitors, MailOptin is the perfect tool.
In the sections below, I will show you how to install and activate MailOptin, set it up, and use it to create exit intent popups.
Install and activate the MailOptin plugin.
The first step is installing the MailOptin plugin, which you can easily do from your WordPress dashboard.
You will need to purchase a MailOptin License and install the MailOptin plugin. To do that, head to the MailOptin website to purchase a suitable license plan.
After purchasing your copy of the MailOptin Plugin, you will receive a confirmation email with a link to download the plugin zip file and your license key. You can also download the plugin from your account page on the MailOptin website.
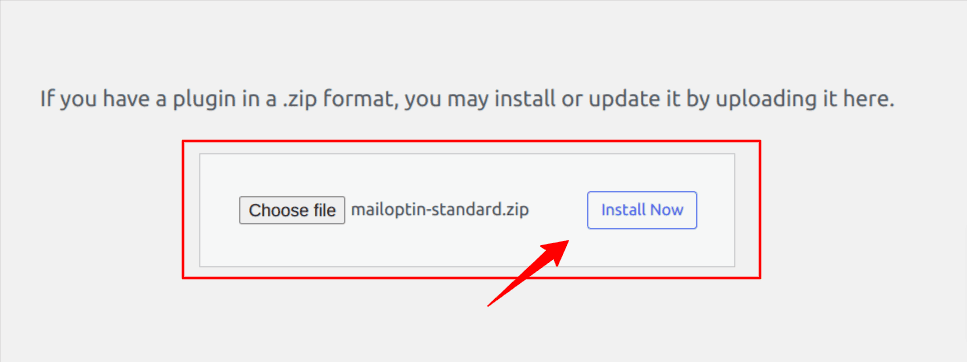
Once you have downloaded the plugin, login to your WordPress admin dashboard, and navigate to the Plugins page; click on the “Add New” button and click “Upload Plugin“. Upload the zip file and install and activate the plugin on your WordPress site.
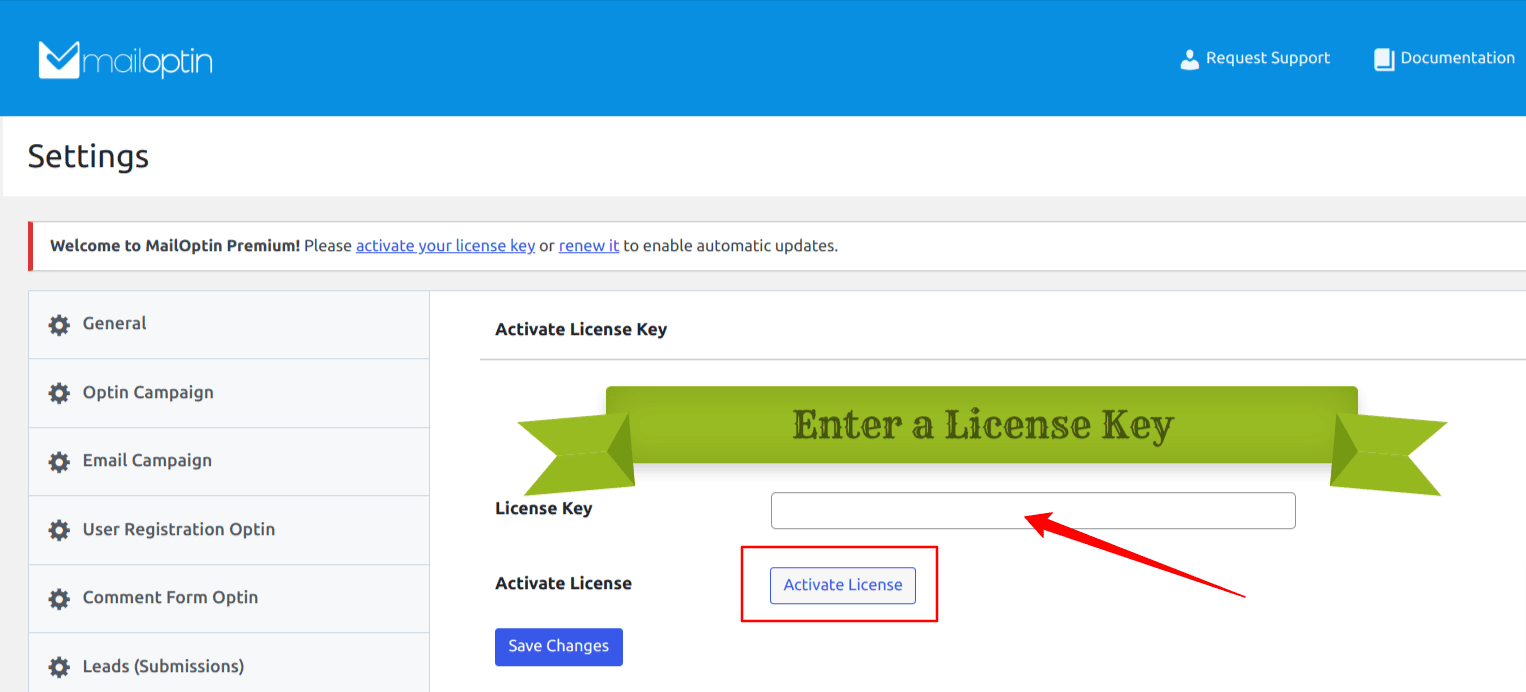
Next, activate the plugin by providing the license key previously sent to your email.
Once the plugin is activated, we can create our optin forms.
Create a New Campaign and Activate Exit Intent
Before adding an exit intent popup, you must create a new campaign in MailOptin.
Go to MailOptin > Optin Campaigns > Add New, then name the campaign. Next, select Lightbox type.
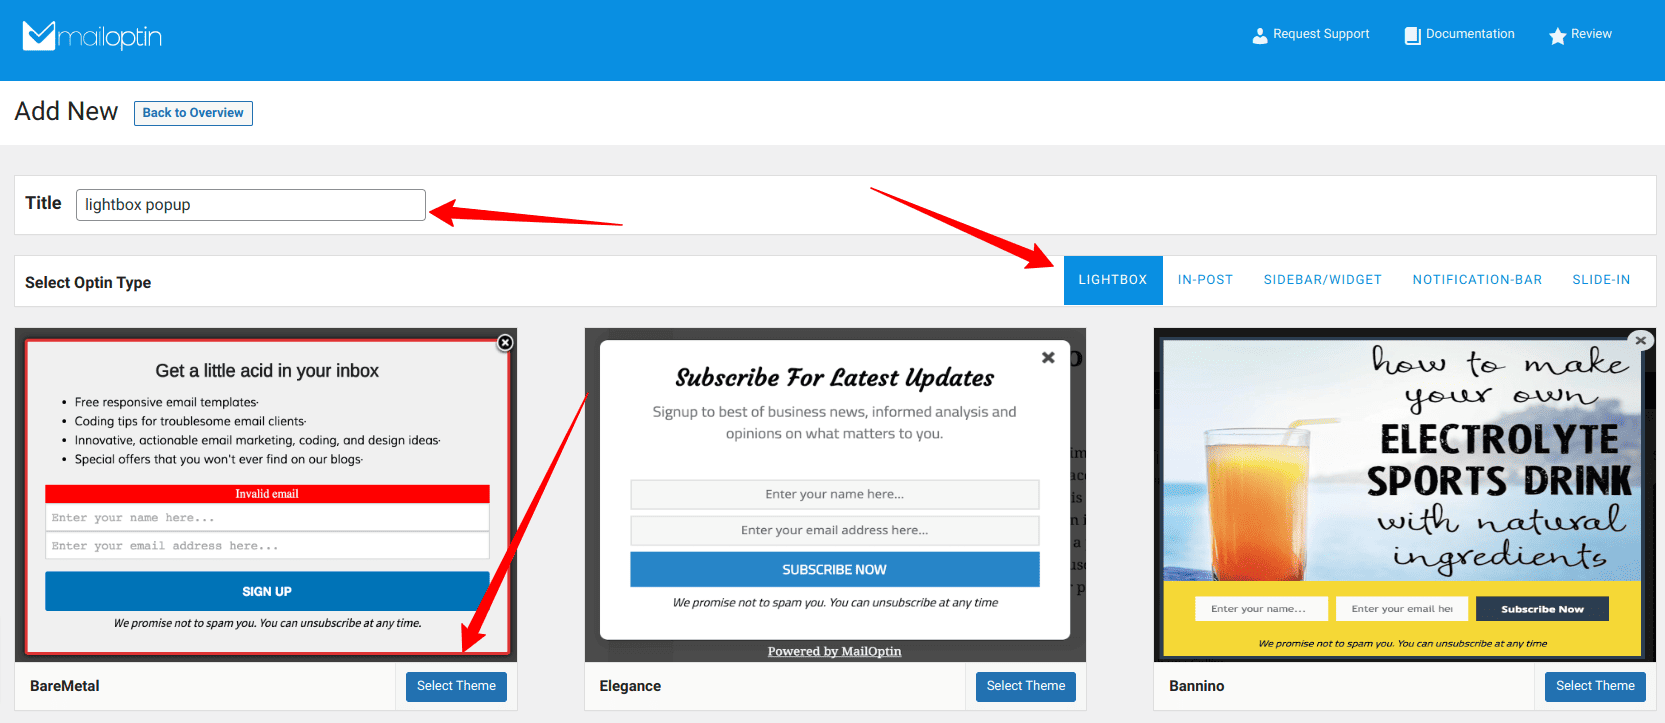
Once you select a desired template, you will be taken to the form builder page, where you can customize the lightbox popup subscription form.
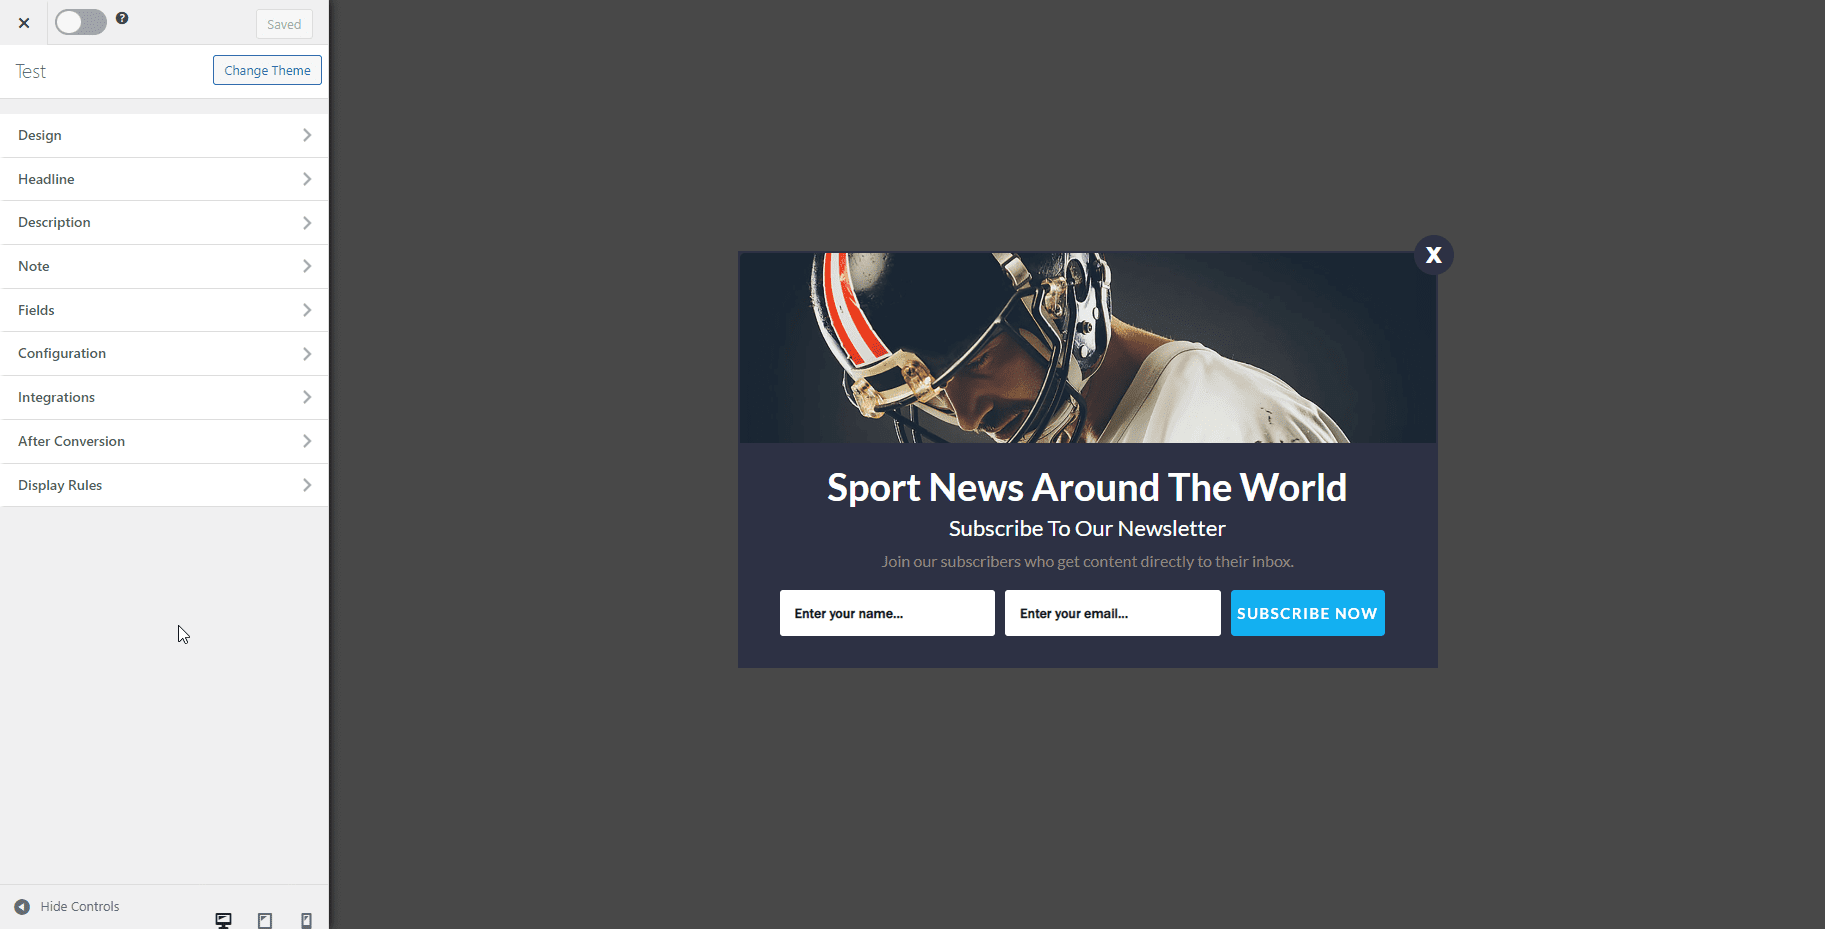
Use the various options available on the side panel to customize the appearance and behaviors of your lightbox form.
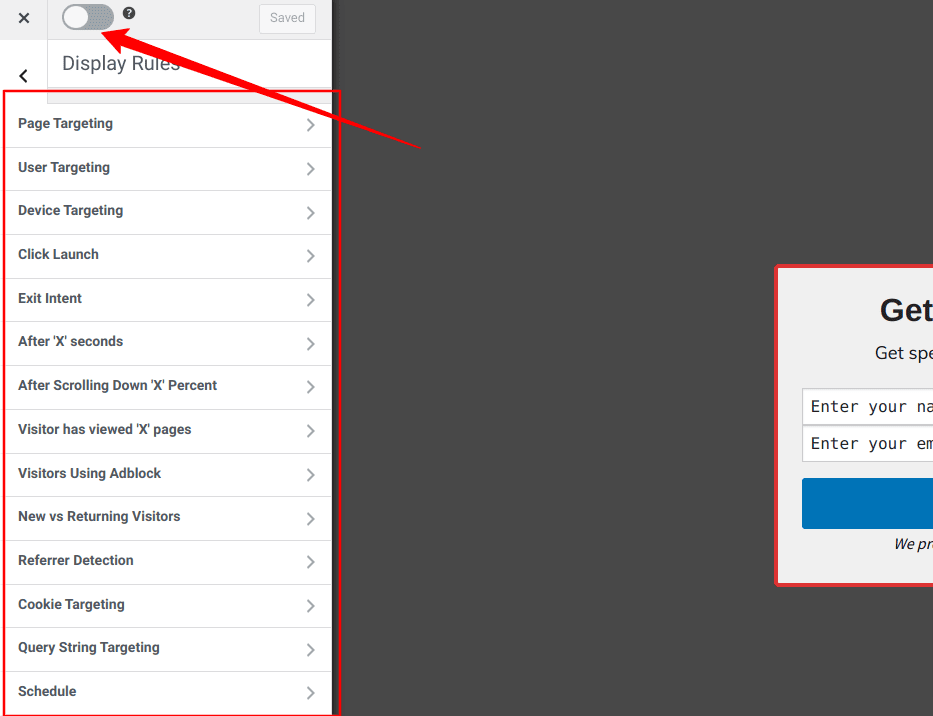
Go to the “Display Rules” to configure where and how your popup subscription should be displayed. Various targeting levels are available at your disposal, such as Page targeting, Device targeting, Exit intent, cookie targeting, and more! MailOptin has a lot of options for you.
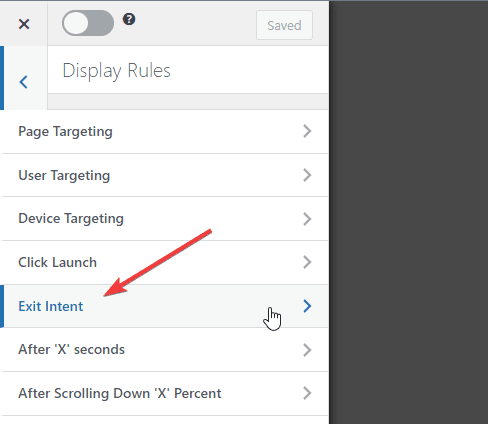
Now, select the Exit-Intent option:
And click the Toggle button to enable the Exit-Intent trigger:
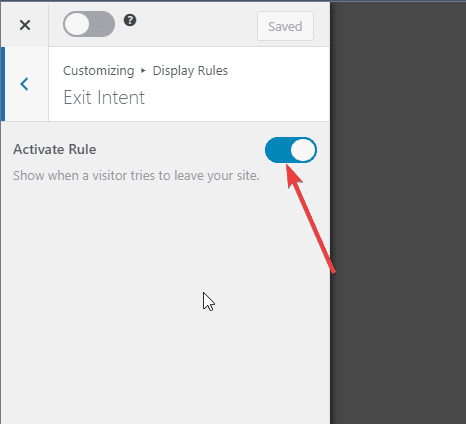
Your popup will only be displayed when the visitor tries to leave your website.
Publish Your New Popup
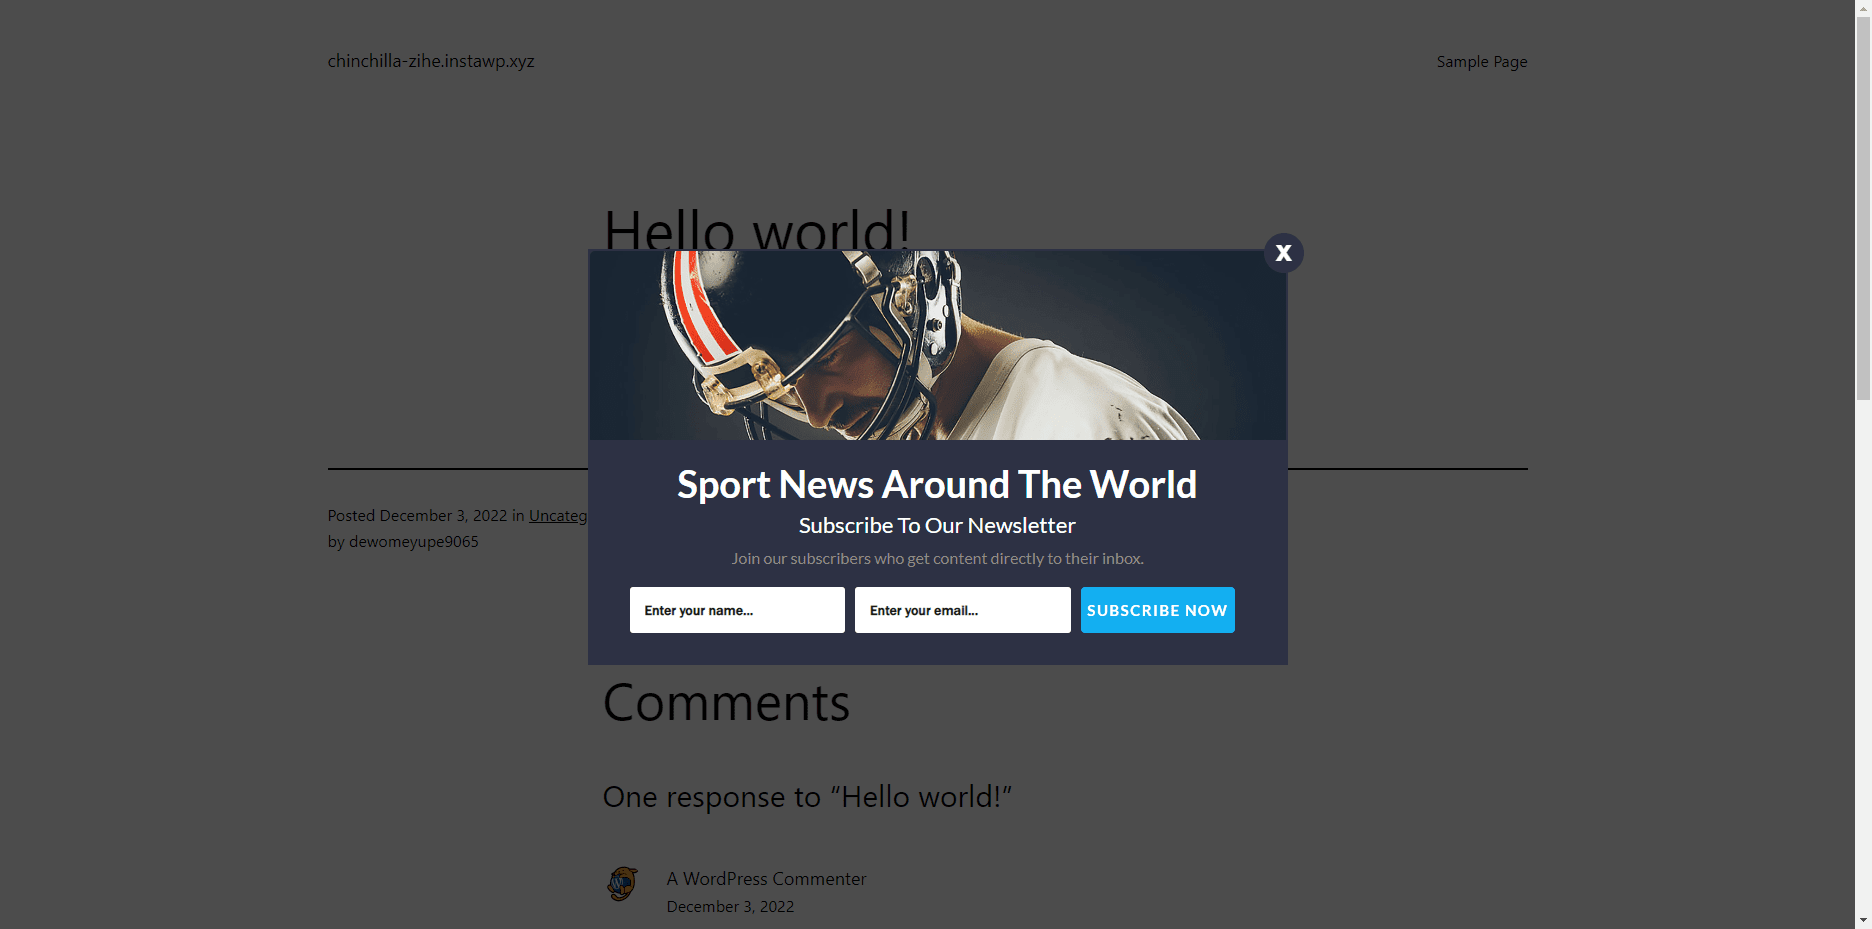
To publish your popup, you’ll need to enable the big toggle button on the top left of your screen:

Now, visit your website in incognito mode. You’ll see your popup as soon as you try to close your website:
Customizing Your Exit Intent Popup
Using the options available on the form editing page, you can customize the opt-in form appearance and feel on the front end of your WordPress site.
Design Panel
Click on the Design tab to customize the background color of your opt-in form. You can customize the typography using the Headline and Description menus and set text colors.
The design section allows you to customize the design of your popup.
Here’s what all the options do:
- Optin Width: Choose how wide your popup is.
- Display Effect: You can add a basic animation to your popup. The animation only plays once when the popup is displayed.
- Hide Image: If the popup you chose has the option to add an image, you can choose to hide it.
- Image: Add an image to your popup. If you are using a lead magnet to get your visitors to subscribe, you can add a screenshot of the lead magnet here.
- Custom CSS: You can add your own custom CSS here if you want. This allows you to customize all aspects of your popup.
Headline Panel
The headline section allows you to customize everything that has to do with the Headline of your popup. You can adjust the settings below:
- Hide Headline: Don’t want to display a headline in your popup? Check this option.
- Headline: You can use WordPress’ WYSIWYG editor to customize the look of the headline.
- Color: The color of your headline text.
- Font Size: You can select different font sizes for different screen sizes.
- Font Family: You can change the font family of your heading to any Google Font you want.
Description Panel
The description section allows you to customize the subtitle or description you see under the headline of your exit-intent popup. You have various settings for customizing your description.
- Font Family: Change the font family of your popup’s description text. Use this to change the font family to match your website’s font family.
- Description: The text that is displayed.
- Color: The text color of the text.
- Font Sizes: Use this option to select different font sizes for different screen sizes.
Note Panel
The Note section allows you to add content, paragraphs, or notes to your popup form. This note is displayed beneath the description on the form.
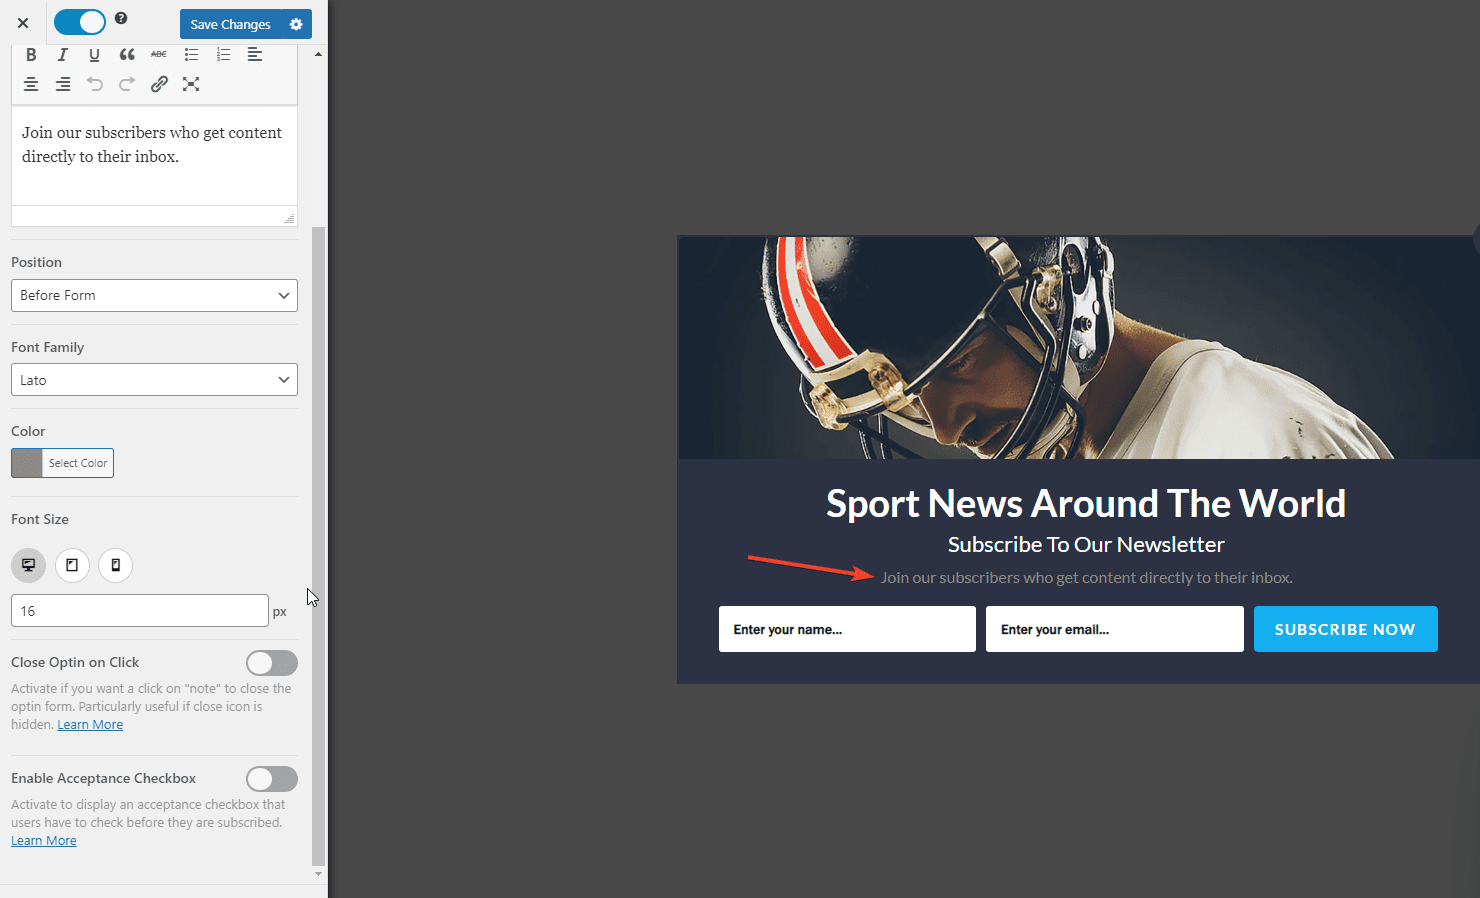
- Note: The note text that is displayed.
- Position: Whether to display the note before or after the form.
- Font Family: The font family of this note text.
- Color: The color of this text.
- Font Size: Use this option to select different font sizes for different screen sizes.
- Close Optin on Click: Use this option with the Position option to create a link-based close button.
- Enable Acceptance Checkbox: Convert this note text into a checkbox. Your visitors will need to check this checkbox before they are allowed to sign up.
Integration Panel
The integration section is one of the most essential sections of building an exit-intent popup form. This section allows you to connect your popup to an email marketing platform, such as MailChimp, Salesforce, Microsoft Dynamics 365, Drip, AWeber, ConvertKit, MailerLite, Constant Contact, GetResponse, Sendy, Campaign Monitor, ActiveCampaign, Brevo (Sendinblue), Gist, Klaviyo, Sendlane, Mailster, Vertical Response, Mailjet, HubSpot, Ontraport, Moosend, MailPoet, and many more which are readily available in MailOptin.
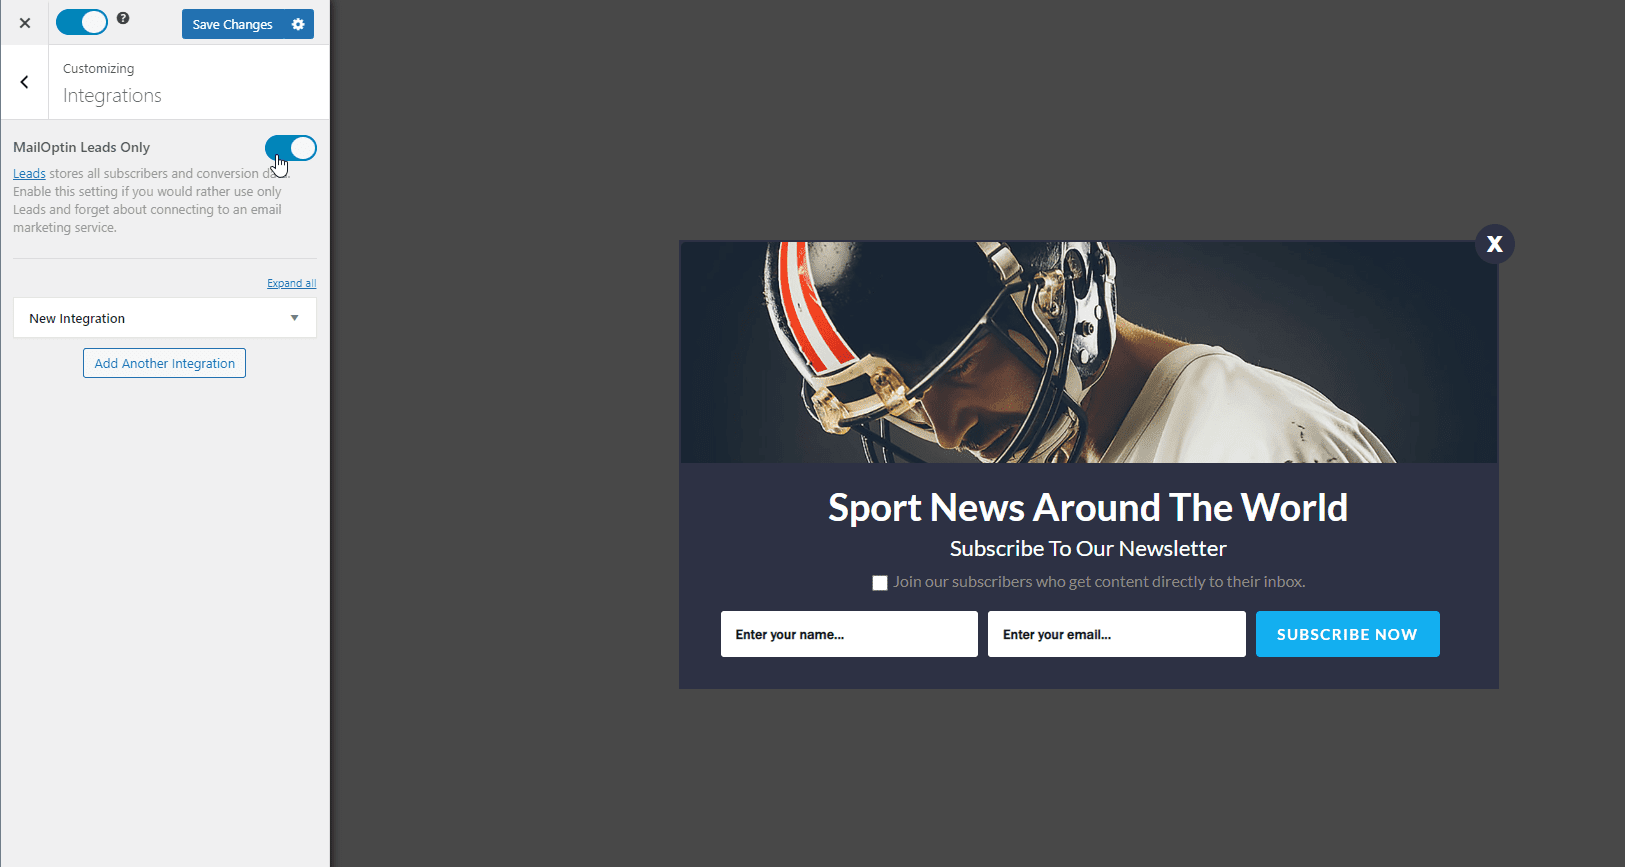
Once connected, all your new leads will be automatically added to your email marketing platform. If you don’t want to integrate a platform right now, you can enable the MailOptin Leads Only option. This option saves all your leads in your website’s database. You can then export and import them into your email marketing platform.
You can also look through each of the other sections on the customization panel to adjust the look and behavior of your popup.
You may not bother with customizing the popup as MailOptin comes with a lot of usable design templates, the important thing is to activate the “Exit Intent” option from the “Display Rules” panel, and you will immediately have a good Exit-intent popup form on your website.
Conclusion
In this article, we have looked at What Exit intent popups are, why you should use them, and how to add them to your WordPress site.
Exit-intent popups are a great way to capture abandoning visitors, grow your sales, and increase your subscribers. Luckily, you can quickly add one to your WordPress site with the help of the MailOptin plugin.
To achieve the best result with your popups, ensure you make the offer irresistible to your visitors so that even though they are about to leave, your offer with grab their attention and get them to stay or subscribe to your email list, where you can follow them up.