If you sell products online, you know that sending an invoice is crucial to completing a sale. This confirms the purchase for the customer and helps you keep track of transactions and sales.
Generating invoices manually can be time-consuming and frustrating. However, if your online store uses WordPress, there’s a plugin that can help streamline the process.
In this article, I’ll show you how to use the ProfilePress plugin to set up a paid membership site and automatically generate PDF invoices for your customers.
What is ProfilePress?
With ProfilePress, you can easily sell digital products, create membership sites, and manage your website content.
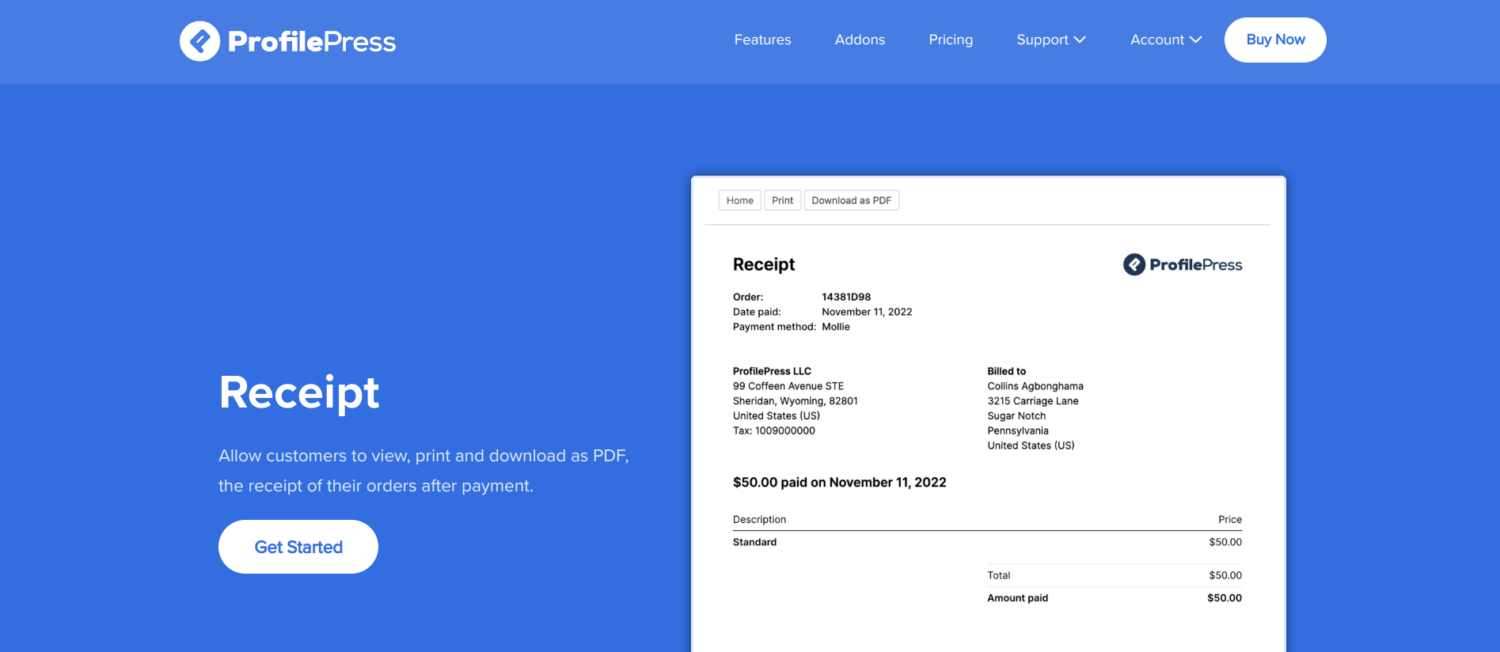
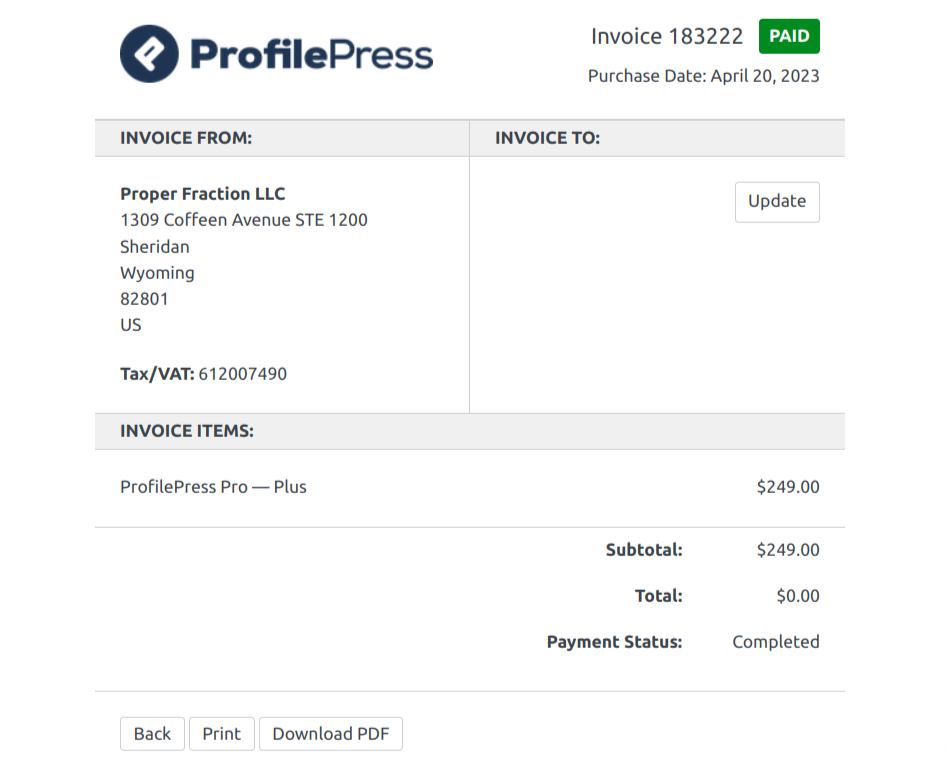
This eCommerce and WordPress membership plugin also features a Receipt addon that generates attractive and comprehensive purchase receipts for your customers. Once a purchase is complete, customers can easily access and download their PDF invoices.
Why Create PDF Invoices?
There are numerous reasons why you should generate an invoice for your customers, but we will take a look at a few of them in this article.
- Order Information: Generating an invoice is an excellent way to provide an overview of the important information regarding an order. The invoice will provide information such as date, quantity, price, etc., which are important information to your customers.
- Record Keeping: Creating invoices in WordPress is a good form of record keeping. Invoices can help you to keep track of sales and transactions by automatically attaching PDF invoices to internal email notifications.
- Customer Experience: Sending a PDF invoice to your customer’s mailbox or offering a downloadable PDF on the order confirmation page is a good way to improve customer experience. This will allow the customers to confirm that you have successfully received their orders and improve your site credibility.
How to Make PDF Invoices in WordPress
As you know, invoices are created when a purchase has been made, so before we can make a PDF invoice, there are a few things we will need to do. So, we will follow the steps below to achieve our goal.
- Installing the ProfilePress plugin
- Setting up a payment gateway
- Creating a membership plan & the checkout process
- Setting up and generating the PDF Invoice
How to Install and Activate ProfilePress
The first step in the process will be to install and activate the ProfilePress plugin. You will need to purchase a ProfilePress Pro License and install the ProfilePress plugin. To do that, head to the ProfilePress website to purchase a suitable license plan.
After purchasing your copy of the ProfilePress Plugin, you will receive a confirmation email with a link to download the plugin zip file and your license key. You can also download the plugin from your account page on the ProfilePress website.
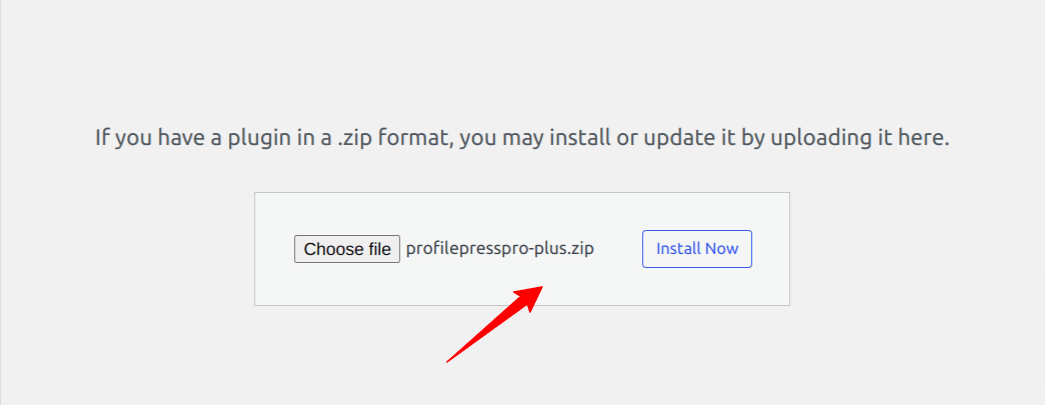
Once you have downloaded the plugin, login to your WordPress admin dashboard, and navigate to the Plugins page; click on the “Add New” button and click “Upload Plugin“.
Next, click “Choose file” to select the previously downloaded plugin zip file. Finally, click “Install Now.”
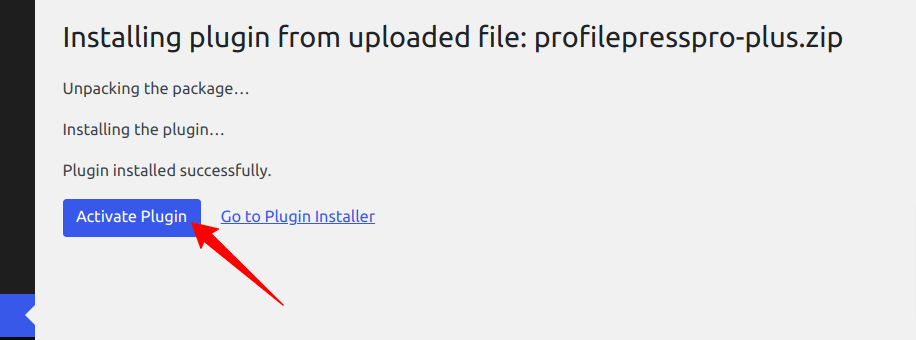
After installation is complete, click the Activate Plugin button.
At the top of the page, you will see a notification that says, “ProfilePress needs to create several pages,” Click on the “Create Pages” button to complete the plugin setup.
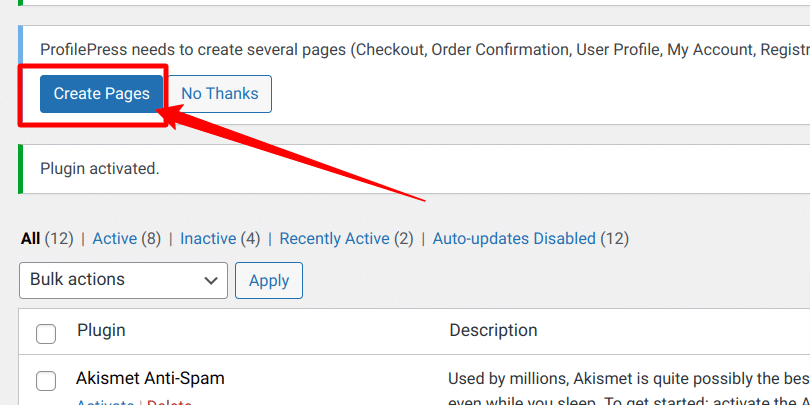
If you do not see this notification, navigate to ProfilePress > Dashboard and click the “Create pages” button to complete the plugin setup.
With this done, we have completed the initial setup of the ProfilePress plugin on our WordPress site.
How to Setup a Payment Gateway
In order to successfully process orders, it’s essential to have a payment collection system in place.
This article will guide you through using Stripe, which is integrated with the ProfilePress plugin, to collect payments.
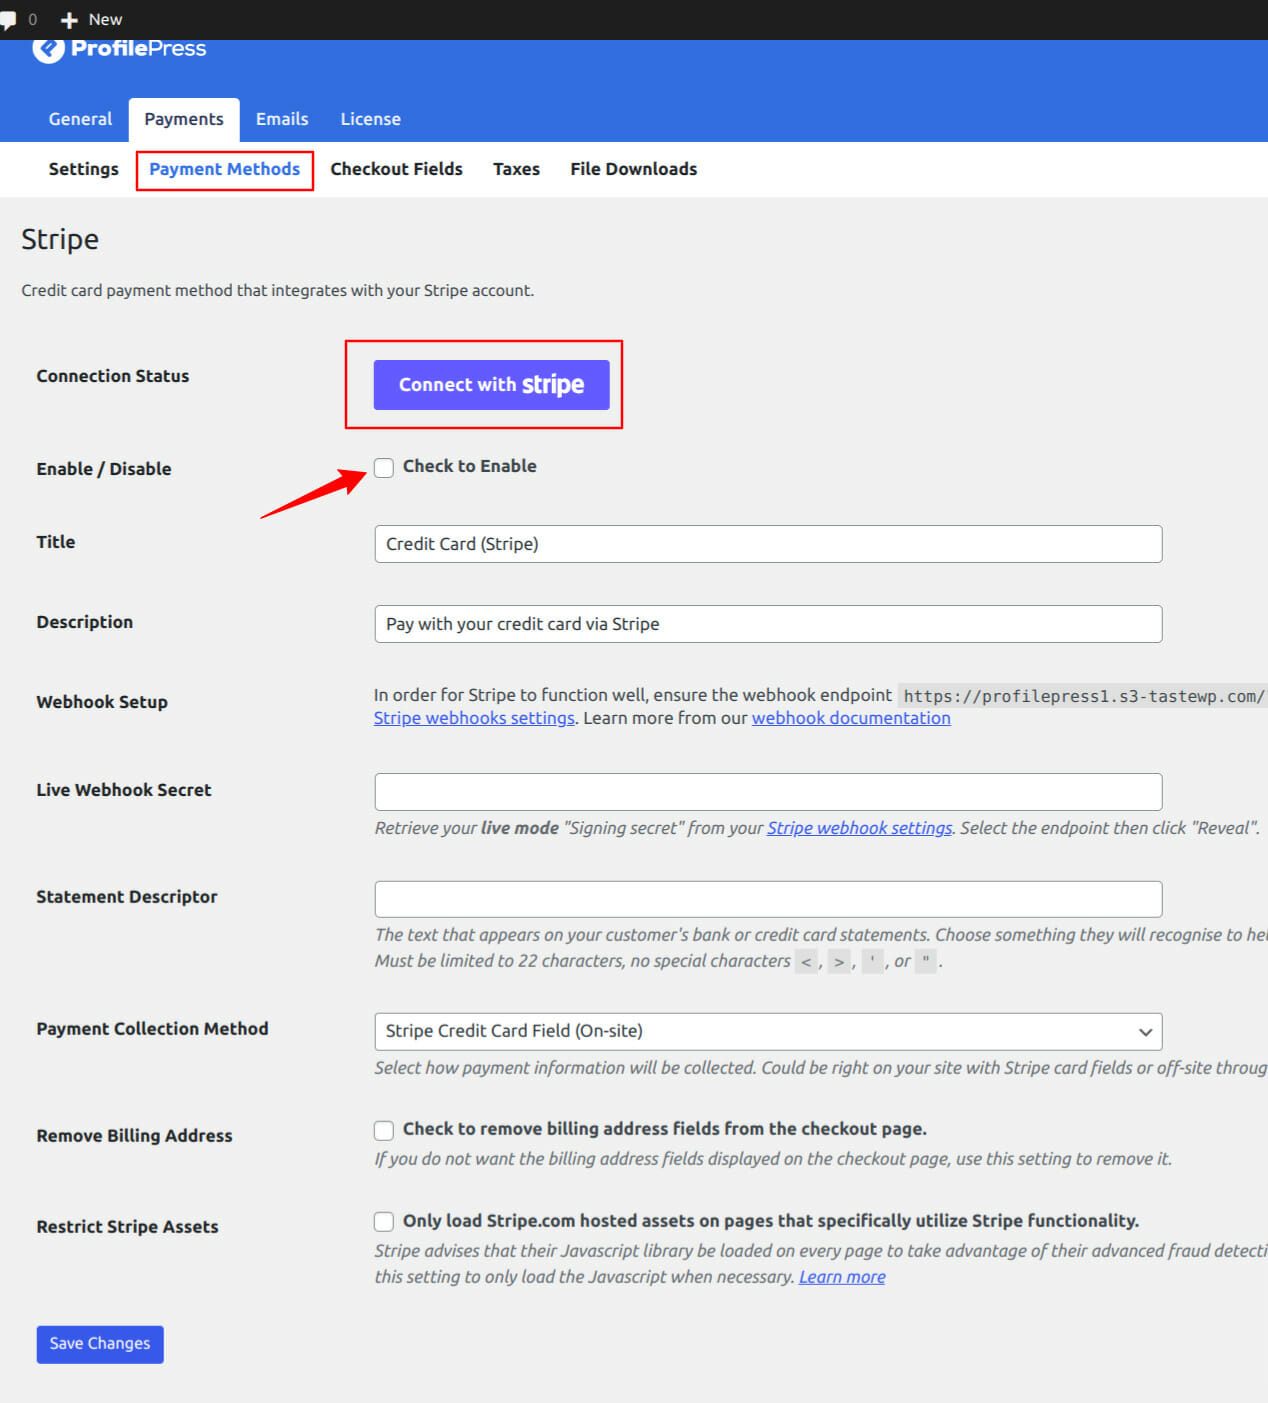
To configure Stripe payments on your website, navigate to ProfilePress > Settings > Payments > Payment Methods and select Stripe.
Click on the “Connect Stripe” button, follow the on-screen instruction, and you’ll be ready to accept credit card payments from your customers.
Aside from Stripe, ProfilePress supports other popular payment gateways like PayPal, Razorpay, Paystack, and Mollie.
Creating Membership Plans & Checkout Process
Now that we have a way to collect payments for our products, the next thing is to create the products that will be sold to our customers. In this example, we will be making a digital product or digital downloadable for our customers.
Go to ProfilePress >> Membership Plans to create a new membership plan or open up the edit screen of an existing one.
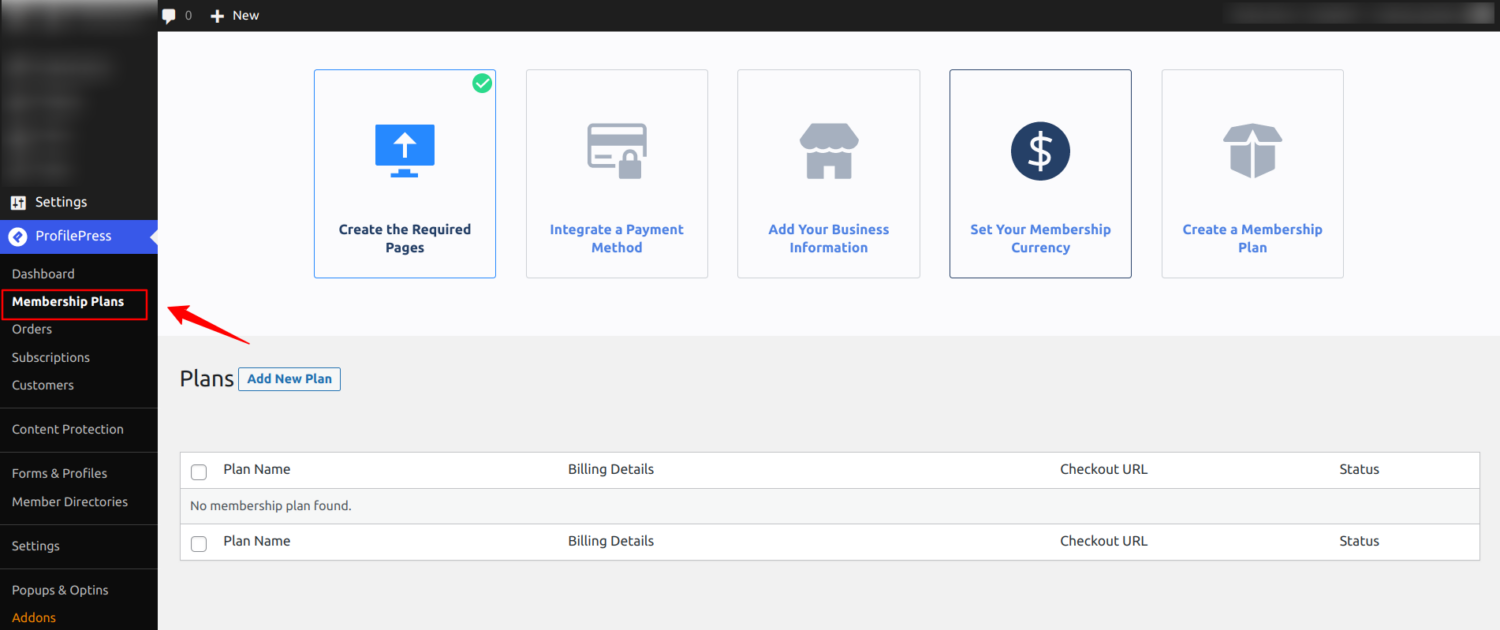
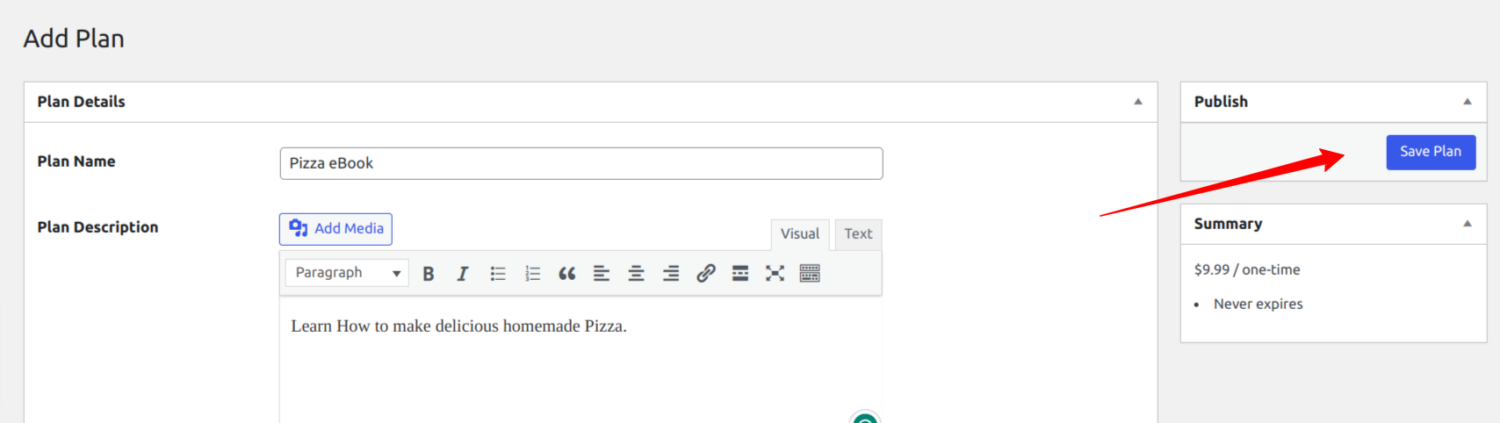
Click on “Add New Plan,” and you will be taken to the page where you can add a plan and set up the details for your product.
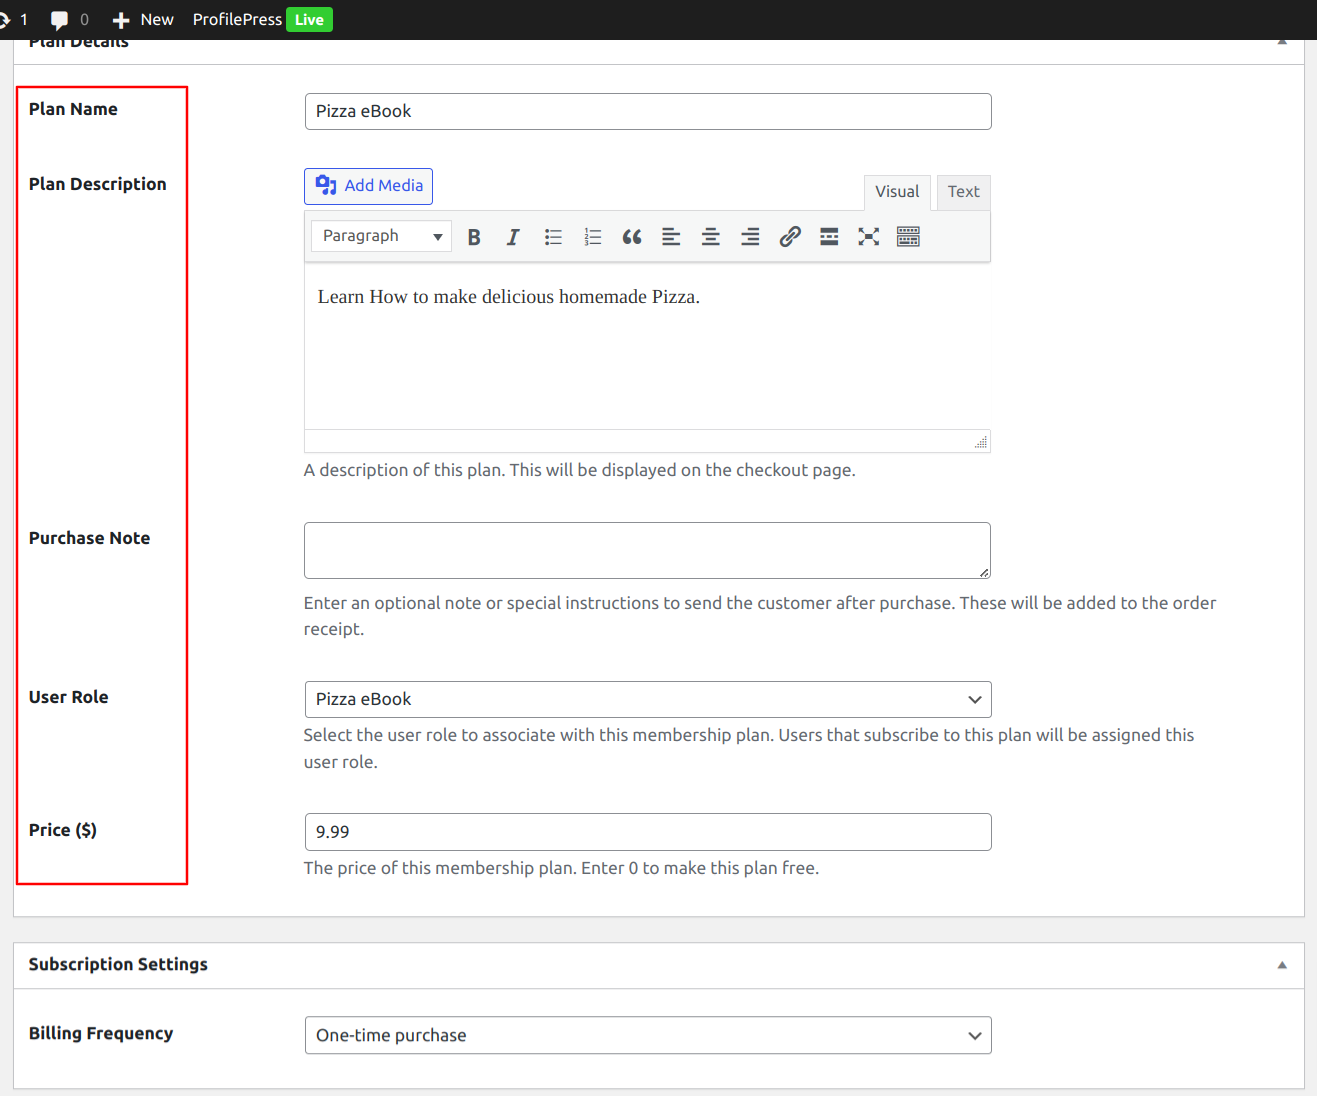
Under Plan Details, input the Plan name, Description, Purchase Note, User Role, and Price.
Next, scroll to the Downloads & Integrations meta box and open the Digital Product section.
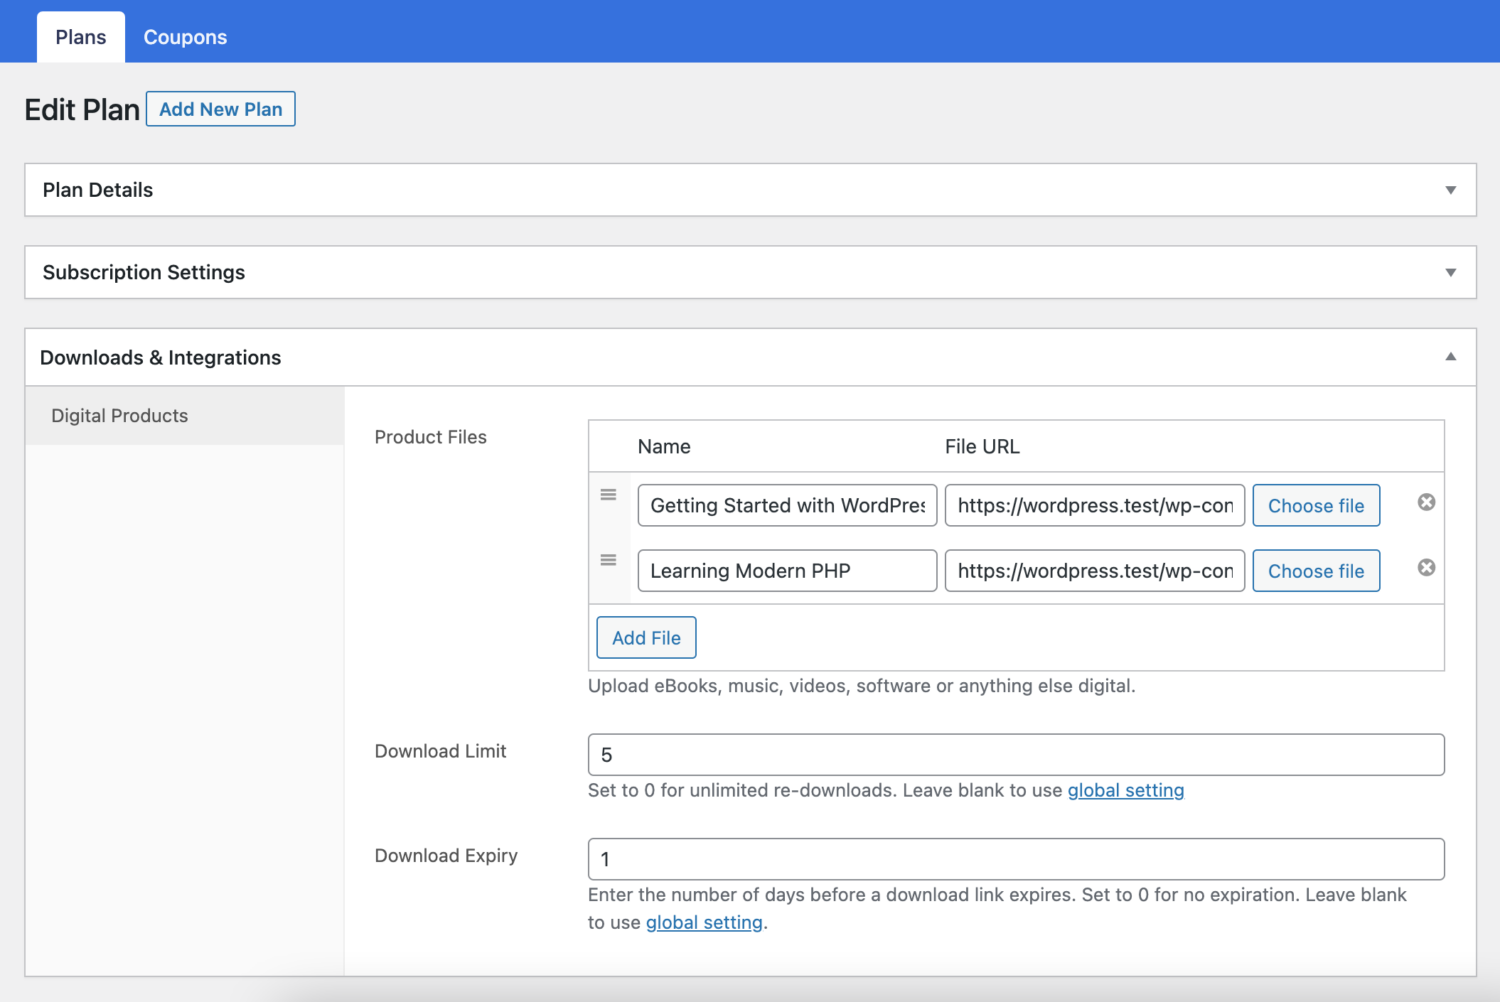
Click the Add File button, and then name the file. Enter the downloadable URL if it’s hosted elsewhere, or select the “Choose file” button to insert an existing file from your Media Library or upload a new file. Upload the file and click Insert to set up each downloadable file URL.
Enter “Download limit” (optional). Once a user hits this limit, they can no longer download the file.
Enter “Download expiry” (optional). If you input a specific number of days, the download links will expire after that number of days.
Once you are done editing the membership plan, save your changes.
Every membership plan includes a checkout link which you can add to your website pricing page or email your users to make payments or purchase the product.
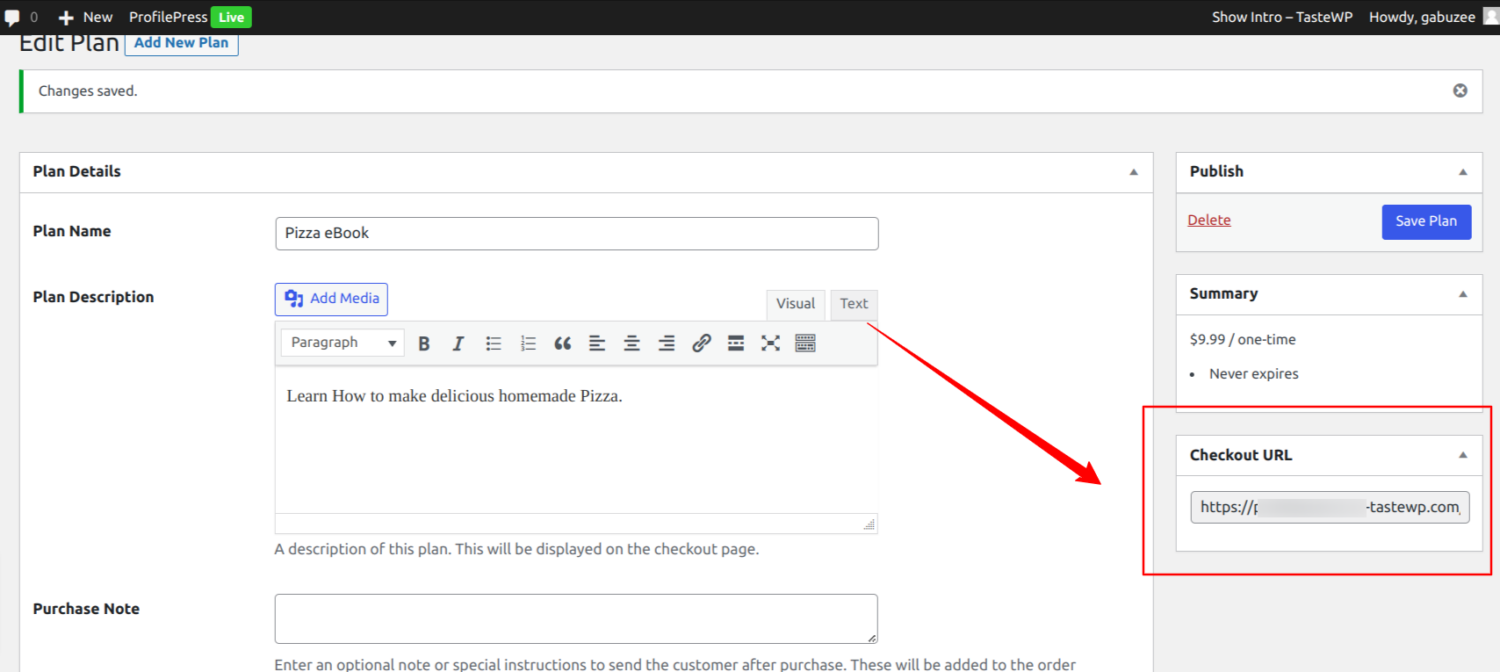
After saving the plan, you will find the checkout URL on the plan editing page.

As you can see in the image above, the price of the product is shown, the stripe payment gateway is also shown, and your customer just fills in their payment details to purchase the digital product.
How to Setup and Generate PDF Invoices with ProfilePress
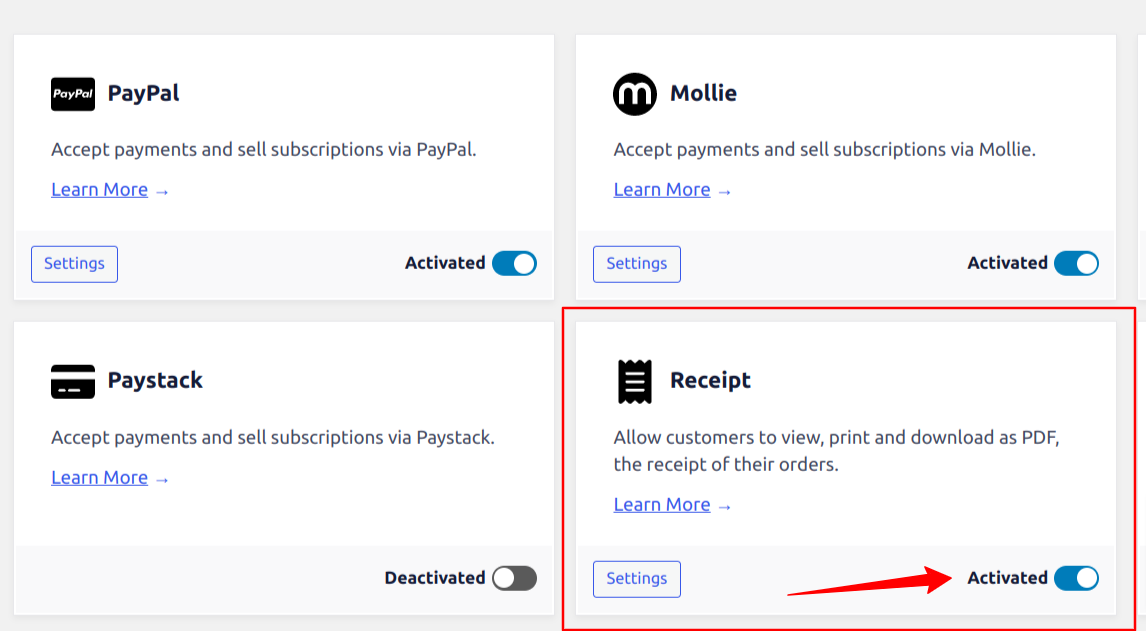
For our invoice generation, we will use the ProfilePress Receipt Addon. This addon will enable your customers to view, print and download a PDF receipt or invoice of their orders after they successfully purchase your products.
In the steps below, we will activate the receipt addon, configure the receipt addon, view orders as a customer and admin, and we will also learn how to add a PDF invoice link to our order email.
Navigate to ProfilePress>>Addons to activate the Receipt Addon.
Next, we need to configure the Receipts settings, you can find its setting by navigating to ProfilePress >> Settings >> Payments >> Receipt Settings.
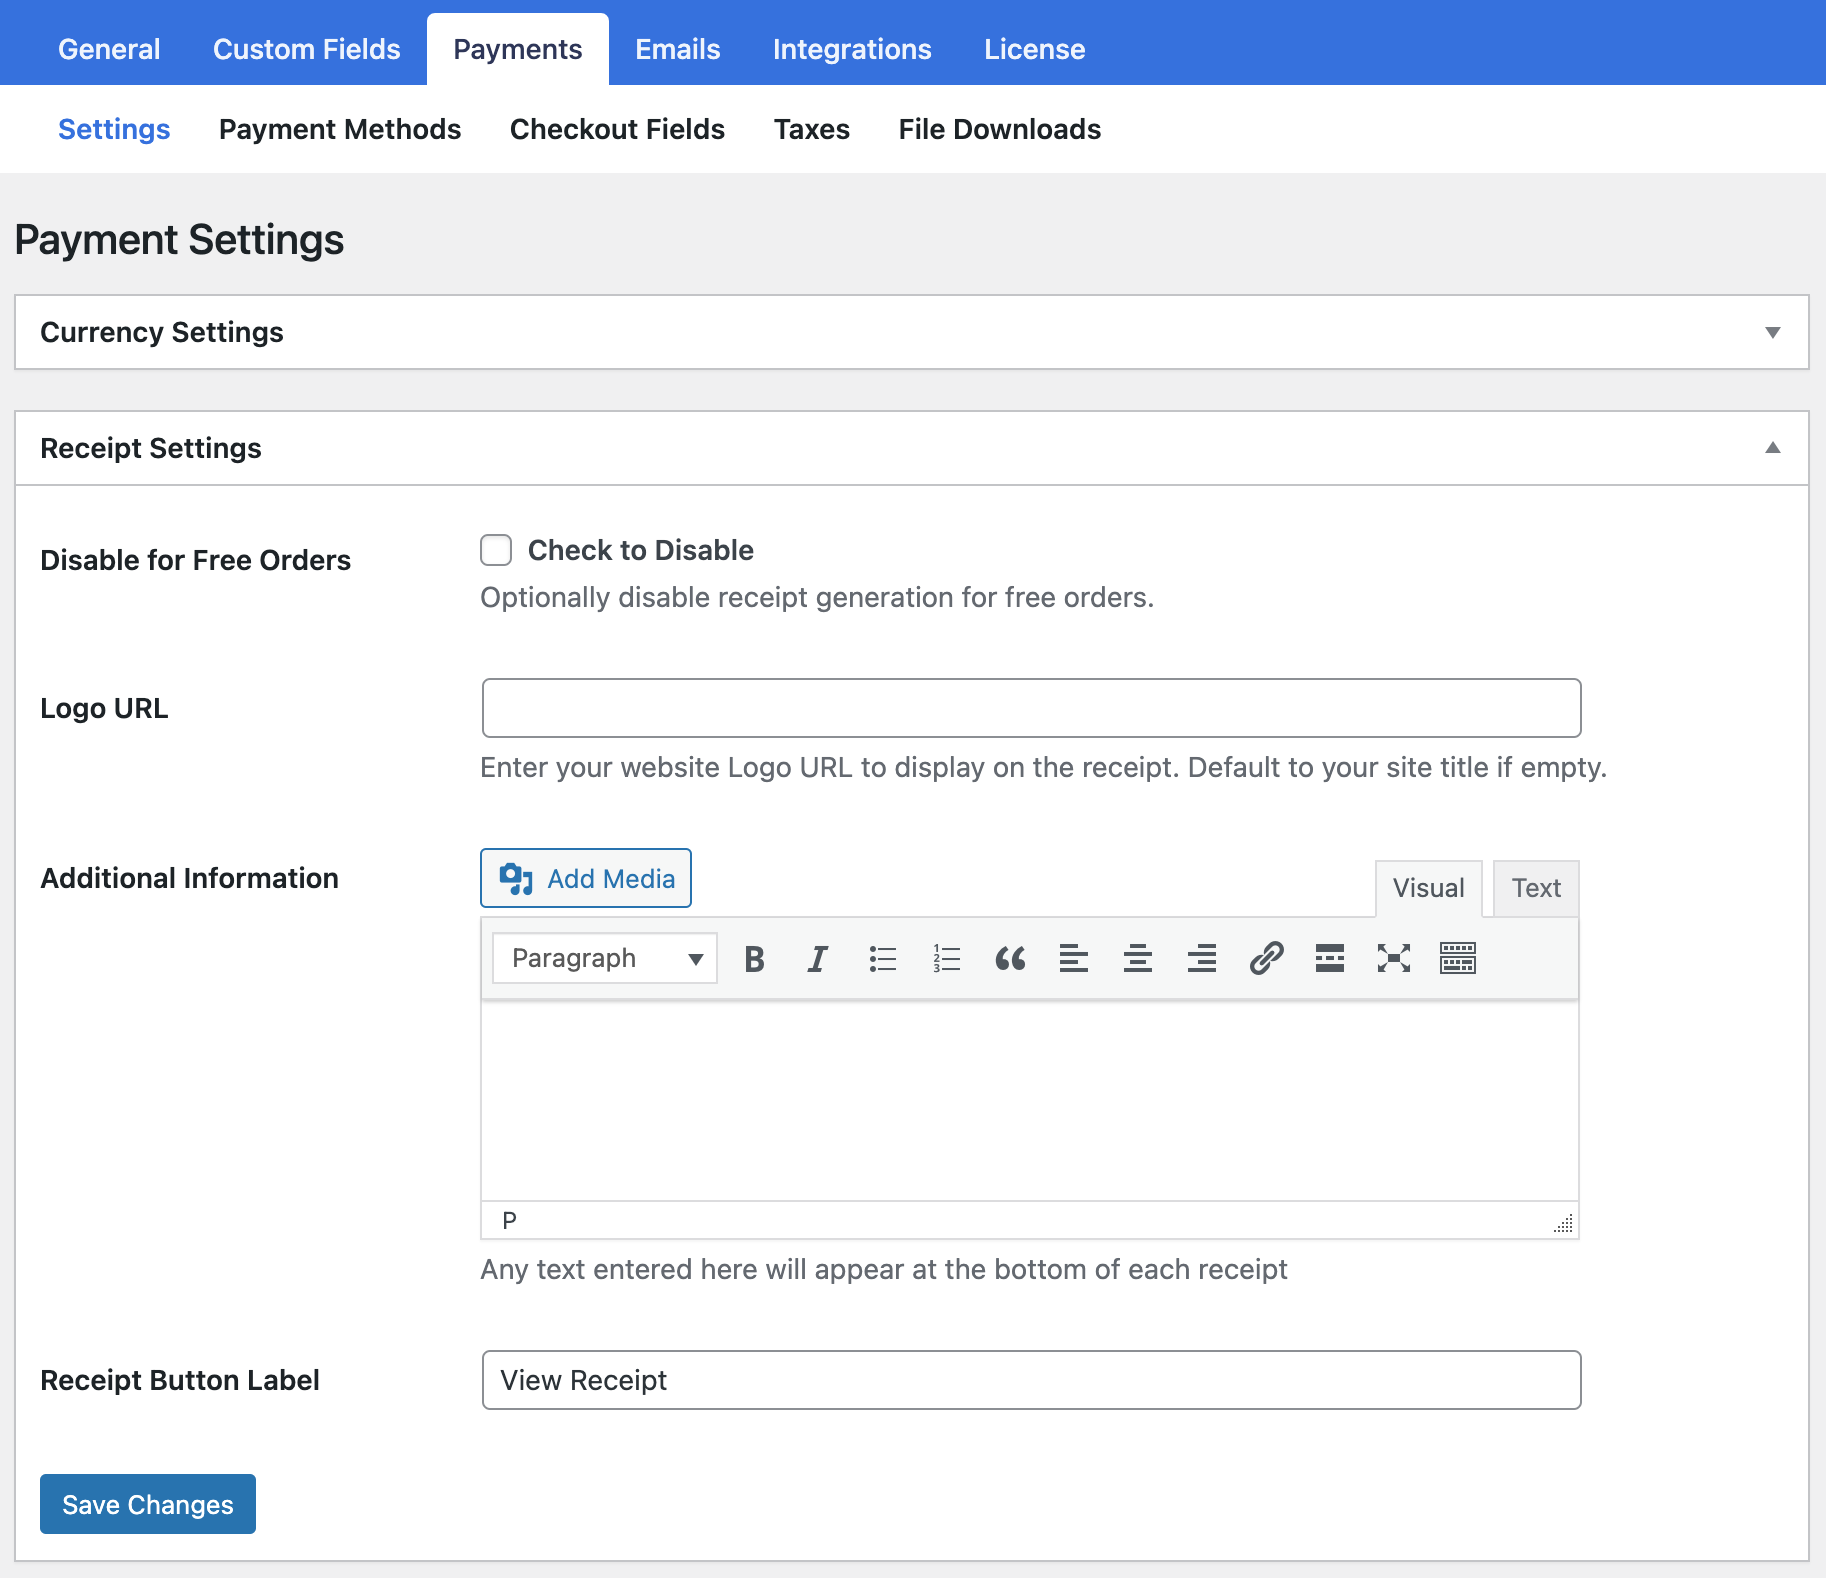
You should enable “Disable for Free Orders” if you don’t want free orders to have receipts or invoices.
Enter your Logo URL in the logo URL field if you want to display your website logo on the receipt or invoice,
If you want to display any additional information at the bottom of the invoice/receipt, use the “Additional Information” setting.
By default, the button to view order receipts is labeled “View Receipt“, but you can change this with the “Receipt Button Label” field.
Don’t forget to save your changes when done.
Viewing Order Receipts as an Admin
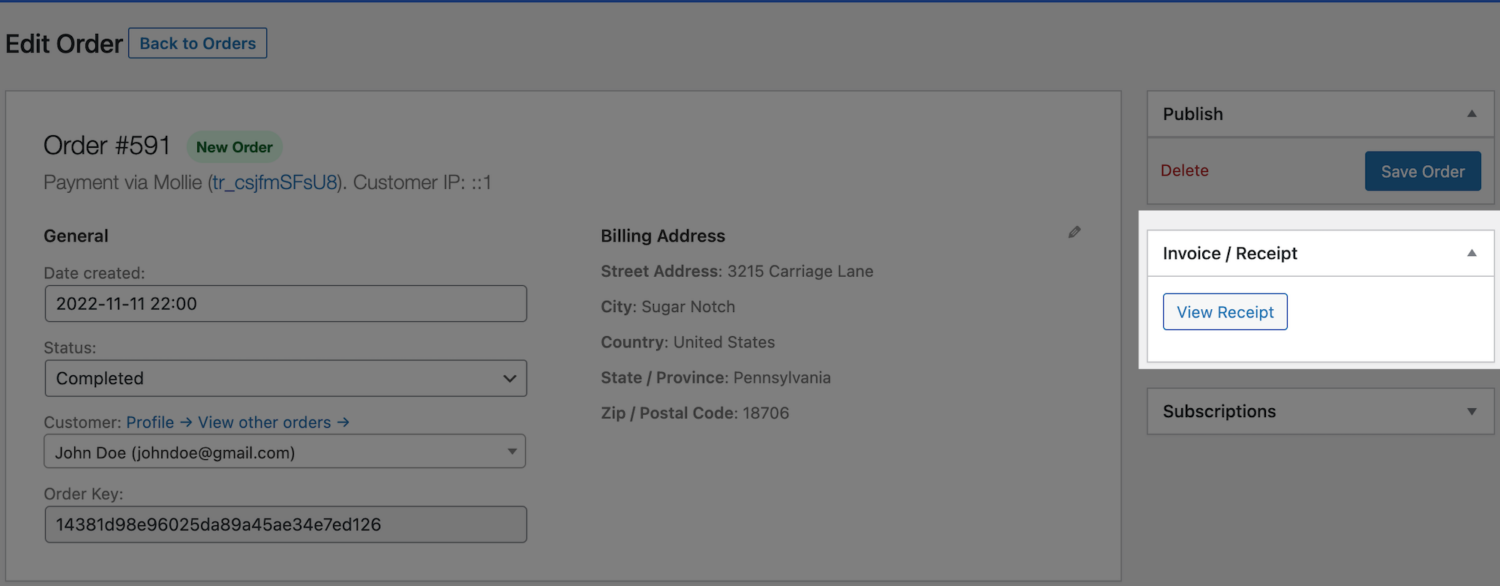
The next thing is to view your order receipts. As an admin, you can view all order receipts, and this is very useful for stock keeping and auditing.
You can view and download any order receipt or invoices from the order edit page accessible via ProfilePress >> Orders in the WordPress dashboard.
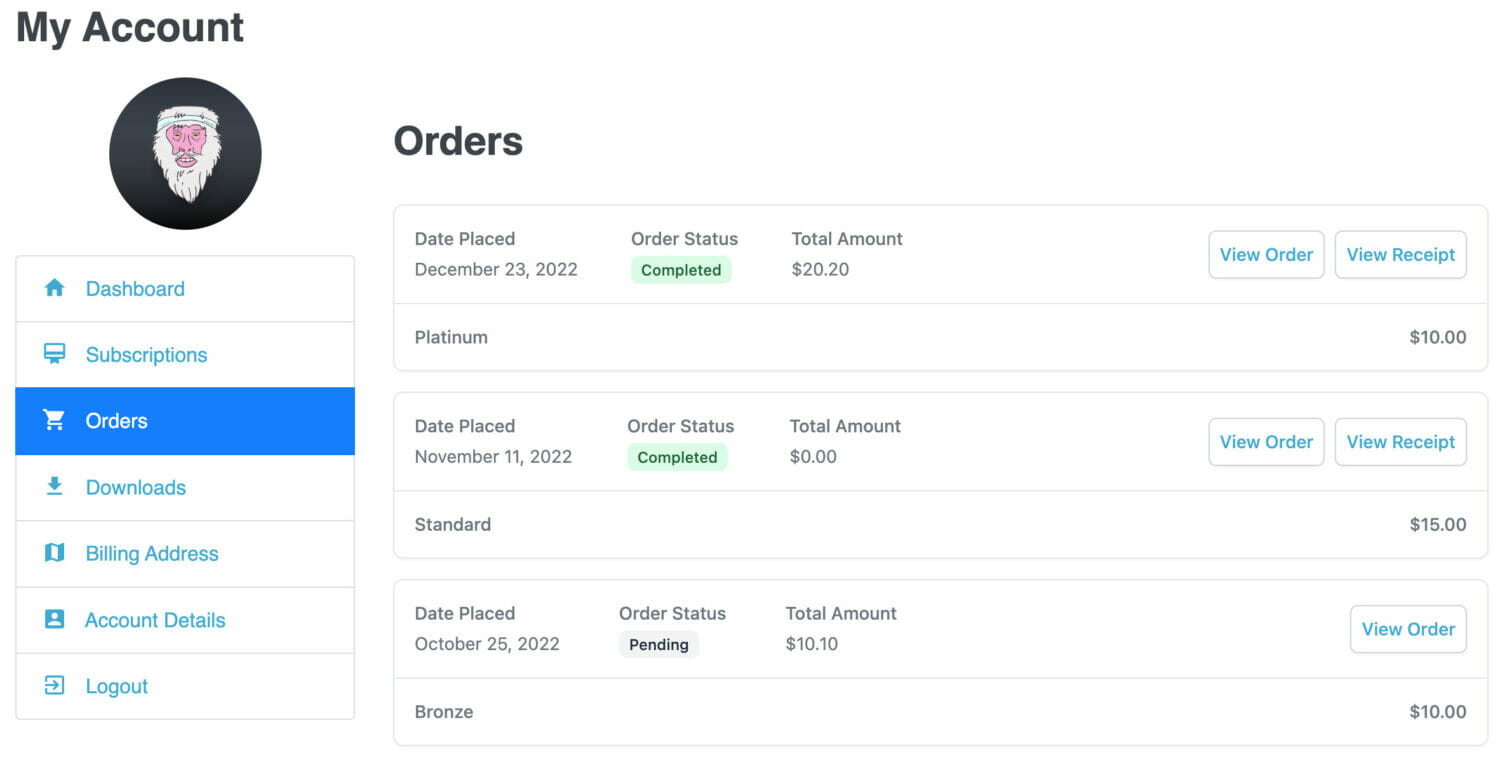
Viewing Order Receipts as a Customer
The customers of your eCommerce products or membership site can also view and download the invoice for their orders from their Account page.
How to Add Receipt Link in Order Emails
ProfilePress provides a receipt URL tag that allows you to embed a link to the receipt page for a particular order. You only need to add the {{receipt_url}} tag in the order emails that are sent by ProfilePress, and you users will be able to view and download their invoices.
You can edit the order email by navigating to ProfilePress > Settings > Emails > Order.

Once this is set up, your customers can easily access their invoice from the order confirmation email that is sent to them.
Conclusion
Creating PDF invoices in WordPress is easy with ProfilePress. This plugin helps you generate professional invoices and has all the tools you need to start selling digital products online.
To get started, install the ProfilePress plugin and set up a payment gateway. Then, create a product for sale and view your order receipts. Finally, generate invoices for your customers.
I recommend you explore the ProfilePress plugin and its features. You may find more ways to use it than just creating invoices.