Do you want to learn how to create a custom WordPress user registration form?
If you are building a membership site, a Learning management system (LMS), or an eCommerce store, you will need to provide a way to enable user registration.
By default, WordPress has a user registration form, but this form looks shabby, has limited fields, and won’t conform to your site design. Do not fret; you can quickly build a custom user registration form for your website using a user registration plugin.
In this article, we will look at all the form creation features of the ProfilePress plugin and use it to create a custom user registration form that will give our website a professional look.
What is ProfilePress?
ProfilePress is a WordPress membership plugin that allows you to build powerful paid membership sites, create eCommerce stores, and also create access control for your content.
With ProfilePress, you can set up Paid membership plans, add a paywall to WordPress site content, integrate multiple payment gateways, and build an optimized checkout system for your Website.
In addition to the above features, ProfilePress also allows you to create custom forms, such as a WordPress user registration form, on the frontend of your website. This means users can sign up on your website without seeing the limited, default registration page.
How to Install the ProfilePress Plugin
To get started, you will need to purchase a ProfilePress license and install the plugin on your WordPress site. To do that, head to the ProfilePress website to purchase a suitable license plan.
After you purchase your copy of the ProfilePress pro plugin, you will receive a confirmation email with a link to download the plugin zip file and your license key. You can also download the plugin from your account page on the ProfilePress website.
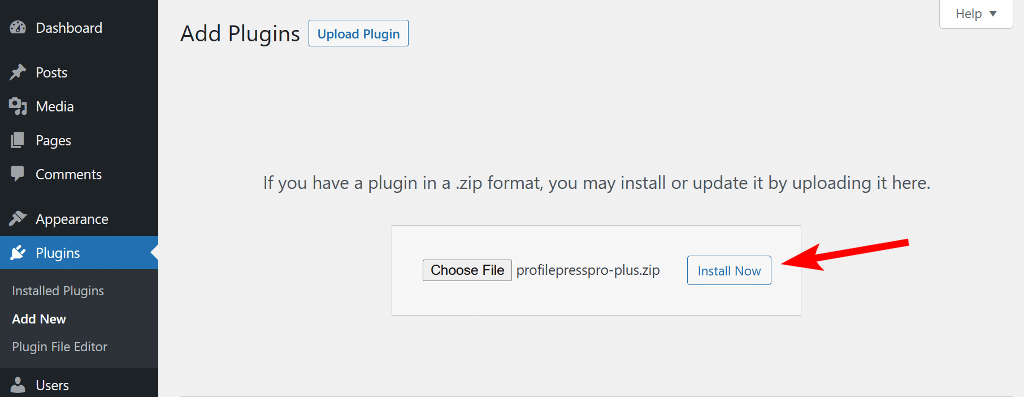
Once you have downloaded the plugin, login to your WordPress admin dashboard, and navigate to the Plugins page; click on the “Add New” button and click “Upload Plugin“. Next, click “Choose file” to select the previously downloaded plugin zip file. Click “Install Now” and then Activate.
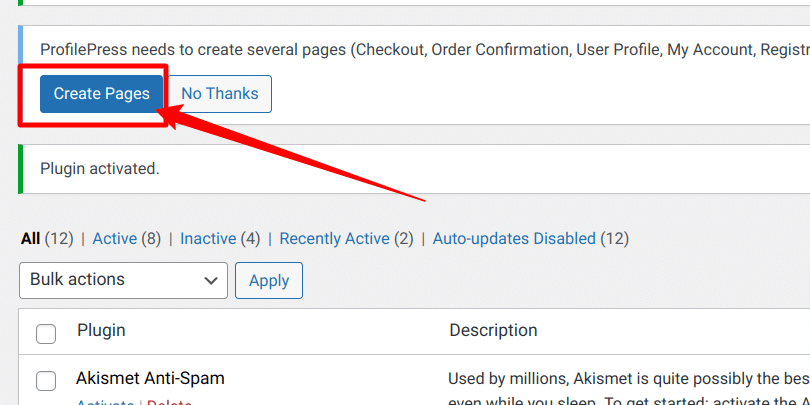
At the top of the page, you will see a notification that says, “ProfilePress needs to create several pages”, Click on the “Create Pages” button to complete the plugin setup.
With this done, we have completed the initial setup of the ProfilePress plugin on our WordPress site, and we can move on to the next step, which is creating the user registration form.
Creating a Custom User Registration Form in WordPress
ProfilePress will create a default registration page after installation when you click the “Create pages” button, as instructed earlier. The default registration form is good enough, but you will most likely want to create your own with all the fields you need and a style that suits your website design.
So, let us create our user registration form.
Creating a Custom Registration Form
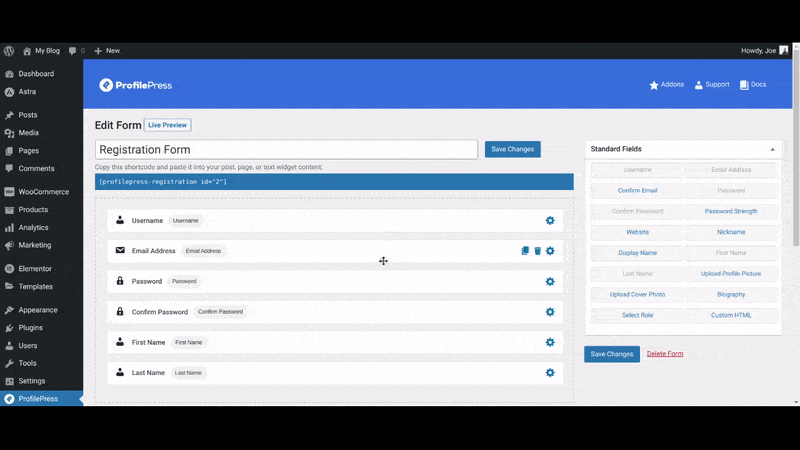
The first thing to do is create a custom registration form; ProfilePress will make this very easy for us. To create a form, navigate to ProfilePress > Forms & Profiles, and click on “Add New” Then you will need to select a builder type, and for this article, we will go with the “Drag & Drop Builder“.
Click the “Get Started” button to proceed under the Drag & Drop Builder. Now you will see a field to enter the name for your form, enter a name – you can call it “Registration Form“, next change the form type to Registration by clicking the Registration tab.
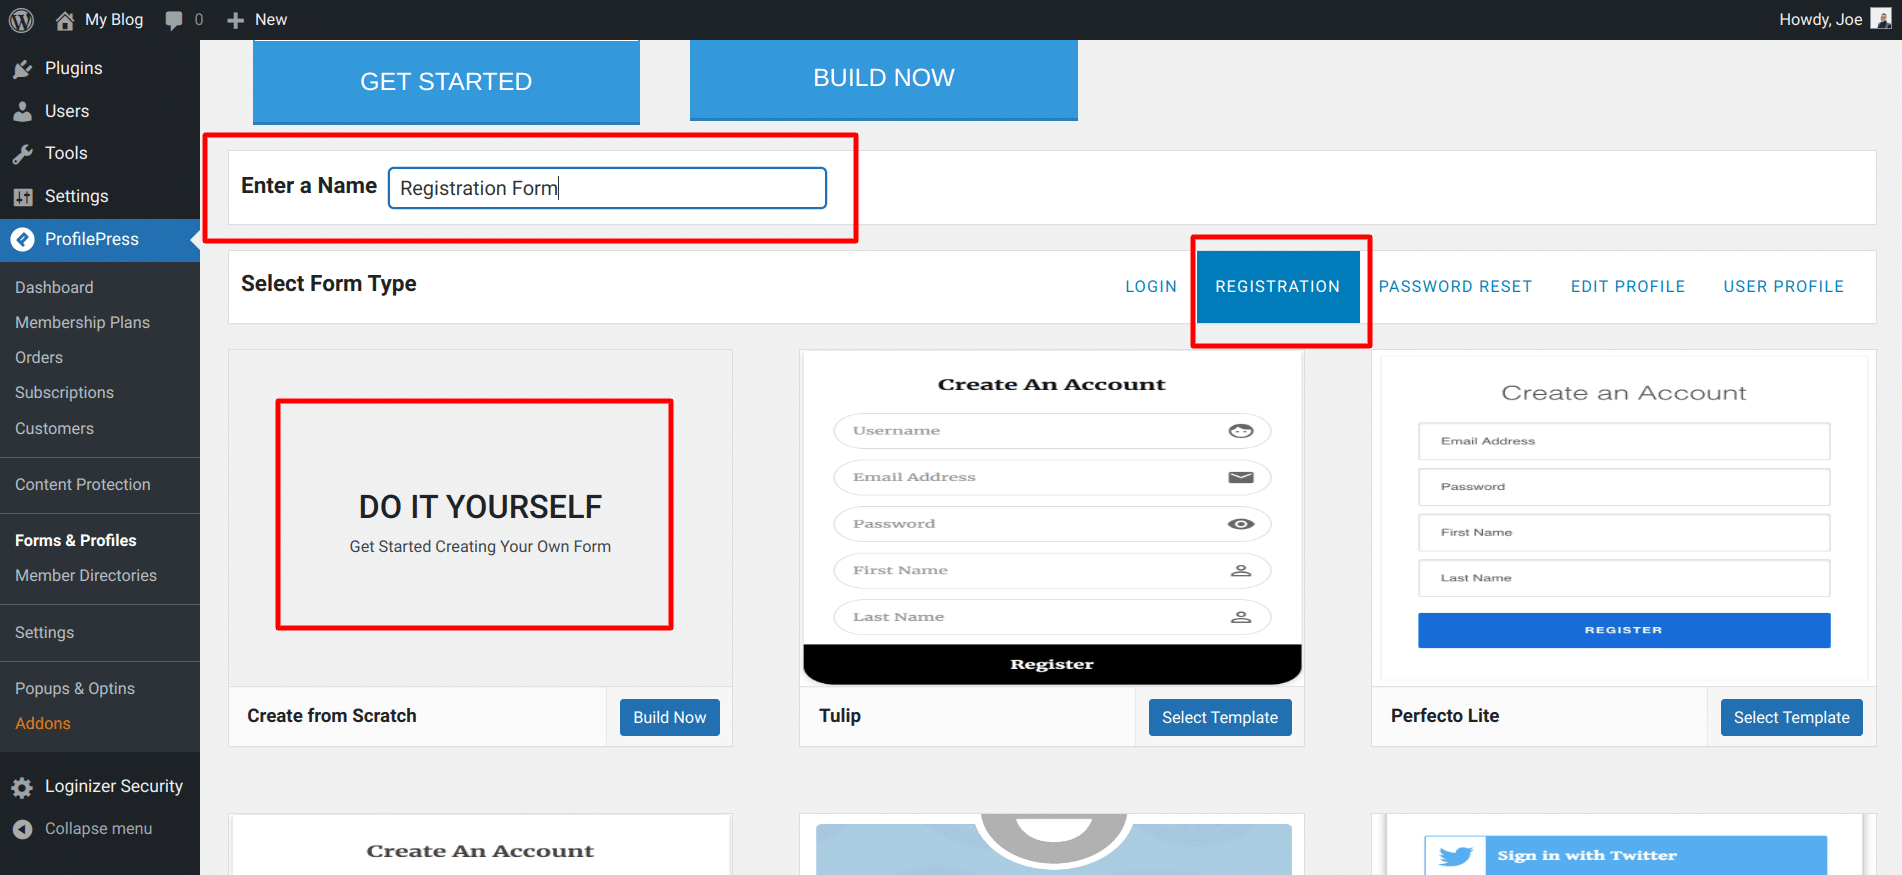
Now, you should see various pre-made registration form templates that you can choose from, and you should also see the “Do It Yourself” option. We will click the “Do It Yourself” option to build a registration form from scratch.
You will be taken to the form creation page, where you can see a lot of form fields that we can use to build our form. We also have our form shortcode at the top of the fields and a live preview button to preview your form changes.
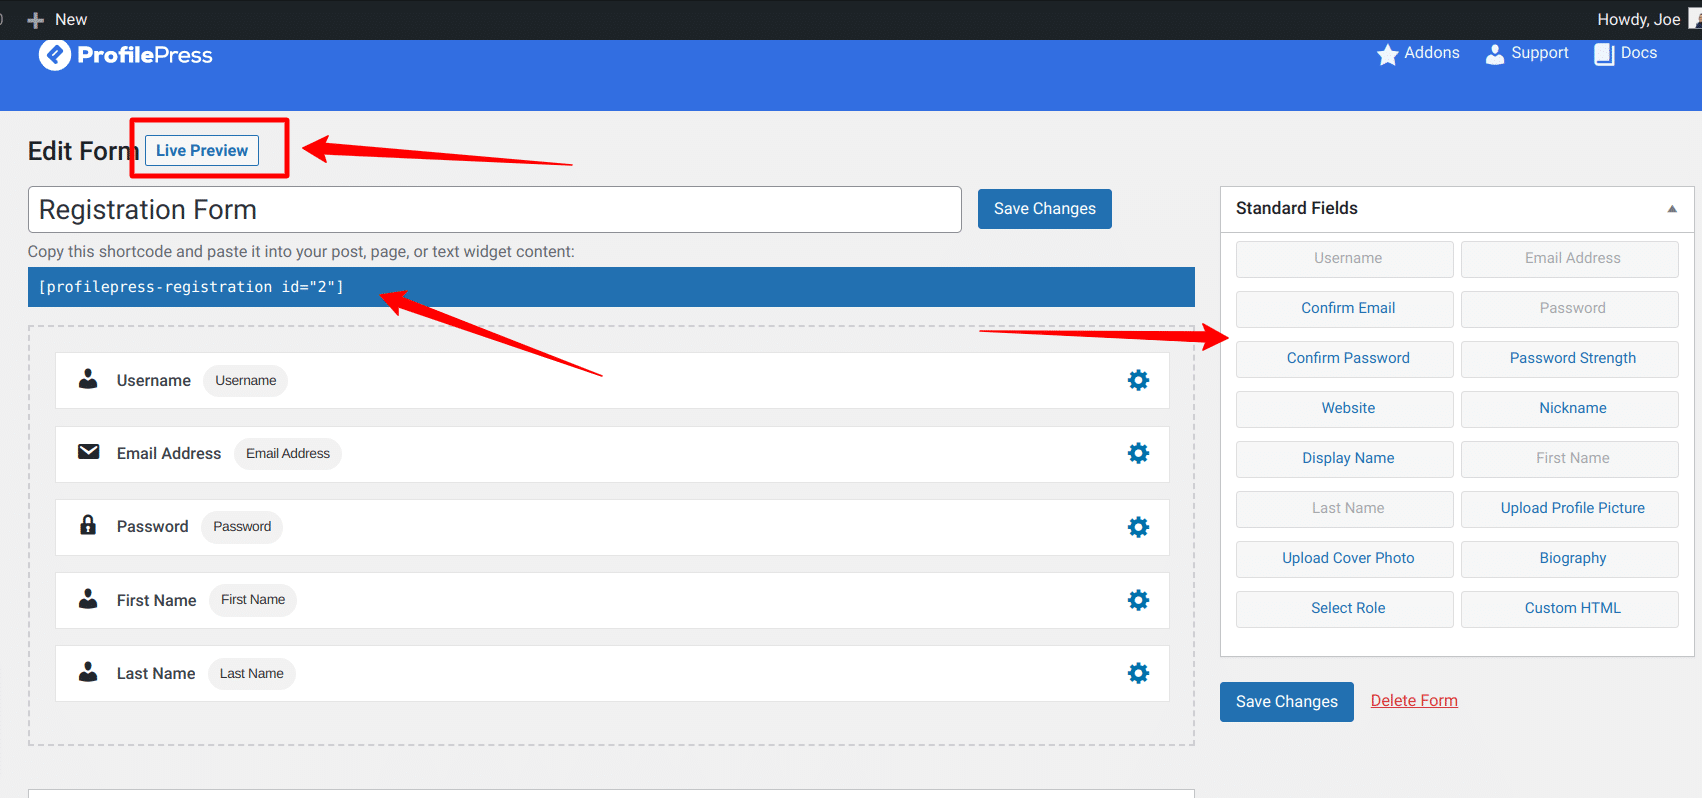
To customize our registration forms, we can drag and drop form fields from the Standard Fields sections on the page’s right sidebar.
Drag and drop the Confirm Password field into the form builder area and move it under the Password field. This field will allow our users to enter their password twice and confirm it matches before they can proceed with their registration.
You can delete any unwanted fields from the form builder by hovering your mouse on a field and clicking the Bin icon.
To adjust the settings for any of the form fields, click on the Gear icon, and you will get a popup with the available settings for that form field. There are three sections that you can modify for each form field. They are – General, style, and Settings. Each section contains various elements that affect the field display and behavior.
Customizing the User Registration Form Design
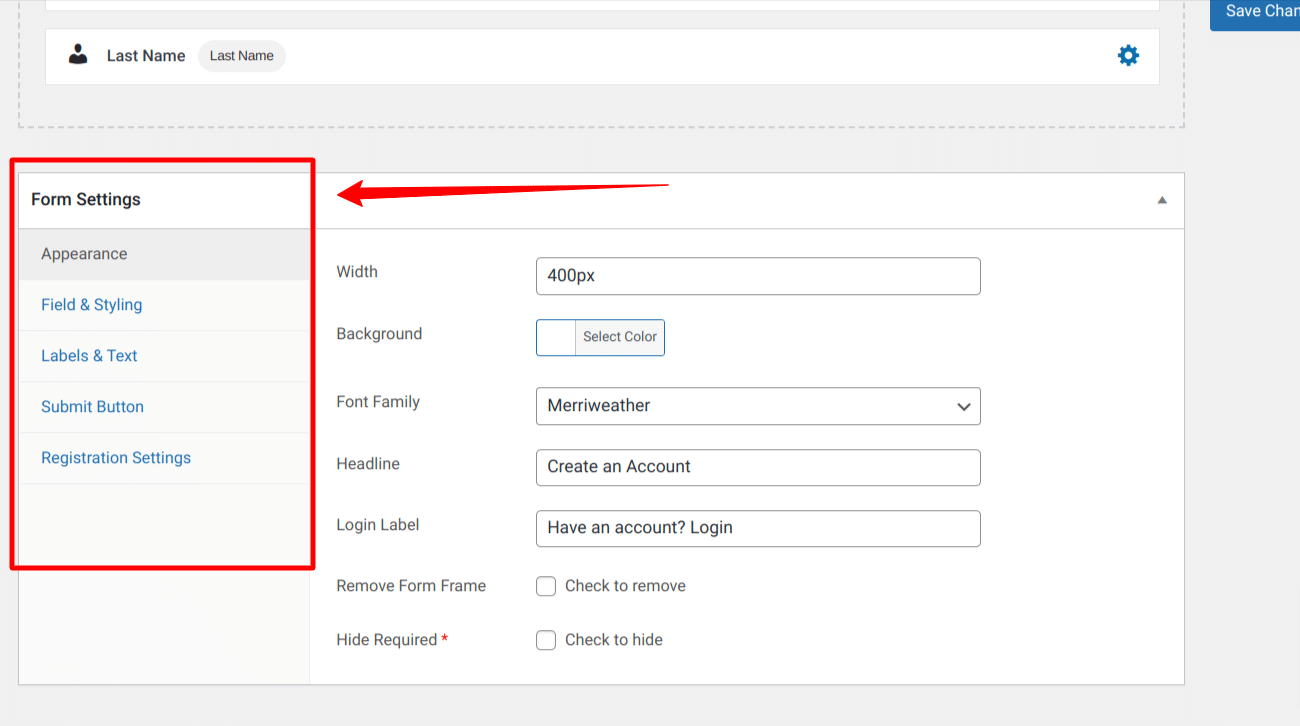
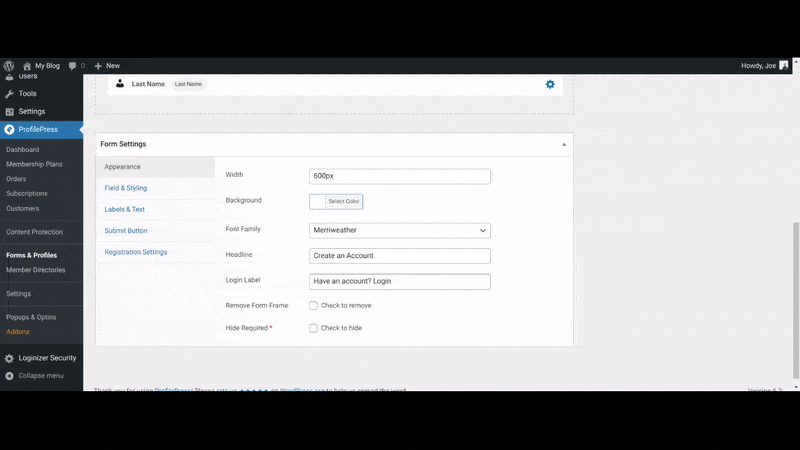
ProfilePress allows us to customize the registration form design from the “Form Settings” section.
In the Form Settings, we have different sections that provide us with the tools needed to customize our form design to our liking. These sections include Appearance, Field & Styling, Labels & Text, Submit Button, and Registration Settings.
Let us take a quick look at each of these sections.
Appearance
The appearance section of the form settings will allow us to modify the form width, Background color, Font, Headline, Login Lable, and Form frame and hide the required asterisk.
For example, change the form width to 600px, scroll up to save changes, and then click on Live Preview to see the size of the new form. You can keep tweaking the width till you get a suitable size. You can also modify other parameters in the appearance tab until you create a design that suits you. Always remember to save your changes before clicking on the live preview.
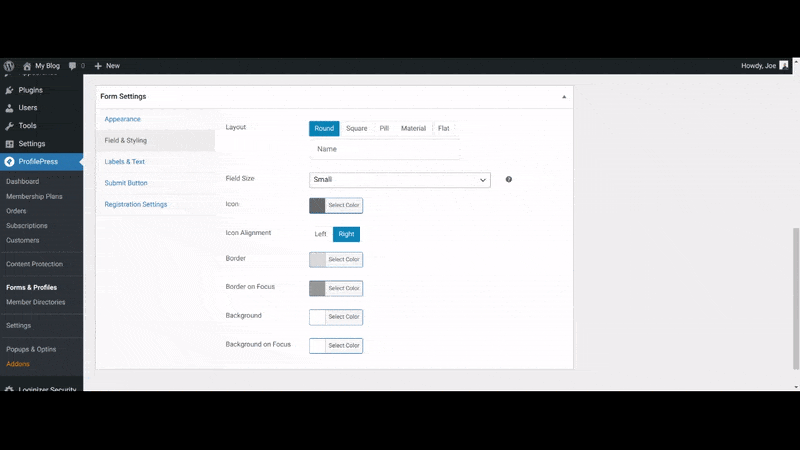
Fields & Styling
The field & styling section allows you to modify the various properties that control the form layout. For example, you can change the layout type, field size, icon color & alignment, background color, and more.
For example, we will modify the field size, icon color, and background color to see how this will impact our form design.
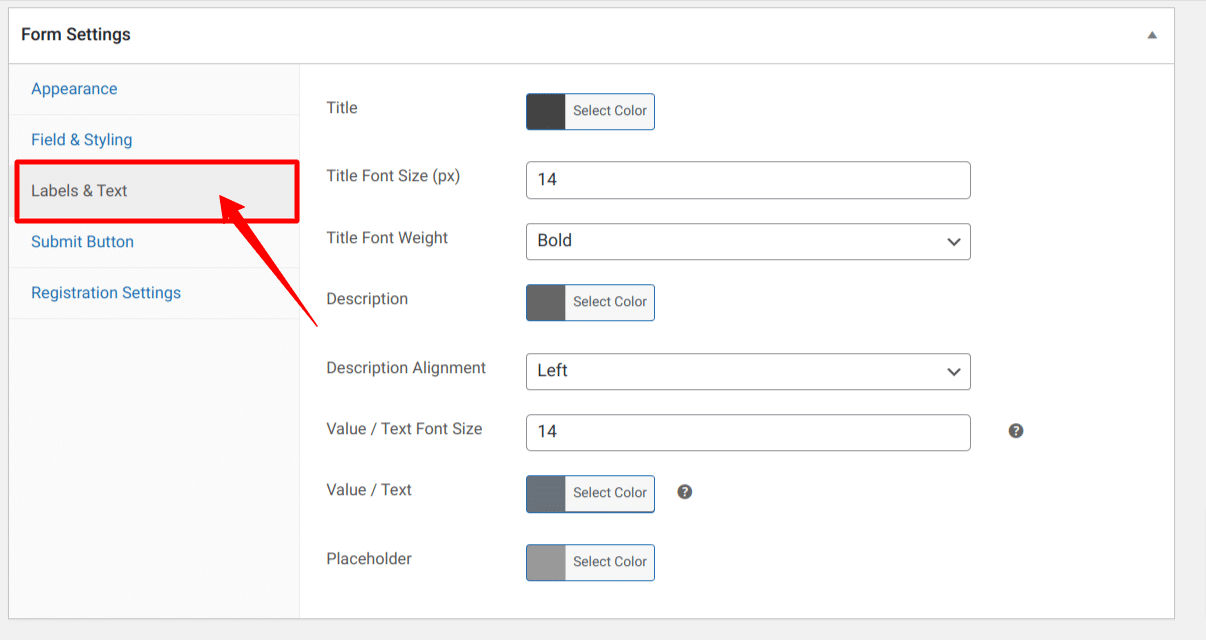
Labels & Text
The Labels & Text section allows you to modify the labels, title color, fonts, alignment, and everything else related to the form labels. You should adjust these properties to your liking, save the changes and click on Live Preview to see your changes.
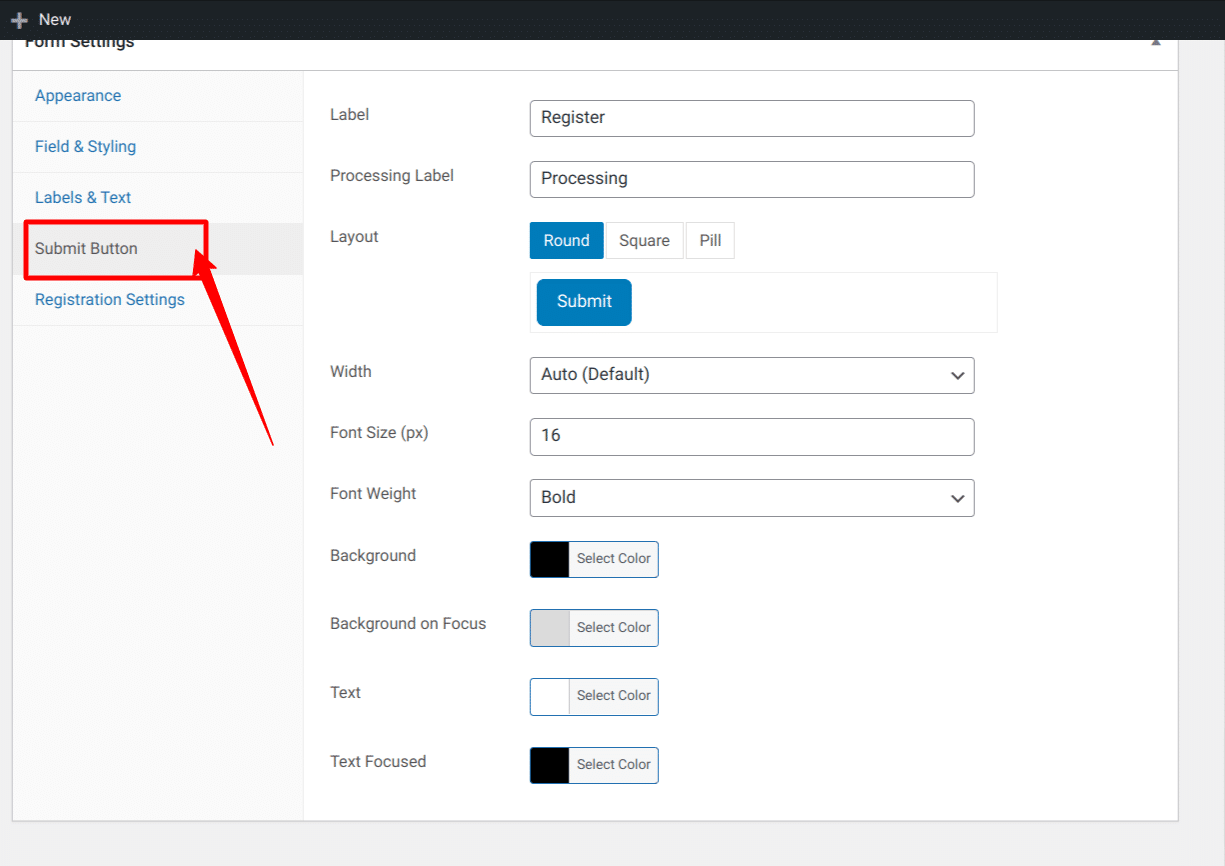
Submit Button
The Submit Button section allows you to change the look and behavior of the form Submission button. For example, you can change the label, button width, colors, and layout.
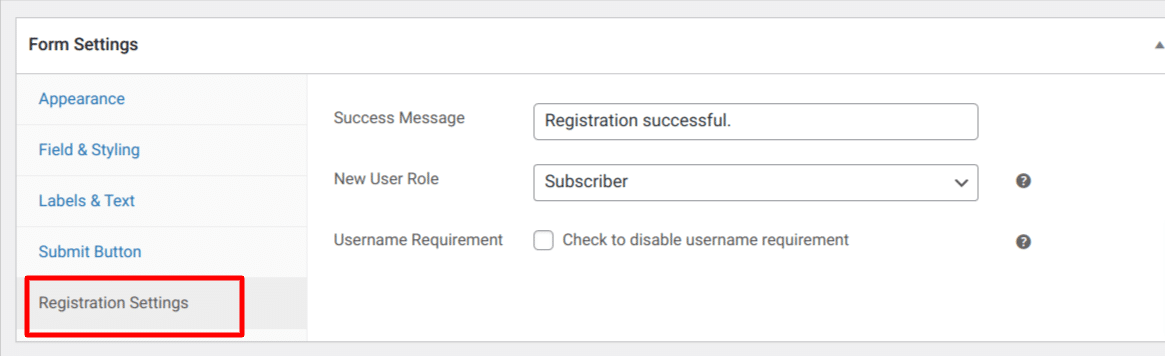
Registration Settings
The registration settings section lets you control the form actions after successful user registration. You can modify the success message shown after successful registration and assign a preferred role to the new user.
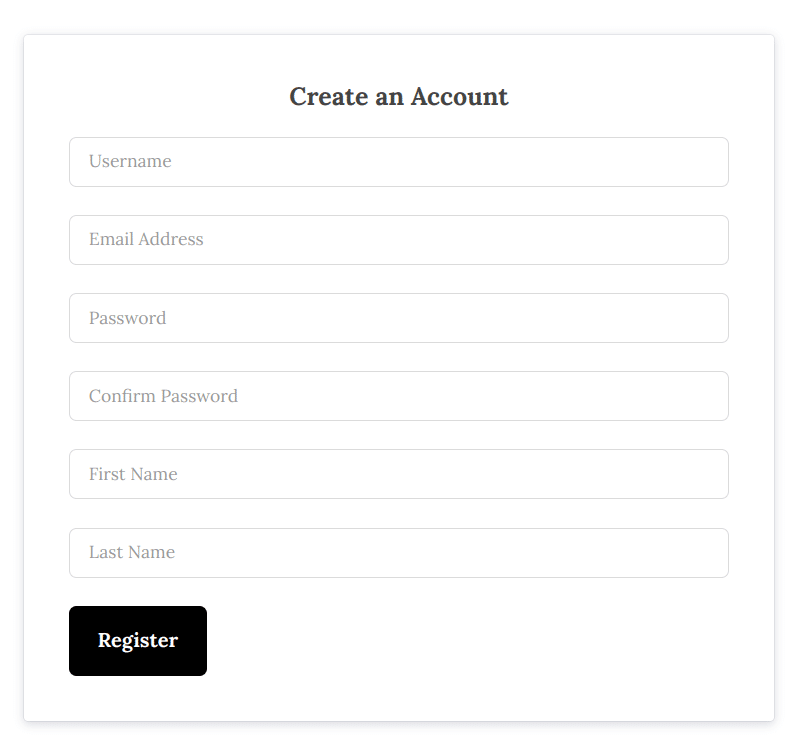
Creating the Registration Page
When you are satisfied with your registration form design, the next step is to put the form to use by creating a registration page where users will fill out and submit this form.
The first step is to copy your form shortcode, shown at the top of the form builder page.
Next, click on Pages > Add New, and enter the page title – Register. If you are using the WordPress block editor, click on the plus icon, select the shortcode block, and paste the copied form shortcode into this block.
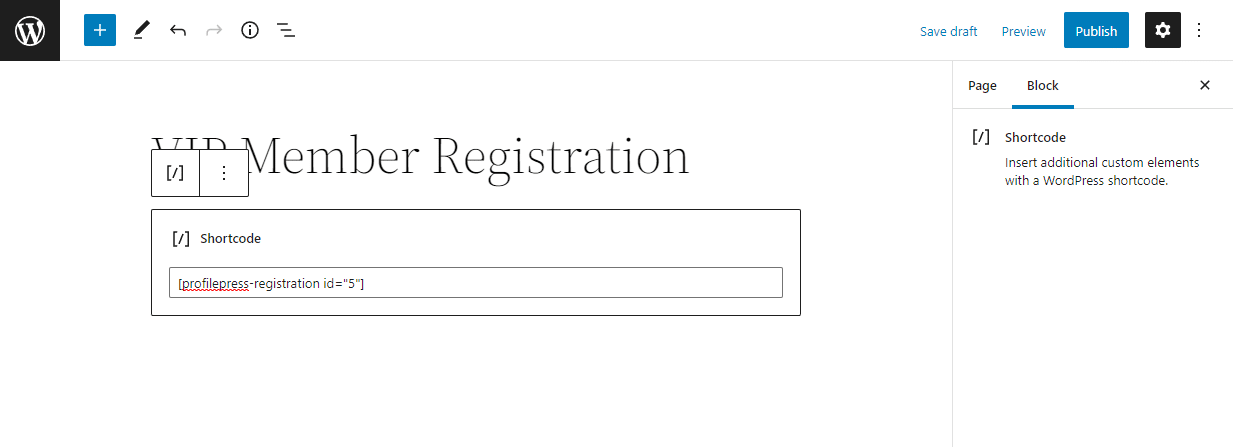
If you use the WordPress classic editor, paste the shortcode into the text editor. Next, click on Publish to publish your new WordPress user registration page.
Now, open the registration page in a new incognito window to ensure that you are logged out, and you should see your user registration form displayed.
You can fill out this form, click on the Register Button, and see the success message shown after successful submission.
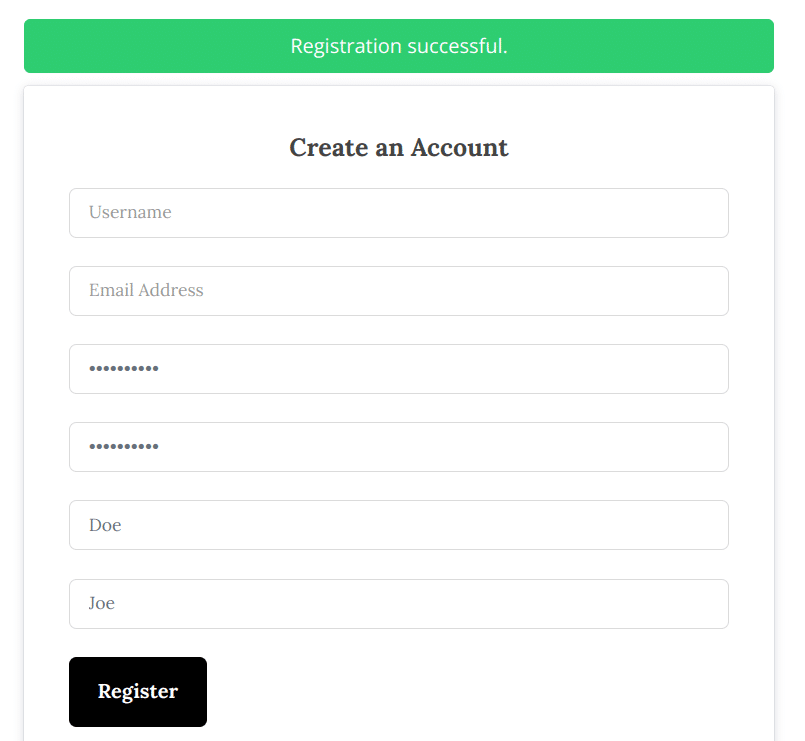
If you can see the success message, you have successfully created a custom user registration form for your website. You now have a way to sign up people to your website without using the ugly, default WordPress registration form that doesn’t conform to your website design.
Conclusion
User registration is essential to building any website or application that requires user interaction. However, WordPress’s standard user registration forms may not always meet your needs. Creating a custom user registration form can give you greater control over the information collected from users, improve the user experience, and enhance the security of your site.
In this article, you learned how to install the powerful WordPress membership plugin, ProfilePress, and then use it to create a custom registration form that can be customized to your heart’s content for you to have a professional user registration page in WordPress.
Creating a user registration form in WordPress is easy using a registration plugin like ProfilePress. The ready-made templates and drag-and-drop form builder in ProfilePress give you the tools to create registration easily and even login forms in WordPress.
What are you waiting for? Get the ProfilePress WordPress plugin today.