As a developer or website owner, there could be one or more reasons why you will want to protect your WordPress site from public access. These reasons become much more valid if you are building a membership site or an eCommerce website.
Password-protecting your WordPress website is an excellent way to prevent access to specific posts and pages, an entire website, or specific categories.
In this article, I will show you how to protect a WordPress site using various rules and methods. You will be able to protect individual pages, posts, categories, menus, and your entire WordPress site using the ProfilePress Plugin.
ProfilePress is a WordPress membership plugin that allows you to build powerful WordPress membership sites and control access to your content. This plugin will give you the power to restrict access to pages, child pages, posts, custom post types, categories, tags, and custom taxonomies.
With ProfilePress, you can restrict access to your WordPress website exactly how you want it.
How to Install the ProfilePress Plugin
To begin restricting content on your WordPress site, you will need to purchase a ProfilePress Pro License and install the ProfilePress plugin. To do that, head to the ProfilePress website to purchase a suitable license plan.
After purchasing your copy of the ProfilePress Plugin, you will receive a confirmation email with a link to download the plugin zip file and your license key. You can also download the plugin from your account page on the ProfilePress website.
Once you have downloaded the plugin, login to your WordPress admin dashboard, and navigate to the Plugins page; click on the “Add New” button and click “Upload Plugin“.
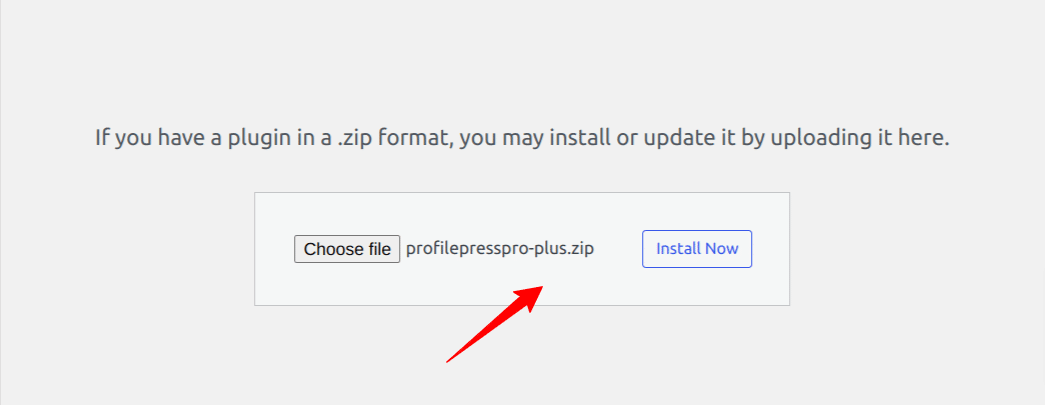
Next, click “Choose file” to select the previously downloaded plugin zip file. Click “Install Now.”
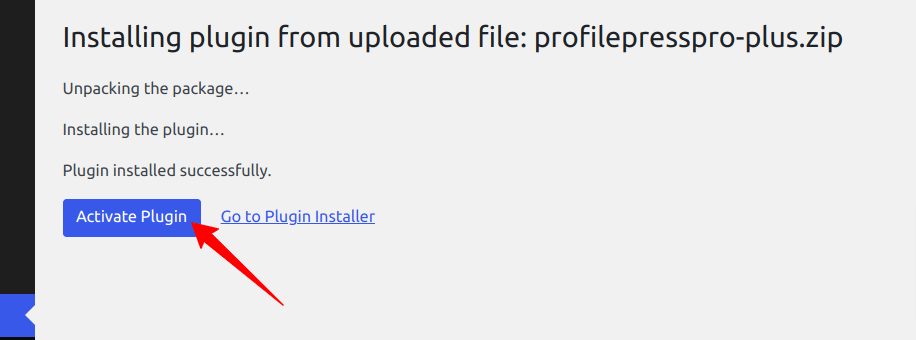
After installation is complete, click the Activate Plugin button.
At the top of the page, you will see a notification that says, “ProfilePress needs to create several pages,” Click on the “Create Pages” button to complete the plugin setup.
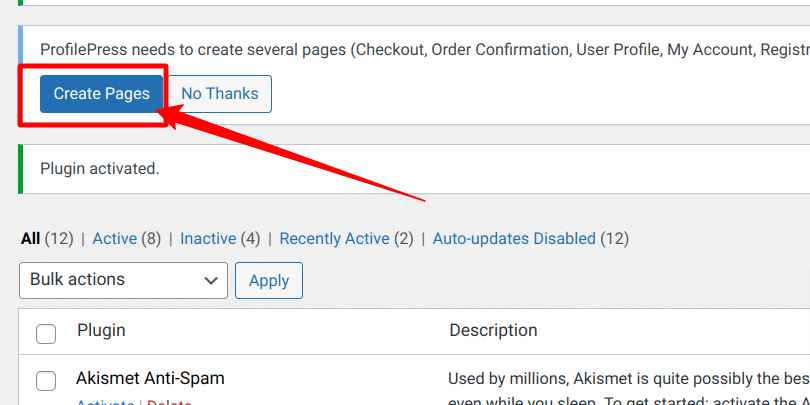
If you do not see this notification, navigate to ProfilePress > Dashboard and click the “Create pages” button to complete the plugin setup.
With this done, we have completed the initial setup of the ProfilePress plugin on our WordPress site.
How to Restrict Access to Entire WordPress Site
When you restrict access to your entire WordPress site, you prevent anyone from accessing your website content except logged-in users. With the ProfilePress plugin, you can easily restrict your entire website to only logged-in users, and I will show you how to do it below.
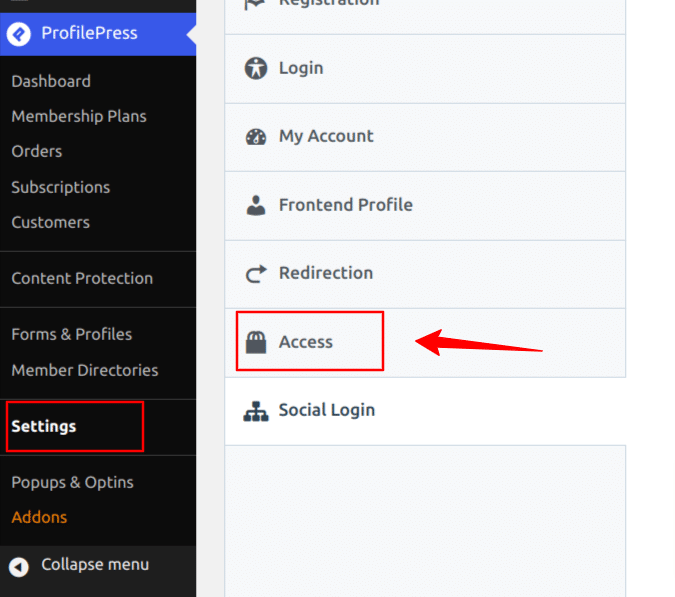
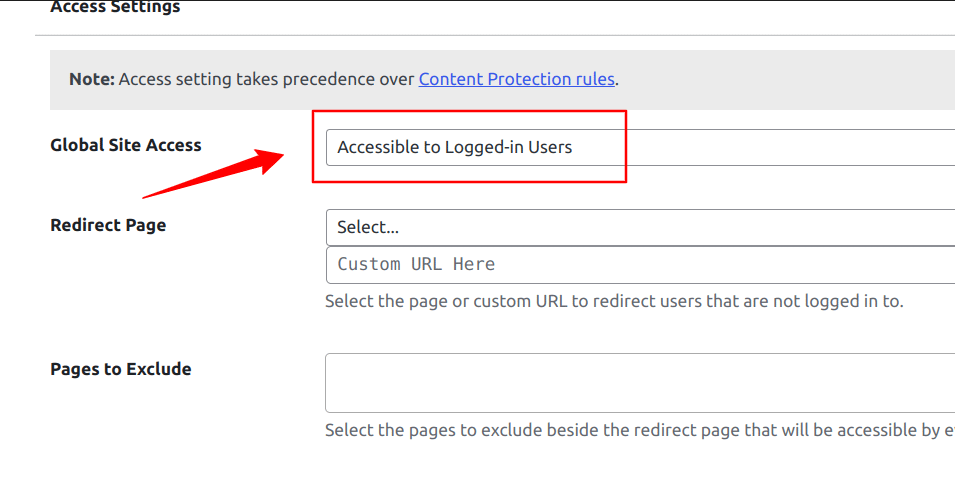
Navigate to ProfilePress > Settings > Access, and select the “Accessible to logged-in users” option.
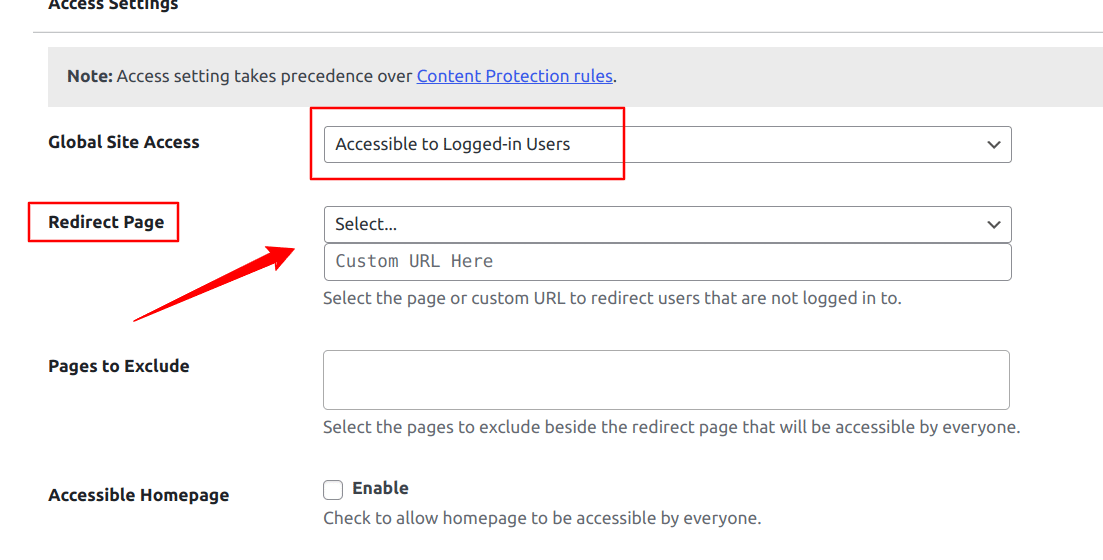
Next, you will need to redirect any user that tries to access your website to another page or a custom URL.
In the Redirect page field, click the drop-down selector, choose your preferred redirect page, or enter a custom URL to any webpage where you want to send your site visitors. If you do not set a redirect page, your site visitors will not be redirected anywhere.
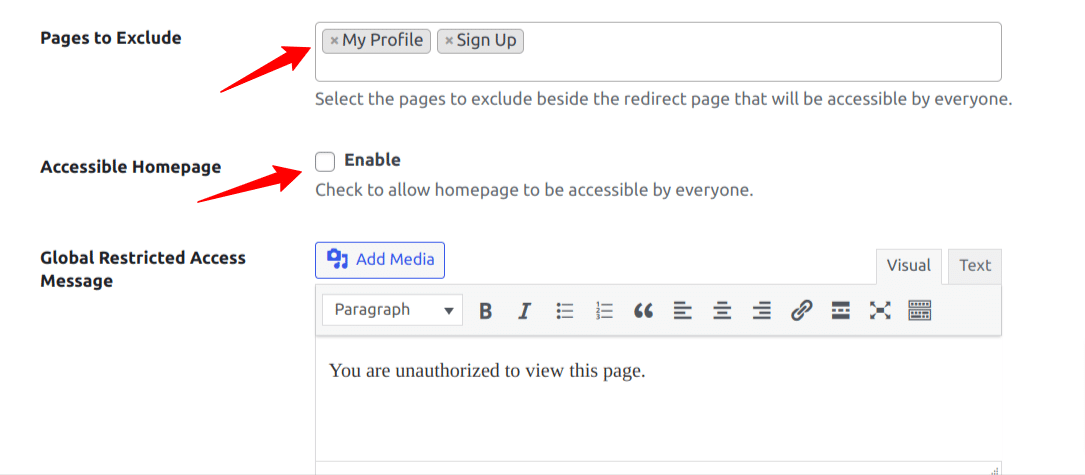
ProfilePress also allows you to exclude some pages from the entire site restriction. This can be very useful if you want to enable a privacy policy page, contact page, or landing page. You can use the “Page to exclude field” for this purpose, you can choose as many pages as you want, and these pages will become accessible to your users.
ProfilePress also allows you to exclude your website homepage from the sitewide restriction. Usually, you might want to use your homepage as a landing page to collect visitors’ data or provide some information to your site visitors. By ticking the “Accessible Homepage” checkbox, your homepage will become accessible to all your visitors, but any other page becomes restricted.
When you are done with your configurations, click on the “Save Changes” button, and your site restriction rules will be activated.
How to Protect WordPress Pages and Posts
Instead of restricting access to your entire WordPress site, you can decide to restrict access to some specific pages or posts within your WordPress site. With ProfilePress, you can easily protect your site pages, posts, child pages, categories, tags, and more.
You can restrict your WordPress content to a particular group of users, members, or customers of a membership plan, logged-in users, and logged-out users.
Regarding content protection with ProfilePress, the plugin has two important configurable rules – Access condition Rules and Logical Rules (AND, OR).
The Access Condition Rules allow you to control who can access the content you want to protect, which are:
- Everyone – all users will have access to the content.
- Logged-in Users – only those who are logged in can access the content and
- Logged-out Users – only those logged out of your website can access the content.
The Logical “AND” rule only works when all the grouped conditions are TRUE, and the Logical “OR” rule works when one of the conditions in a group is TRUE.
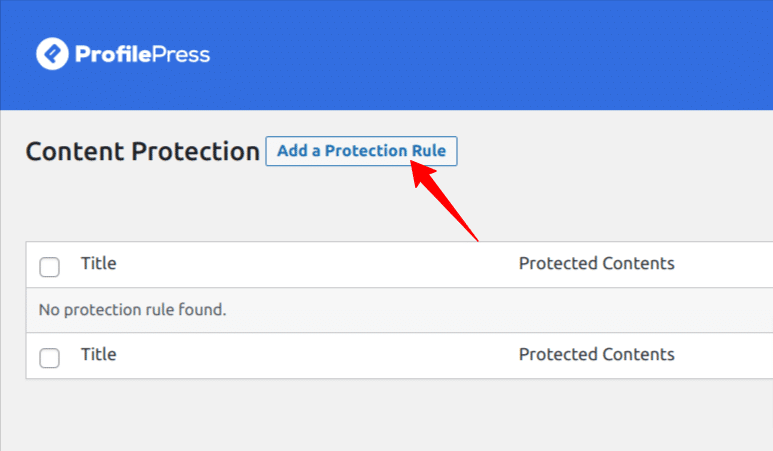
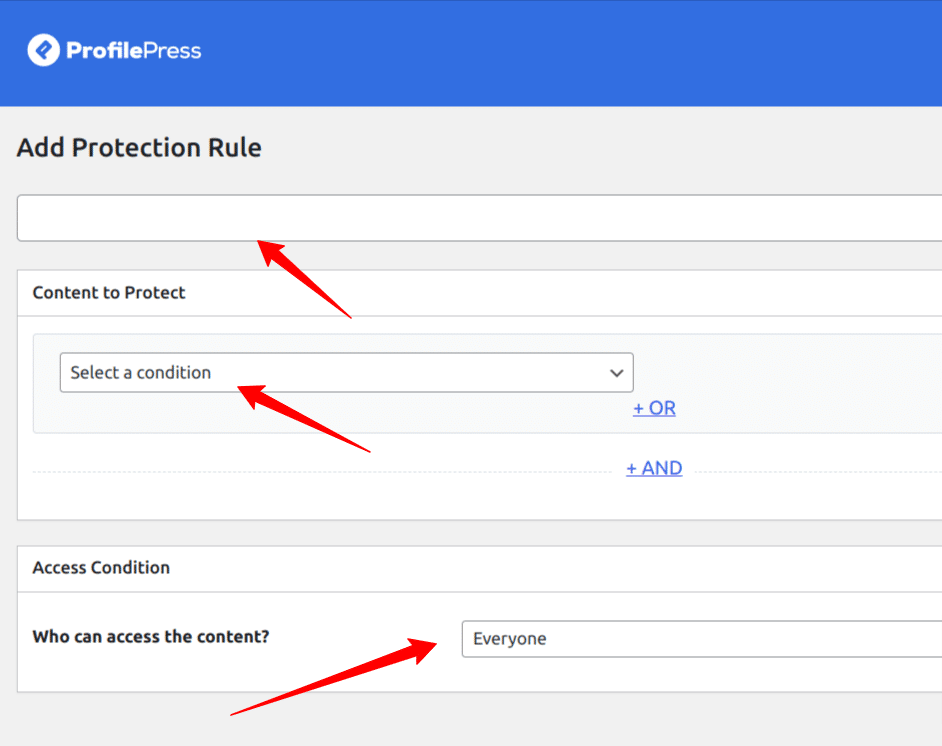
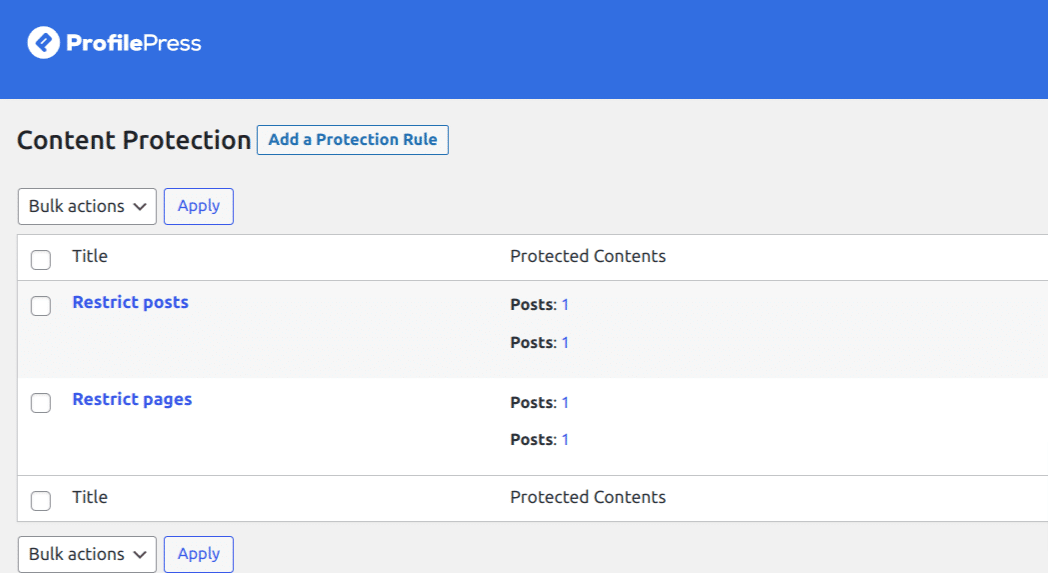
To get started with content restriction, go to ProfilePress > Content Protection. Next, click on the “Add a Protection Rule” button, and you will be redirected to the page where you can build your protection rules.
Enter a descriptive title for the protection rule you are about to create, select the contents to protect, select the logical AND/OR rules, and select who can access the content – Everyone, logged-in users or logged-out users. Next, click the “Save Rule” button to save your changes.
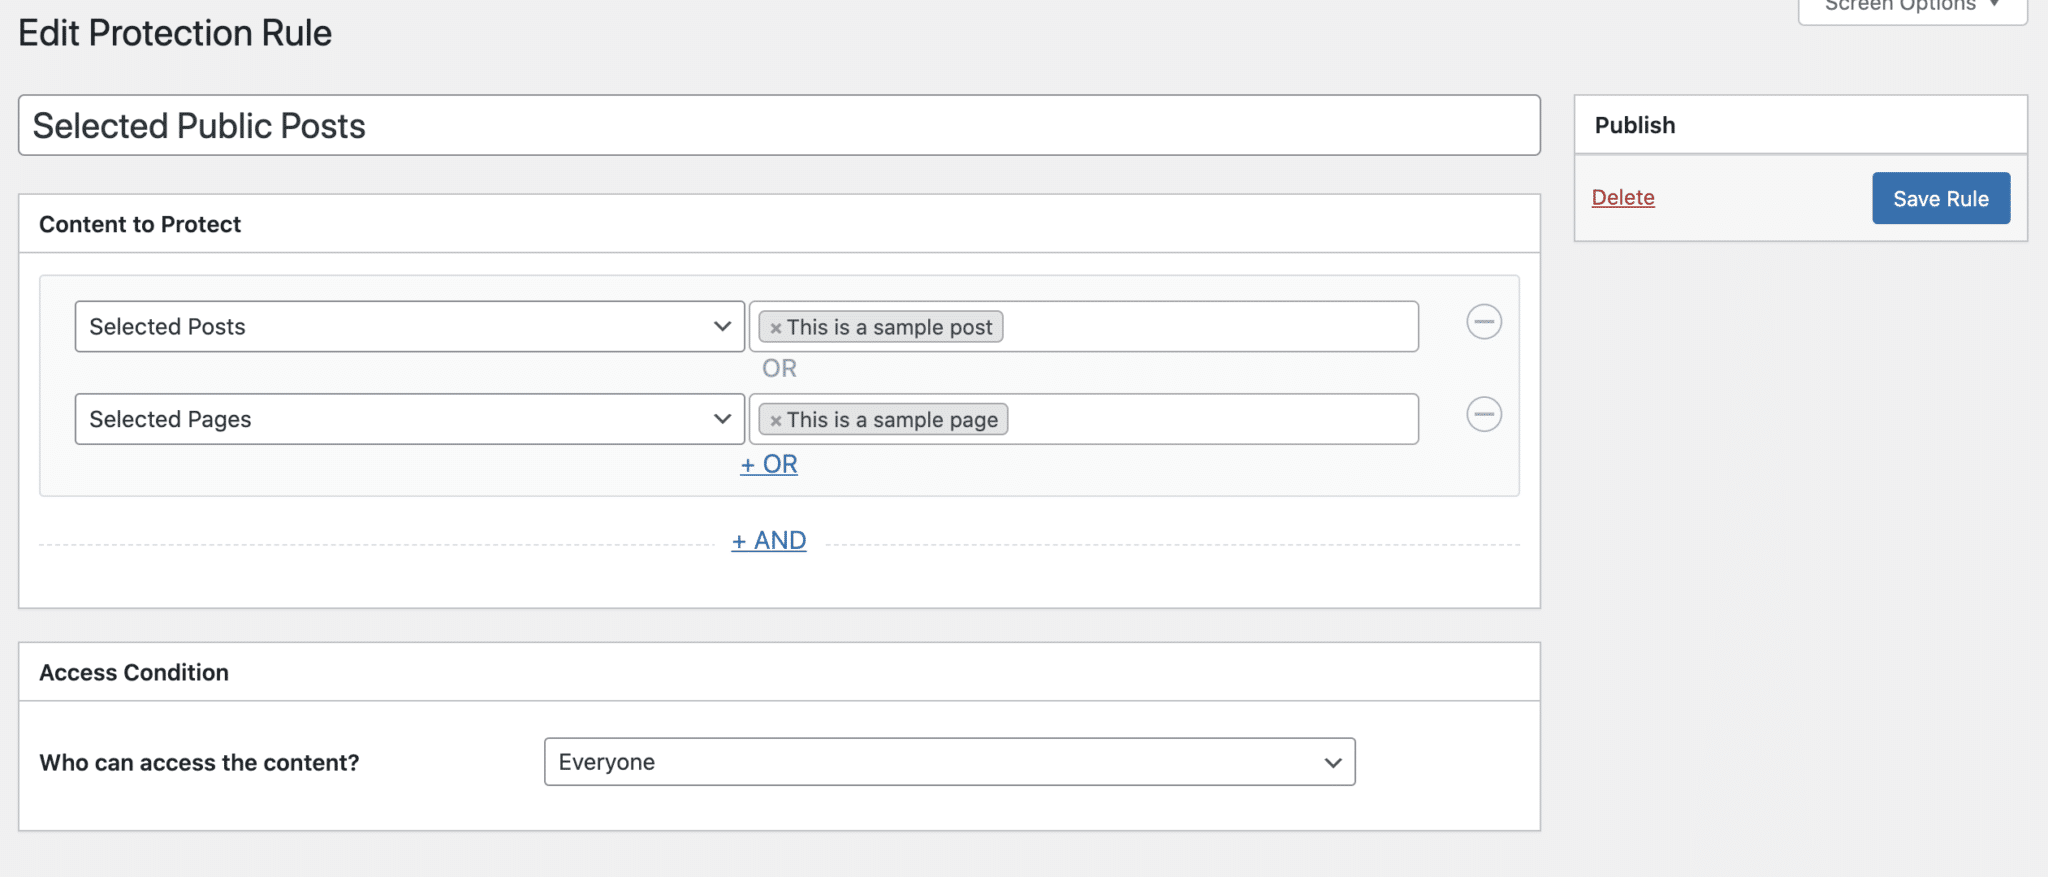
In the screenshot below, we used the OR logic. The protection rule will kick in when anyone accesses either of the selected posts or pages, and we set the Access Condition to “Everyone“, which means we want everyone to access the selected post or page.
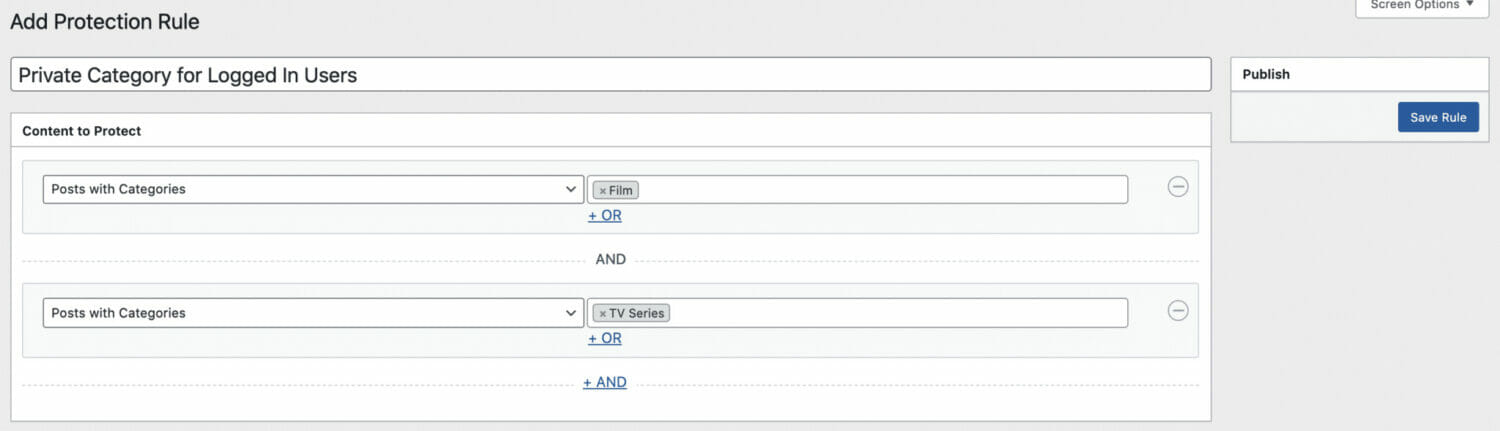
In the screenshot below, the rule will restrict posts on your site that belong to both Film and TV series categories.
You can also restrict your content to members or customers of specific membership plans or products, restrict based on selected user roles and by specific registered users by using the Access condition settings when creating your protection rules.
In the image below, we are restricting the contents to logged-in users who belong to the standard and pro membership plans.
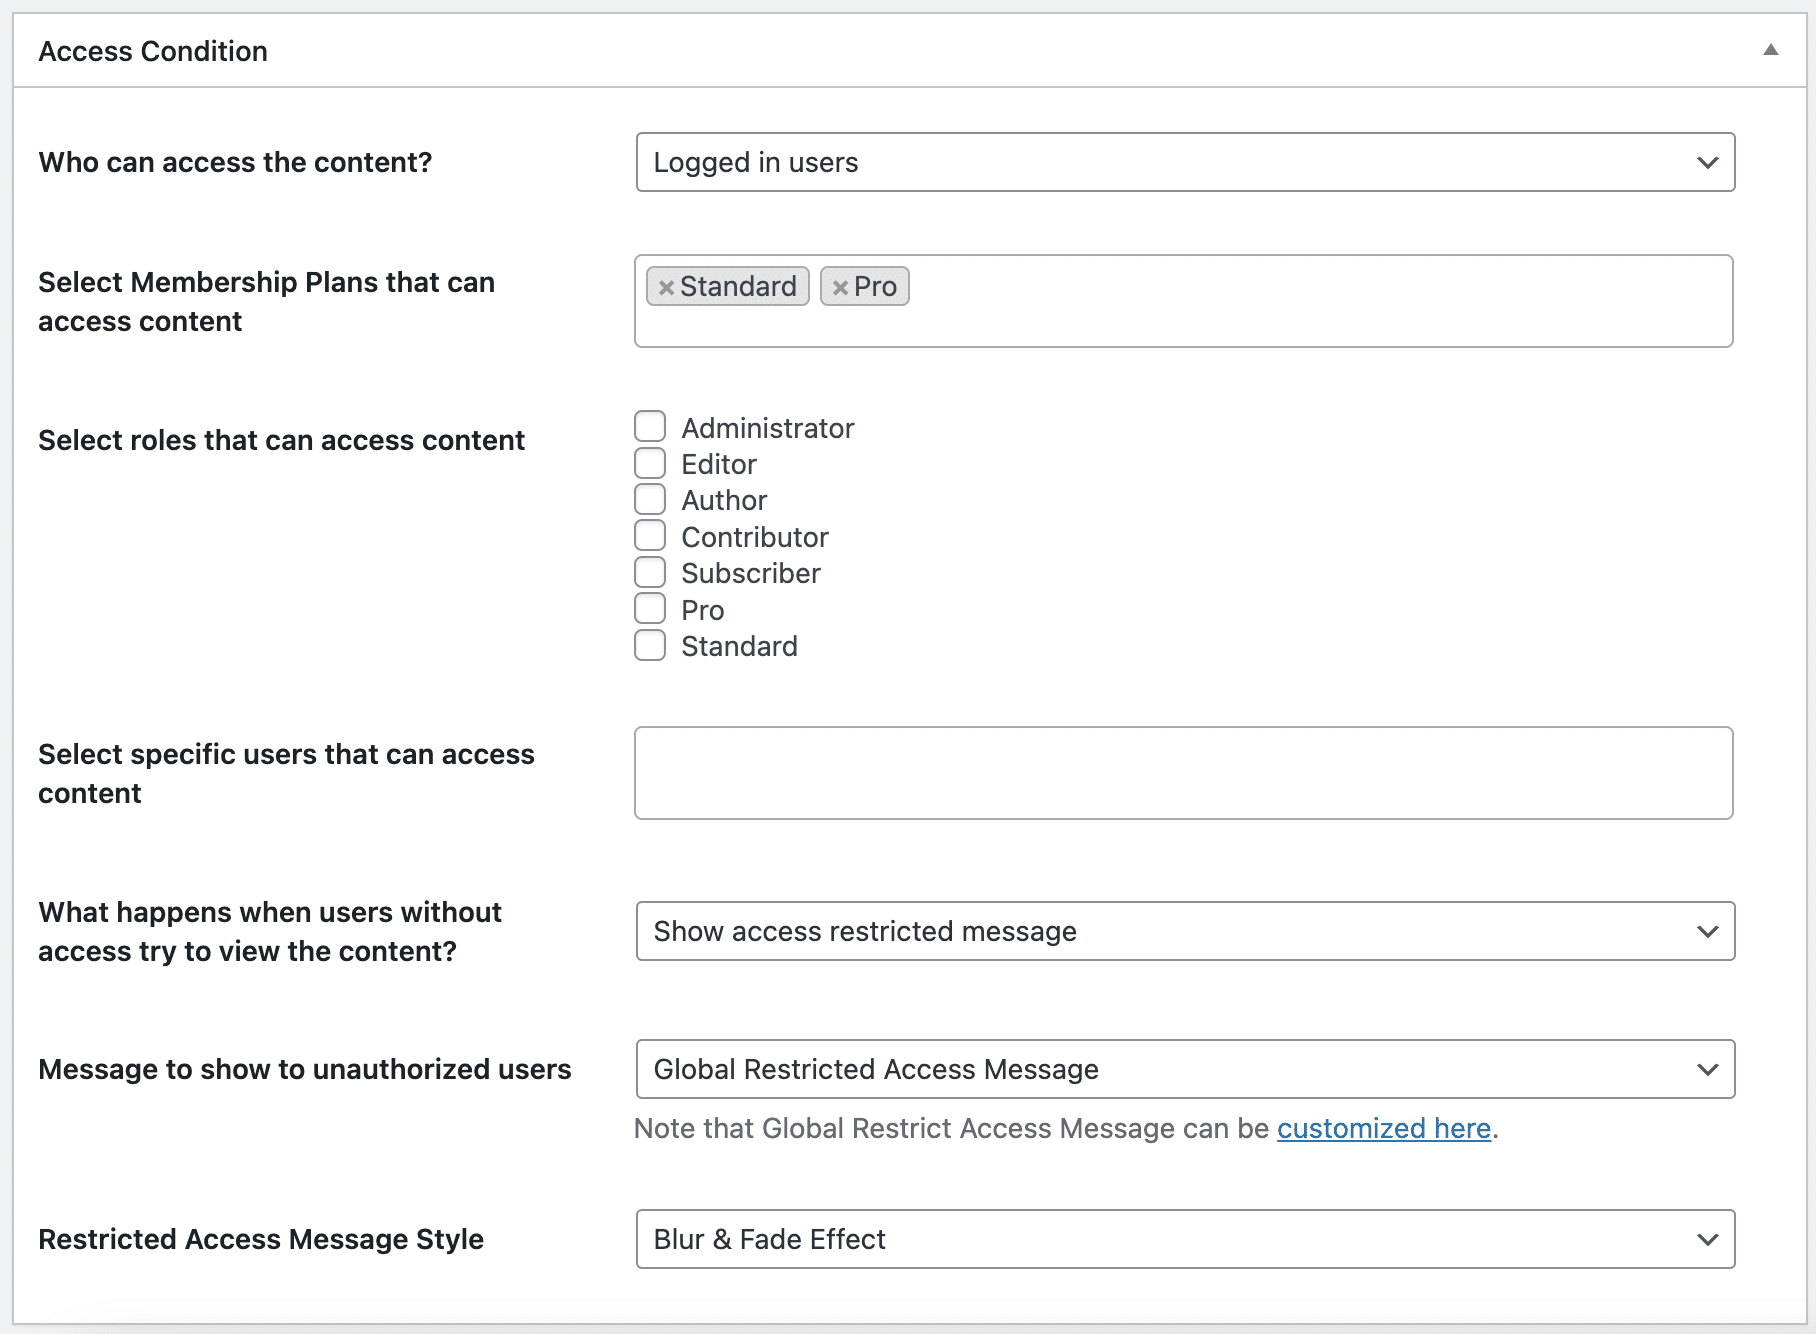
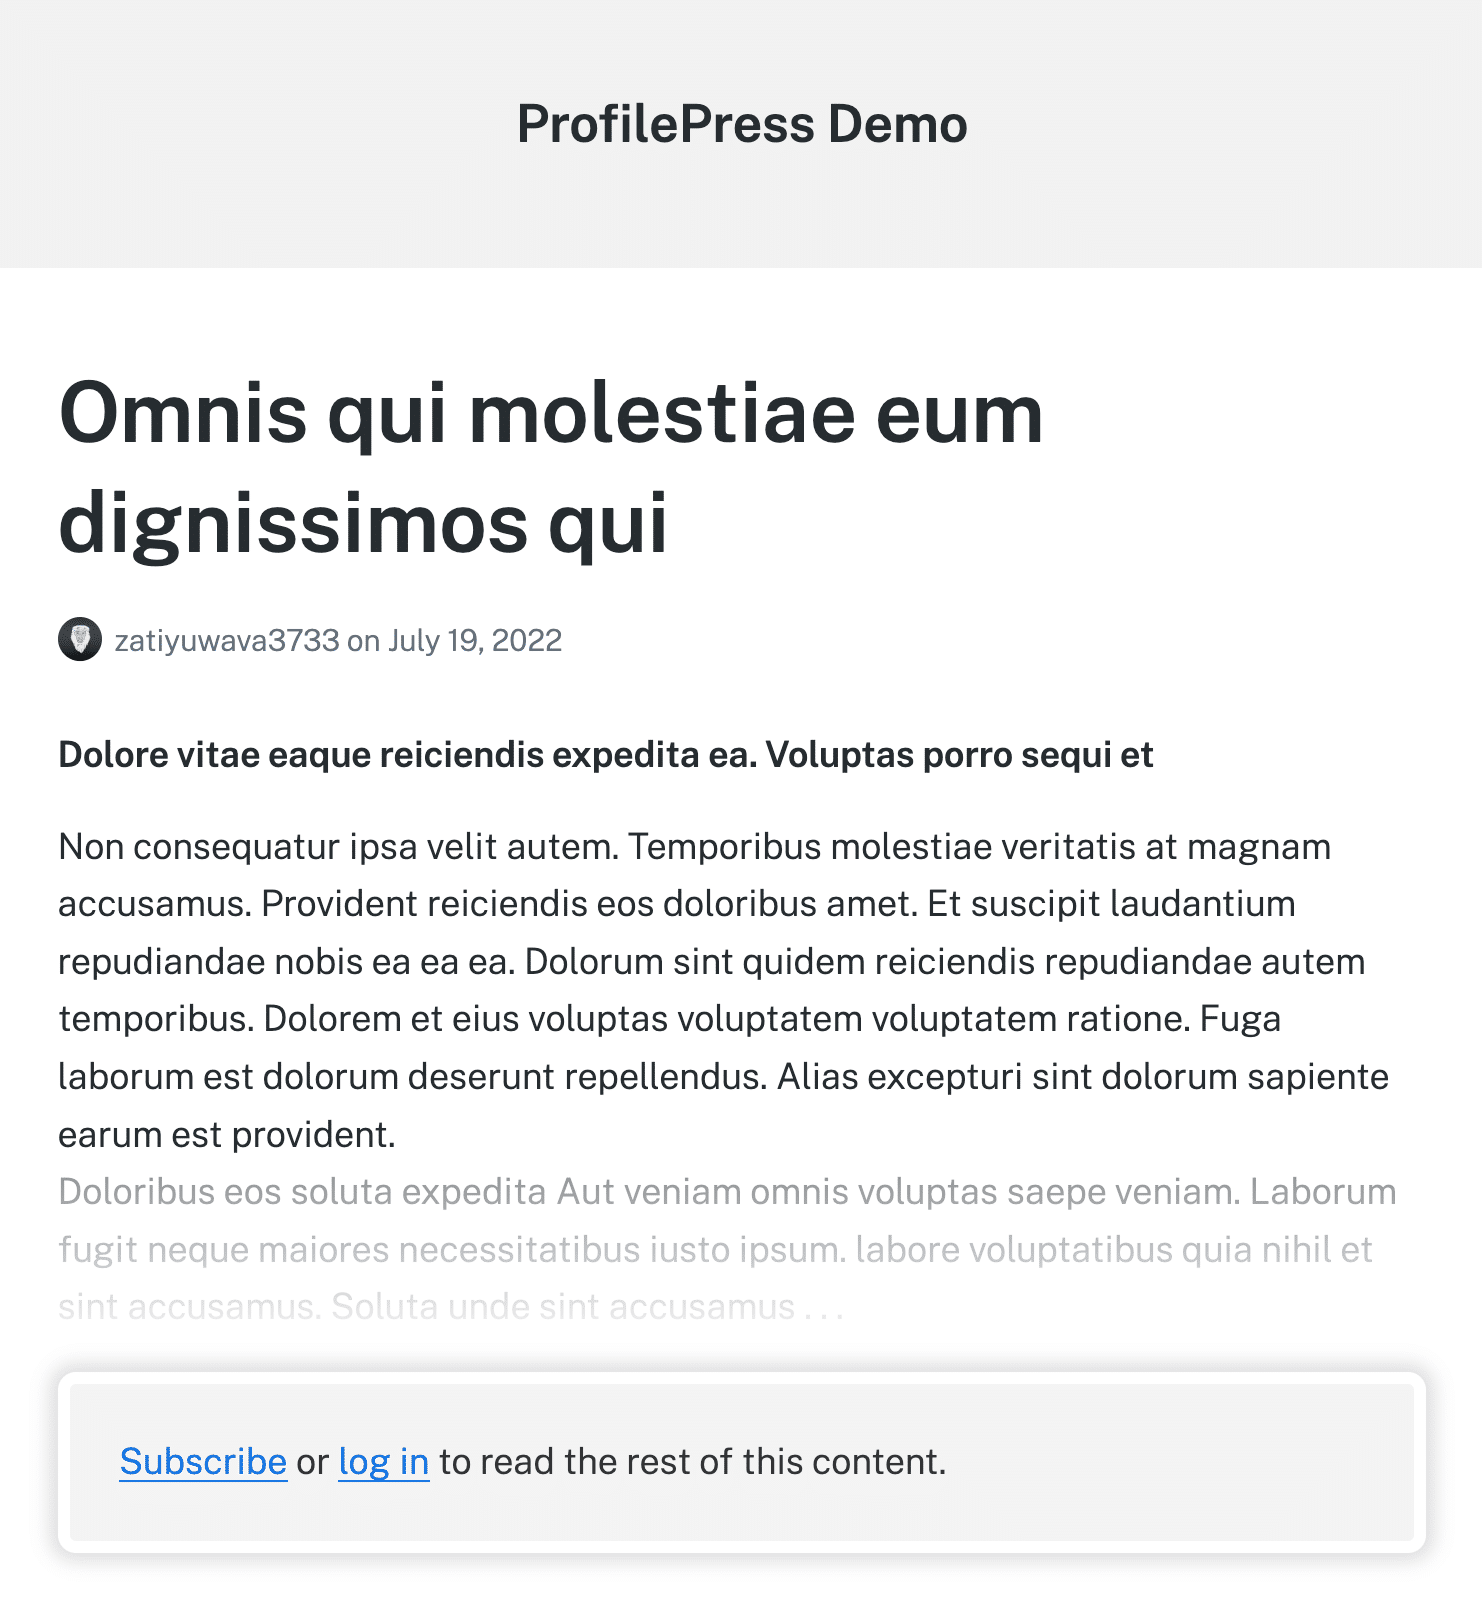
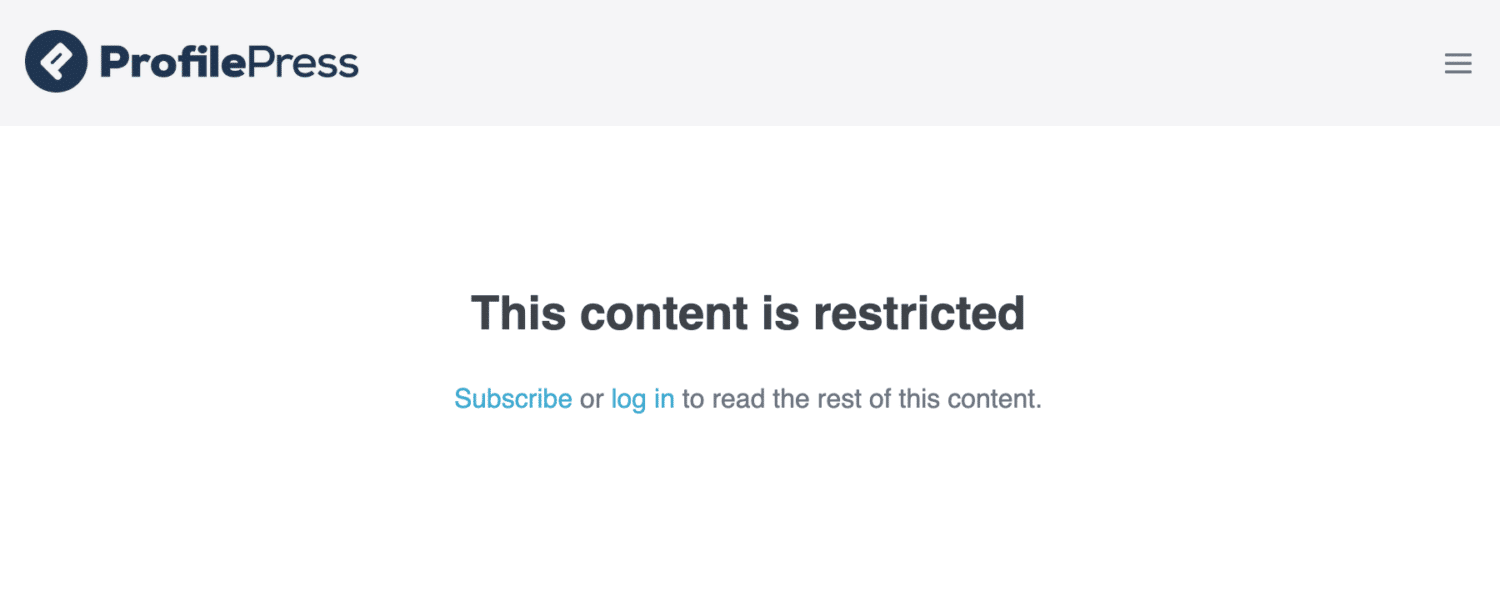
ProfilePress also allows you to configure what happens when unauthorized users try to access your content. You can show them a global restriction message, a custom message, or the post excerpt or redirect them to another page.
You can also choose access message styles like “Blur & Fade Effect” and more stylings for your Access Message.
Remember to click the “Save Rule” button to save your changes.
You should note that you can create as many content protection rules as you want and deactivate or reactivate any rules from the ProfilePress Rules listing page.
How to Protect WordPress Post Categories
Password protecting many individual WordPress posts can be time-consuming and tedious. If you want to protect more than a few pieces of content, you should consider using protected categories.
Protected categories are the best way to restrict access to lots of posts. This is the way to go if you are building a membership site; you can restrict access to your premium posts marked under one category, leaving the rest of your site public to your visitors.
Using the ProfilePress plugin, you can create a content protection rule that protects an entire category. The user must belong to the specified role or membership plan to view any post in this category.
To get started, navigate to ProfilePress > Content Protection. Next, click on the “Add a Protection Rule” button, and you will be redirected to the page where you can build your protection rules.
Next, enter a title for the rule – Protect categories. In the “Content to Protect” section, select “Posts with Categories” from the drop-down and select your preferred categories from the selection box. Next, in the “Access Condition” section, select “Logged-in users” from the drop-down and select roles or membership plans as the case may be.
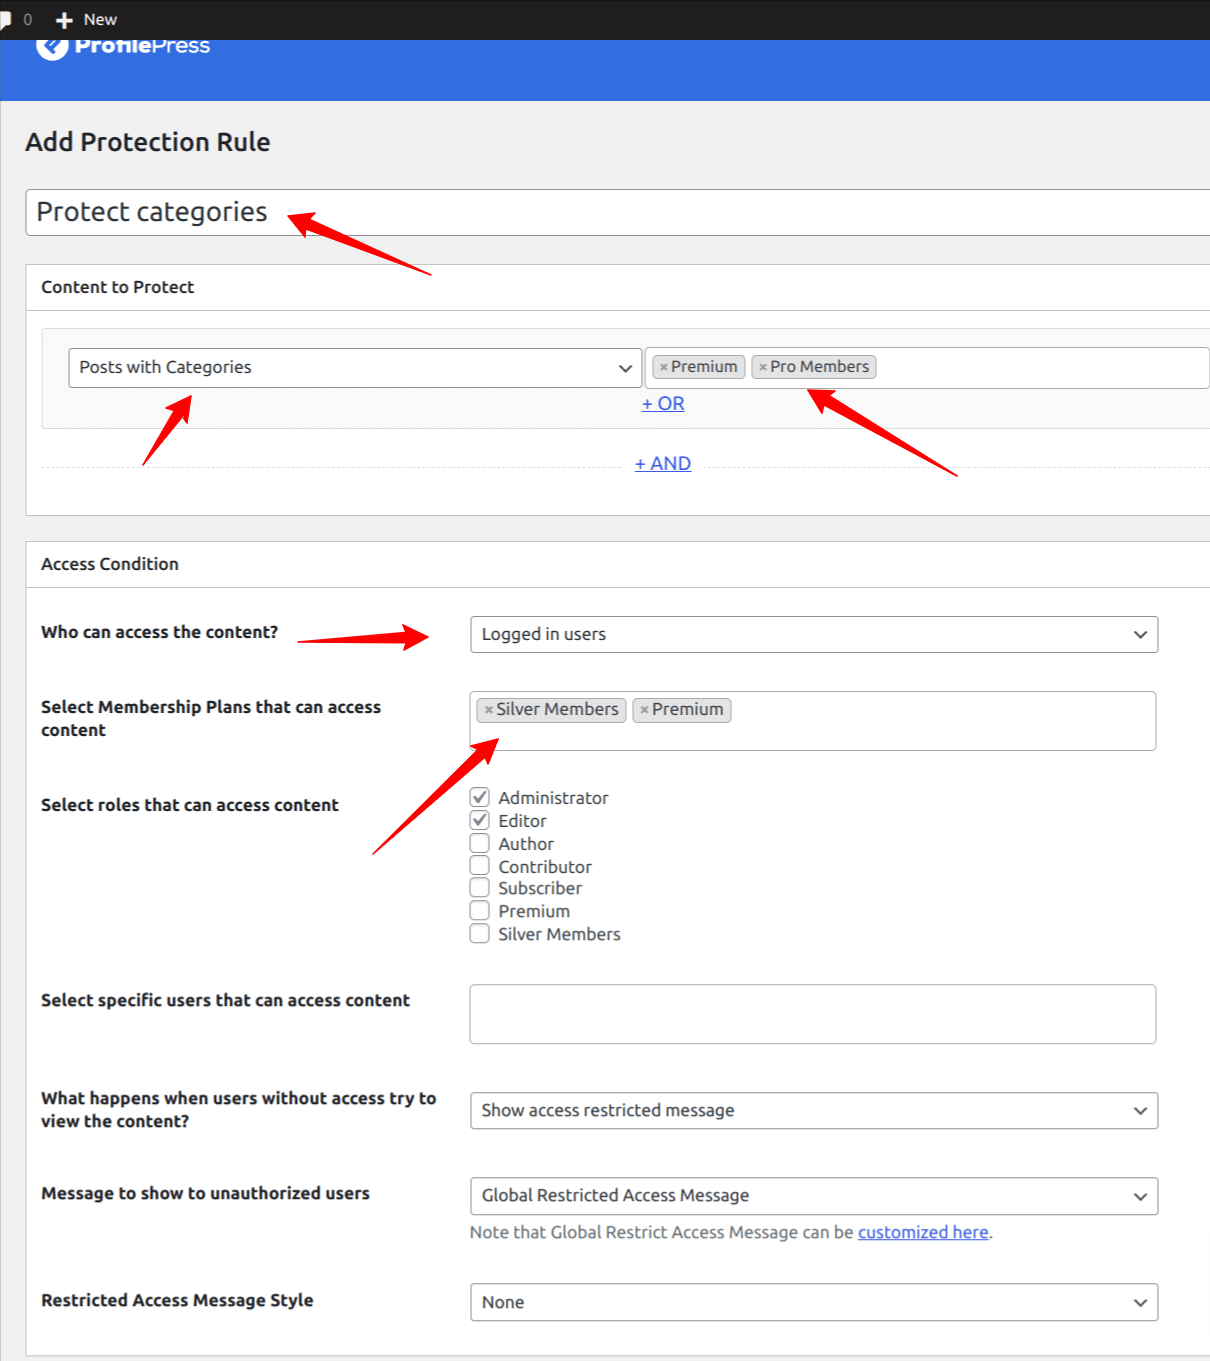
From the image above, any posts in the Premium and Pro Member categories will be restricted to Logged-in users who are members of the Silver and Premium membership plans. Remember to click the “Save Rule” button to save your changes.
How to Protect WordPress Navigation Menu
If you are building a membership or a community website with WordPress, you will most likely want to control the visibility of your WordPress navigation menus.
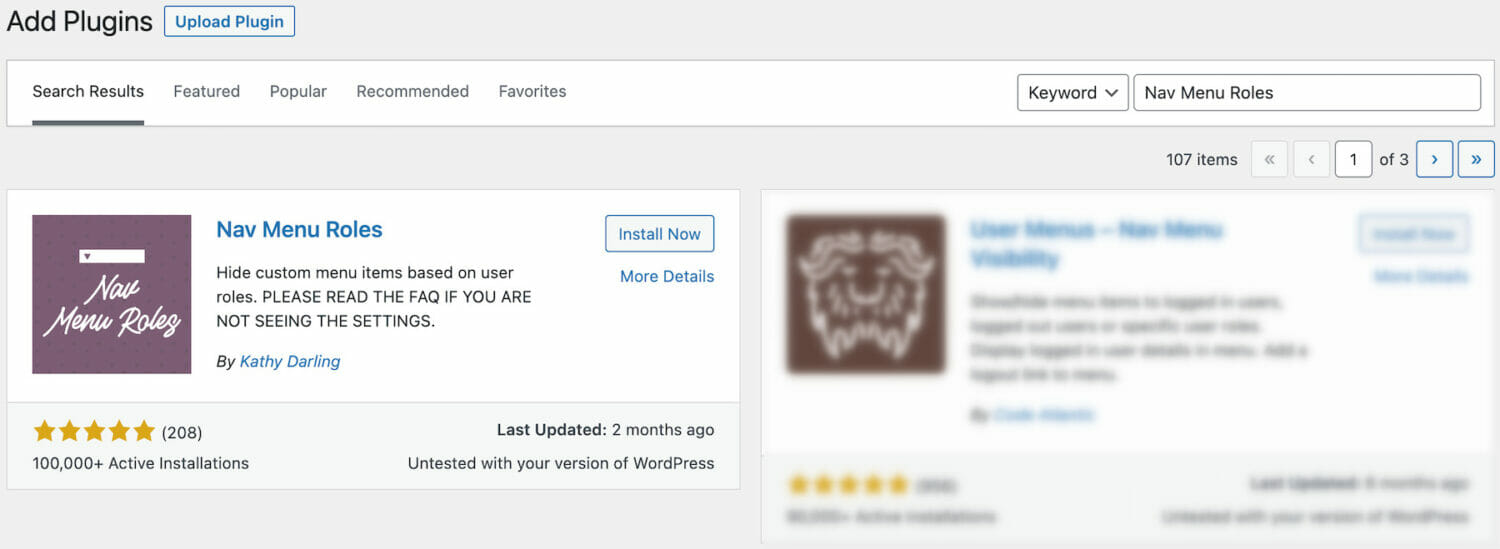
ProfilePress membership plugin integrates with the powerful menu restriction plugin, Nav Menu Roles, which allows you to control the visibility of your WordPress site menu based on specific user roles, logged-in or logged-out users, or paid members.
To get started, you need to install and activate the Nav Menu Roles plugin. Go to your WordPress dashboard, go to Plugins > Add new. In the search box, type in “Nav Menu Roles“, then click the “Install Now” button and then the Activate button.
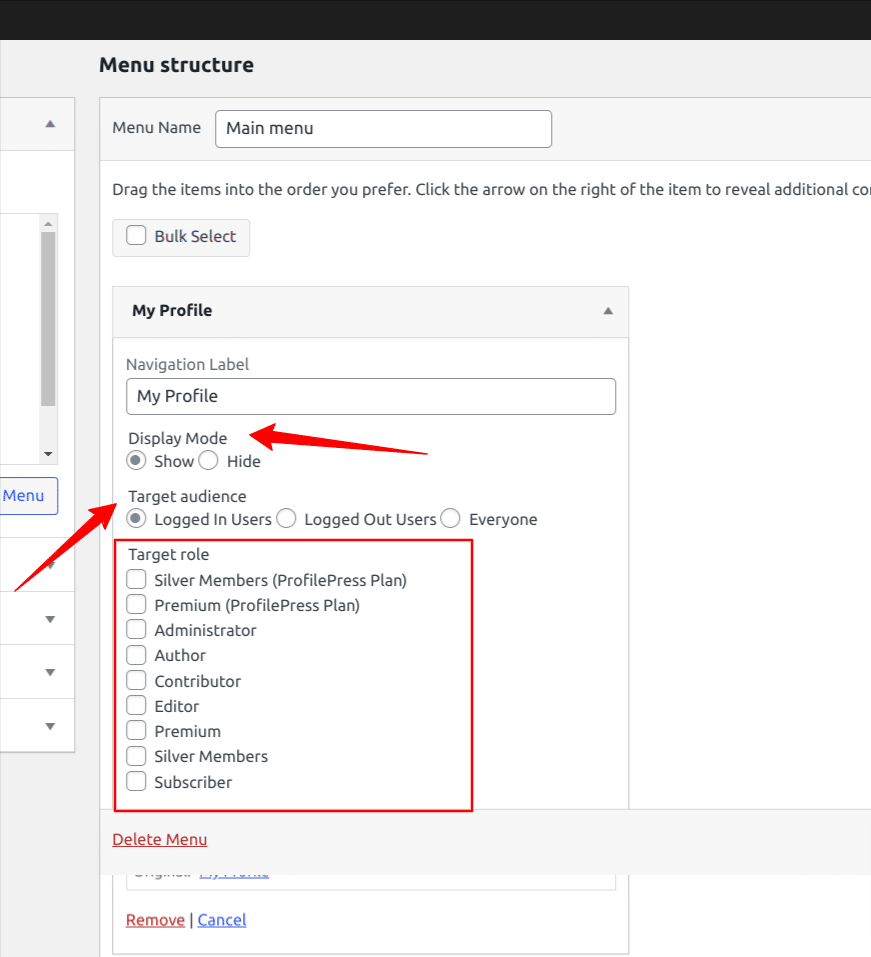
After activating the plugin, go to Appearance > Menus and expand your menu item. You will be presented with various options that allow you to control the visibility of your navigation menus.
You can choose the target audience for your menu and the target role based on the member’s active membership plan.
The “Display” mode settings allow you to hide or show the menu based on the rule you have set.
The “Target Audience” setting allows you to choose whether to show the menu to all users, logged-in users, or logged-out users.
The “Target Role” setting allows you to select the roles of the user allowed to access the menu. You can choose from the default WordPress user roles based on a member’s active membership plan.
Click on the “Save menu” button, and your settings will be applied to your menu item.
How to Protect Content in WordPress Block Editor
The WordPress Block Editor, which ships by default with WordPress installations, is now becoming more popular amongst web developers and website owners for the creation of posts and pages.
If you use the Block editor, you can control the visibility and restrict access to your website’s specific contents, elements, sections, and widgets based on the user’s logged-in status, roles, and membership plans.
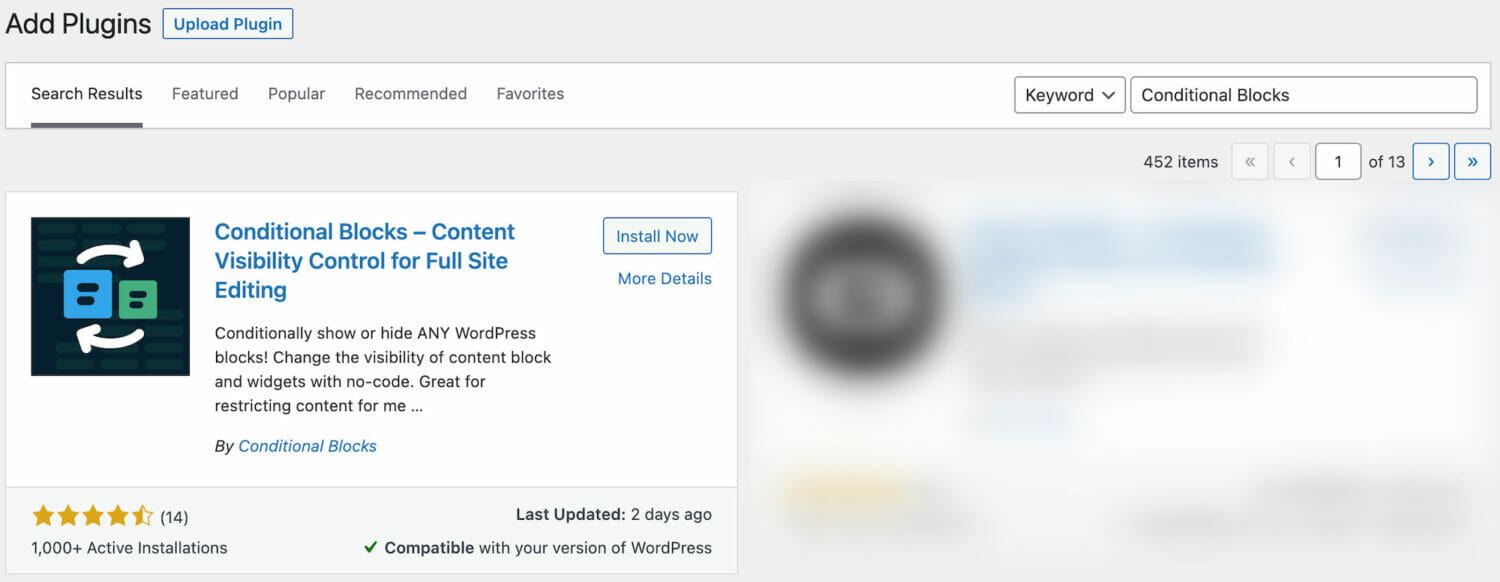
To achieve this, we will be using the Conditional Blocks Plugin. This plugin will give you the tools to restrict content in the WordPress block editor.
To get started, you need to install the Conditional Blocks Plugin. Go to your WordPress dashboard, go to Plugins > Add new. In the search box, type in “Conditional Blocks“, then click the “Install Now” button and then the Activate button.
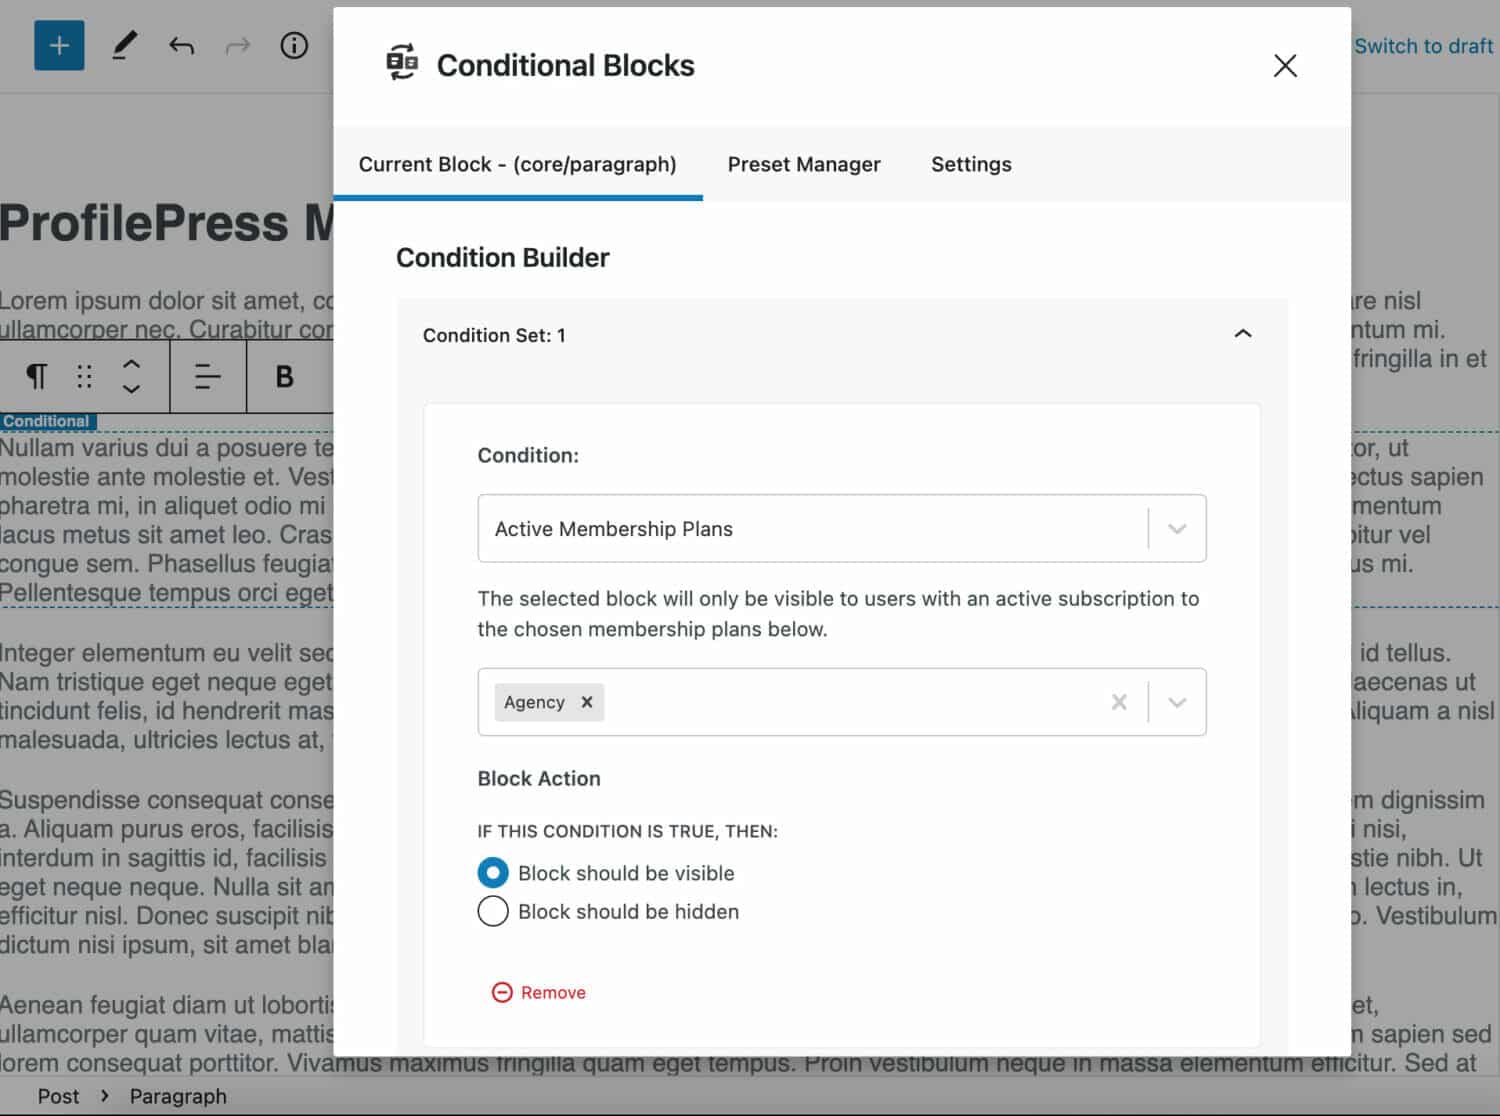
To restrict your content visibility in the Block editor, you will click on the specific content block to reveal the block settings, scroll to the “visibility conditions” section and click the “configure Conditions” button.
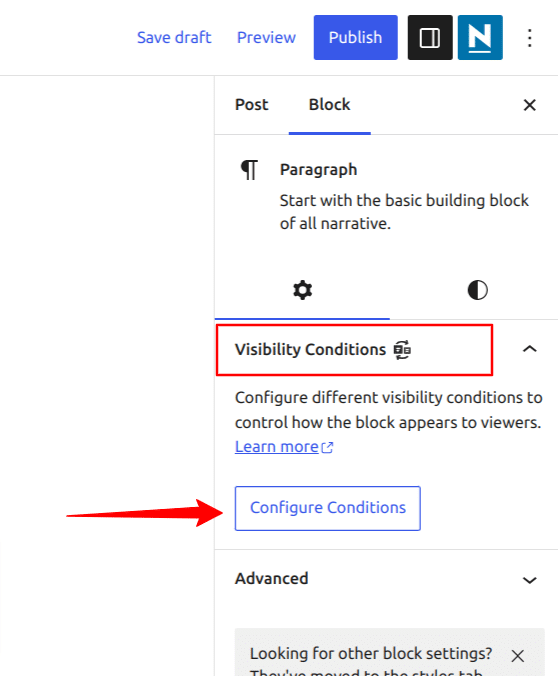
You will be presented with a modal screen that will enable you to build your conditions for restrictions. Select “Active membership plan” under ProfilePress as the condition and then select the membership plans whose active members will get access or denied access to the content block.
You can tweak the configurations to suit your needs and save your changes when you are done.
How to Protect Content in Elementor Builder
Elementor is one of the most popular website builders out there. Luckily, the ProfilePress plugin integrates with the Elementor builder to control visibility and restrict access to certain contents, elements, sections, and sections widgets based on users’ logged-in status and membership plans.
ProfilePress adds a content restriction feature to every container, element, and widget you use to build your WordPress site with Elementor so that you can control the visibility of those contents. To restrict any content, select an element, container, section, or widget and open the Advanced tab from the Elementor sidebar.

To restrict the content to users that are logged out or not logged in to your WordPress site, set the Target Audience dropdown to Logged-out Users, and to restrict the content to Logged-in Users, set the Target Audience dropdown to Logged-in Users. This will cause the content to be available only to users logged in to your WordPress site.
You can further restrict the content to logged-in users with an active subscription to specific membership plans or users of certain user roles by tweaking the settings to your liking.
How to Protect Content in Beaver Builder
Beaver Builder is another popular WordPress website builder out there. ProfilePress also integrates with it to control visibility and restrict access to certain contents, elements, sections, and widgets based on users’ logged-in status and membership plans.
By default, the Beaver Builder plugin includes a visibility feature for controlling who can see every row, column, and module.
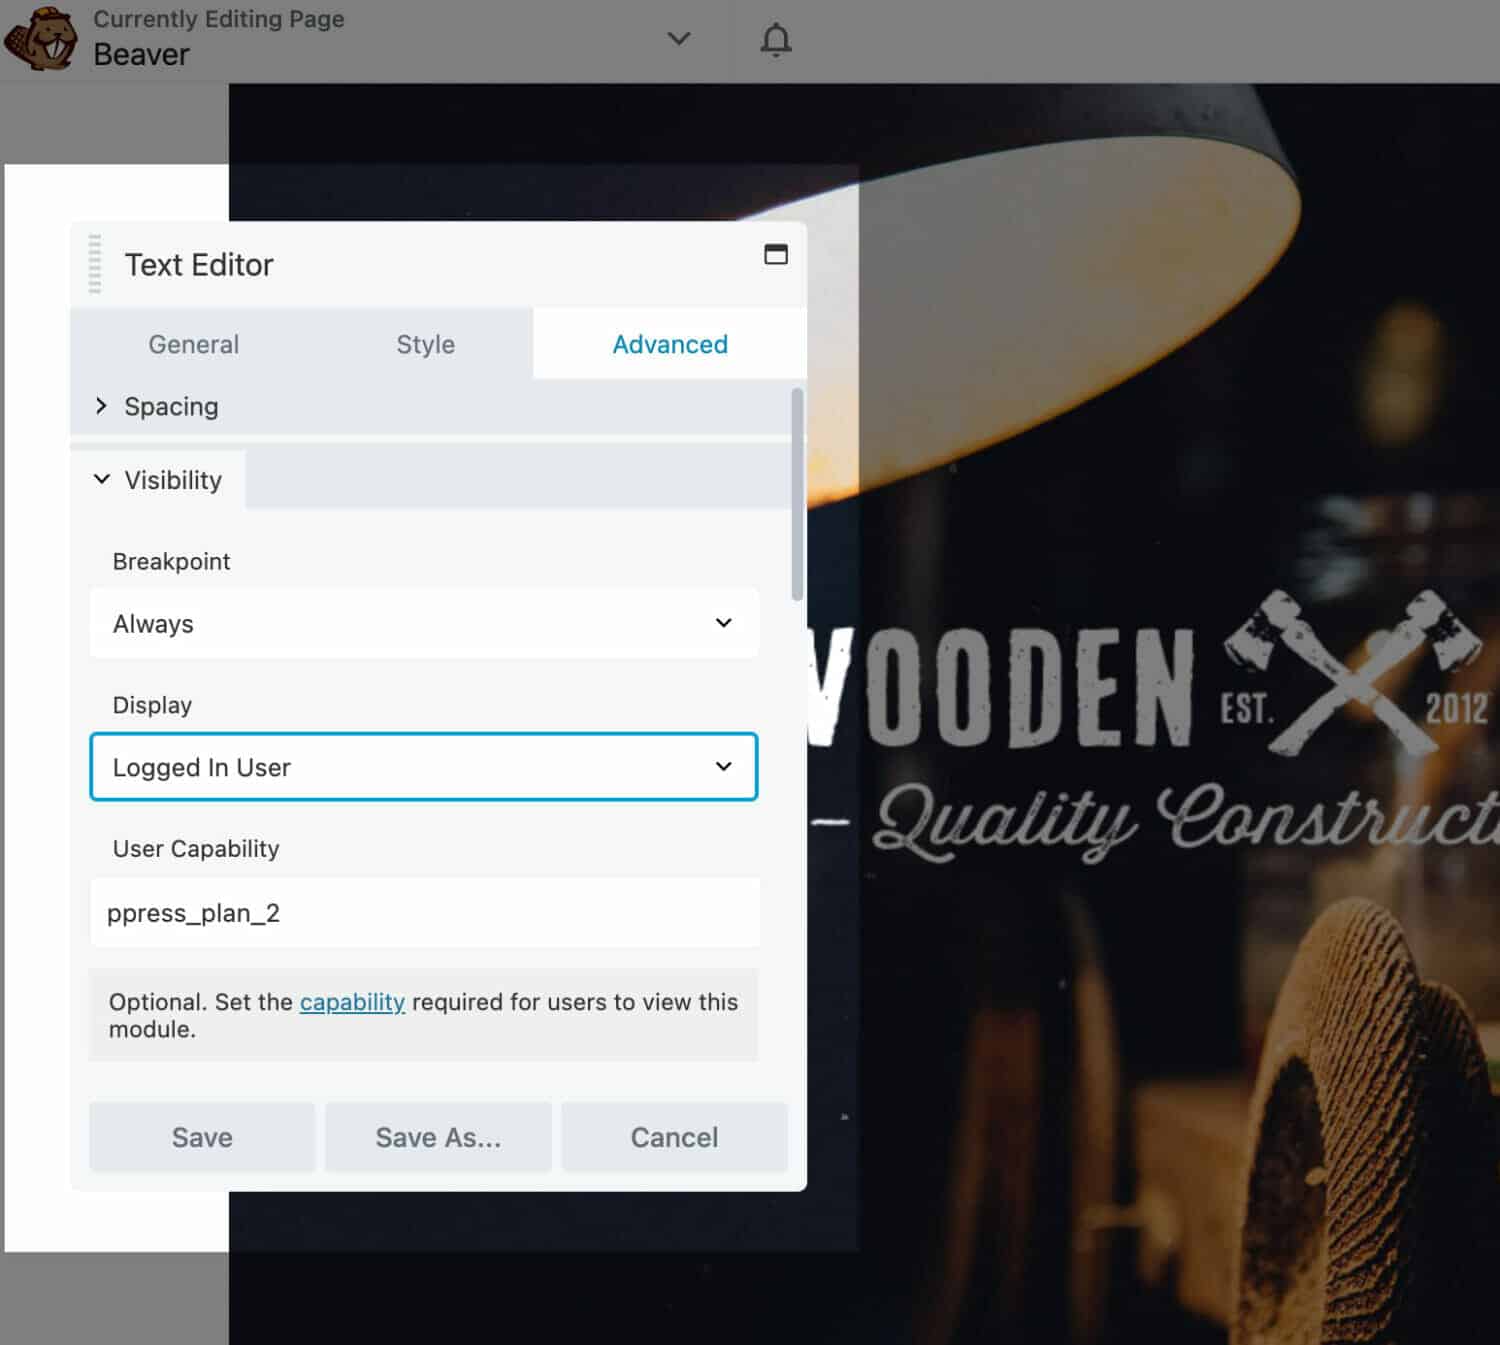
To restrict contents, open an individual row, column, or module for editing by clicking the wrench icon. Click the Advanced tab and scroll to the Visibility section.
In the Display field, choose who can see the content. The options are Never, Always, Logged Out User, and Logged In User.
To restrict the content to logged-out users, set the Display setting to “Logged Out User”. Set to “Logged In User” if you want only logged-in users to see the content.
To restrict the content to members with an active subscription to a specific membership plan, add to the “User Capability” setting,ppress_plan_{plan_id_here}. For example, ppress_plan_2 where 2 is the membership plan ID.
To restrict the content to multiple membership plans, add a comma-separated list of capabilities to the “User Capability” settings like so: ppress_plan_2, ppress_plan_6. Don’t forget to save your changes when you are done.
Aside from protecting your WordPress content, the ProfilePress plugin also has a Metered Paywall feature.
The Metered Paywall feature gives you the power to allow users to read a limited number of posts or articles for free within a set timeframe. Once they reach that threshold, you can ask them to become a paid member or sign up for your website to gain unlimited access.
This method of restricting content access is called Metered Paywall, and you can find this feature on popular News and Magazine sites such as New York Magazine, The New York Times, and Medium sites.
You can activate the Metered Paywall feature from the ProfilePress Add-ons page.
Final Words
This article covers how to protect your WordPress Posts, Pages, Categories, and other content. Whether you want to restrict access to your entire WordPress site, a piece of content, a group of posts and categories, or something else, you can do it using the ProfilePress plugin.
Take some time to look at your end goal and then decide which content protection method in this article will work best for you and enjoy your WordPress protection functionality.
Get your copy of the ProfilePress plugin today and start securing your content.