Do you want to learn how to accept payments in WordPress via Paddle?
If you are selling digital products, online courses, subscriptions, or membership access, you already know that accepting payments in WordPress can quickly become complicated. Payment setup often involves tax rules, compliance issues, and technical configurations that slow down your launch.
Paddle removes that complexity. When you accept payments in WordPress via Paddle, you are not just adding a payment gateway. Paddle acts as a Merchant of Record, handling payment processing, VAT, sales tax, and global compliance on your behalf. This means you can focus on your product while Paddle manages the financial and legal side of each transaction.
In this guide, I’ll walk you through why Paddle is worth your time, then show you exactly how to accept payments in WordPress via Paddle. We’ll also cover a few best practices I’ve learned along the way, and wrap things up with answers to the most common questions people ask.
Why Use Paddle for WordPress Payments
Paddle offers several advantages for WordPress users selling digital products, memberships, and subscriptions. Here are some of the biggest benefits.
1. It Handles Sales Tax and VAT Automatically: Selling to customers in multiple countries often means dealing with different tax laws and reporting requirements. Keeping up with those rules can quickly become overwhelming.
Paddle automatically calculates, collects, and remits applicable sales taxes and VAT based on the customer’s location. This reduces the amount of manual work required and helps businesses stay compliant with international tax regulations.
2. Great for SaaS and Subscription Businesses: If your WordPress website sells recurring memberships, software licenses, or subscription-based services, Paddle includes built-in subscription management features. You can create recurring billing plans, manage renewals, handle failed payments, and allow customers to update their payment methods without needing multiple third-party services.
3. Supports Global Customers: Paddle accepts payments from customers around the world and supports multiple currencies and payment methods, including credit/debit cards, PayPal, Apple Pay, Google Pay, Alipay, iDEAL, WeChat Pay, UPI, and bank transfers (ACH, SEPA, BACS). This allows visitors to pay with options they are familiar with, creating a better checkout experience and potentially improving conversion rates.
Requirements Before Integration
Before setting up Paddle payments in WordPress, you need a few essentials in place.
1. Paddle Account Setup: The first requirement is a Paddle account. If you don’t already have one, you’ll need to create a vendor account and complete the required business verification process.
Once your account is approved, you’ll have access to important credentials needed for the integration, including:
- API keys
- Client-side tokens
- Notification Secret
- Webhook
These credentials allow your WordPress website to communicate securely with Paddle and process payments correctly.
2. WordPress Setup: Your WordPress website should already be installed and running properly on a web hosting server. Make sure you have administrator access, since you’ll need permission to install plugins and modify site settings.
It’s also a good idea to ensure your website uses HTTPS with a valid SSL certificate. This encrypts customer data during checkout and is considered a standard security requirement for online payments.
3. A Paddle-Compatible WordPress Plugin: WordPress does not include native support for Paddle payments, so you’ll need a plugin that integrates Paddle with your site.
Depending on your use case, this could be a plugin for selling digital downloads, memberships, subscriptions, online courses, or other products and services. In this guide, we’ll use ProfilePress, which includes built-in support for Paddle and allows you to accept one-time and recurring payments.
Steps to Accept Paddle Payments in WordPress Using ProfilePress
Ready to start accepting Paddle payments in WordPress? Follow the four steps below to connect your site to Paddle and begin collecting payments.
Step 1: Install and Activate ProfilePress
First, visit the ProfilePress pricing page and purchase a license. After completing your purchase, you’ll receive an email containing your license key and a download link for the plugin ZIP file.
Download the ZIP file to your computer, then log in to your WordPress admin dashboard. Navigate to Plugins > Add New > Upload Plugin, select the ProfilePress ZIP file, and click Install Now.
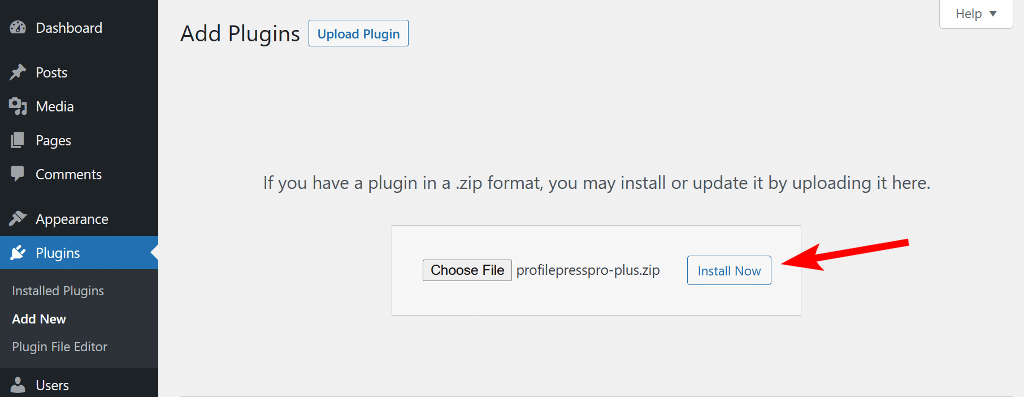
Once the installation is complete, click Activate Plugin to enable ProfilePress on your website.
Step 2: Enable Paddle Addon
To set this up, go to ProfilePress > Addons, then activate the Paddle addon.

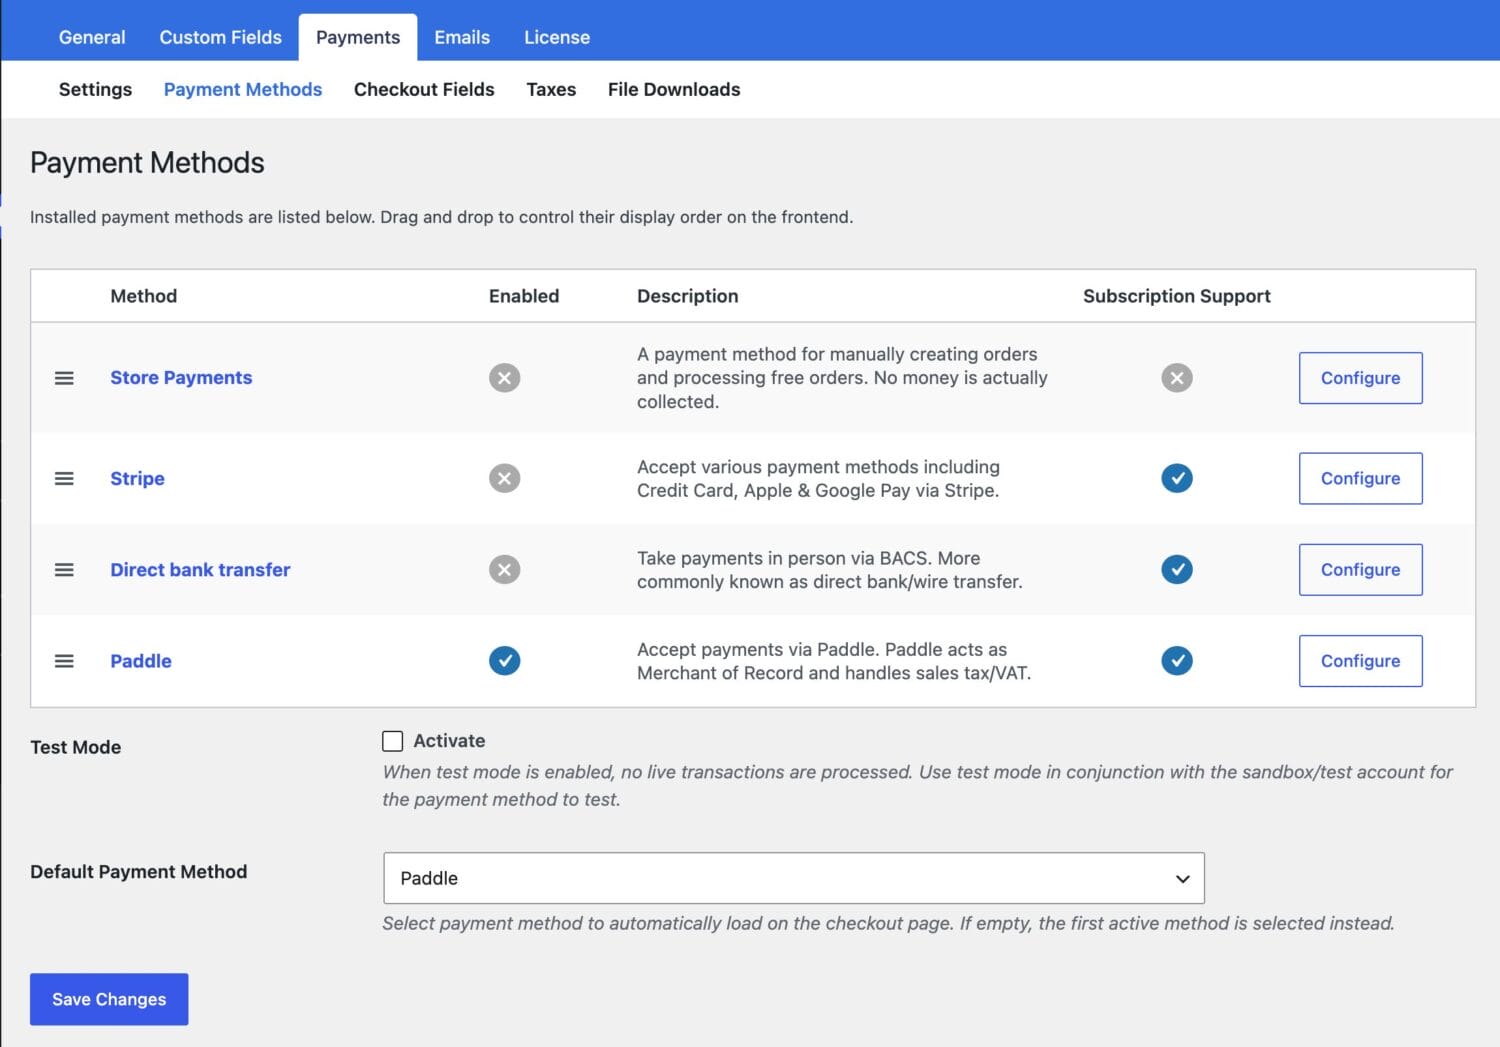
After that, go to ProfilePress > Settings > Payments > Payment Methods, locate Paddle in the list, and click Configure to continue the setup.
If you’d like to test your integration before accepting real payments, enable Test Mode first. You’ll also need to create an account on the Paddle Sandbox platform instead of using your live Paddle account.
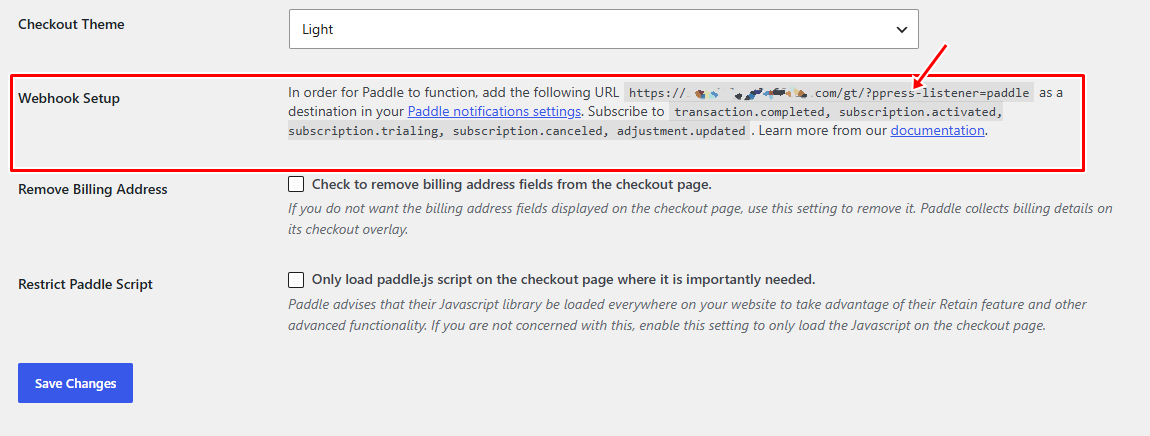
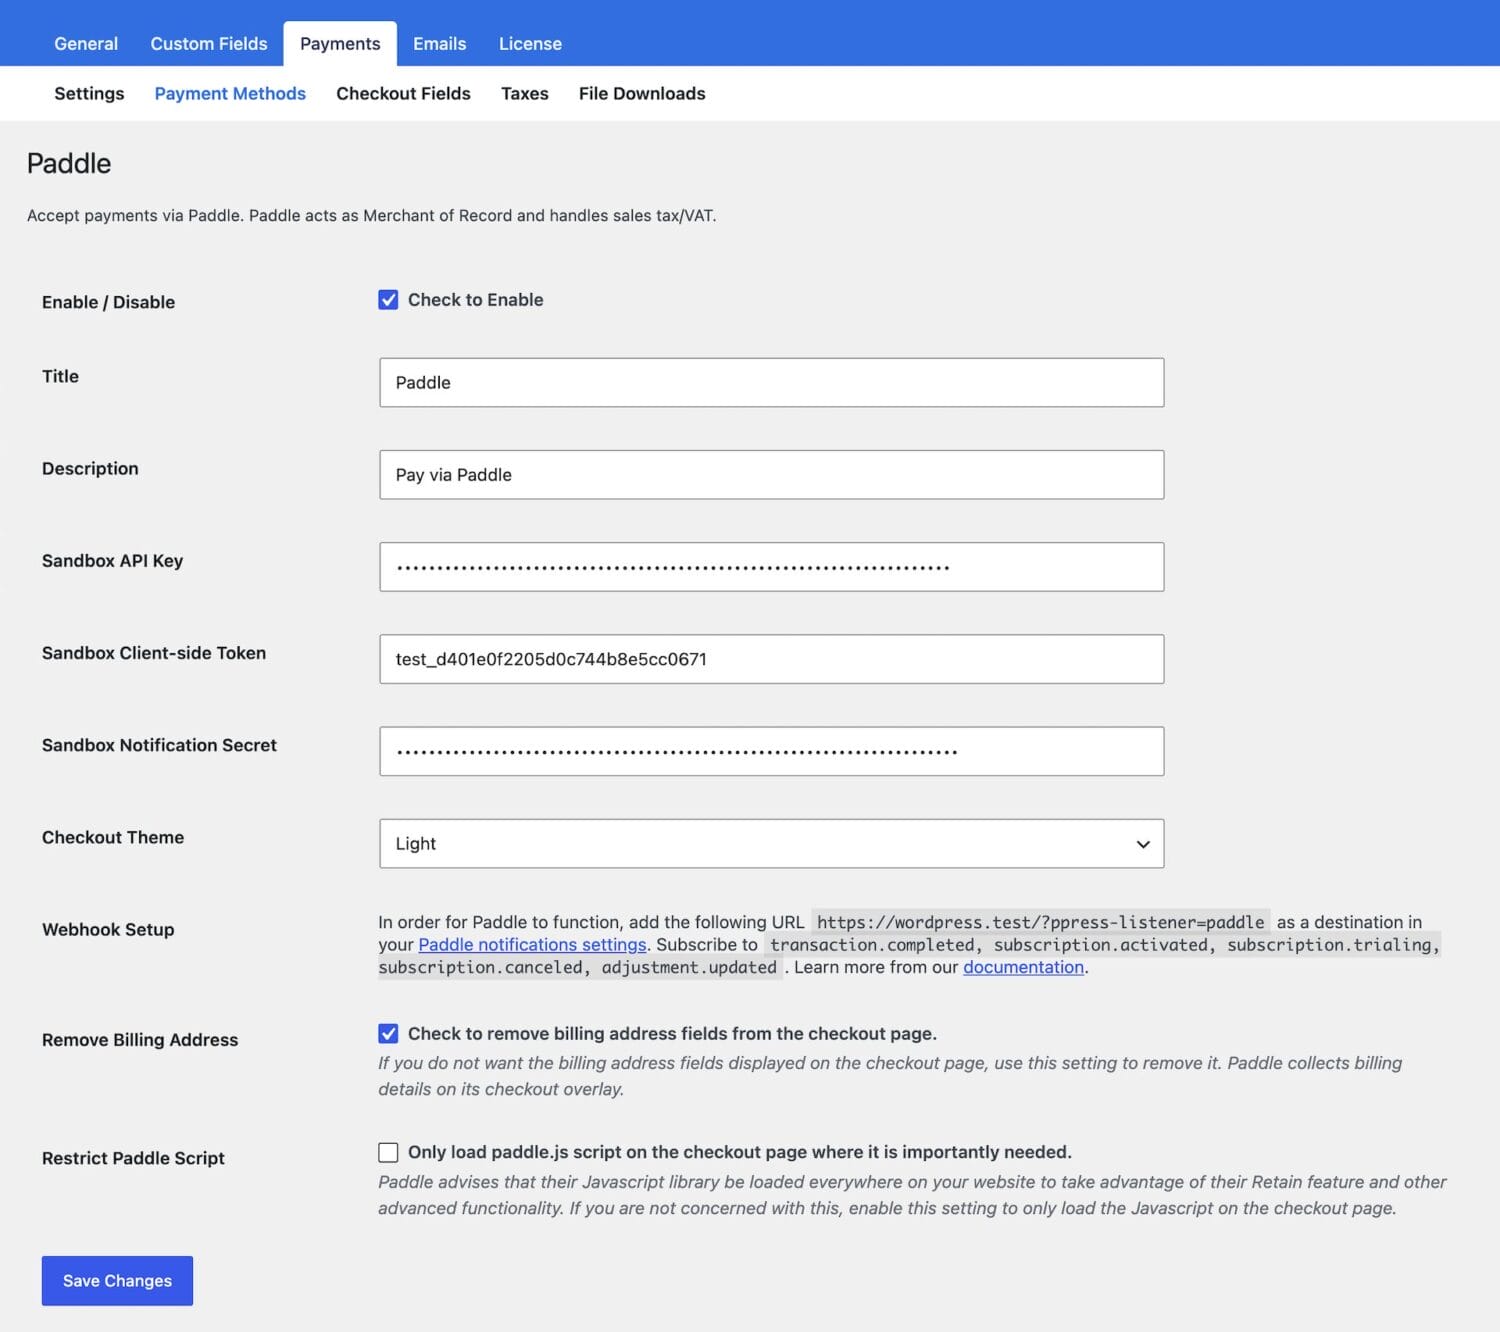
In the new window, you will need to enter your Paddle API key, Client-side Token, Notification Secret, and webhook setup to start accepting one-time and subscription payments in WordPress.
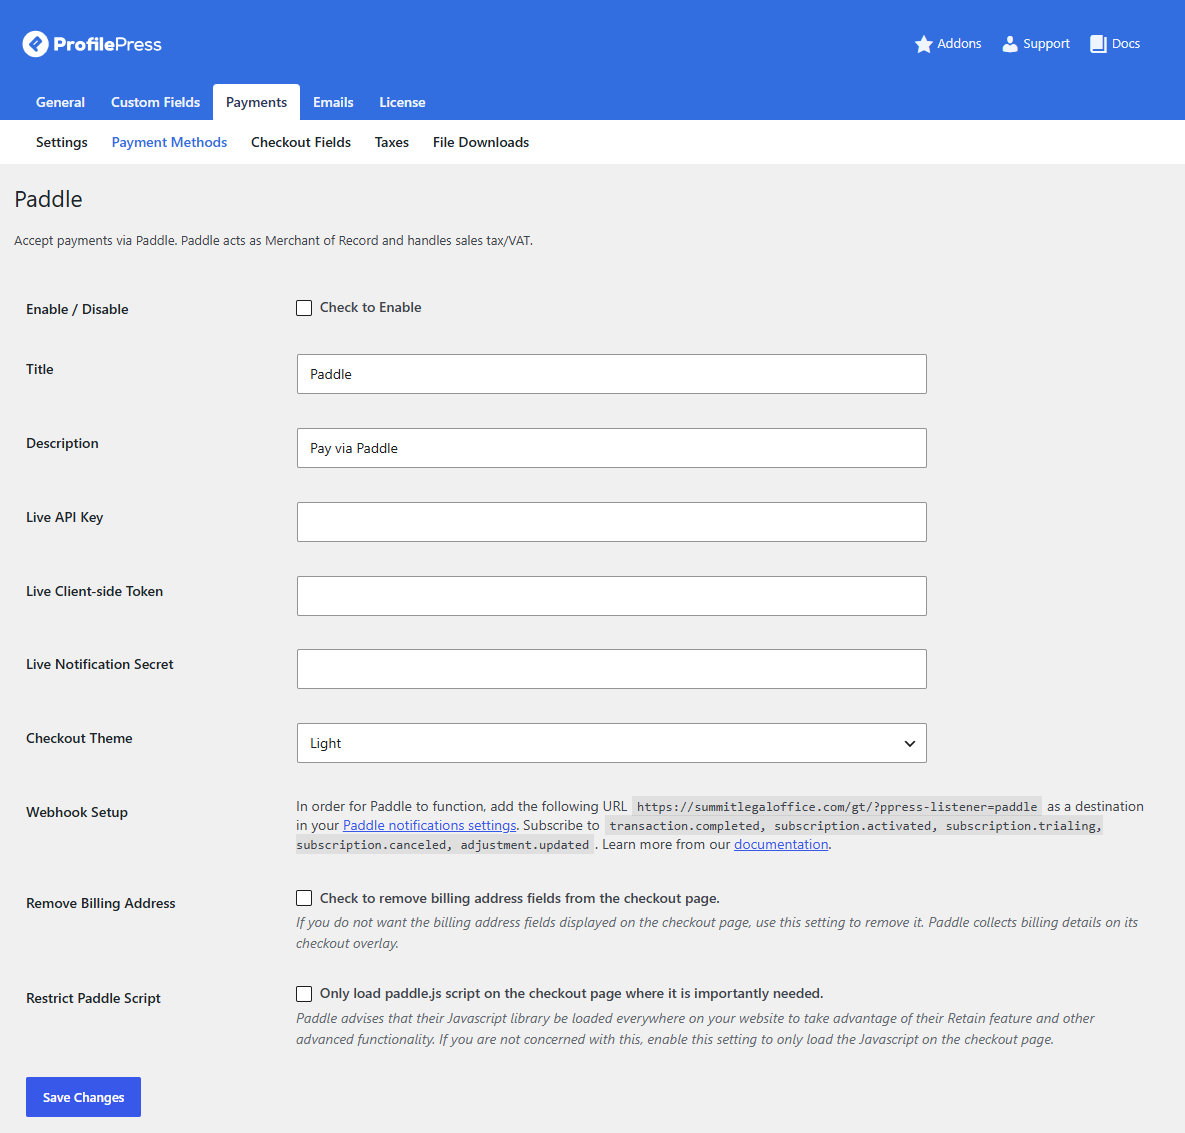
You also have the option to hide billing fields on the checkout form when Paddle is active. You can further customize the checkout experience by selecting a theme for the Paddle overlay, which is the interface customers use to complete their payments.
Step 3: Get Your Paddle Credentials and Set Up Webhooks
To get the required Paddle credentials, log in to your Paddle dashboard. From the left menu, select Developer Tools > Authentication >> API Key and click the New API key button.
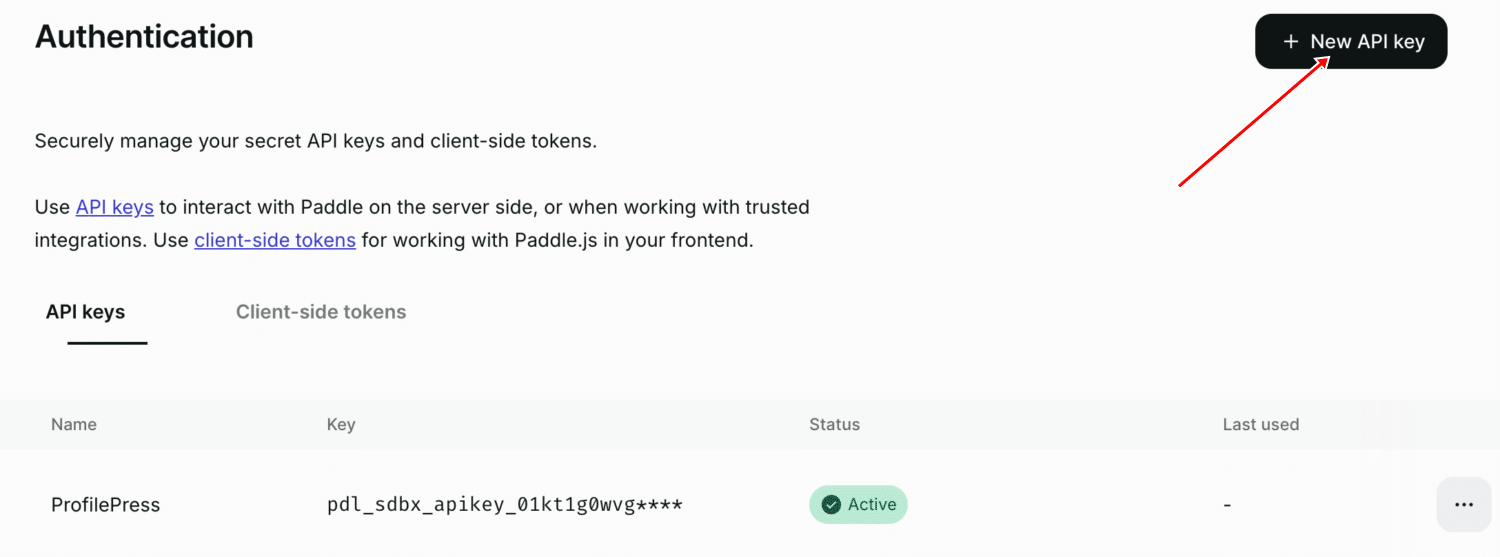
Give it a name and a short description, set “Expires at” to “Never expires,” and ensure that “Write access to all permissions” is checked.
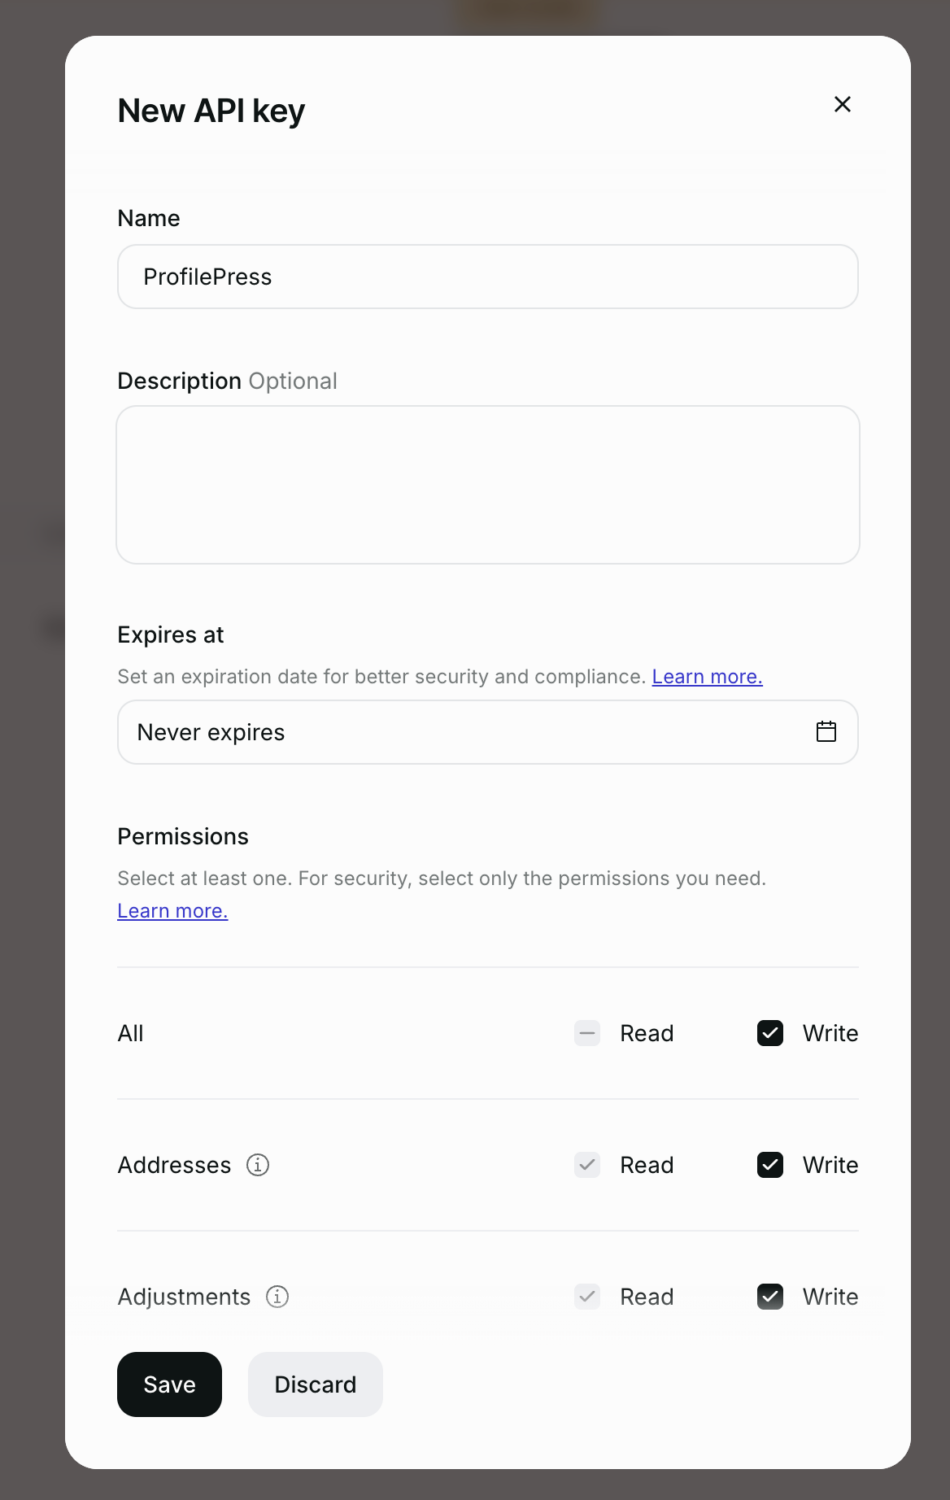
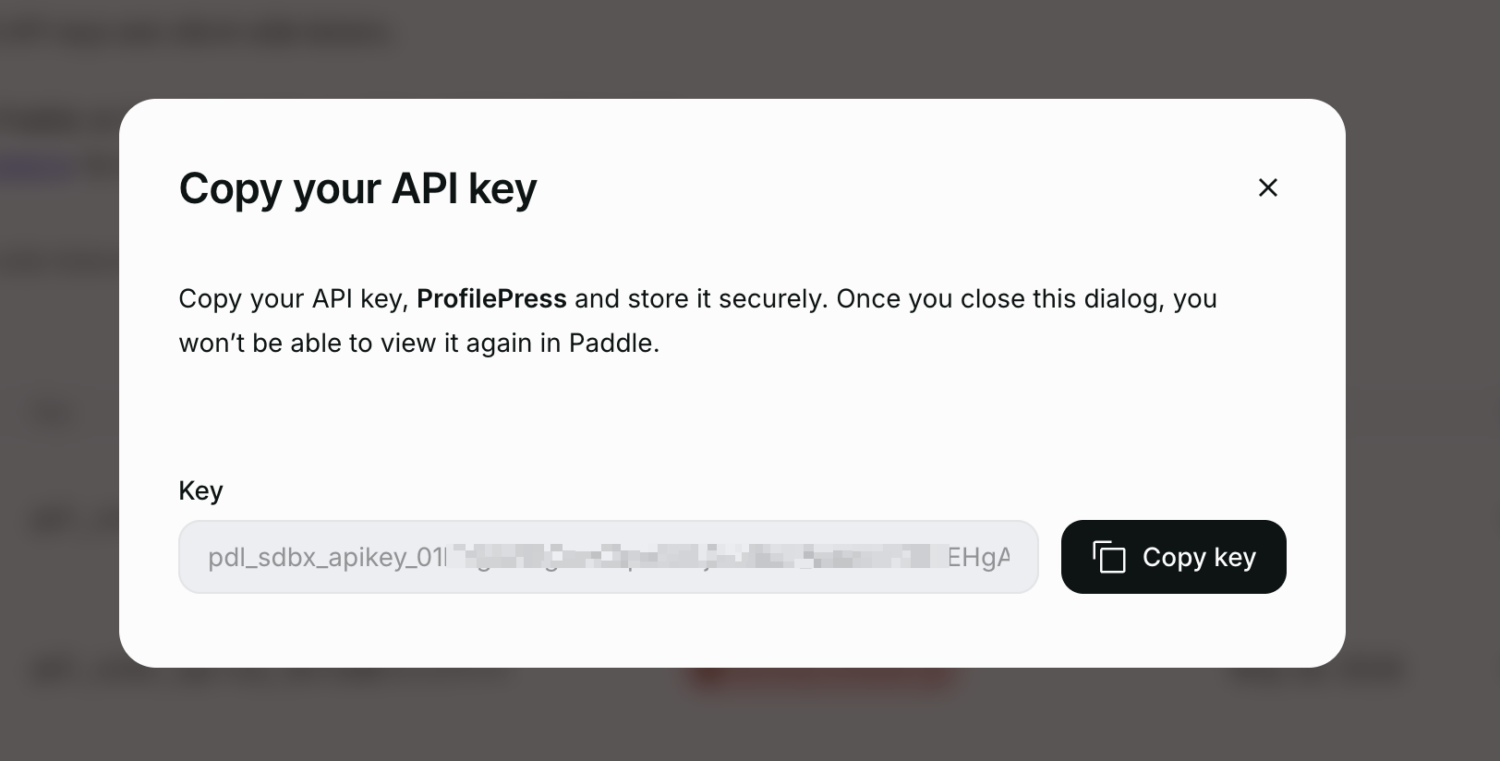
Next, click the Save button to reveal the API Key you created. Copy it and store it safely, then add it to your ProfilePress settings.
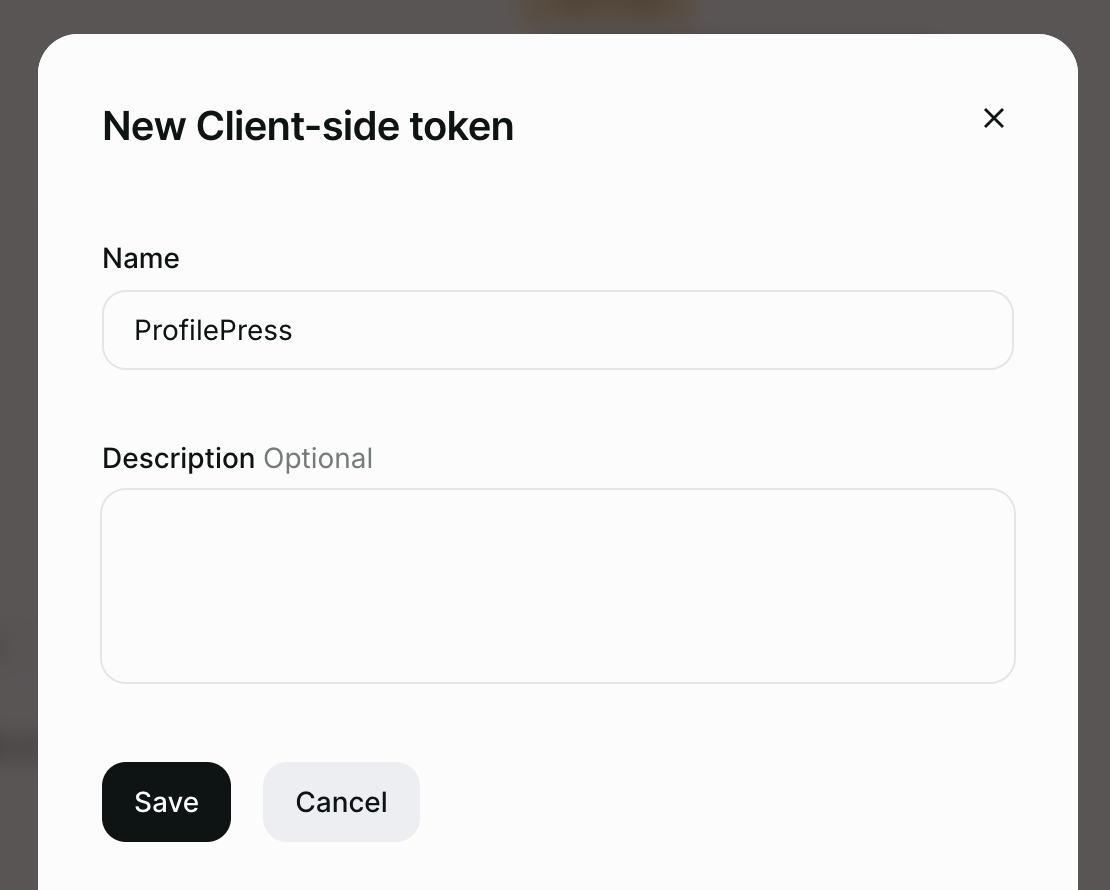
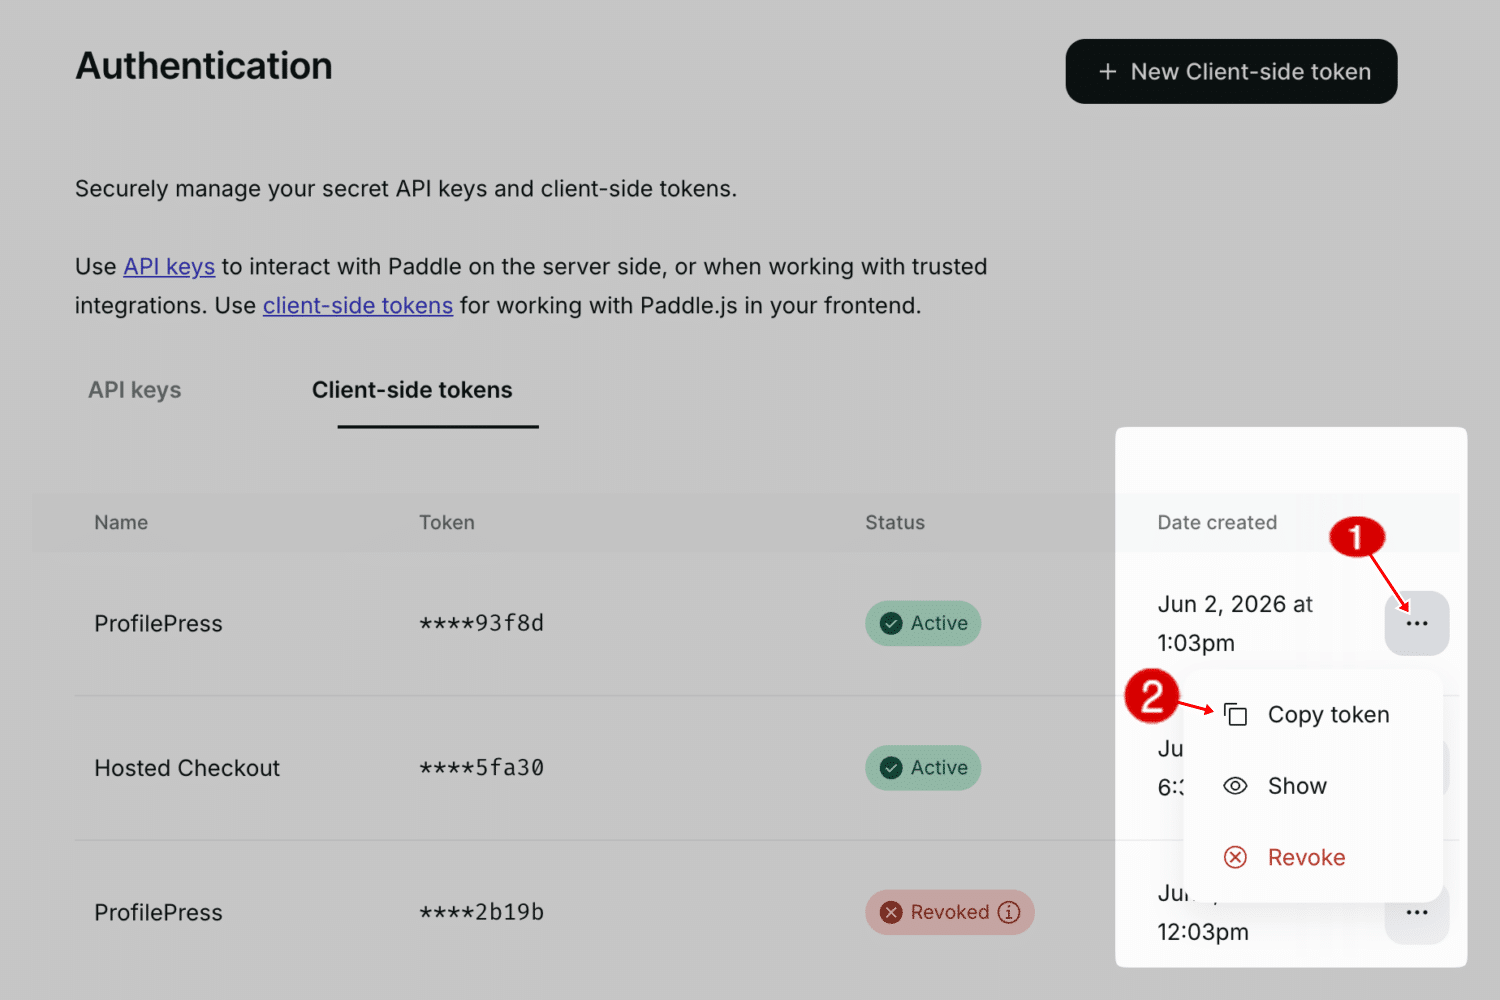
Next, you’ll need a client-side token. Head to the “Client-side tokens” area in your dashboard and click the “New Client-side token” button. Give it a name and create it.
Once it is created, find it in the list, click the menu icon (three dots), and select Copy token.
Setting Up the Paddle Webhook
The next step is to configure a webhook. Webhooks allow Paddle to notify ProfilePress of important events, such as successful payments, new subscriptions, canceled subscriptions, or refunds. This keeps your WordPress site and Paddle account in sync.
To create a webhook, navigate to Developer Tools > Notifications. Click New Destination to create a new notification endpoint.
Choose Webhook as the notification type, then enter your website’s webhook URL. You can find this URL in ProfilePress > Settings > Payments > Paddle under the Webhook Setup section. It typically looks something like: https://yourwebsite.com/?ppress-listener=paddle
Next, select the relevant events so that ProfilePress receives the necessary updates from Paddle:
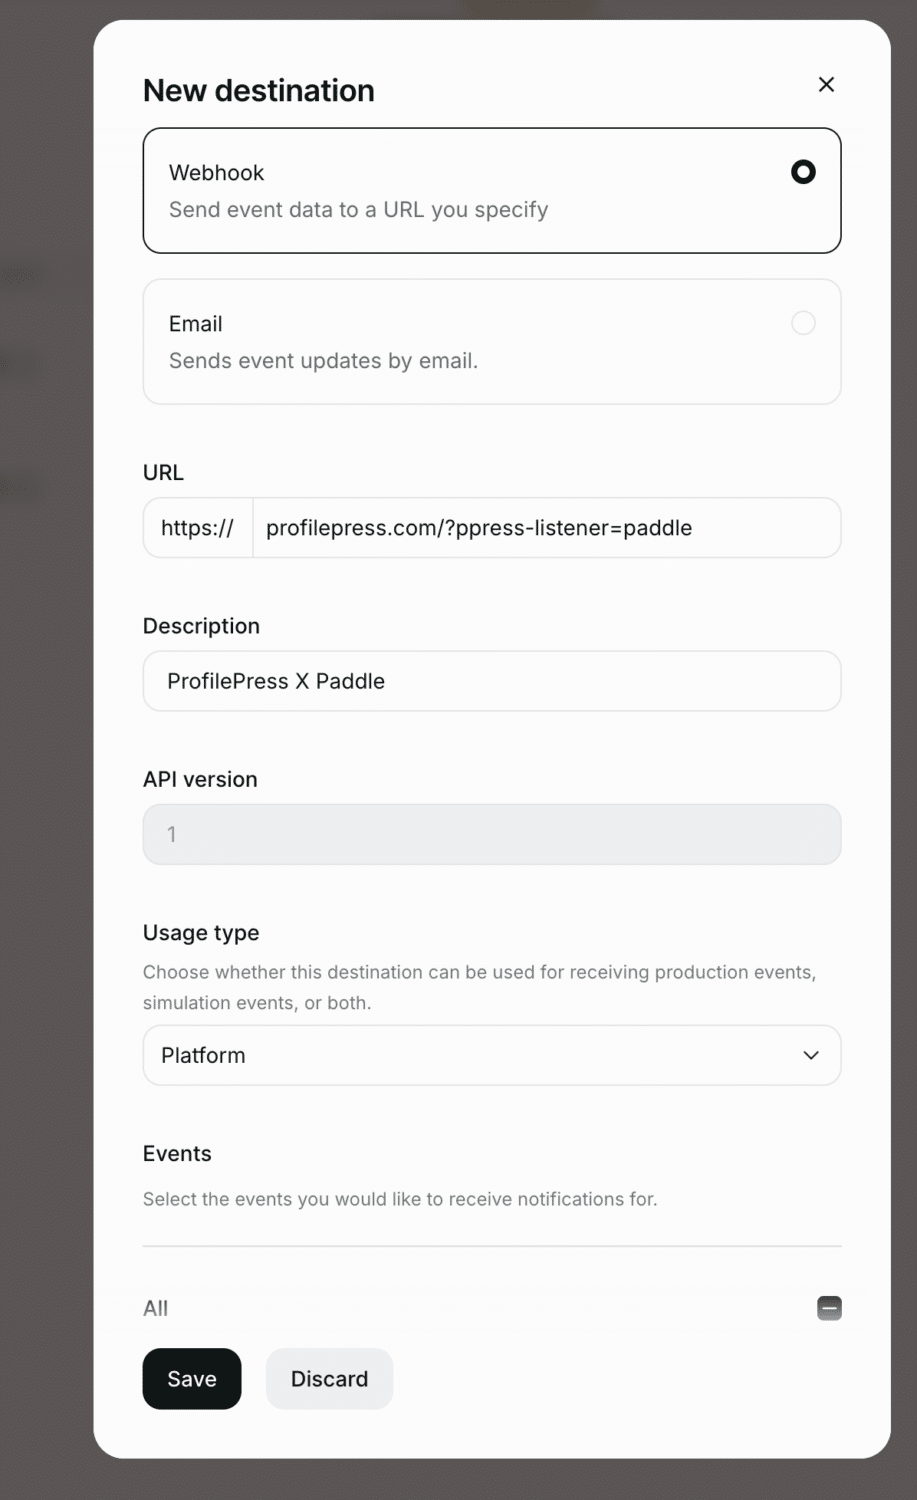
After selecting the events, save the webhook.
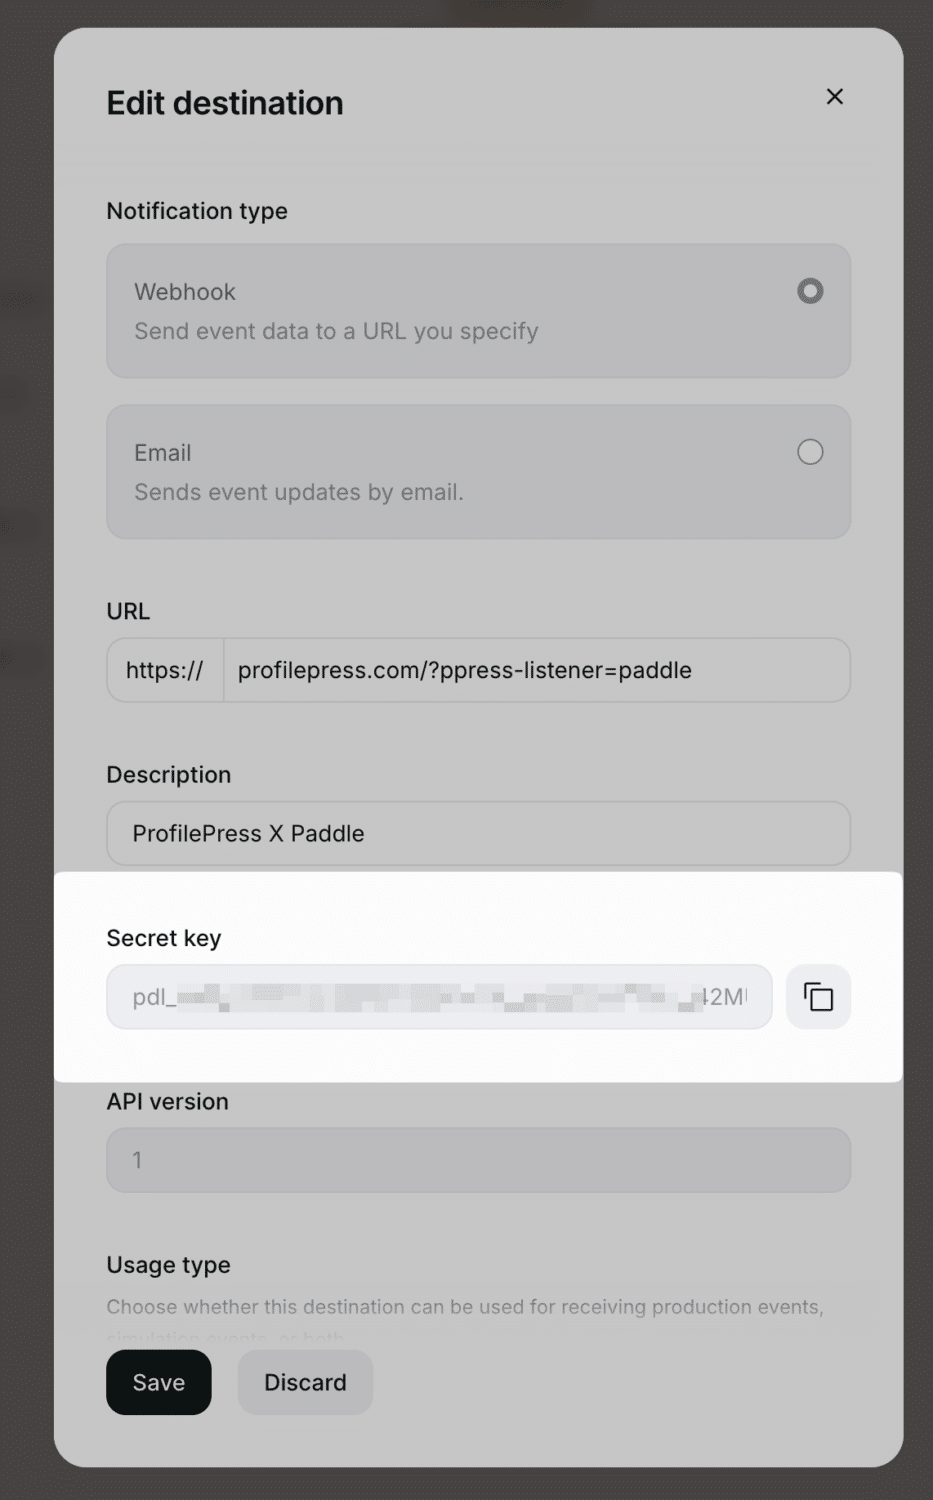
Once the webhook has been created, you’ll be taken back to the Notifications page. Locate the webhook you just added, click the three-dot menu, and select Edit Destination. Here, you’ll see the Notification Secret, which you’ll need to copy into the corresponding field in your ProfilePress Paddle settings.
Approve Your Website Domain
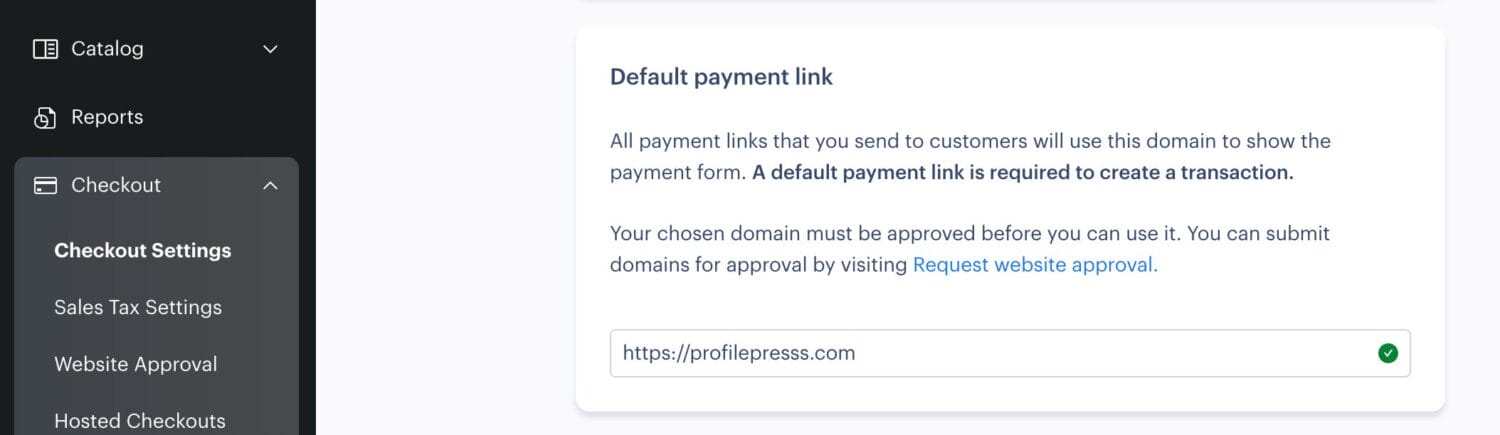
Before Paddle Checkout can work on your site, your domain must be approved by Paddle. To do this, go to Checkout > Website Approval in your Paddle dashboard and submit your website for approval.
Once approved, make sure that the domain is also configured as your default payment link from Checkout > Checkout Settings.
Finally, return to your WordPress dashboard, paste your Paddle API Key, Client-side Token, and Notification Secret into the appropriate fields in the ProfilePress Paddle settings, then click Save Changes.
After saving your changes, your WordPress site will be fully connected to Paddle and ready to start accepting both one-time and recurring payments.
Step 4: Test the Checkout Process and Start Accepting Payments
At this point, your Paddle integration is complete and ready to use. Below is a screenshot of the Paddle payment gateway on a ProfilePress checkout page.
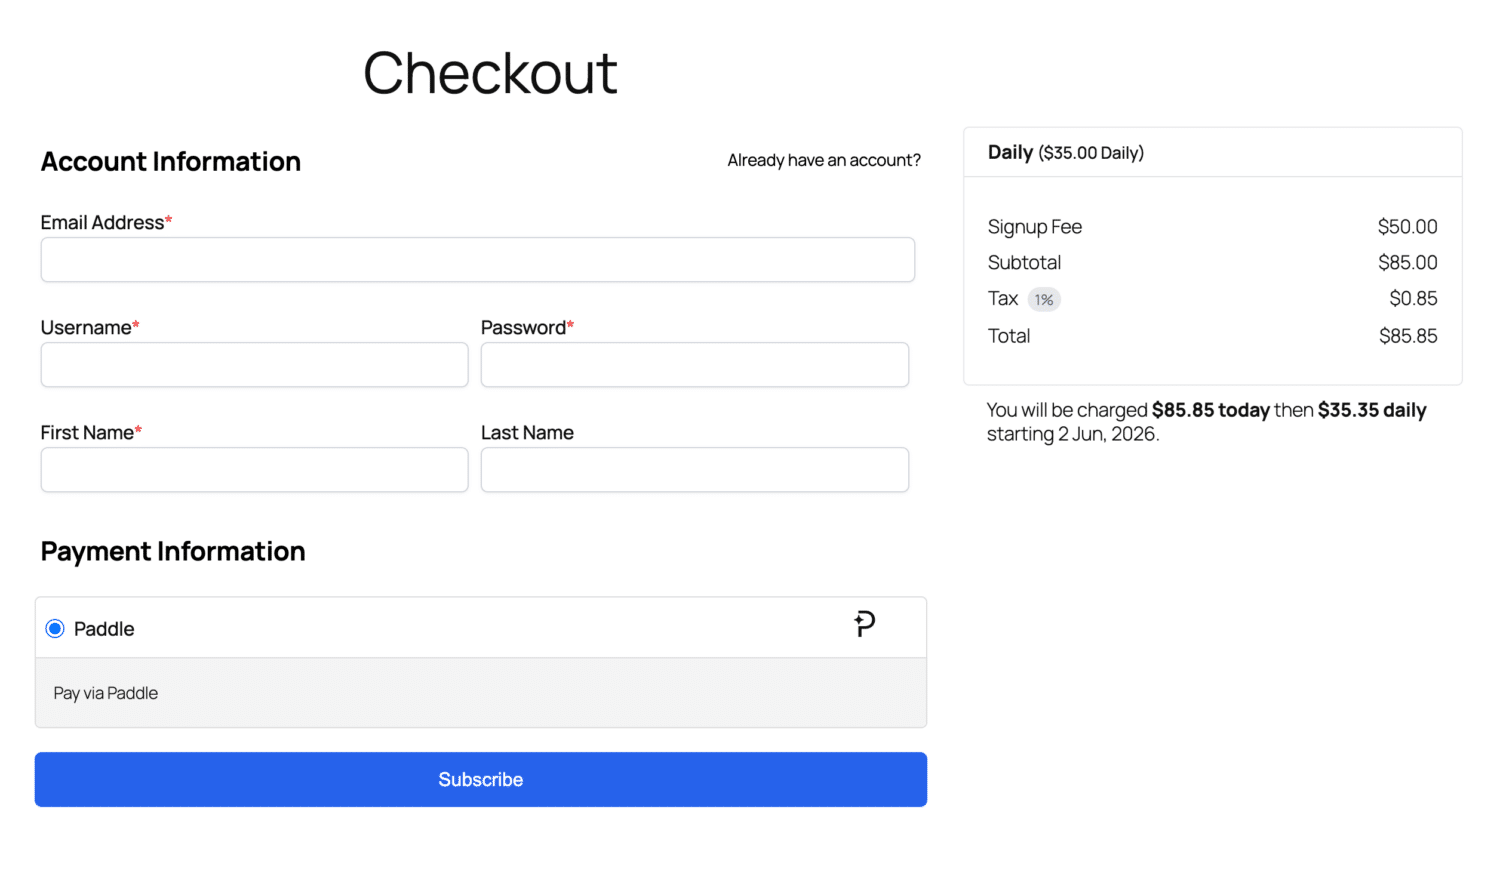
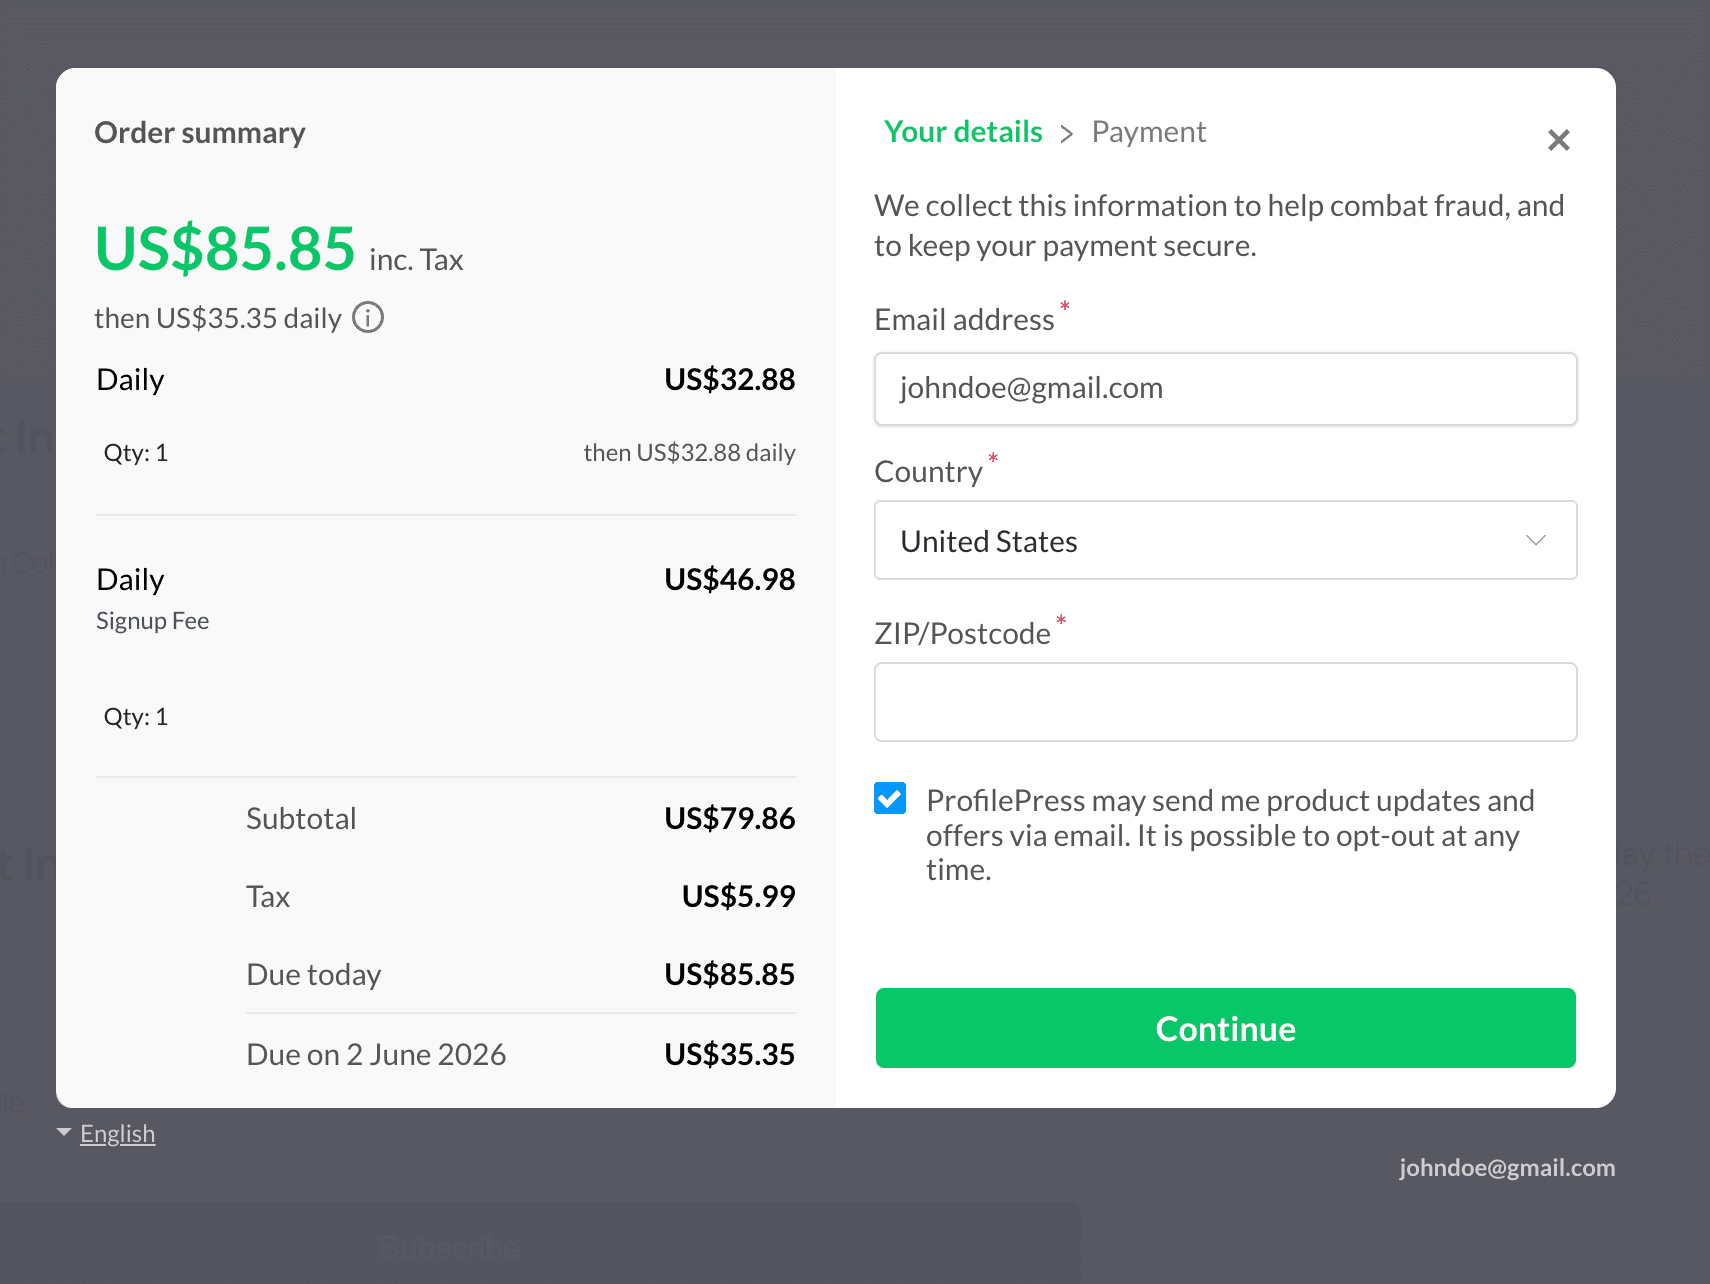
Once the checkout form is submitted, a Paddle popup checkout window will appear, allowing customers to securely complete their payment without leaving your WordPress website.
Note that before accepting real payments, it’s a good idea to test your setup using Paddle Sandbox. Complete a few test transactions to verify that payments are processed correctly, memberships or subscriptions are activated as expected, and customers receive the appropriate access after checkout.
Once you’re satisfied that everything is working properly, disable Test Mode, switch to your live Paddle account, and you’re ready to start accepting payments from real customers.
Best Practices for Accepting Payments in WordPress via Paddle
To deliver a reliable checkout experience and prevent common issues, follow these best practices below.
1. Test Everything Before Going Live: Before switching to live mode, use Paddle Sandbox to run several test transactions. This allows you to verify that payments are processed correctly, subscriptions are created successfully, and customers receive the appropriate access after checkout.
It’s also a good idea to test different scenarios, such as successful payments, failed payments, and subscription cancellations, to make sure everything behaves as expected.
2. Keep Your API Credentials Secure: Your Paddle API key, client-side token, and notification secret allow your WordPress site to communicate with Paddle. These credentials should never be shared publicly or stored in insecure locations.
3. Verify That Your Webhooks Are Working: Webhooks play an important role in keeping your website synchronized with Paddle. If a webhook stops working, payments may succeed while membership access or subscription updates fail to process correctly.
After setting up your integration, periodically check your webhook status in both Paddle and ProfilePress to confirm that events are being delivered successfully.
4. Always Use HTTPS: Customers expect their payment information to be handled securely. Make sure your WordPress site uses a valid SSL certificate so all communication between visitors and your website is encrypted.
5. Keep ProfilePress and WordPress Updated: Running outdated software can lead to compatibility issues or security vulnerabilities.
Regularly update WordPress, ProfilePress, and any related plugins to benefit from bug fixes, performance improvements, and support for the latest Paddle features.
6. Monitor Transactions Regularly: Even after your integration is live, review your Paddle dashboard from time to time to monitor sales, subscription renewals, failed payments, and refunds. Spotting issues early allows you to resolve them before they affect more customers.
FAQs About Accepting Payments in WordPress via Paddle
Below are some common questions and clear answers to help you understand how Paddle works within a WordPress environment.
Q1. What is Paddle and how does it work with WordPress?
Paddle is a payment platform that handles online payments, subscriptions, taxes, and compliance for digital products and services. When connected to WordPress, Paddle acts as the checkout and payment processor while your WordPress site handles product pages, pricing, and customer flow. Once a customer clicks the pay button, they are redirected to a secure Paddle checkout overlay to complete the payment.
Q2. Do I need coding skills to use Paddle in WordPress?
No, coding skills are not required for Paddle integrations in WordPress. ProfilePress provides dashboard-based setup options that let you enter API keys, configure payment settings, and connect webhooks.
Q3. Is Paddle safe for accepting payments online?
Yes. Paddle is designed with built-in security features, including fraud detection, secure checkout pages, and PCI compliance. This means you do not store or handle sensitive card details directly on your WordPress site, which reduces security risks.
Q4. Does Paddle handle taxes automatically?
Yes. One of the major advantages of using Paddle is that it acts as a Merchant of Record. This means Paddle handles VAT, sales tax, and compliance requirements in different regions, so you don’t have to manage tax calculations manually.
Q5. Can I refund customers through Paddle?
Yes. Refunds are managed directly from your Paddle dashboard or from the order screen in ProfilePress. You can issue full or partial refunds, depending on your policy, and return the funds to the customer’s original payment method.
That’s how to accept payments in WordPress via Paddle
Simple, right?
You’ve just learned how to accept payments in WordPress via Paddle. Whether you are selling eBooks, online courses, software, or membership access, this setup is built to work globally, enabling your WordPress site to reach customers worldwide.
Now it is time to take action. Log in to your WordPress dashboard, install ProfilePress, connect your Paddle account, and follow the steps in this guide. Once everything is configured, your site becomes a fully functional payment system ready for real customers.
Start today. Your future customers are ready to buy.