Do you want to hide WordPress sites from the public until it’s ready?
Launching a WordPress site can be exciting, but sometimes, you’re not ready for everyone to see it. Whether you’re still fine-tuning design elements, testing functionalities, or crafting compelling content, the desire to keep your site under wraps until it’s polished and perfected is completely understandable. Fortunately, WordPress offers several methods to shield your site from public view until you’re ready to unveil it to the world.
In this article, we’ll discuss the various ways to hide WordPress sites from the public eye. From utilizing built-in privacy settings to using plugins, we’ll explore the options available to ensure your site stays private until it’s ready for its big debut.
Why Hide Your WordPress Site Until It’s Ready?
Hiding WordPress sites until it’s ready serves several important purposes:
Professionalism: Presenting an unfinished or underdeveloped website can create a negative first impression. By hiding your site until it’s ready, it ensures that users encounter your brand in its best state.
Testing and Refinement: By limiting access to your site, you can thoroughly test its features, functionalities, and design elements without the risk of negative user experiences or premature judgments.
Search Engine Optimization (SEO): By hiding your site until it’s fully optimized with relevant keywords, metadata, and high-quality content, you can maximize its potential for ranking well in search engine results pages.
Content Preparation: Crafting compelling content takes time and effort. Hiding your site until you’ve finalized your content allows you to perfect your messaging, imagery, and overall storytelling before presenting it to your audience.
Client Approval: If you’re developing a website for a client, hiding the site during the development phase provides them with privacy and the opportunity to review and approve the final product before it goes live. This helps ensure client satisfaction and minimizes the need for last-minute revisions or changes after launch.
Surprise Element: Keeping your website hidden until it’s ready builds anticipation among your audience. When you finally unveil your site, it can create excitement and generate interest in your brand or offerings.
Hiding WordPress Until Ready with ProfilePress
Plugins are the most effective way to hide a WordPress site from the public. In this section, I will show you how to accomplish this using the ProfilePress Plugin.
ProfilePress is an excellent WordPress membership plugin that allows you to build paid membership sites, sell digital products, and control who can access your content. With its built-in content restriction feature, you can hide a WordPress site from the public. It gives you complete control over who has access to your content and enables you to set up unique protection rules.
To use ProfilePress, you’ll need to first set it up.
Step #1: Setting Up ProfilePress
Begin by installing the ProfilePress plugin on your WordPress website.
To do this, visit the ProfilePress website and buy a plan. Once you’ve purchased, you’ll get an email with a link to download the plugin.
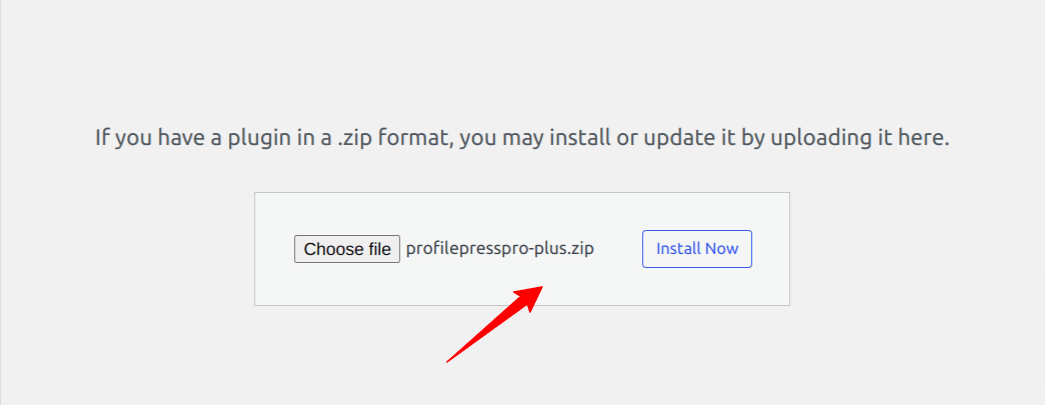
After you download the plugin file to your computer, log in to your WordPress admin dashboard and navigate to the “Plugins” section in the menu on the left side.
Next, click “Add New” at the top of the page. Choose the “Upload Plugin” option. Click on “Choose file” and select the plugin you downloaded from your computer earlier.
Then, click “Install Now” to start the installation process.
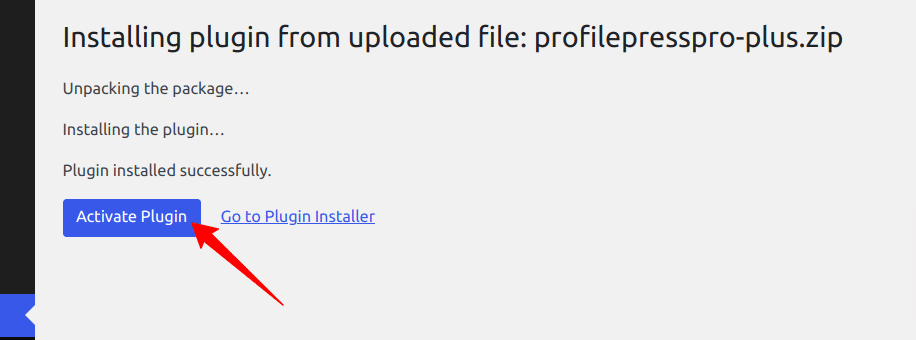
When the installation is done, click the ‘Activate Plugin’ button.
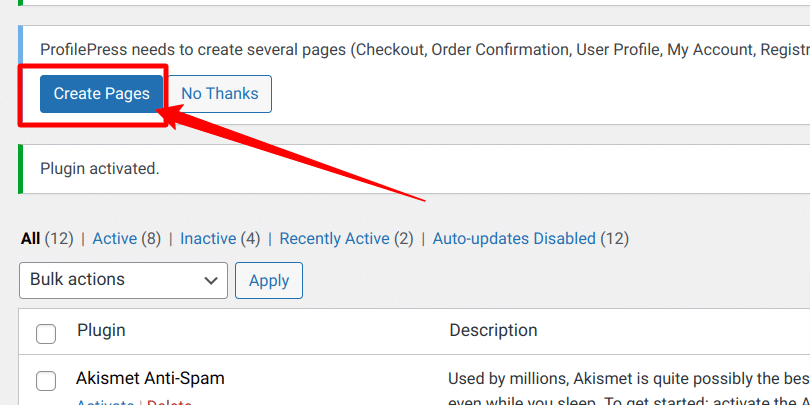
At the top of the page, you will see a message that says, “ProfilePress needs to create several pages”, Click on the “Create Pages” button to complete the plugin setup.
We have successfully installed and activated the ProfilePress Plugin on our WordPress website.
Step #2: Hiding Your Site With ProfilePress
Now that the ProfilePress plugin is installed and activated, the next step is to set up the feature that allows you to hide your WordPress website from the public. In this section, I will use ProfilePress’s global site access and content protection features.
Setting up Global Access Feature
To set it up, navigate to ProfilePress → Settings from the WordPress admin panel and click on the Access tab to restrict access to your WordPress site.

Here, you have the option to set the following:
Global Site Access: This option allows you to grant access to logged-in users or the public.
Redirect Page: Choose a page or custom URL to redirect users not logged in to your site.
Pages to Exclude: Select the pages, in addition to the redirect page, that will be accessible to everyone.
Accessible Homepage: Check this box to make the homepage accessible to everyone.
Global Restricted Access Message: Set the message shown to users who do not have permission to view the content.
Blocked Email Addresses: Block users from registering or checking out with email addresses in this list. You can use full email addresses ([email protected]), domains (@example.com), or top-level domains (.gov). Use a new line for each item.
Allowed Email Addresses: Input user email addresses that are not blocked from registering or checking out. You can use full email addresses ([email protected]), domains (@example.com), or top-level domains (.gov). Use a new line for each item.

Referring to the image above, to hide our site from the public, we set the Global Site Access to ‘accessible to logged-in users’, the Redirect page to ‘login page’, and the Global Restricted Access Message to ‘This site is not open to the public yet’.
Once saved, the site will be hidden from the public.
Setting up Content Protection Feature
This feature allows you to control how your WordPress content is accessed. You can restrict access to specific groups of users, including everyone, members or customers of a membership plan, logged-in users, and logged-out users.
To hide a WordPress site from public view, navigate to ProfilePress >> Content Protection >> Add Protection Rule.
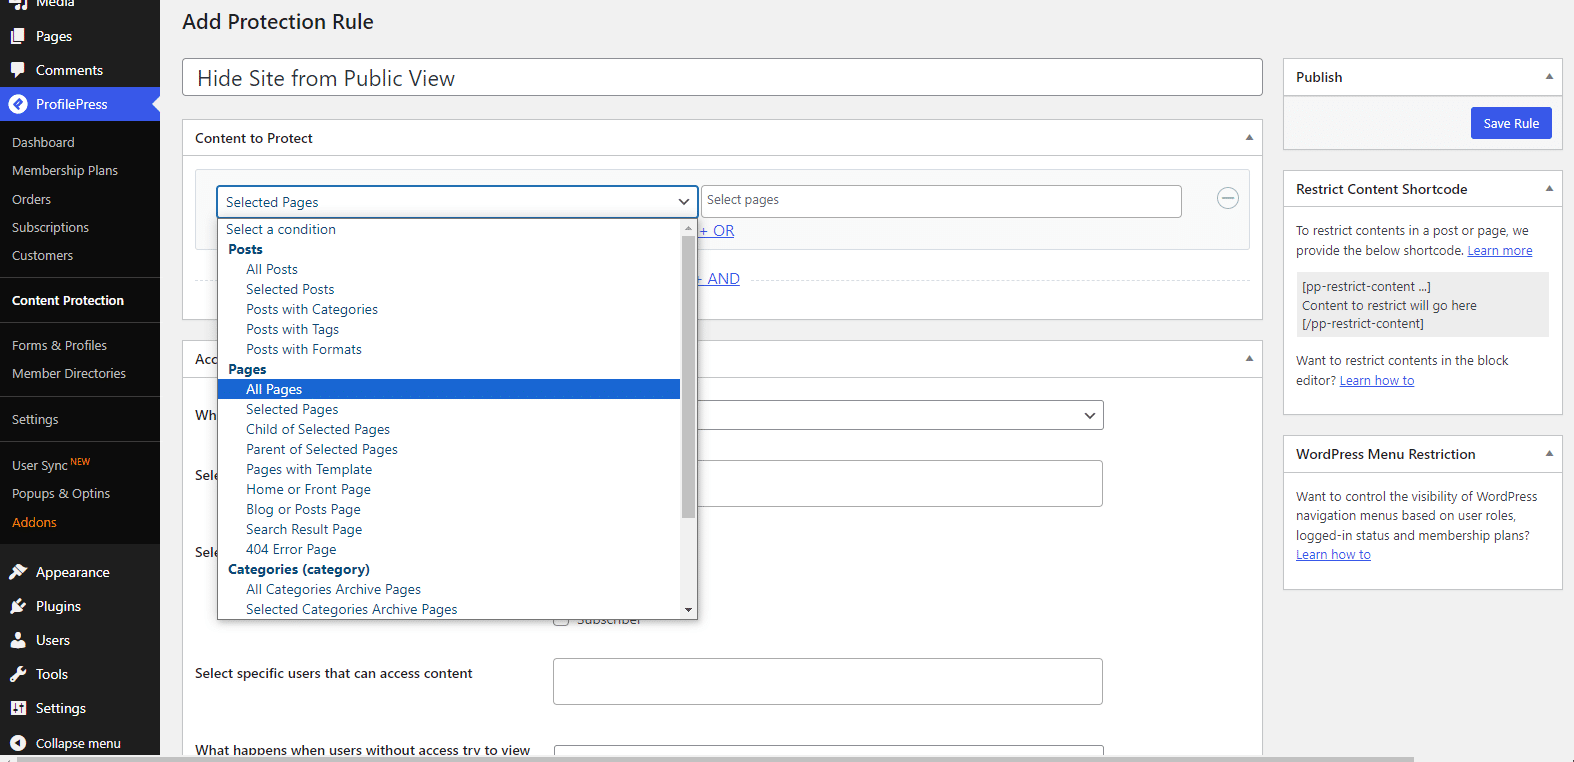
Input a name for the rule, then select all pages because we are hiding the site from the public.

Next, we’ll set the access condition to “logged-in users”, this ensures that only login users have to the site.

Next, save the rule.
That is why we have succeeded in hiding our WordPress site from the public.
Note: Global access settings take precedence over content protection rules.
Hide Your WordPress Site Until Ready Without a Plugin
To hide your WordPress site until it’s ready for public viewing without a plugin, you’ll need to edit your theme’s functions.php file. Here’s how:
Go to your theme’s functions.php file and paste in the following code:
function maintenance_mode()
{
    if ( ! current_user_can('edit_themes') || ! is_user_logged_in()) {
        wp_die('Maintenance.');
    }
}

add_action('get_header', 'maintenance_mode');
To deactivate the maintenance mode and let users see your website, comment out the last line like this:
// add_action('get_header', 'maintenance_mode');;Note: Manually editing your theme’s functions.php file can break your site. If you don’t know how to code, it’s best to ask a professional to do this. It is important that you back up your website before making any changes.
How to Hide Your WordPress Site from Google
Hiding your WordPress site from Google can be necessary in certain situations, such as when you’re still working on the site and don’t want it indexed by search engines yet. Here’s how you can do it:
Method 1: Hide Your Site in WordPress Settings
WordPress has a built-in feature to discourage search engines from indexing your site. To hide your site until it’s ready, follow these steps:
Log in to your WordPress admin dashboard. Go to Settings > Reading.
Check the box next to ‘Discourage search engines from indexing this site.’

Then save your changes.
Method 2: Hide Your Site From Search Engines Using robots.txt File
The robots.txt file tells search engine crawlers which pages or files they can or cannot request from your site. You can use it to block all search engine crawlers from indexing your site. This might be difficult for beginners, so only use this method if you know what you’re doing.
To set it up, connect to your website using FTP or a file manager provided by your hosting provider. Then, locate the root directory of your WordPress installation.
Next, look for the robots.txt file. If it doesn’t exist, you can create one.
Then open the robots.txt file and add the following lines:
User-agent: *

Disallow: /your-page/
When done, save your changes. This tells all search engine crawlers not to crawl any pages on your site.
That’s How to Hide a WordPress Site Until It’s Ready
Keeping your WordPress site hidden until fully prepared demonstrates a commitment to quality and professionalism.
Throughout this article, we’ve explored various methods, from leveraging the ProfilePress Plugin to utilizing WordPress’s built-in privacy settings to help you maintain control over your site’s visibility until it’s ready.
Ready to make your WordPress site private? Get ProfilePress Today!