Would you like to inform your WordPress users or subscribers about any new posts on your WordPress blog?
As a website or business owner, keeping in touch with your WordPress users and subscribers is crucial. Email notifications are a great way to engage and stay connected with them, especially when people lead busy lives and are bombarded with information daily.
In this article, you will learn how to completely automate sending WordPress post notifications to your WordPress users and newsletter subscribers using the MailOptin plugin.
How to Automatically Send WordPress Blog Posts to Subscribers
If you’re looking for a one-stop shop for WordPress email marketing, MailOptin is an excellent option. This tool helps you turn site visitors into subscribers by creating professional opt-in boxes that you can customize and showcase on your WordPress site. MailOptin is user-friendly and comes loaded with many useful features.
In this article, we’ll show you three ways to use MailOptin to send notifications for new blog posts. These methods include sending posts to leads in MailOptin, WordPress users, and Mailchimp subscribers. We’ll walk you through all three ways, but first, we need to install and set up the MailOptin plugin.
How to Install and activate the MailOptin plugin
The first step is installing the MailOptin plugin, which you can easily do from your WordPress dashboard.
You will need to purchase a MailOptin License and install the plugin. To do that, head to the pricing page to purchase a suitable license plan.
After purchasing your copy of the MailOptin Plugin, you will receive a confirmation email with a link to download the plugin zip file and your license key. You can also download the plugin from your account page on the MailOptin website.
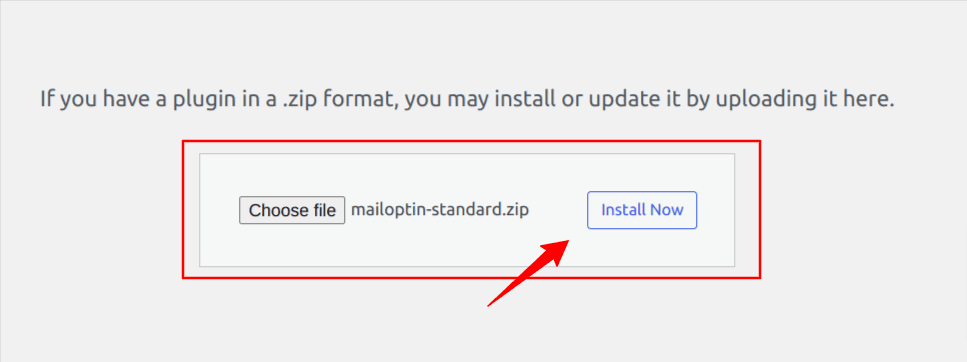
Once you have downloaded the plugin, login to your WordPress admin dashboard, and navigate to the Plugins page; click on the “Add New” button and click “Upload Plugin“. Upload the zip file and install and activate the plugin on your WordPress site.
Once the plugin is activated, we need more time to be ready to set up our various email notification systems.
1. Send New WordPress Posts to MailOptin Leads
To send email notifications, you must collect the details of your recipients.
MailOptin leads can help you with this by allowing you to gather your website visitors’ information. This tool provides you with the means to create subscription forms that are both straightforward and visually appealing.
With MailOptin lead, you can easily place these forms in multiple locations on your website. Let’s take a look at how to utilize MailOptin lead.
Import Leads
If you have an existing list of subscribers, MailOptin allows you to import them and send them new post notifications.
Go to MailOptin > Leads > Import. Then follow the instructions by the plugin.

Select “Choose File” to upload a CSV file containing your email subscribers. Click the “Upload Leads” button to upload your subscribers.
Collecting Leads
If you need an existing list of subscribers, you need to start collecting leads on your WordPress site, and MailOptin will help you do that and more.
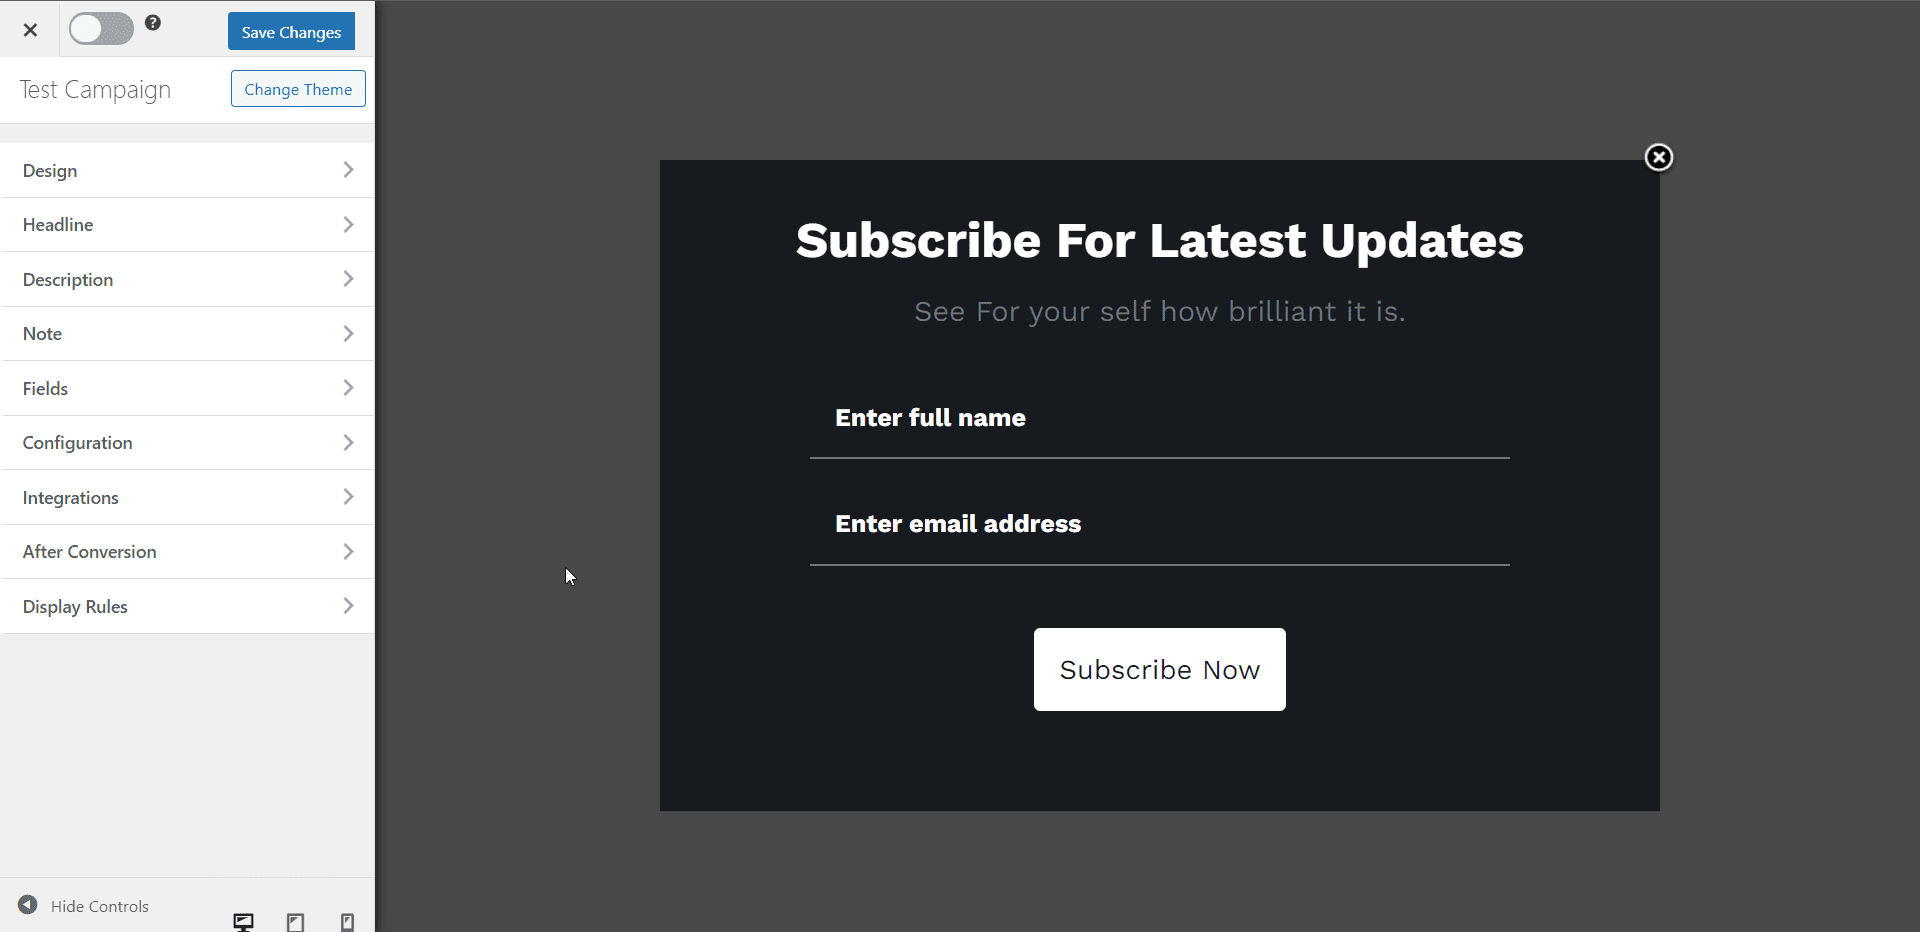
Go to MailOptin > Optin Campaigns > Add New, then name the campaign. Next, select a lead collection box. There are plenty to choose from. On the next page, you can customize the box according to your needs and save changes.
Require more assistance? Follow this documentation.
Once you have some subscribers, you can automate new post alerts.
Automating New Post Alerts For Subscribers
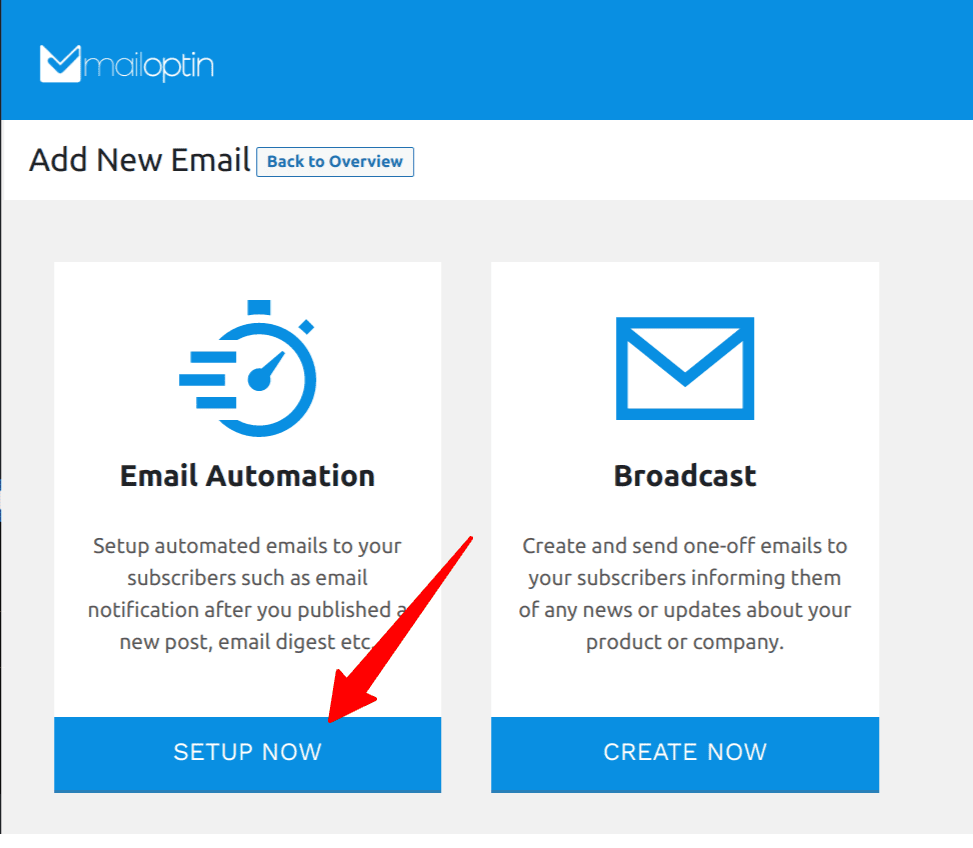
Go to MailOptin > Emails > Add New. Select Email Automation > New Post Notifications.
Give a title to the email campaign. And then, select whether you want to use a pre-built template or a new one from scratch.
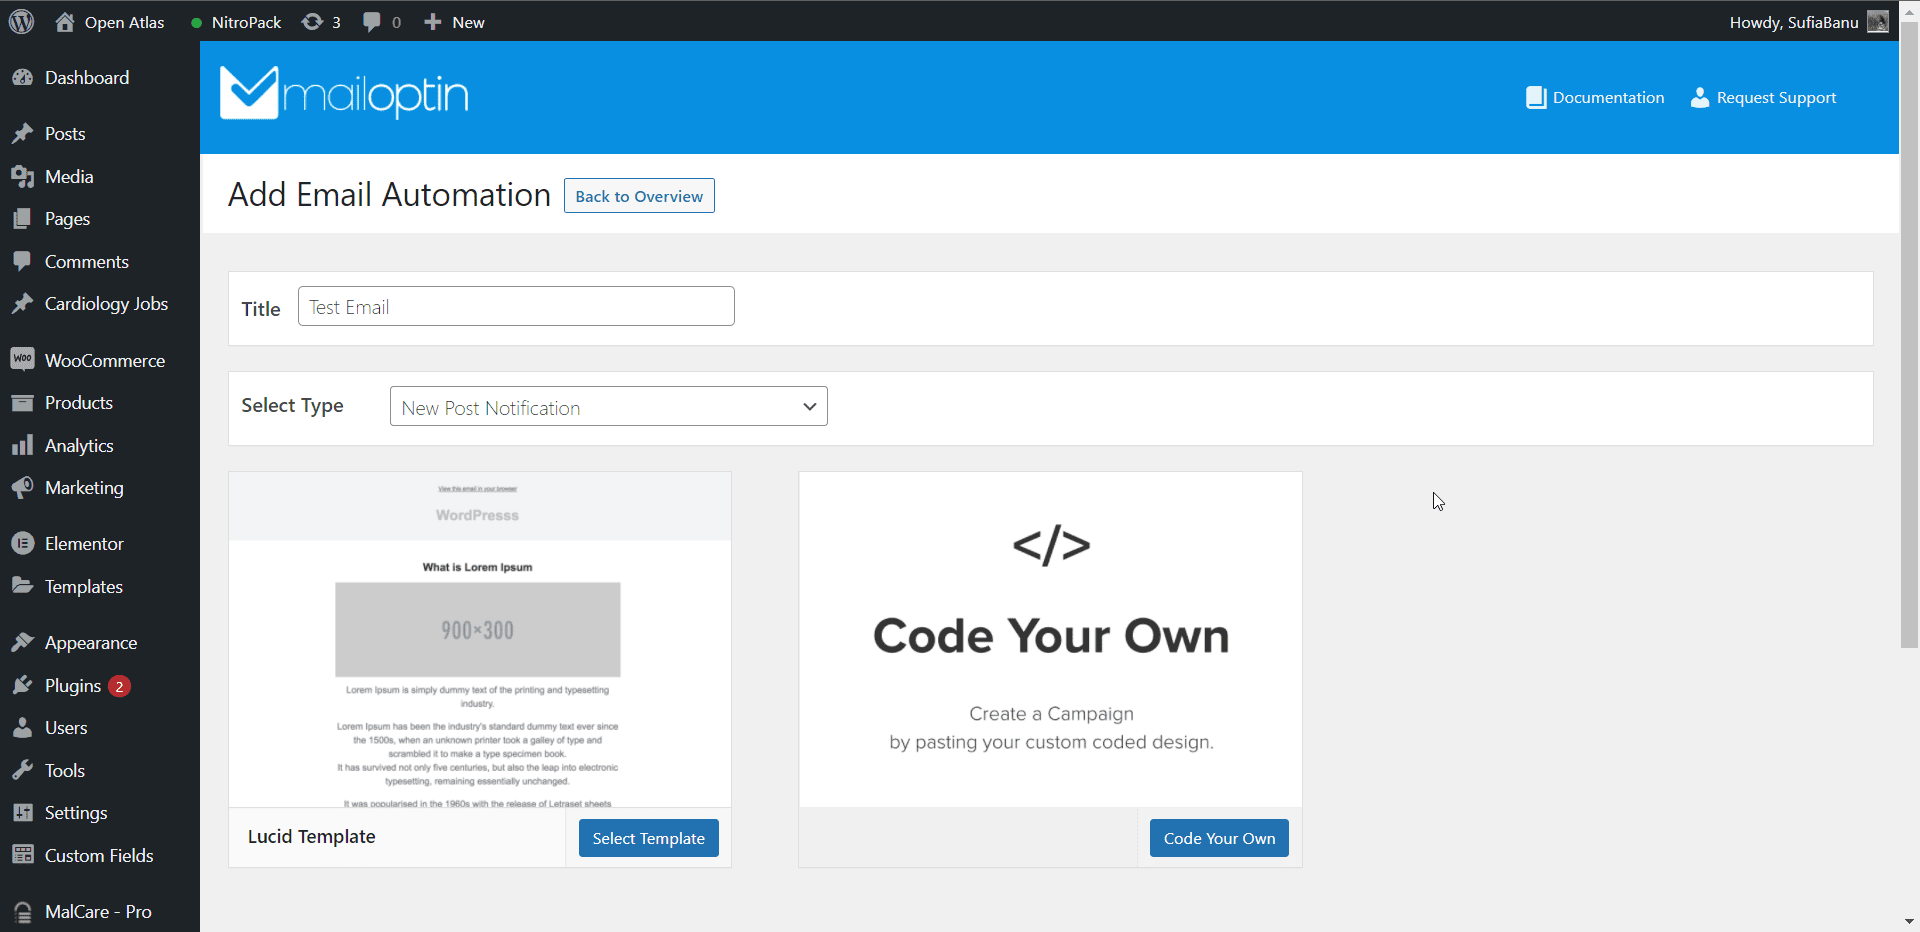
If you choose the pre-built template, you’ll be taken to the email-building tool, where you can customize the email template according to your needs.
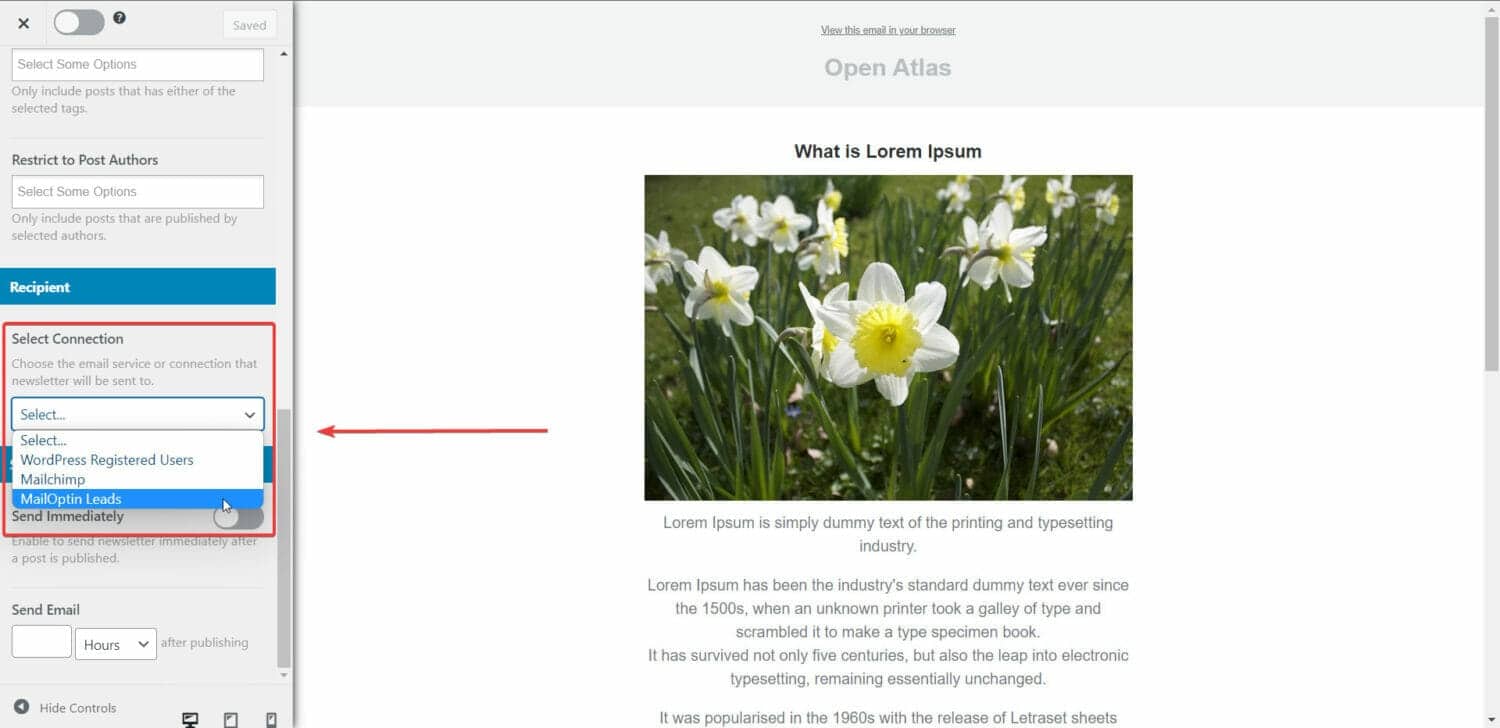
Next, go to Settings > Select Connection > MailOptin Leads.
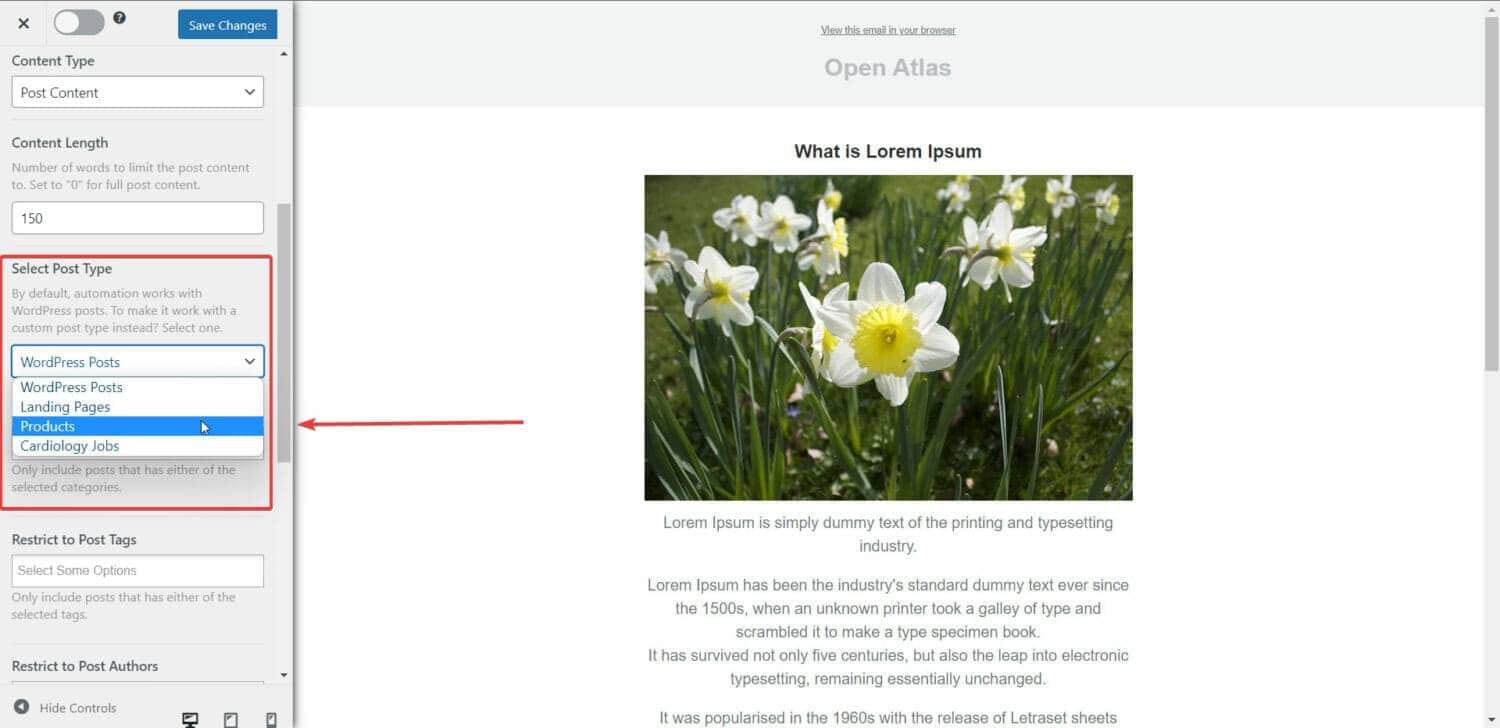
PRO TIP: If you want to send new post alerts from custom post types, go to Settings > Select Post Types and select the custom post type.
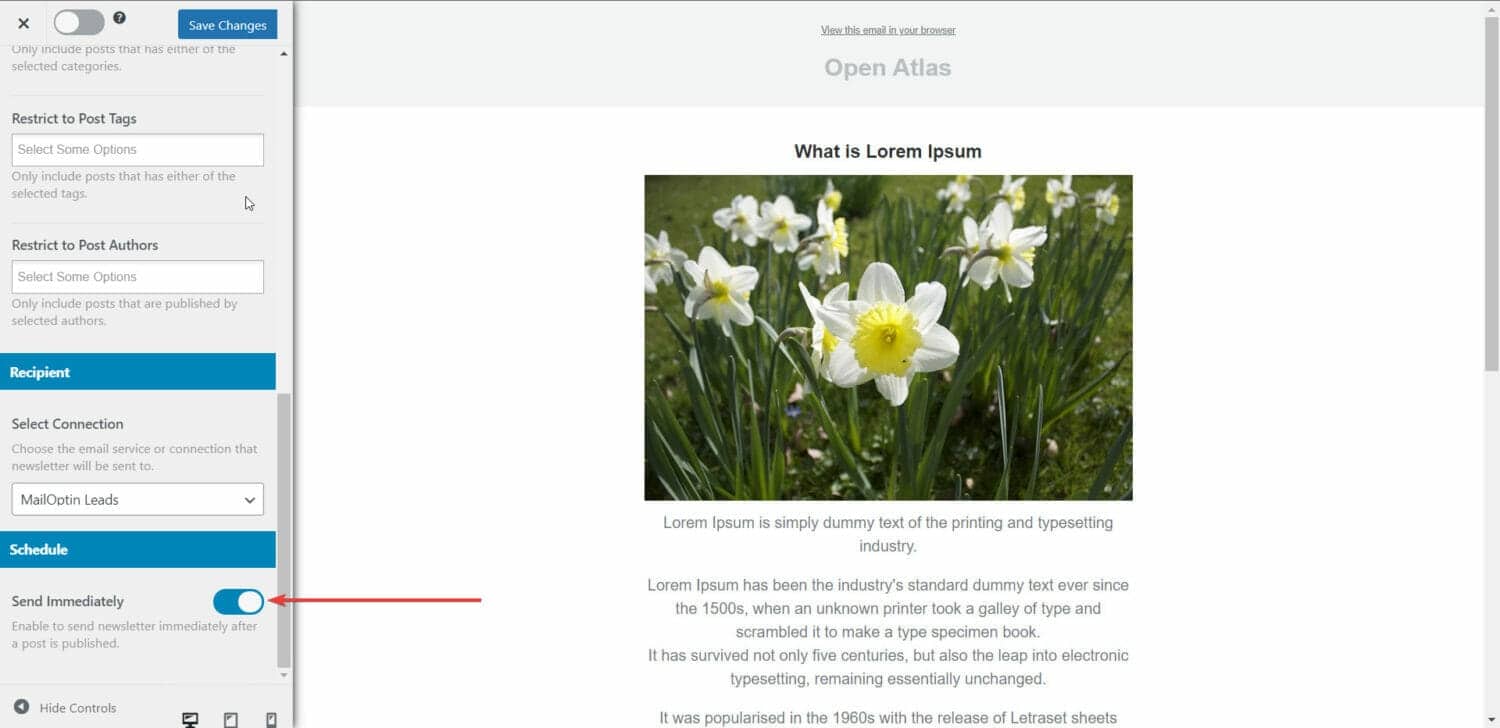
And finally, toggle on the Sent Immediately option on the Settings page. This will ensure the emails are sent after a post is published.
2. Send New WordPress Posts to WordPress Users
To inform WordPress users of new posts, you must create a new email campaign. The previous section explained the necessary steps to create a new campaign.
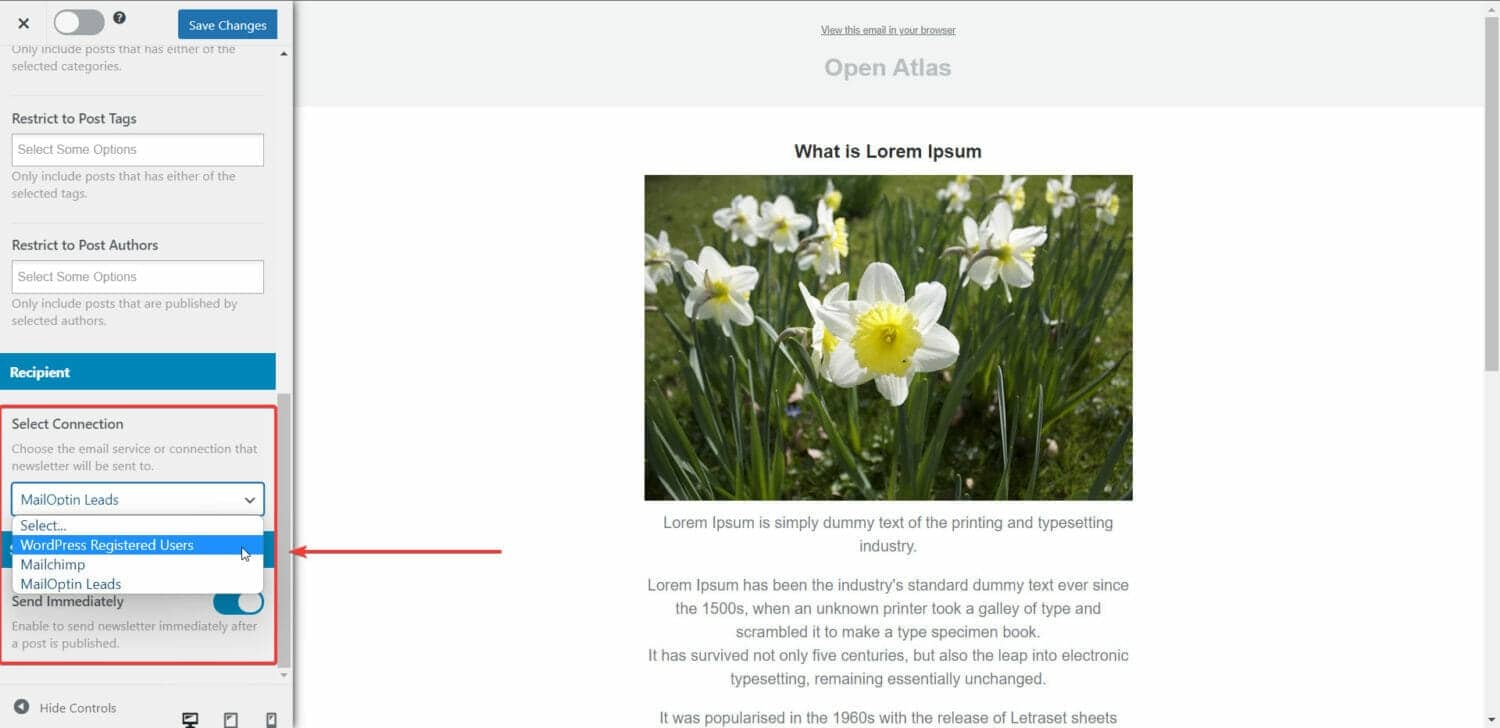
When you reach the Select Connection option, choose WordPress Registered Users instead of MailOptin Leads.
That’s it. You have successfully set up MailOptin to send automated new post alerts.
Note that besides sending emails to WordPress users, MailOptin also supports emailing WooCommerce and Easy Digital Downloads customers, members in WooCommerce memberships, MemberPress, Paid Memberships Pro, LearnDash, GiveWP, Restrict Content Pro, LifterLMS.
3. Send New WordPress Posts to Mailchimp Subscribers
If you’re looking for an effective email marketing tool, Mailchimp is a top choice. You may already be familiar with Mailchimp or even using it yourself.
Pairing Mailchimp with MailOptin can take your new post notifications to the next level. It’s important to note that MailOptin also works seamlessly with other popular email marketing platforms like Campaign Monitor, AWeber, and GetResponse, among many others.
Now, let’s connect Mailchimp and MailOptin so you can set up new post notifications to your Mailchimp email list.
Setting Up MailChimp
If you don’t already have a MailChimp account create one, it’s super easy.
Next, you can import a list of subscribers or create a pop-up form to collect subscribers.
Import Subscribers
To import a list of subscribers, here’s what you need to do:
1. Have the subscriber list ready as a comma-separated value (CSV) file. The file should have at least three columns: Email Addresses, First Name, and Last Name. Make sure you have formatted dates and birthdays as per these guidelines.
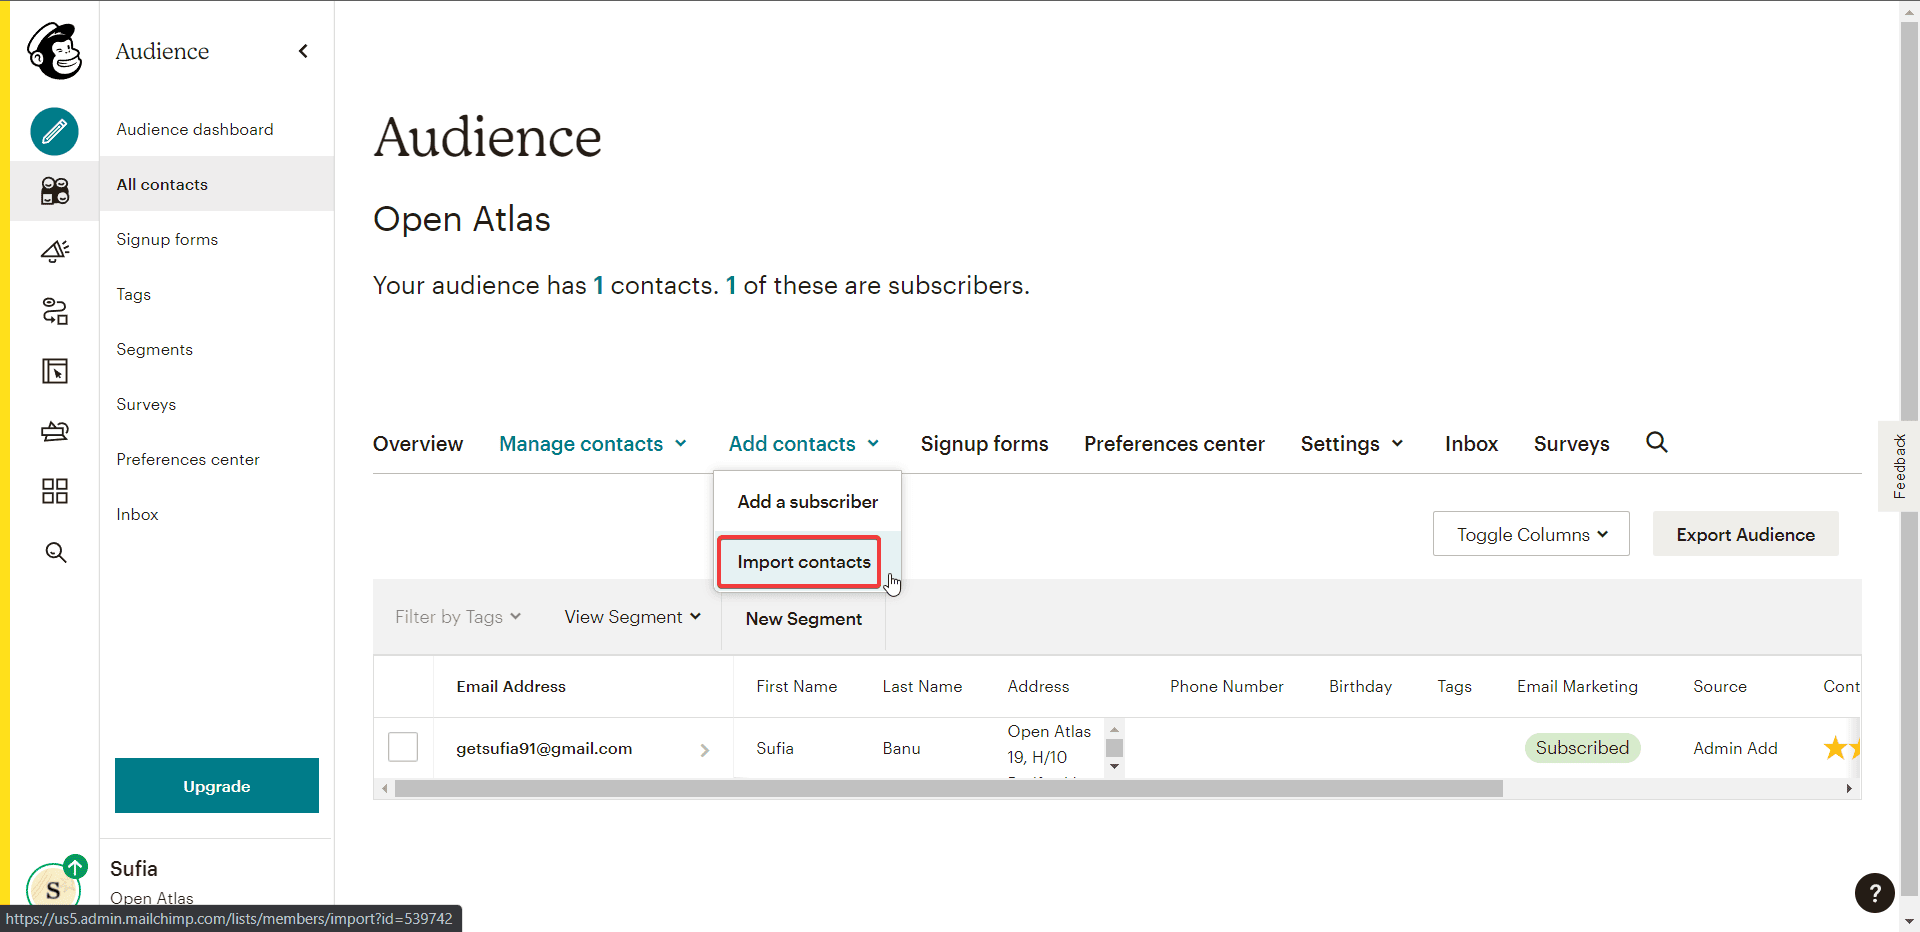
2. To import the contacts into MailChimp, go to Audience > Audience dashboard > All contacts > Add contacts > Import contacts > Upload file.
3. Next, you will be asked to select a status. From the drop-down menu, choose Subscribed.
4. Under Select Groups, select Customers and Monthly.
6. You have the option to add tags if you want to.
6. Finally, click on Finalize Import > Complete Import.
And that’s it. So that you know, there is a limit to the number of contacts you can import. If you cross that limit, you will be subjected to additional charges. Learn more.
Next, it’s time to set up MailOptin to send automated new post alerts.
Connecting MailChimp With MailOptin
First things first – you need to create a MailChimp API. Open your MailChimp account and go to Account > Extras > API keys > Create a Key. MailChimp will create a key that looks like this:

Now you can go to MailOptin > Integrations > MailChimp and enter the API key to establish a connection between MailOptin and MailChimp.

Aside from Mailchimp, MailOptin also supports sending emails to contacts or subscribers in other email marketing software, including Campaign Monitor, Sendy, Constant Contact, AWeber, ConvertKit, MailerLite, GetResponse, Klaviyo, ActiveCampaign, SendinBlue, SendGrid, Mailjet, Keap/Infusionsoft, Vertical Response, CleverReach, and Moosend.
Using MailOptin to Automate New Post Notifications
Go to MailOptin > Emails > Add New. Select Email Automation > New Post Notifications.
Give a title to the email campaign. And then, select whether you want to use a pre-built template or a new one from scratch.
If you choose the pre-built template, you’ll be taken to the email-building tool, where you can customize the email template according to your needs.
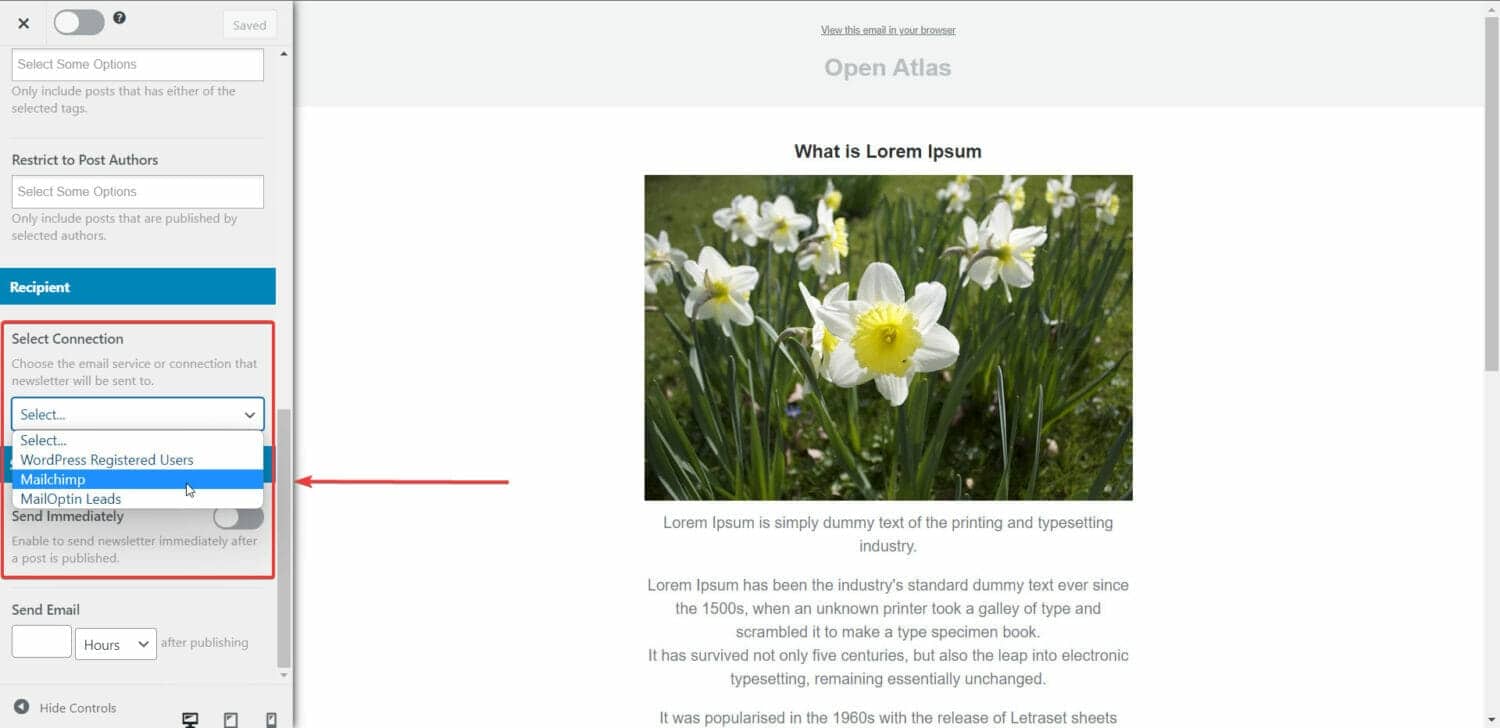
Next, go to Settings > Select Connection > MailChimp.
PRO TIP: If you want to send new post alerts from custom post types, go to Settings > Select Post Types and select the custom post type.
And finally, toggle on the Sent Immediately option on the Settings page. This will ensure the emails are sent after a post is published.
How To Send New Product Email Notifications to WooCommerce Customers
If you have a WooCommerce store, it’s essential to keep your customers informed about new products by sending them email notifications. This can help generate website traffic and increase sales.
To achieve this, you can utilize MailOptin to send automated email notifications to your customers. Alternatively, you can integrate MailOptin with your current email marketing tool, such as MailChimp, to send automated email alerts.
Combining these tools allows you to send new product alerts to your customers and manage everything from your WordPress dashboard.
For a step-by-step guide on using MailOptin as a standalone tool or in conjunction with MailChimp, please refer to the previous section.
IMPORTANT: When customizing the email, there is an option called Select Post Types. By default, it chooses WordPress Posts. You need to modify that and choose Products. This will ensure that every time a product is added to the shop, your subscriber base and WooCommerce users are informed about it immediately.
That’s it; your customers will be notified when you add a new product to your WooCommerce store.
Conclusion
Keeping your users and subscribers engaged is crucial for boosting traffic and sales on your website. One effective way to do this is by sending email notifications whenever you publish new content or products.
With the help of MailOptin, you can easily automate these emails and even connect them with popular email marketing tools like Mailchimp, Sendy, Infusionsoft, Sendgrid, Klaviyo, Zoho, GetResponse, ActiveCampaigns, MailerLite, CampaignMonitor, Convertkit, Brevo, and Constant Contact.