Do you want to capture email addresses from your website visitors and offer them valuable content in return?
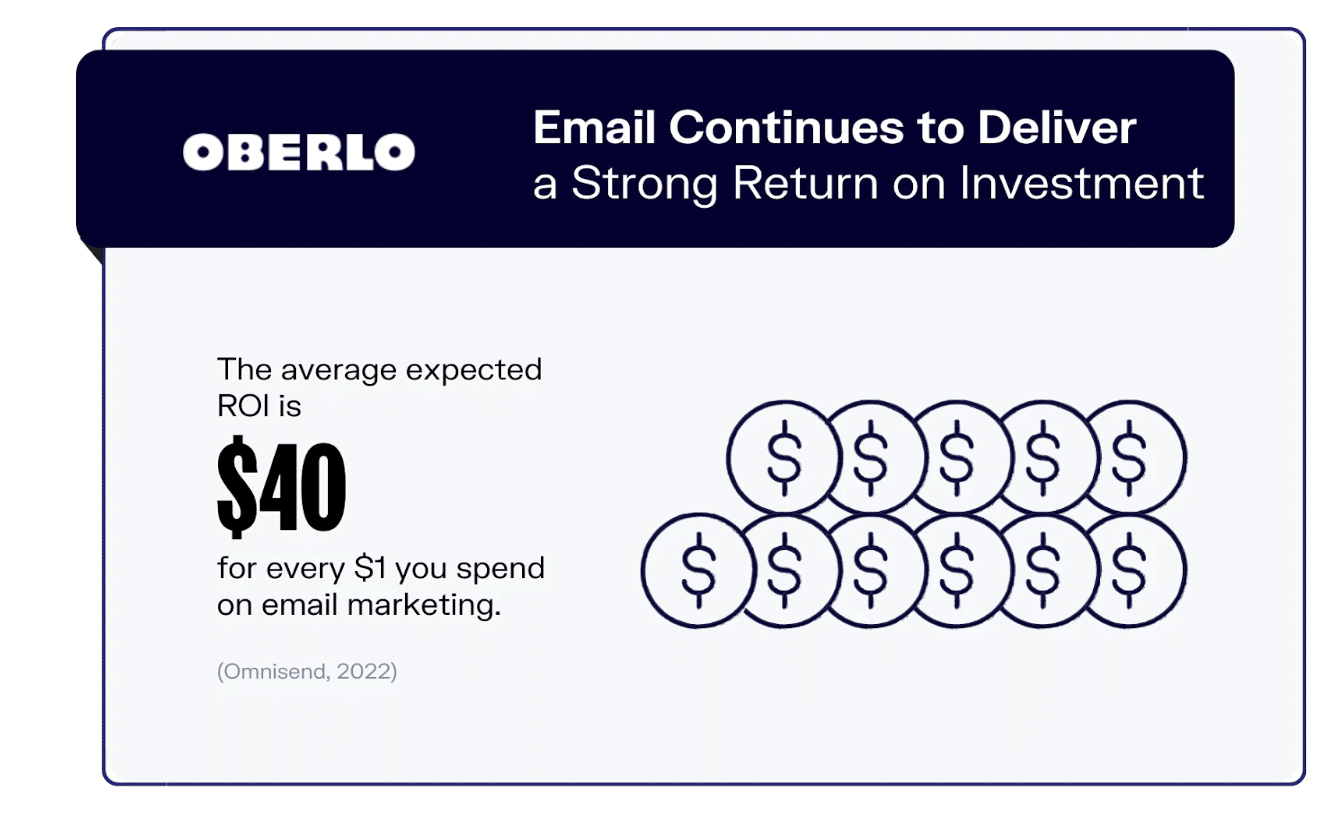
I hear you! Email marketing is a battle-tested marketing strategy. In fact, according to a recent study, for every $1 you spend on email marketing, you can expect an average return of $40.
Also, you’ll agree with me that it’s way easier to ask a prospect for their email address in exchange for a valuable resource — a PDF, a plugin, a checklist, literally anything you believe your prospect will consider useful — than just asking them to join your email list.
In this guide, we’ll learn how you can easily set up a system that requires users to provide their email addresses before they can download a file.
We’ll use MailOptin— a WordPress plugin that allows you to build multipurpose forms such as popups, subscription forms, and user registration forms quickly and send automated or one-of-email newsletters right from your WordPress dashboard — to create and configure our form to require email address before downloading a file.
We’ll start by setting up the plugin on your WordPress site
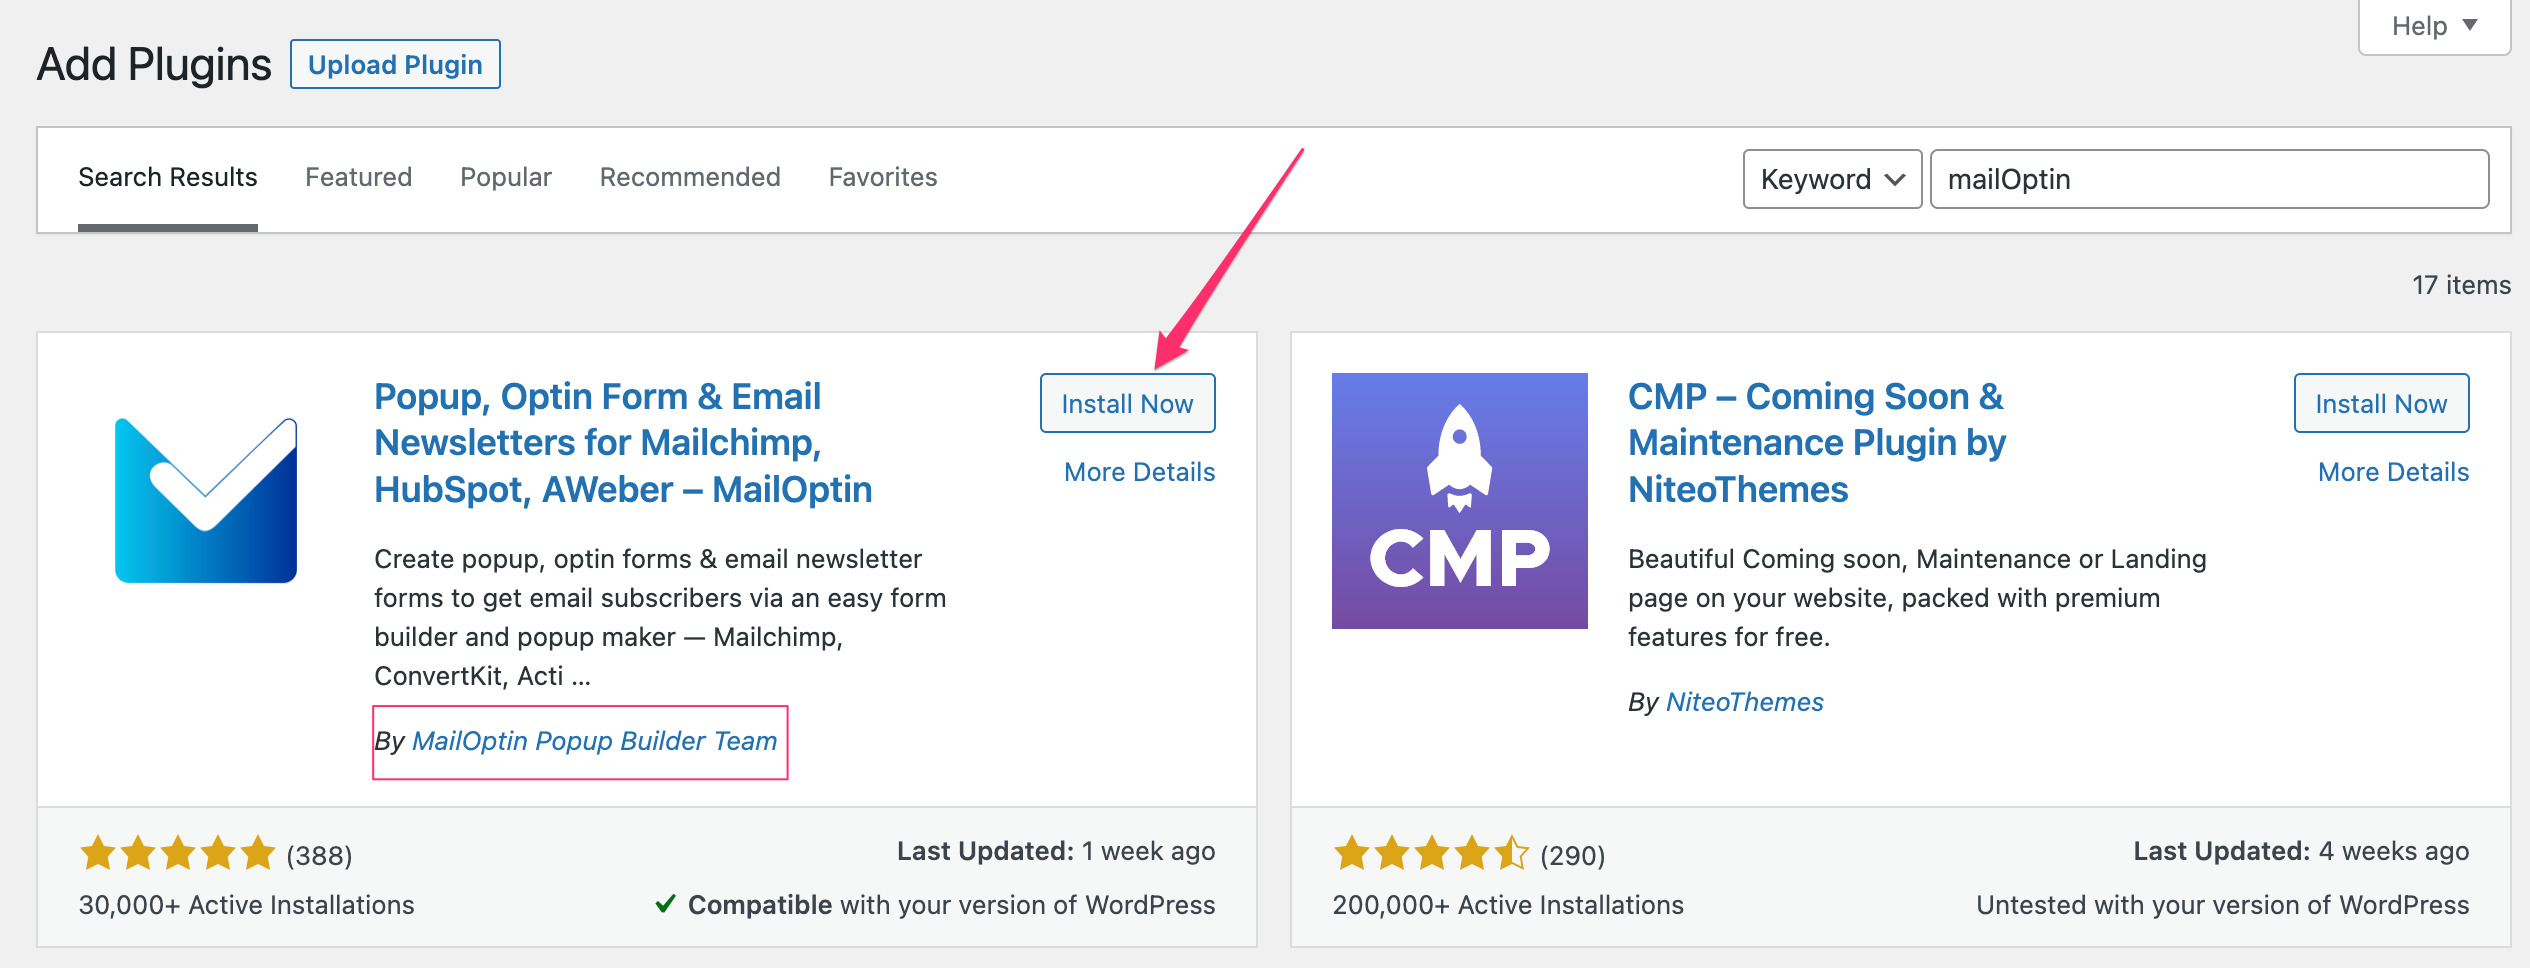
Install and Activate the MailOptin Plugin
Navigate to the Plugin section of your WordPress dashboard and search for MailOptin. Install and activate the one by “MailOptin Popup Builder Team” as shown below:
You can also download the plugin from the official WordPress plugin repository page, upload and activate it via the WordPress plugin upload section:
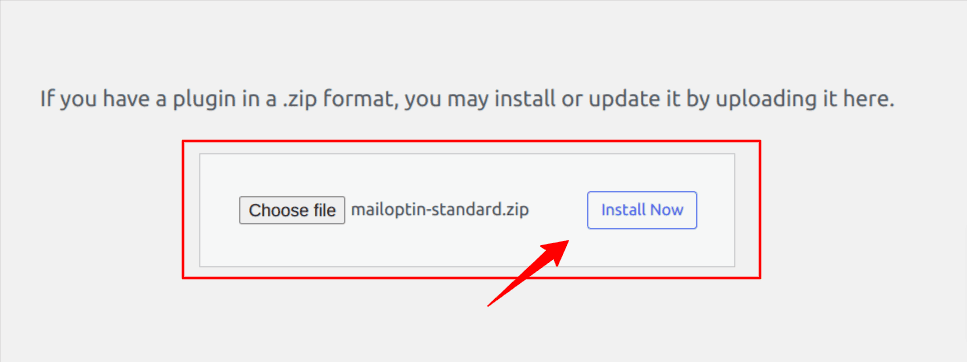
Both methods work just fine. It would be best if you favored the technique that is most convenient for you.
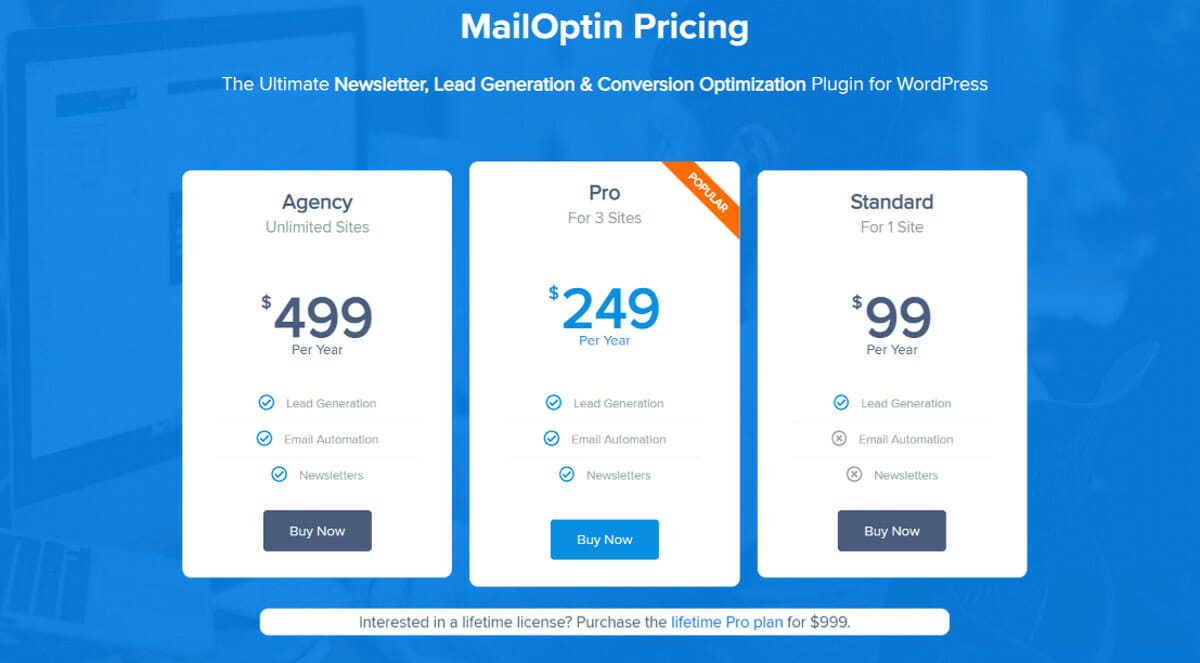
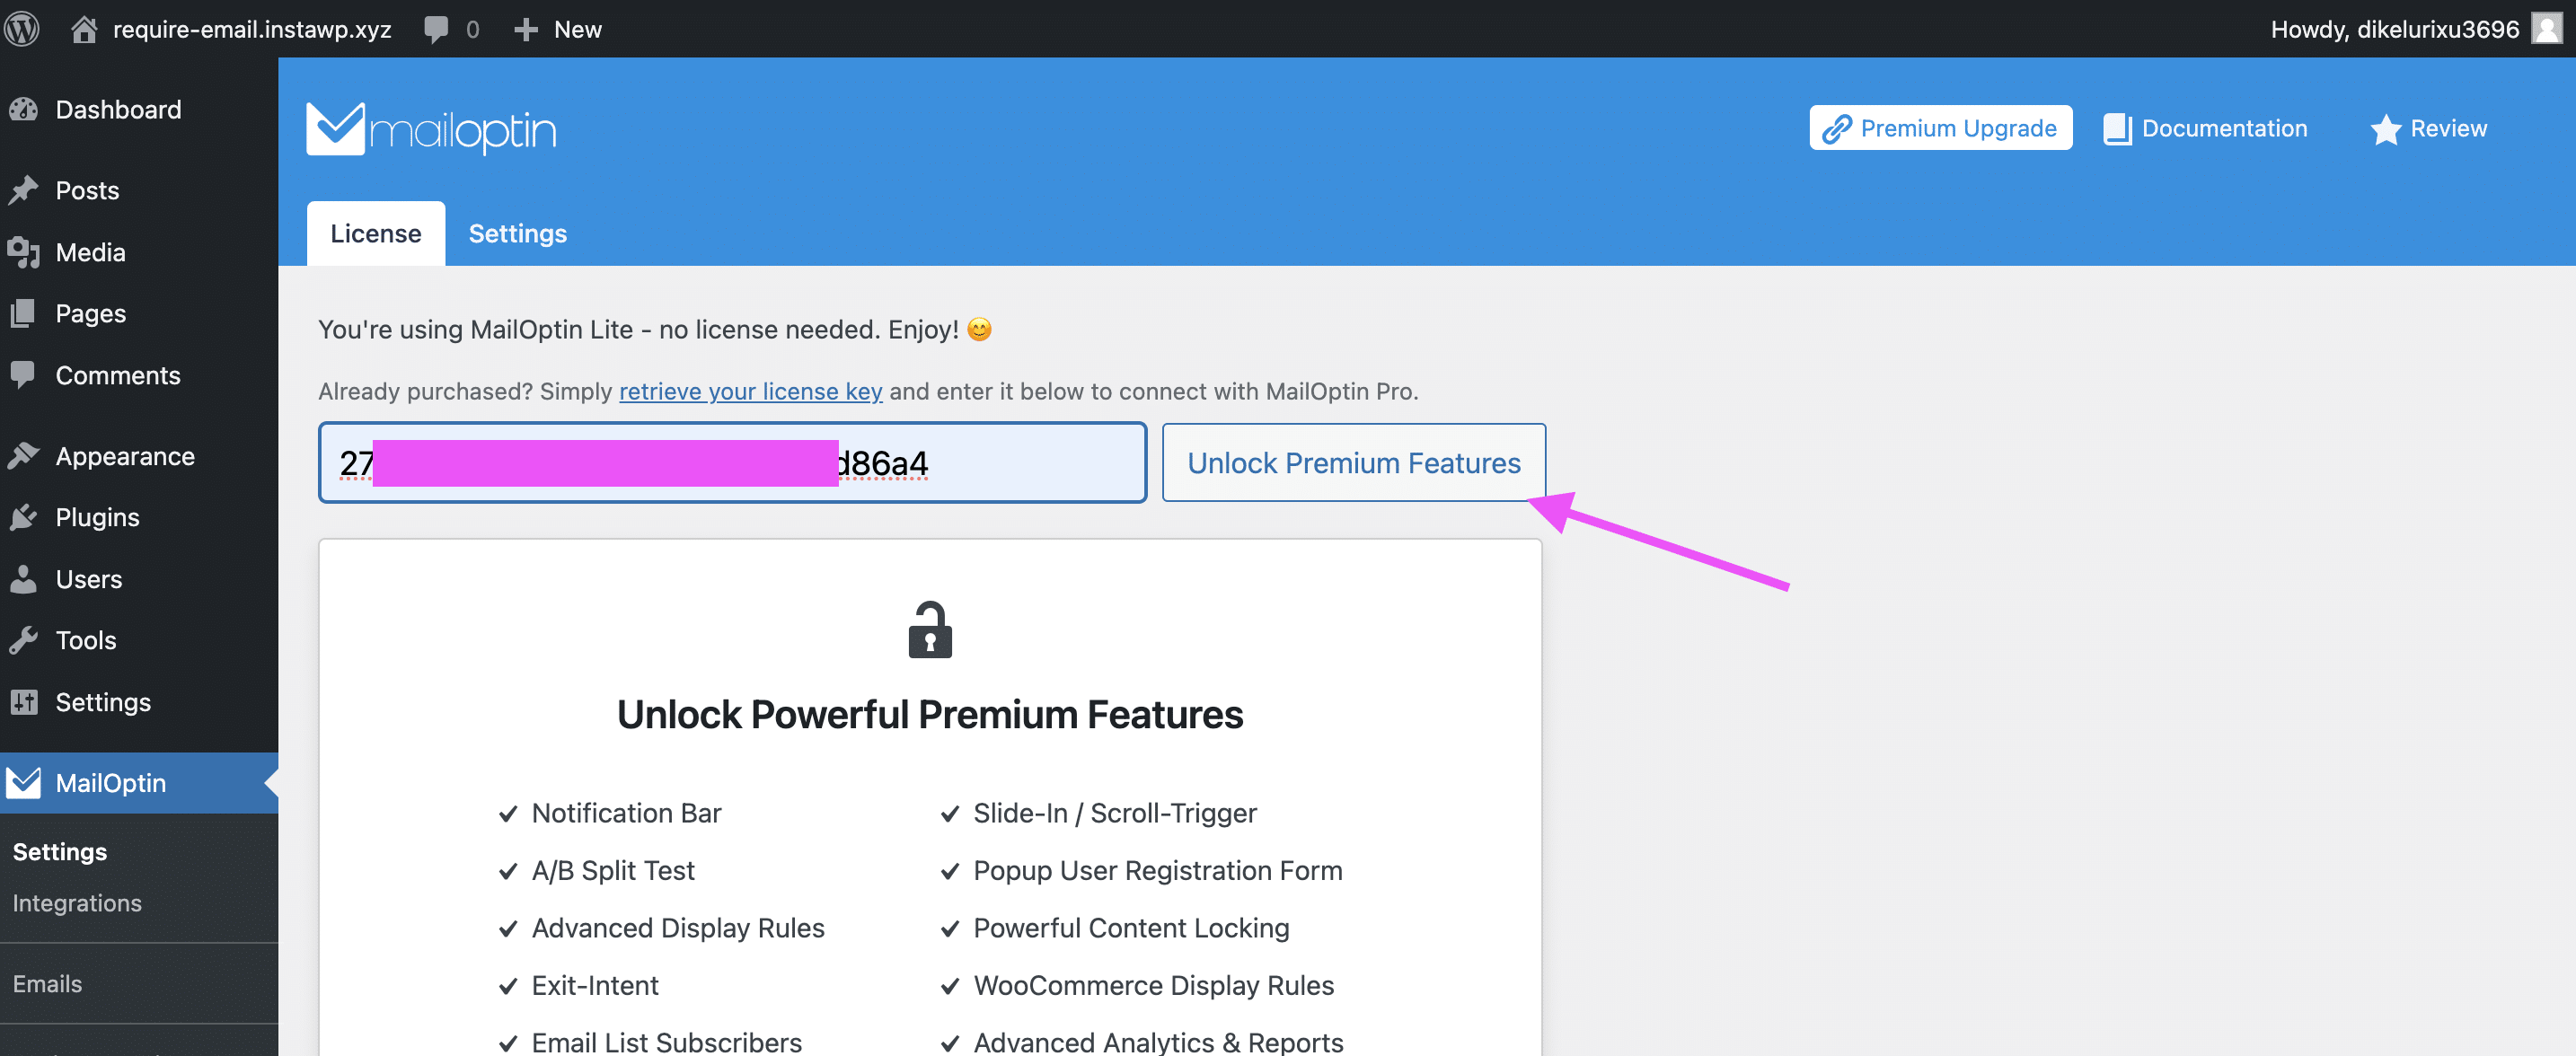
You can use MailOptin for free, but it has limited features. To get the most out of it, I recommend you get the premium version, which gives you all the features and customization you need. If you don’t have the premium version, check the pricing page and purchase the package suitable for your business.
If you just completed your purchase, you’ll be given a token, which will be sent to your email as well. Now, return to your dashboard and click MailOptin on the left sidebar. You’ll be presented with a form that allows you to enter your token and a button to upgrade and Unlock Premium Features as shown below:
Congratulations, you now have the Premium version of MailOptin; let’s create a form allowing the lead to submit their email address.
Creating a New Campaign
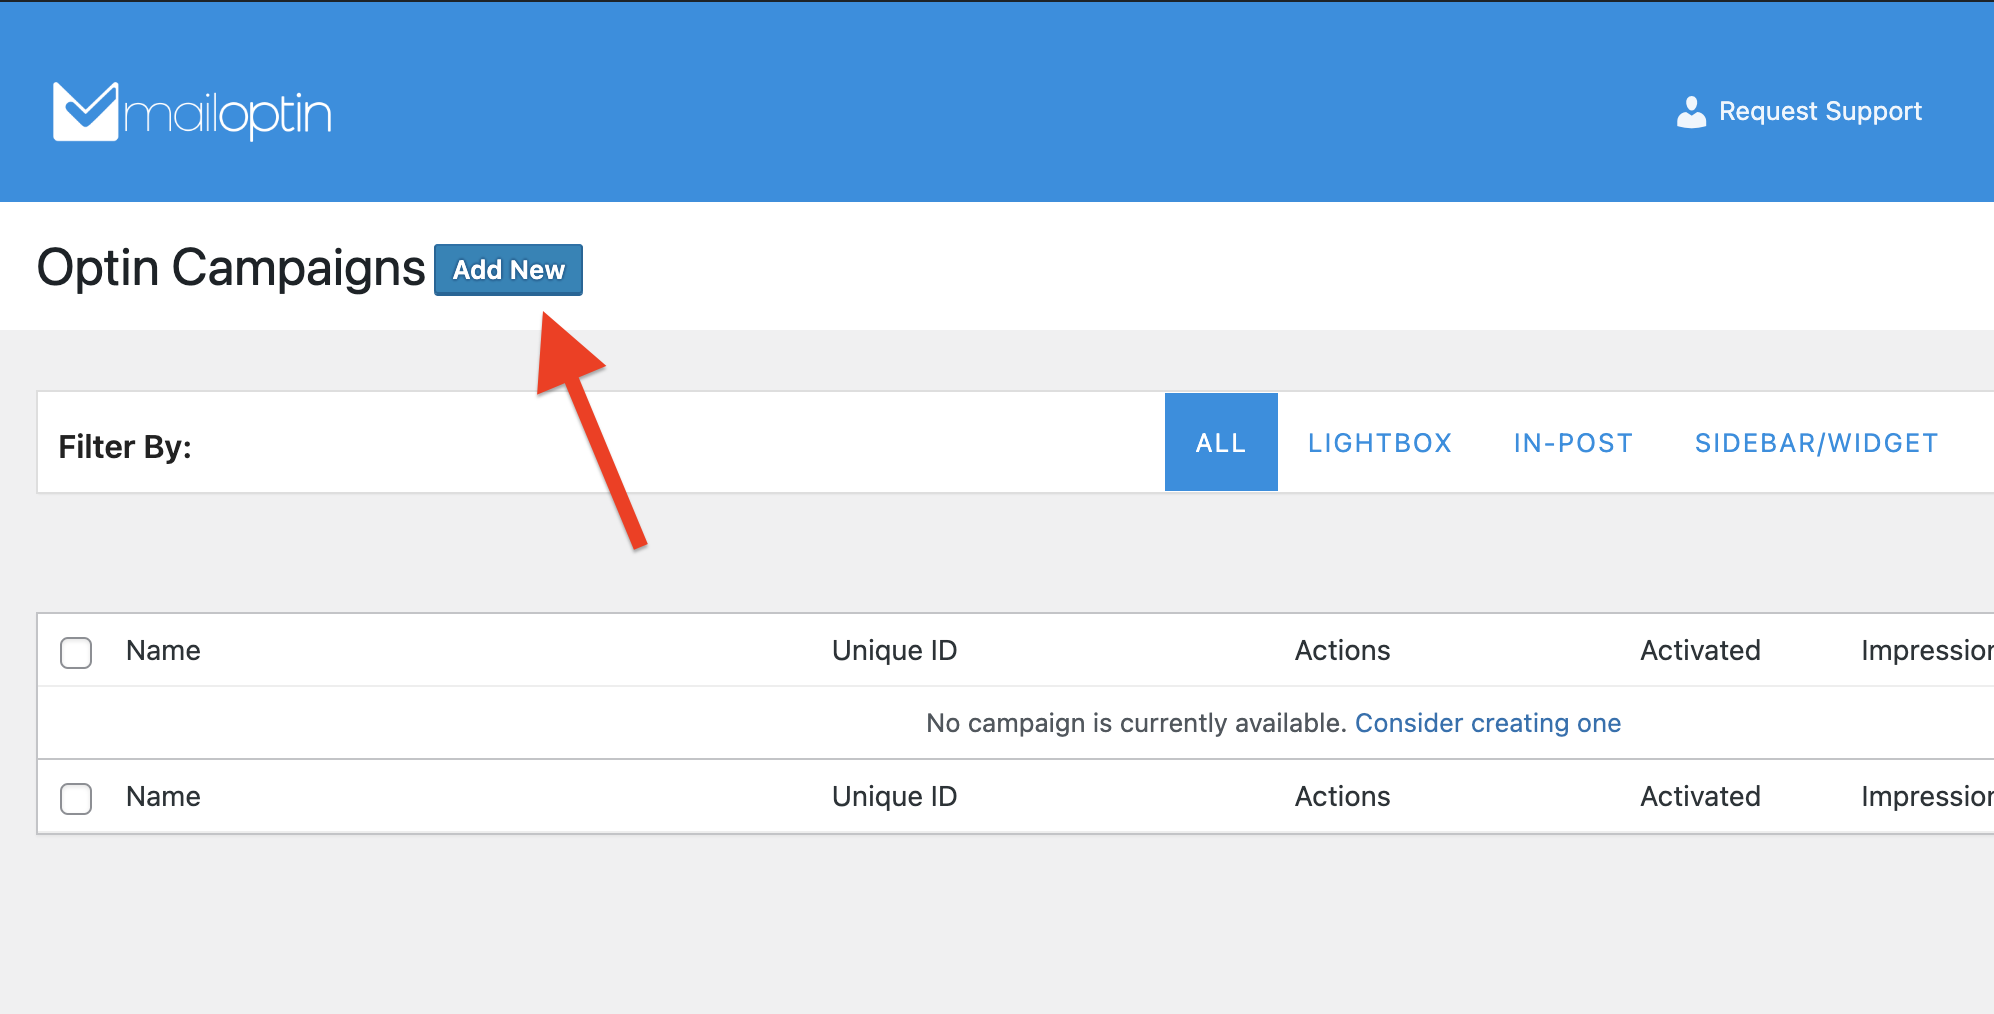
To create a form using MailOptin, the first step is to create a campaign. This campaign will serve as your central hub for managing the entire workflow of your signup form.
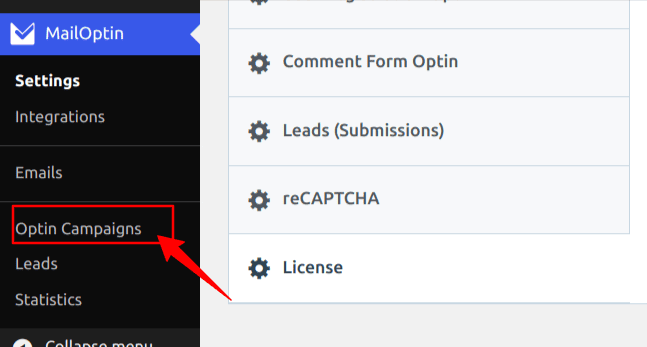
From the MailOptin plugin menu options, click on “Optin Campaigns” as shown below:
When the Optin Campaign page shows up, click “Add New” to create a new campaign.
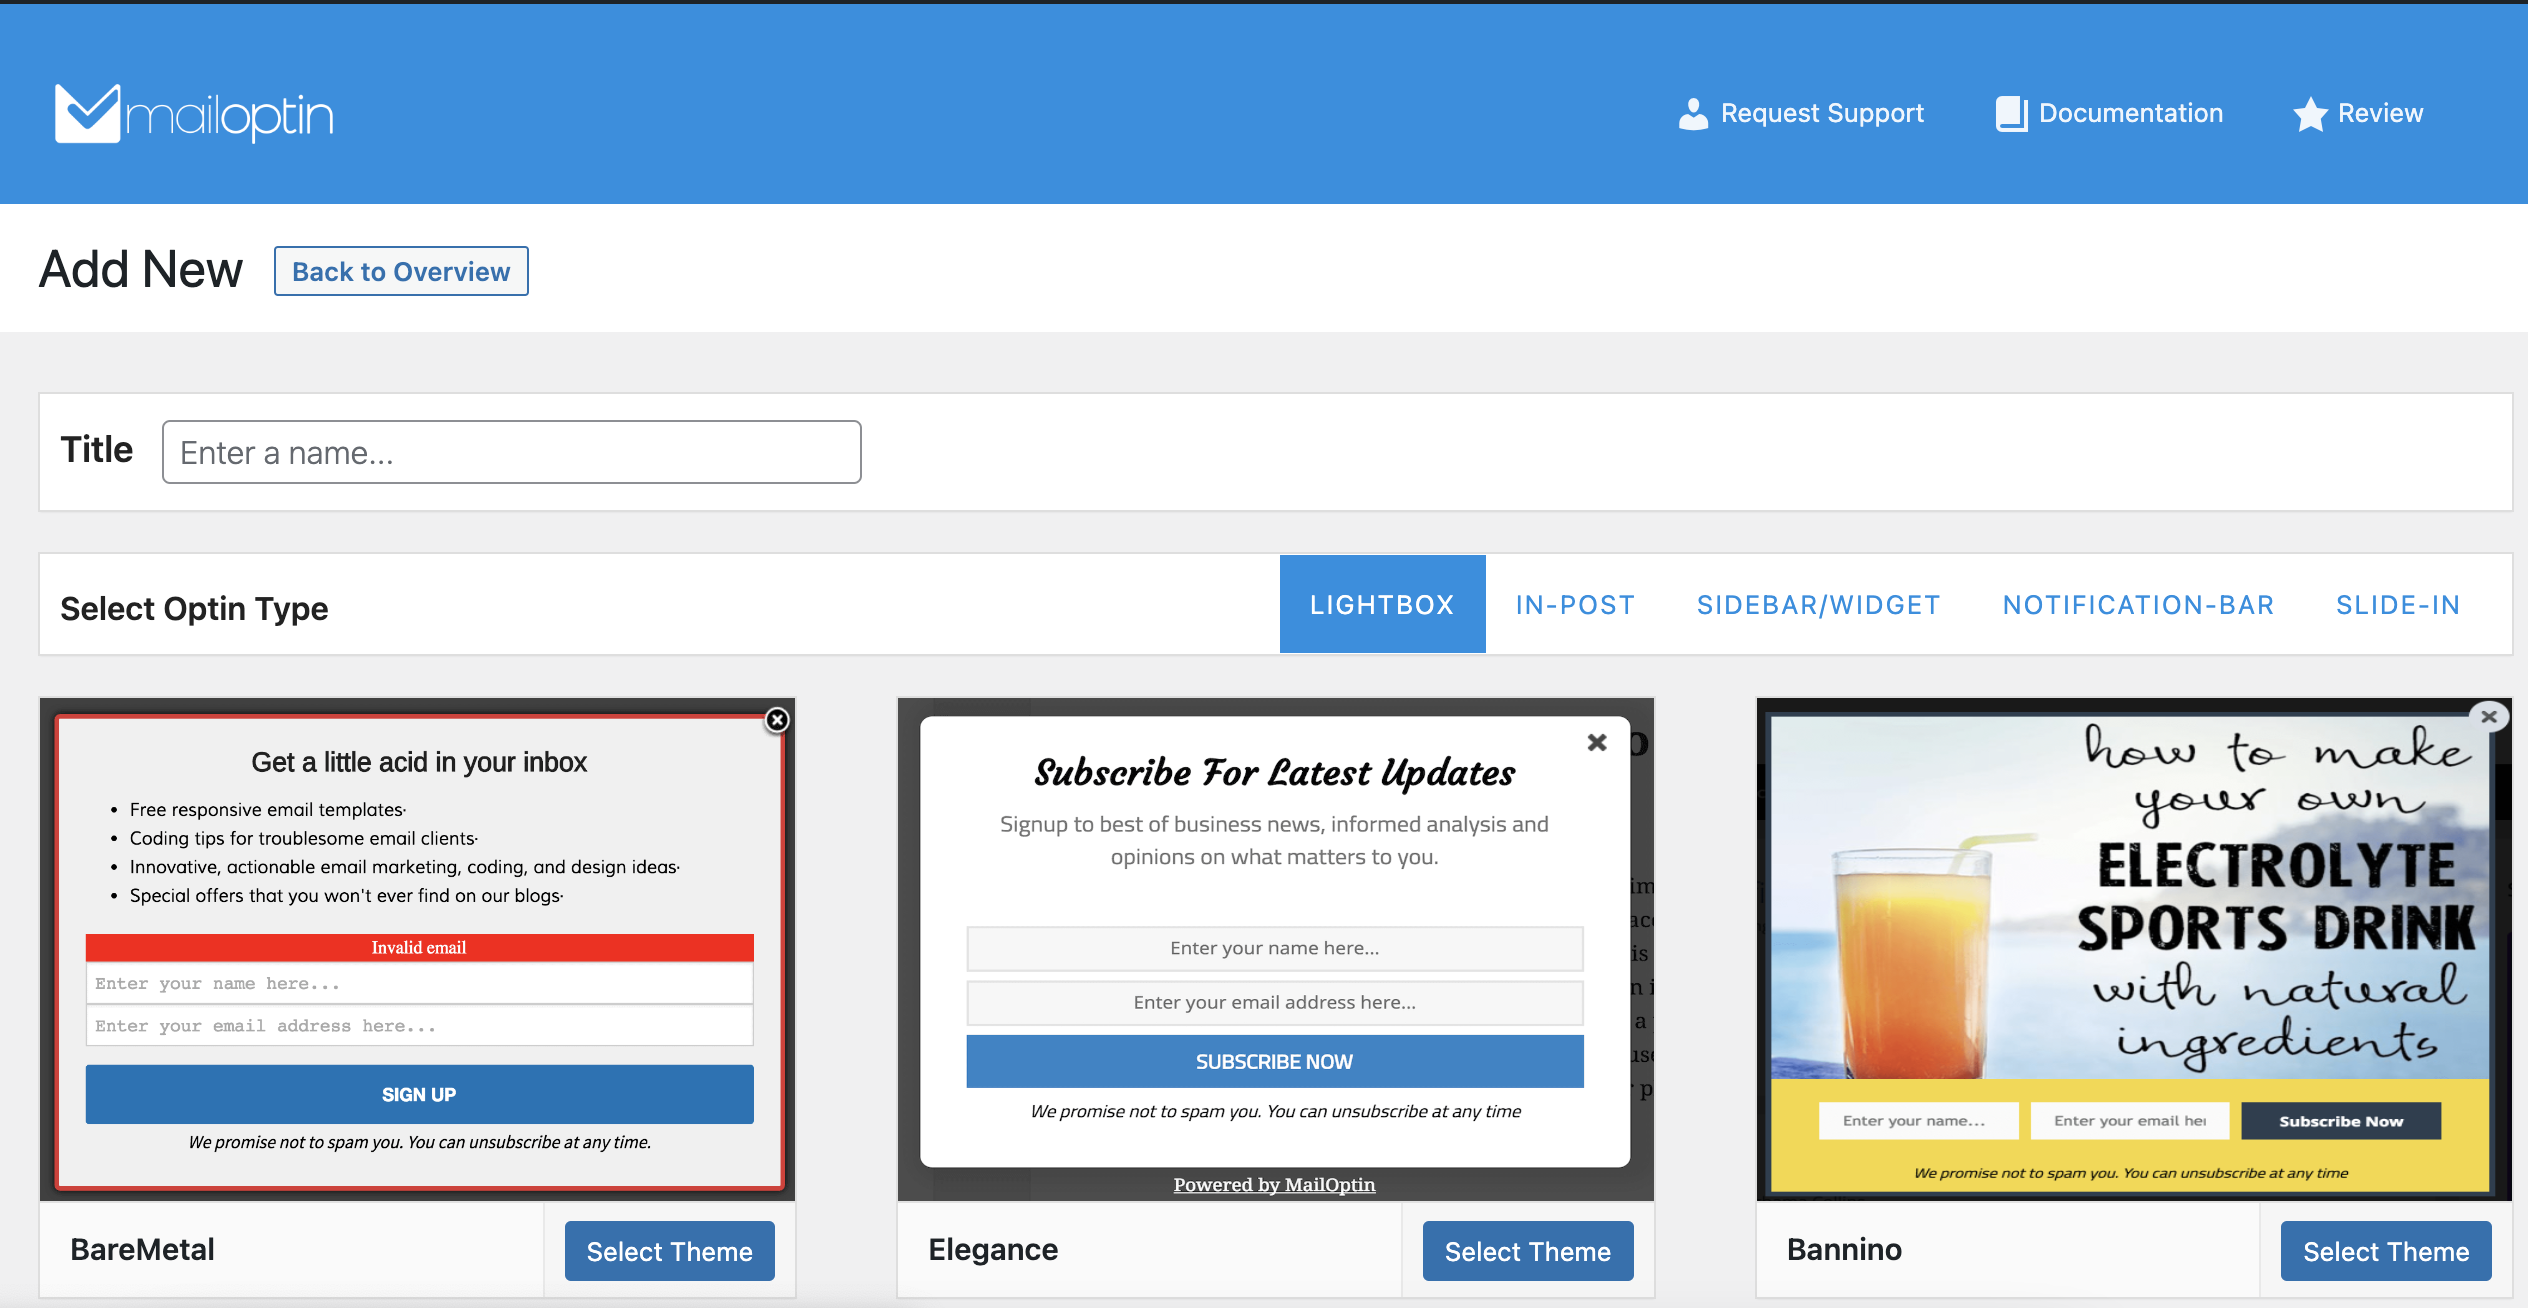
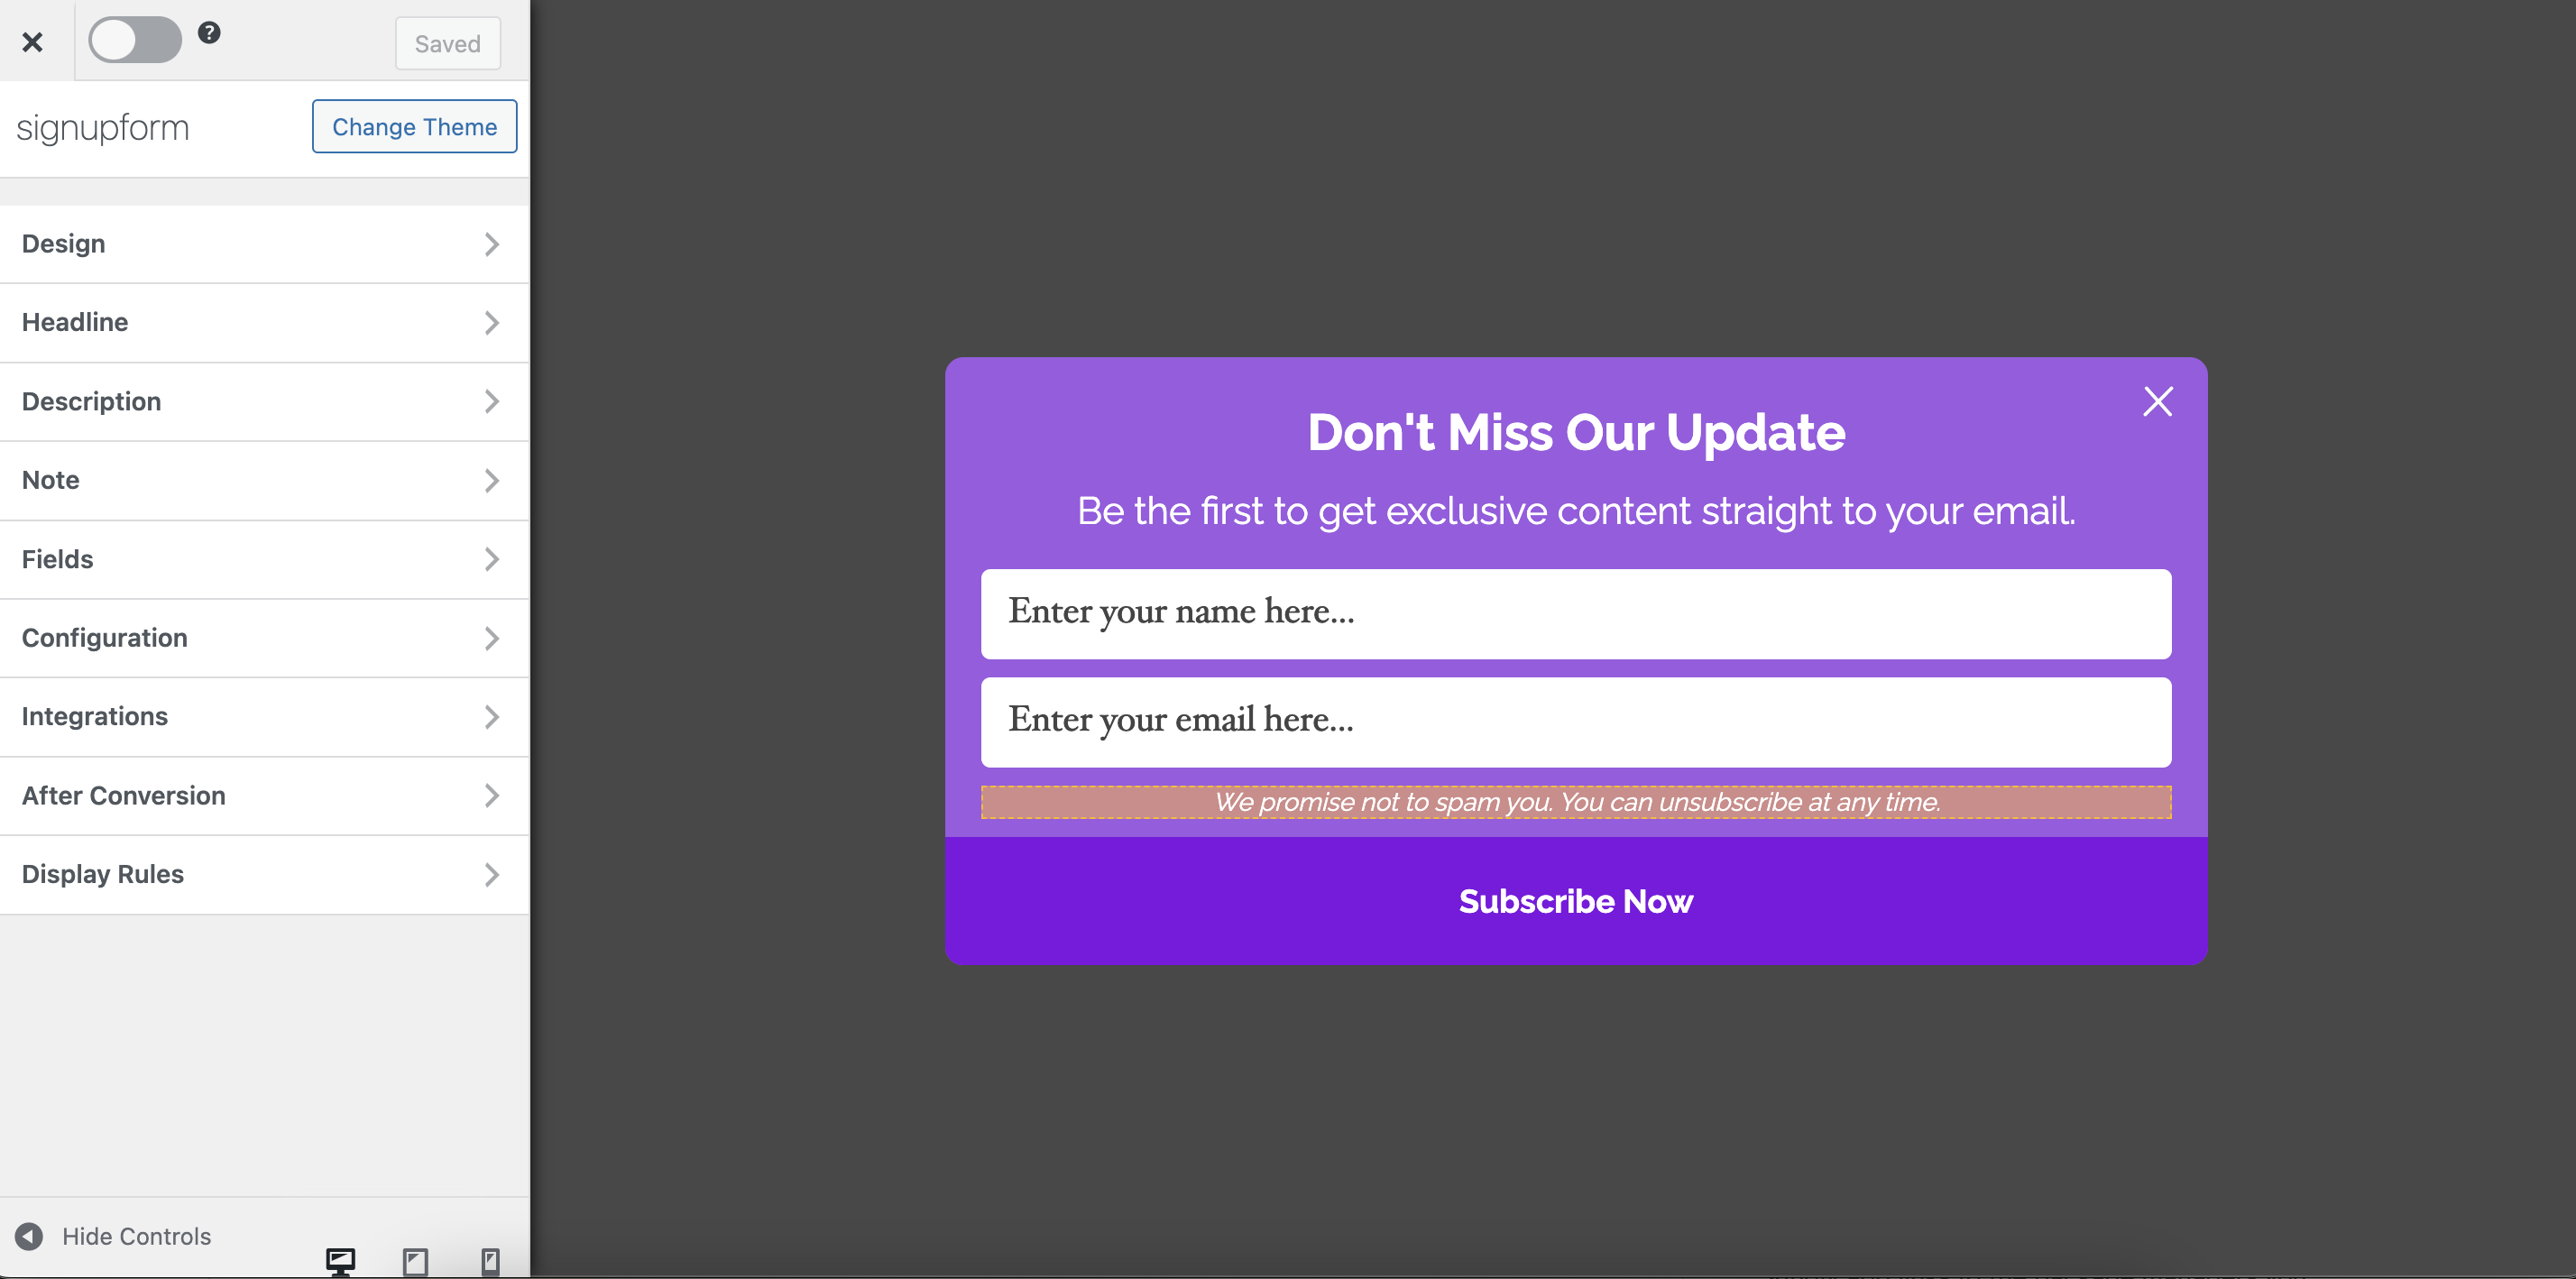
What follows is a page that allows you to enter the title and select a theme for your form:
When you choose a theme, you’ll be taken to a screen that allows you to design the form as you desire:
Now that we have the form ready, we can integrate it with email marketing services like Mailchimp, Aweber, etc., by navigating the integration section. More so, you can also choose to use the WordPress enabled integrations like the WordPress User Registration option or the MailOptin Lead:
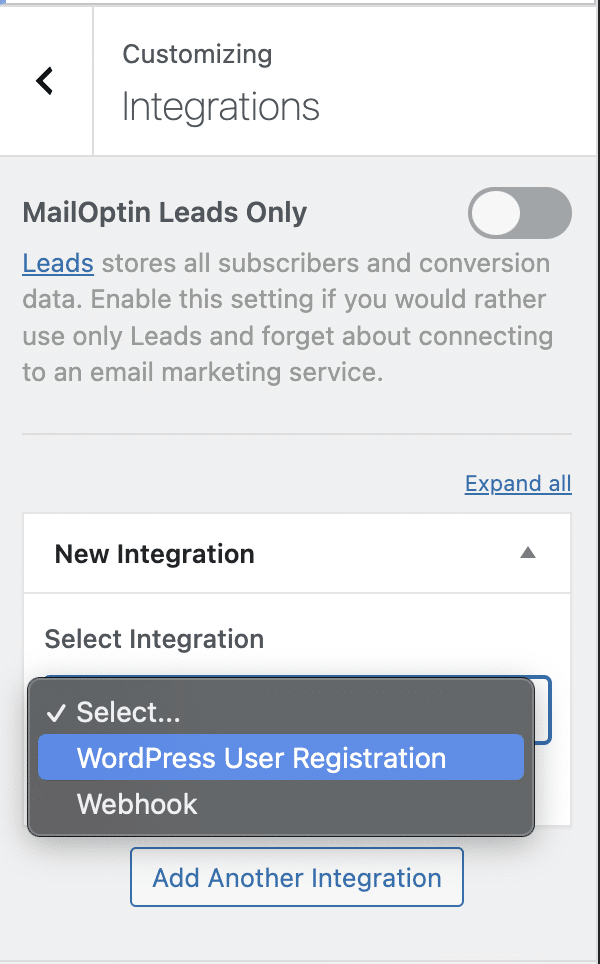
To use the “MailOptin Leads Only” option, just toggle it on, and all the email addresses you collect will be handled by MailOptin directly. You can access it directly from your WordPress dashboard— which, in my opinion, is pretty cool and easy and opens up many possibilities without having to pay additionally for an email service provider.
And most importantly, you’ll own the data and can control it. There won’t be a chance of one service provider shutting your account down, and all your collected email addresses will be gone with it.
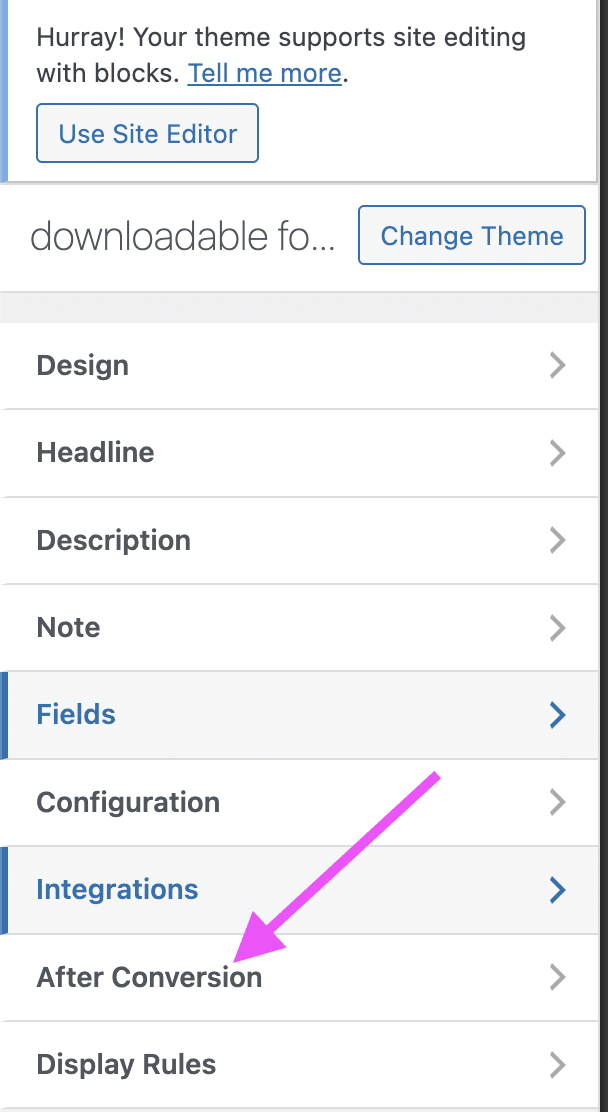
Setting the Download Rules for File Download
We need to set some rules; most importantly, we need to tell MailOptin what to do after the user provides their email address. Of course, we want the user to be able to download the file we promised, right?
To achieve this, navigate to the After Conversion section of the customization view as shown below:
When it opens up, select the Redirect to URL option because we want the user to be redirected to the link with the downloadable file.
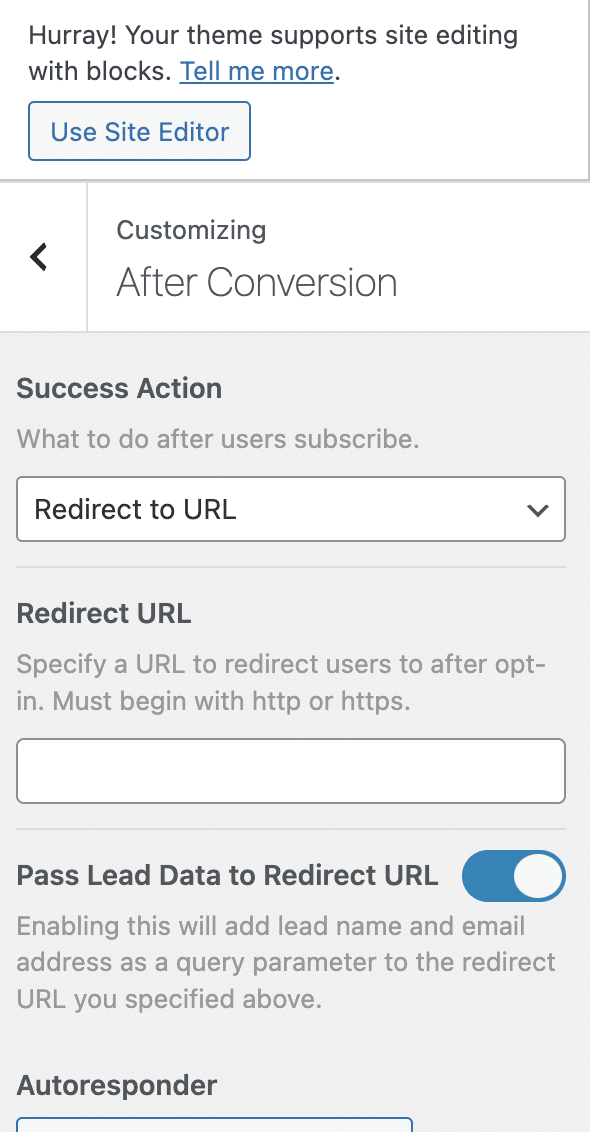
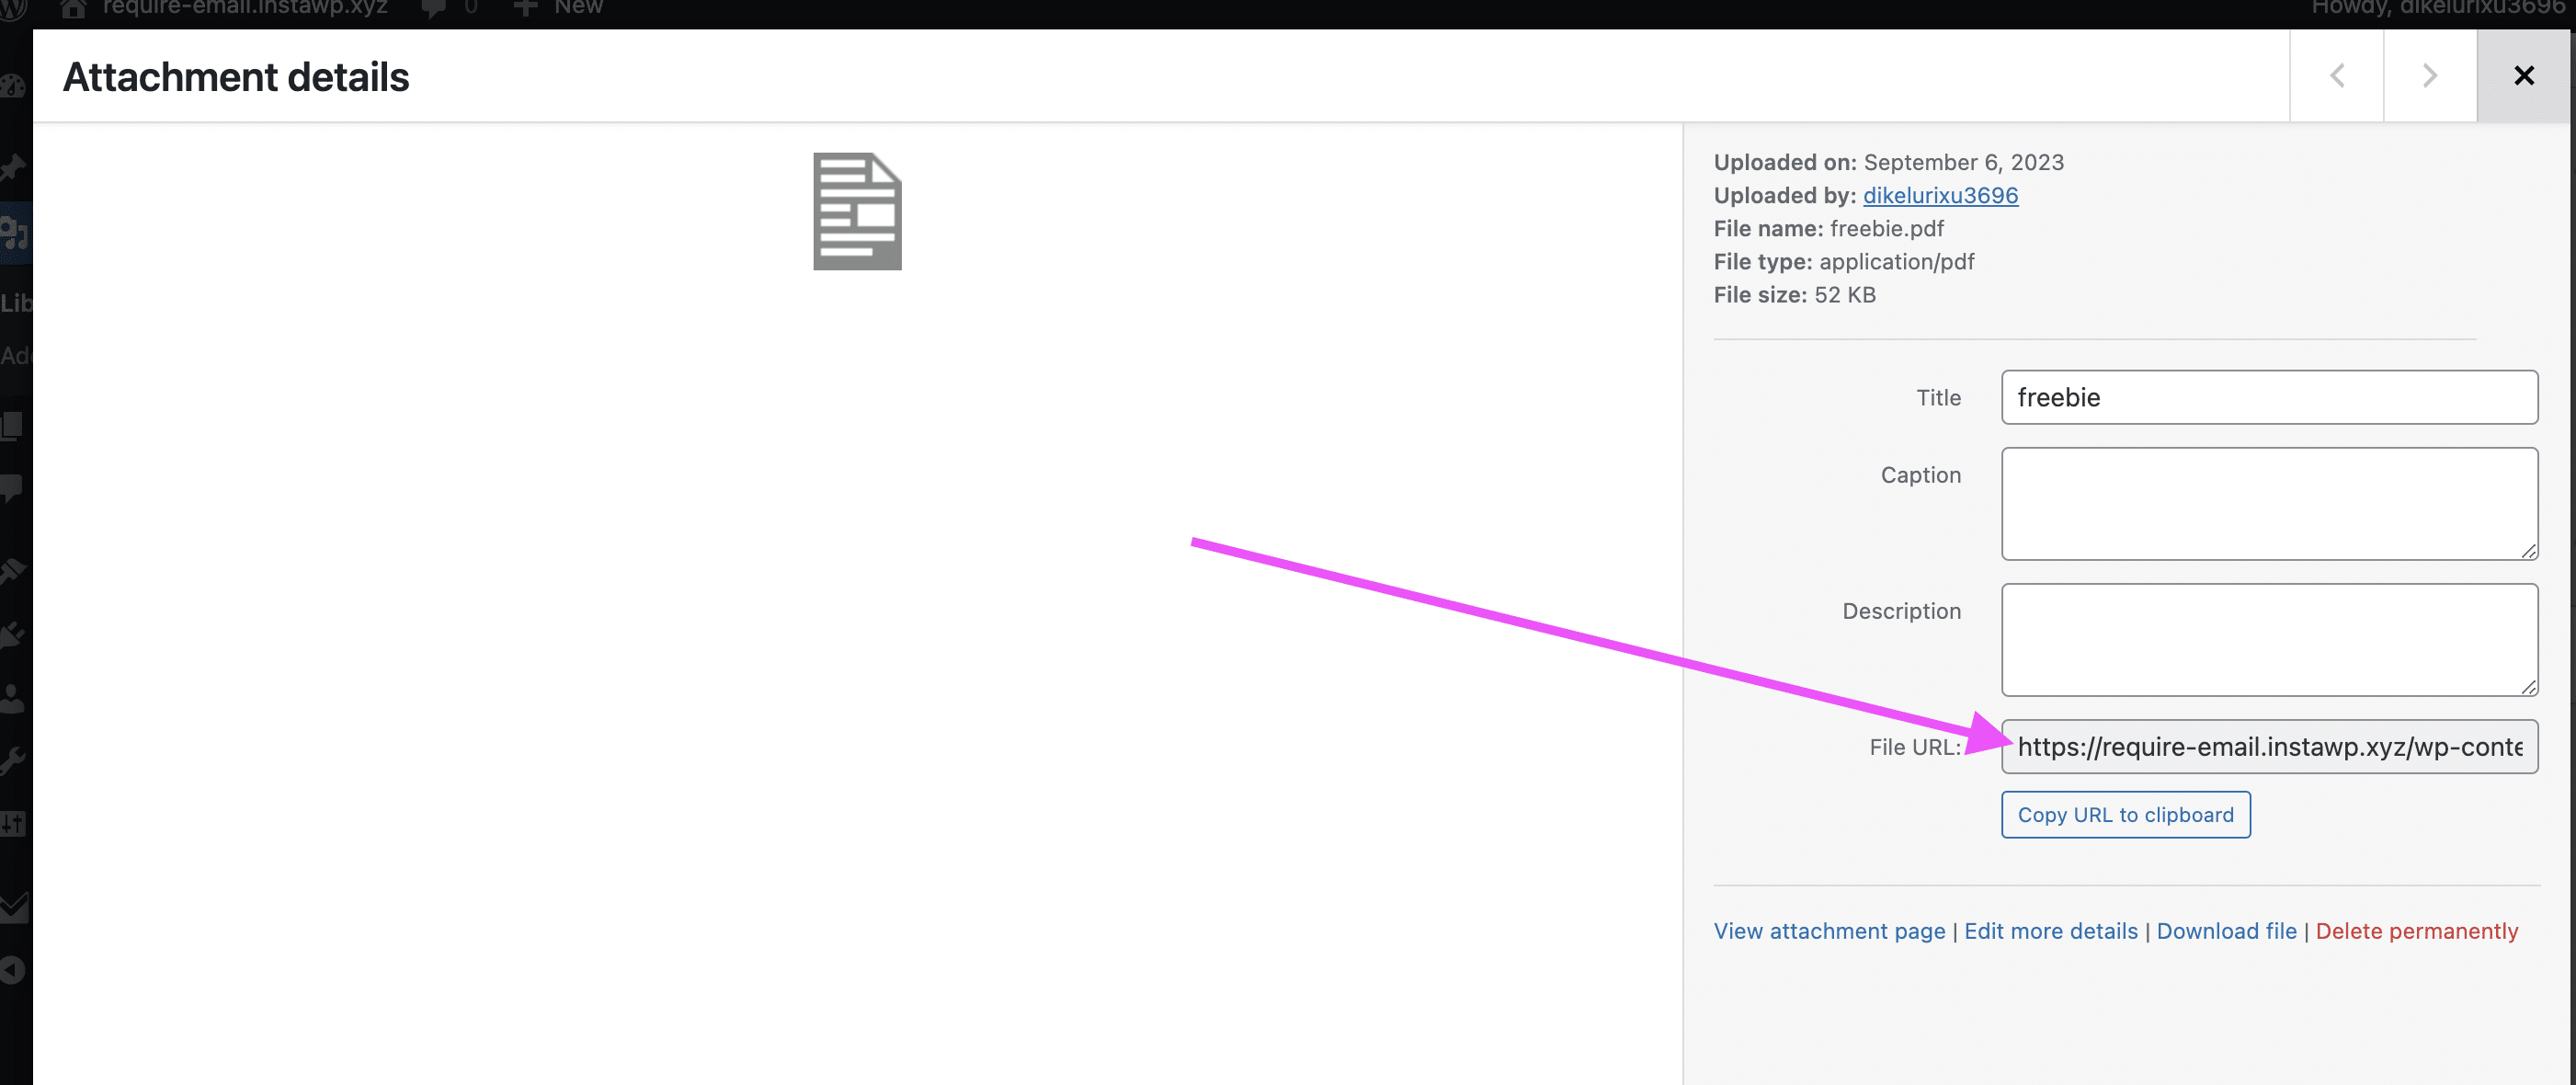
By now, you must have uploaded the file to your server and copied and pasted the link in the provided box. Otherwise, go to the Media section of your dashboard and upload the file.
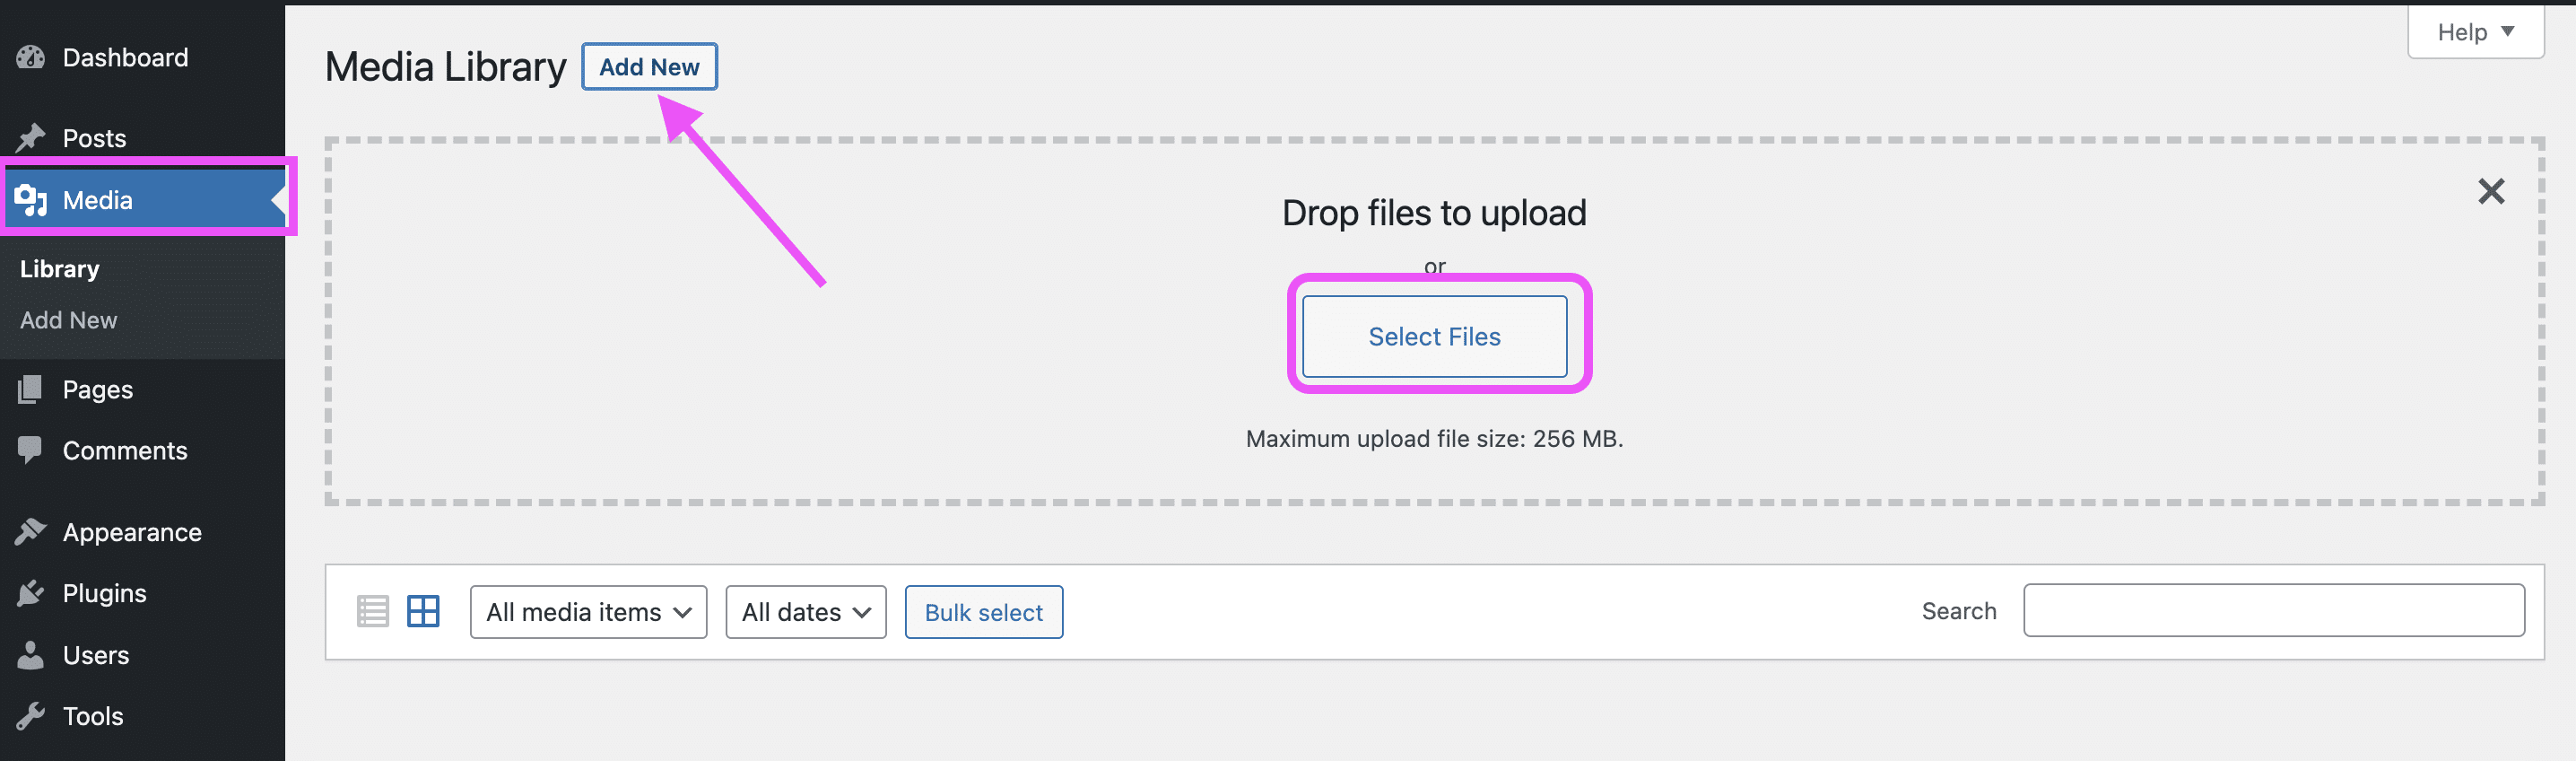
Once the upload is complete, copy and paste the file link into the Redirect URL input box.
With this setup, every user subscribing to your email list can download it automatically.
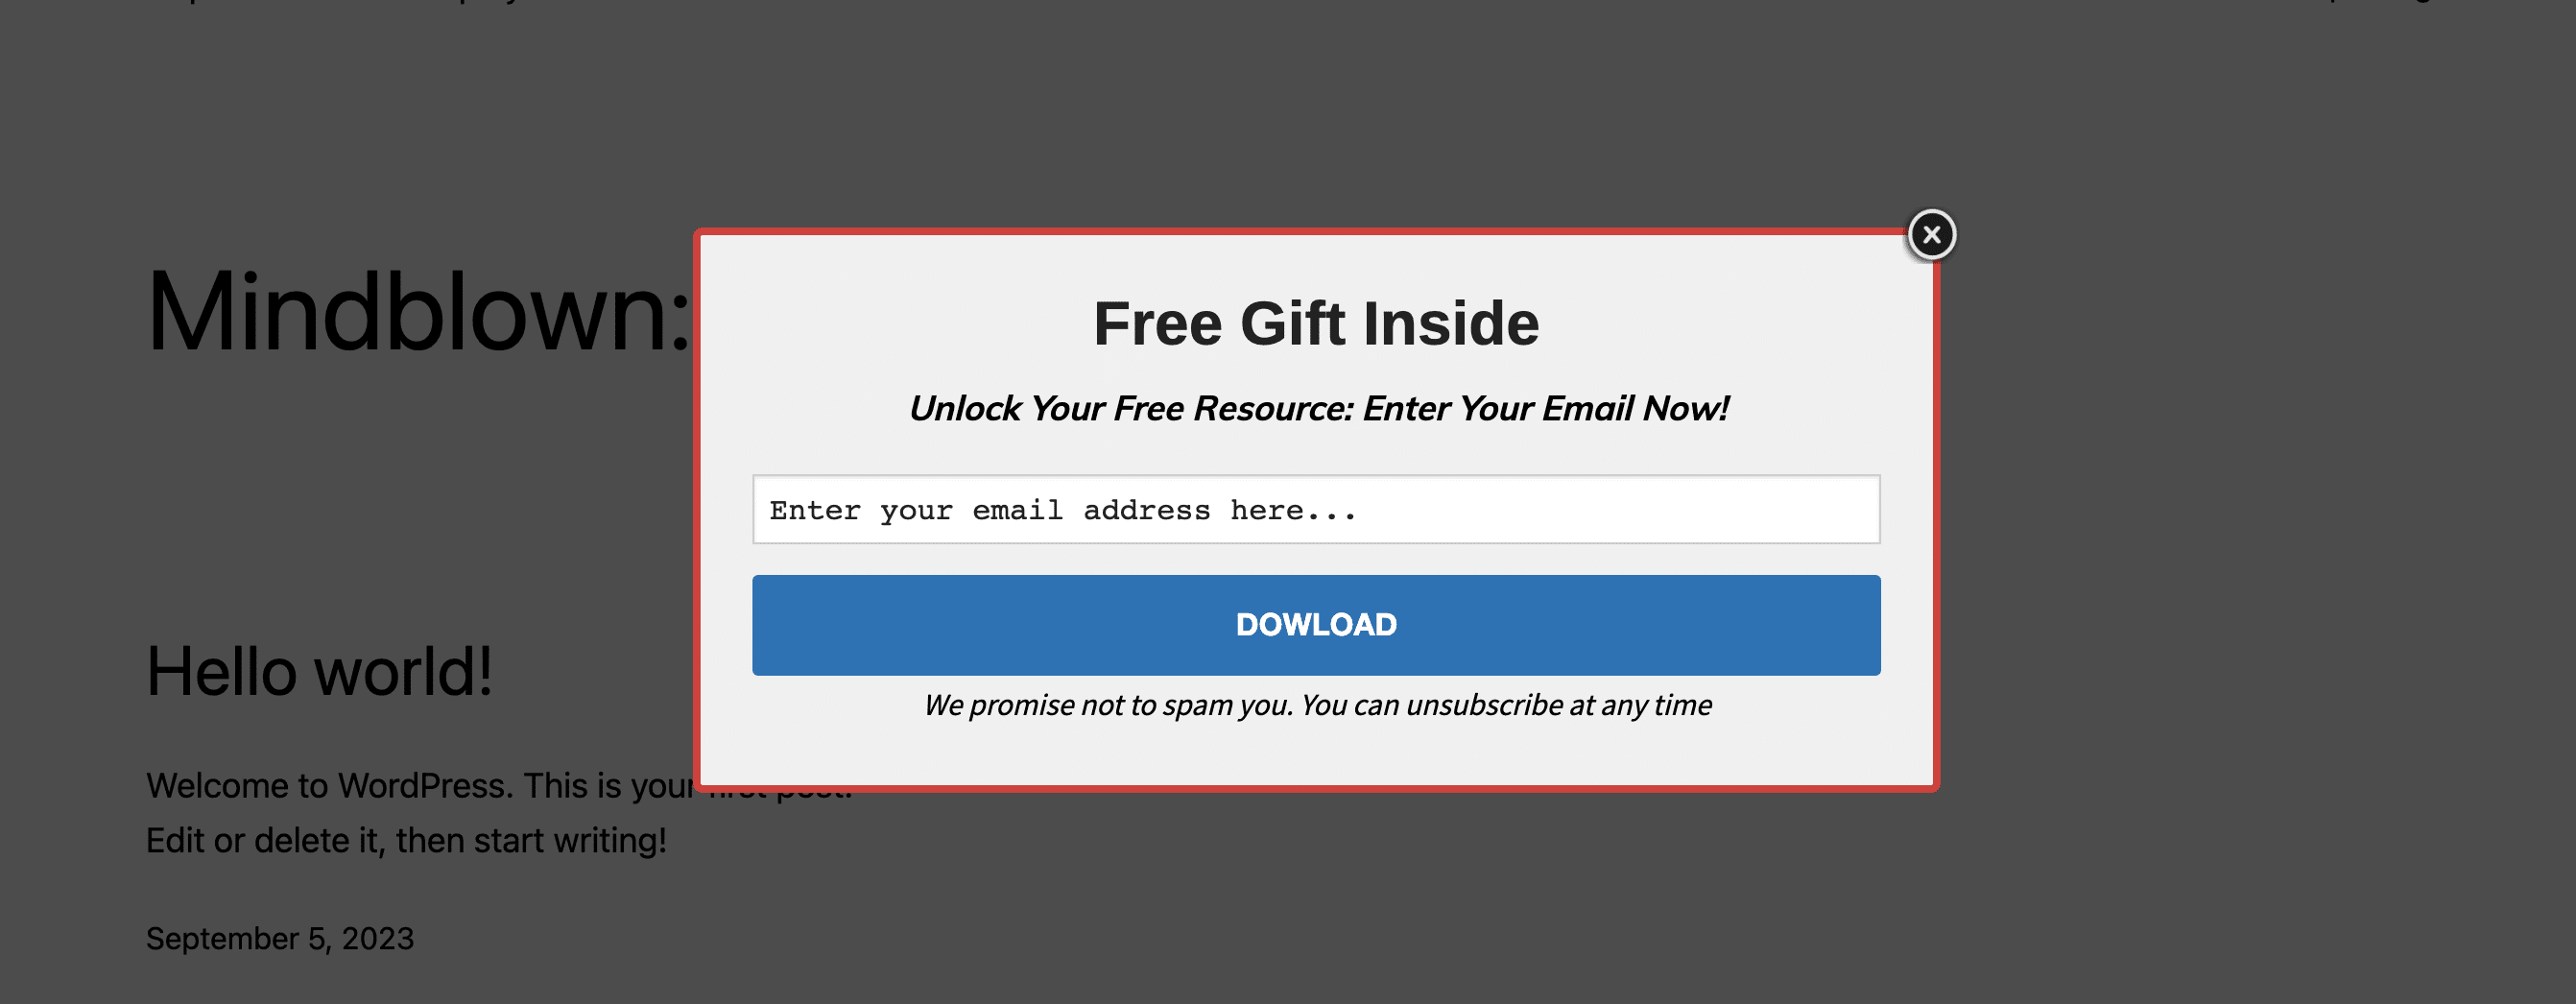
However, to ensure that the form becomes fully active and visible on your website, we need to address one more crucial configuration. Within the settings, you’ll notice a toggle at the top left. Switch it on to make the form live and accessible to your audience as, by default, this toggle is switched off.

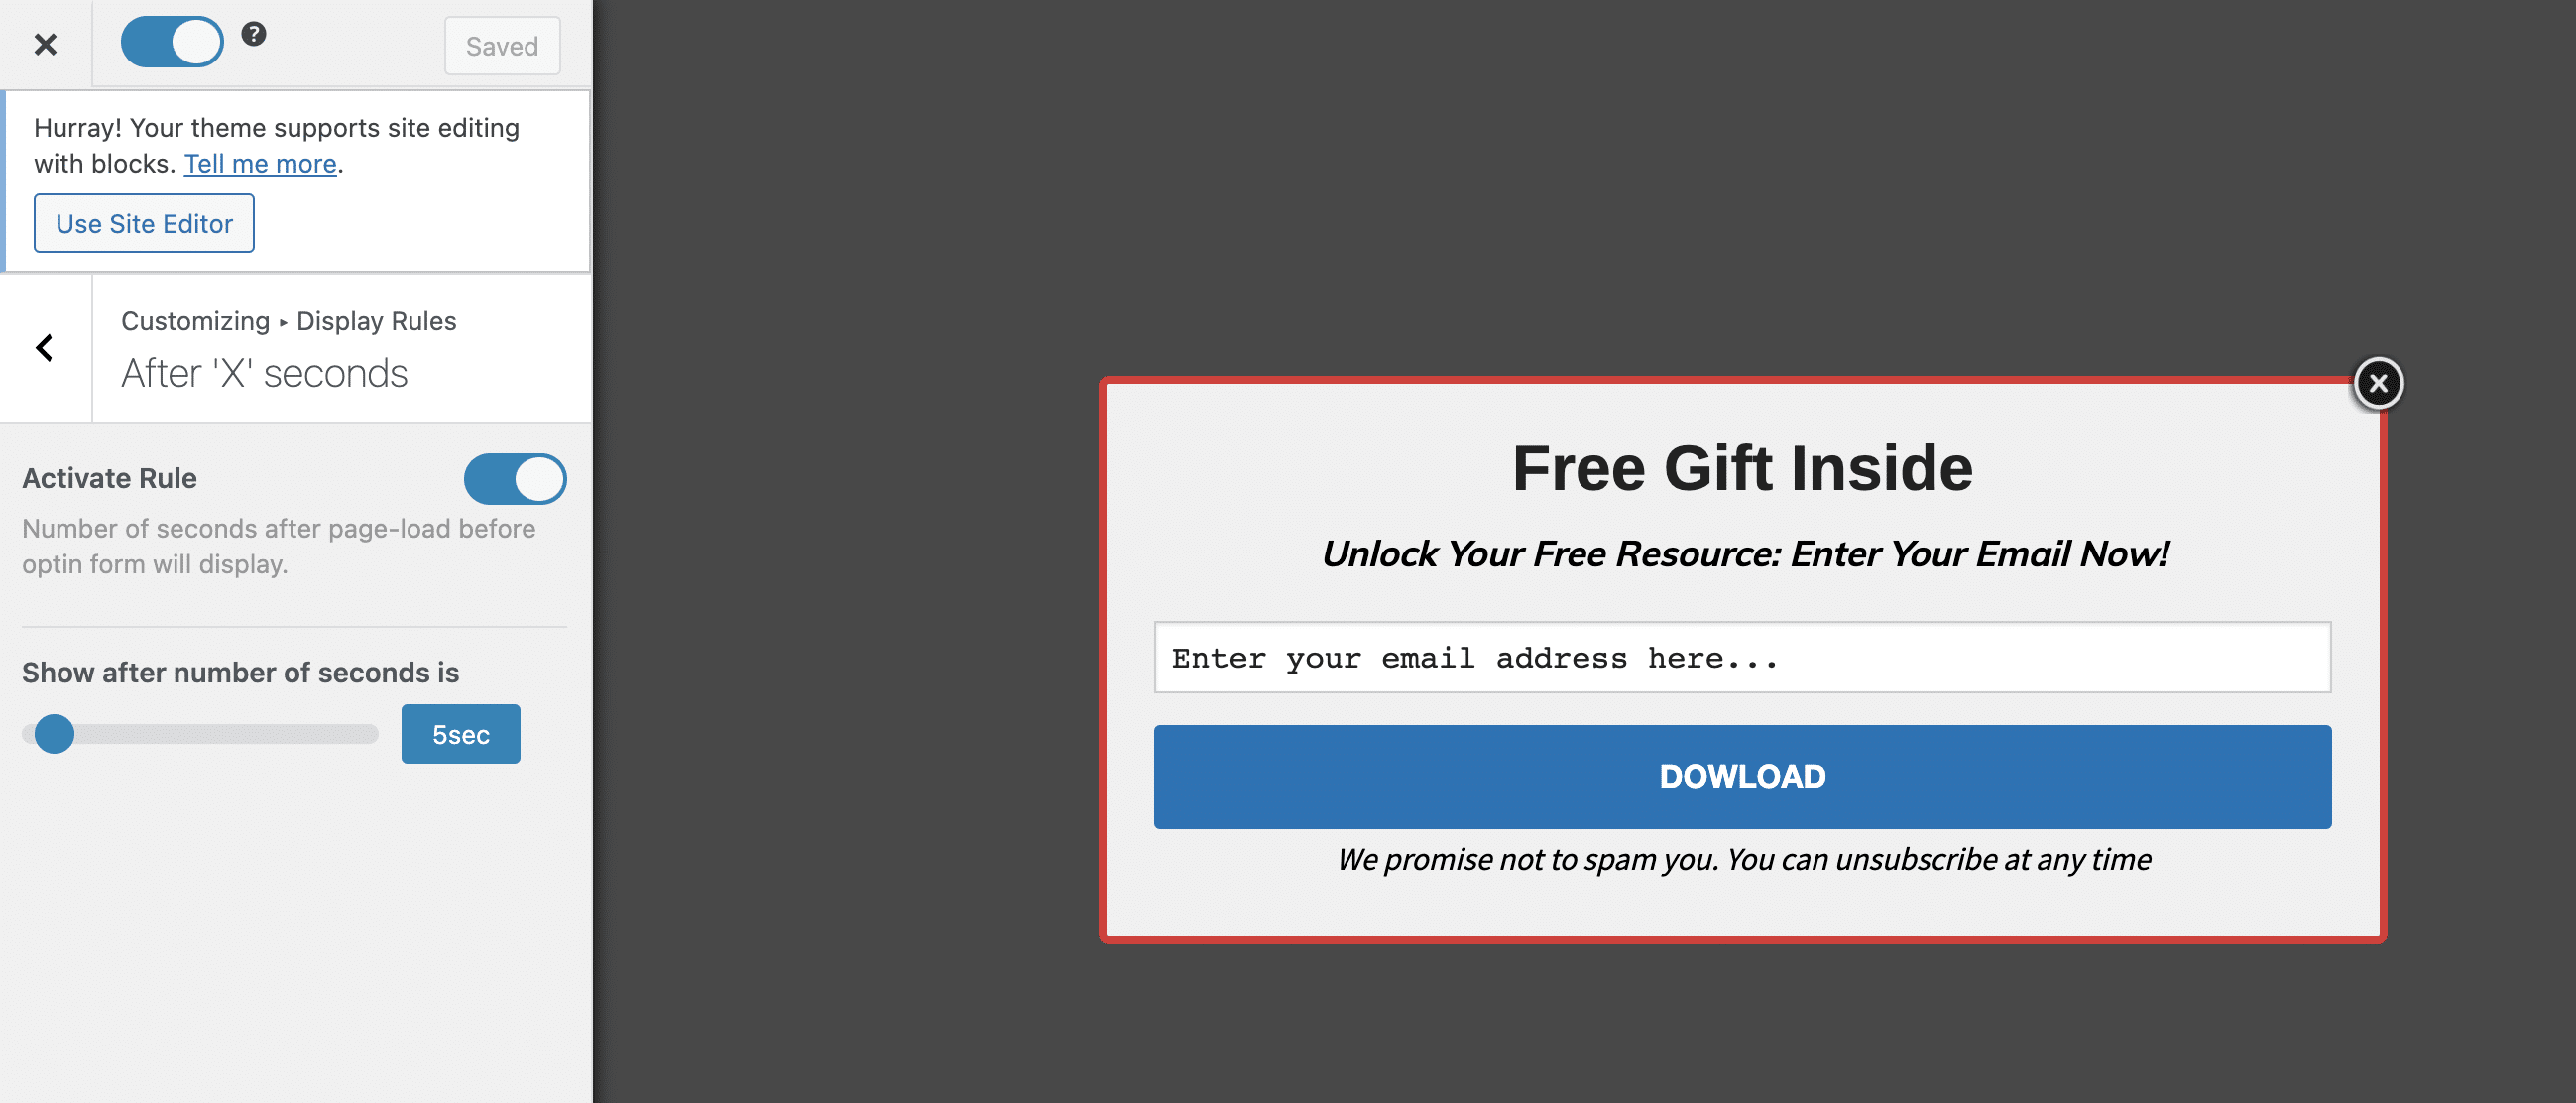
If you try to visit your website, you’ll immediately see a popup like this:
That might not be your desired behavior; however, you can control when the form pops up by customizing the Display rules. The display rules offer a wide range of possibilities:
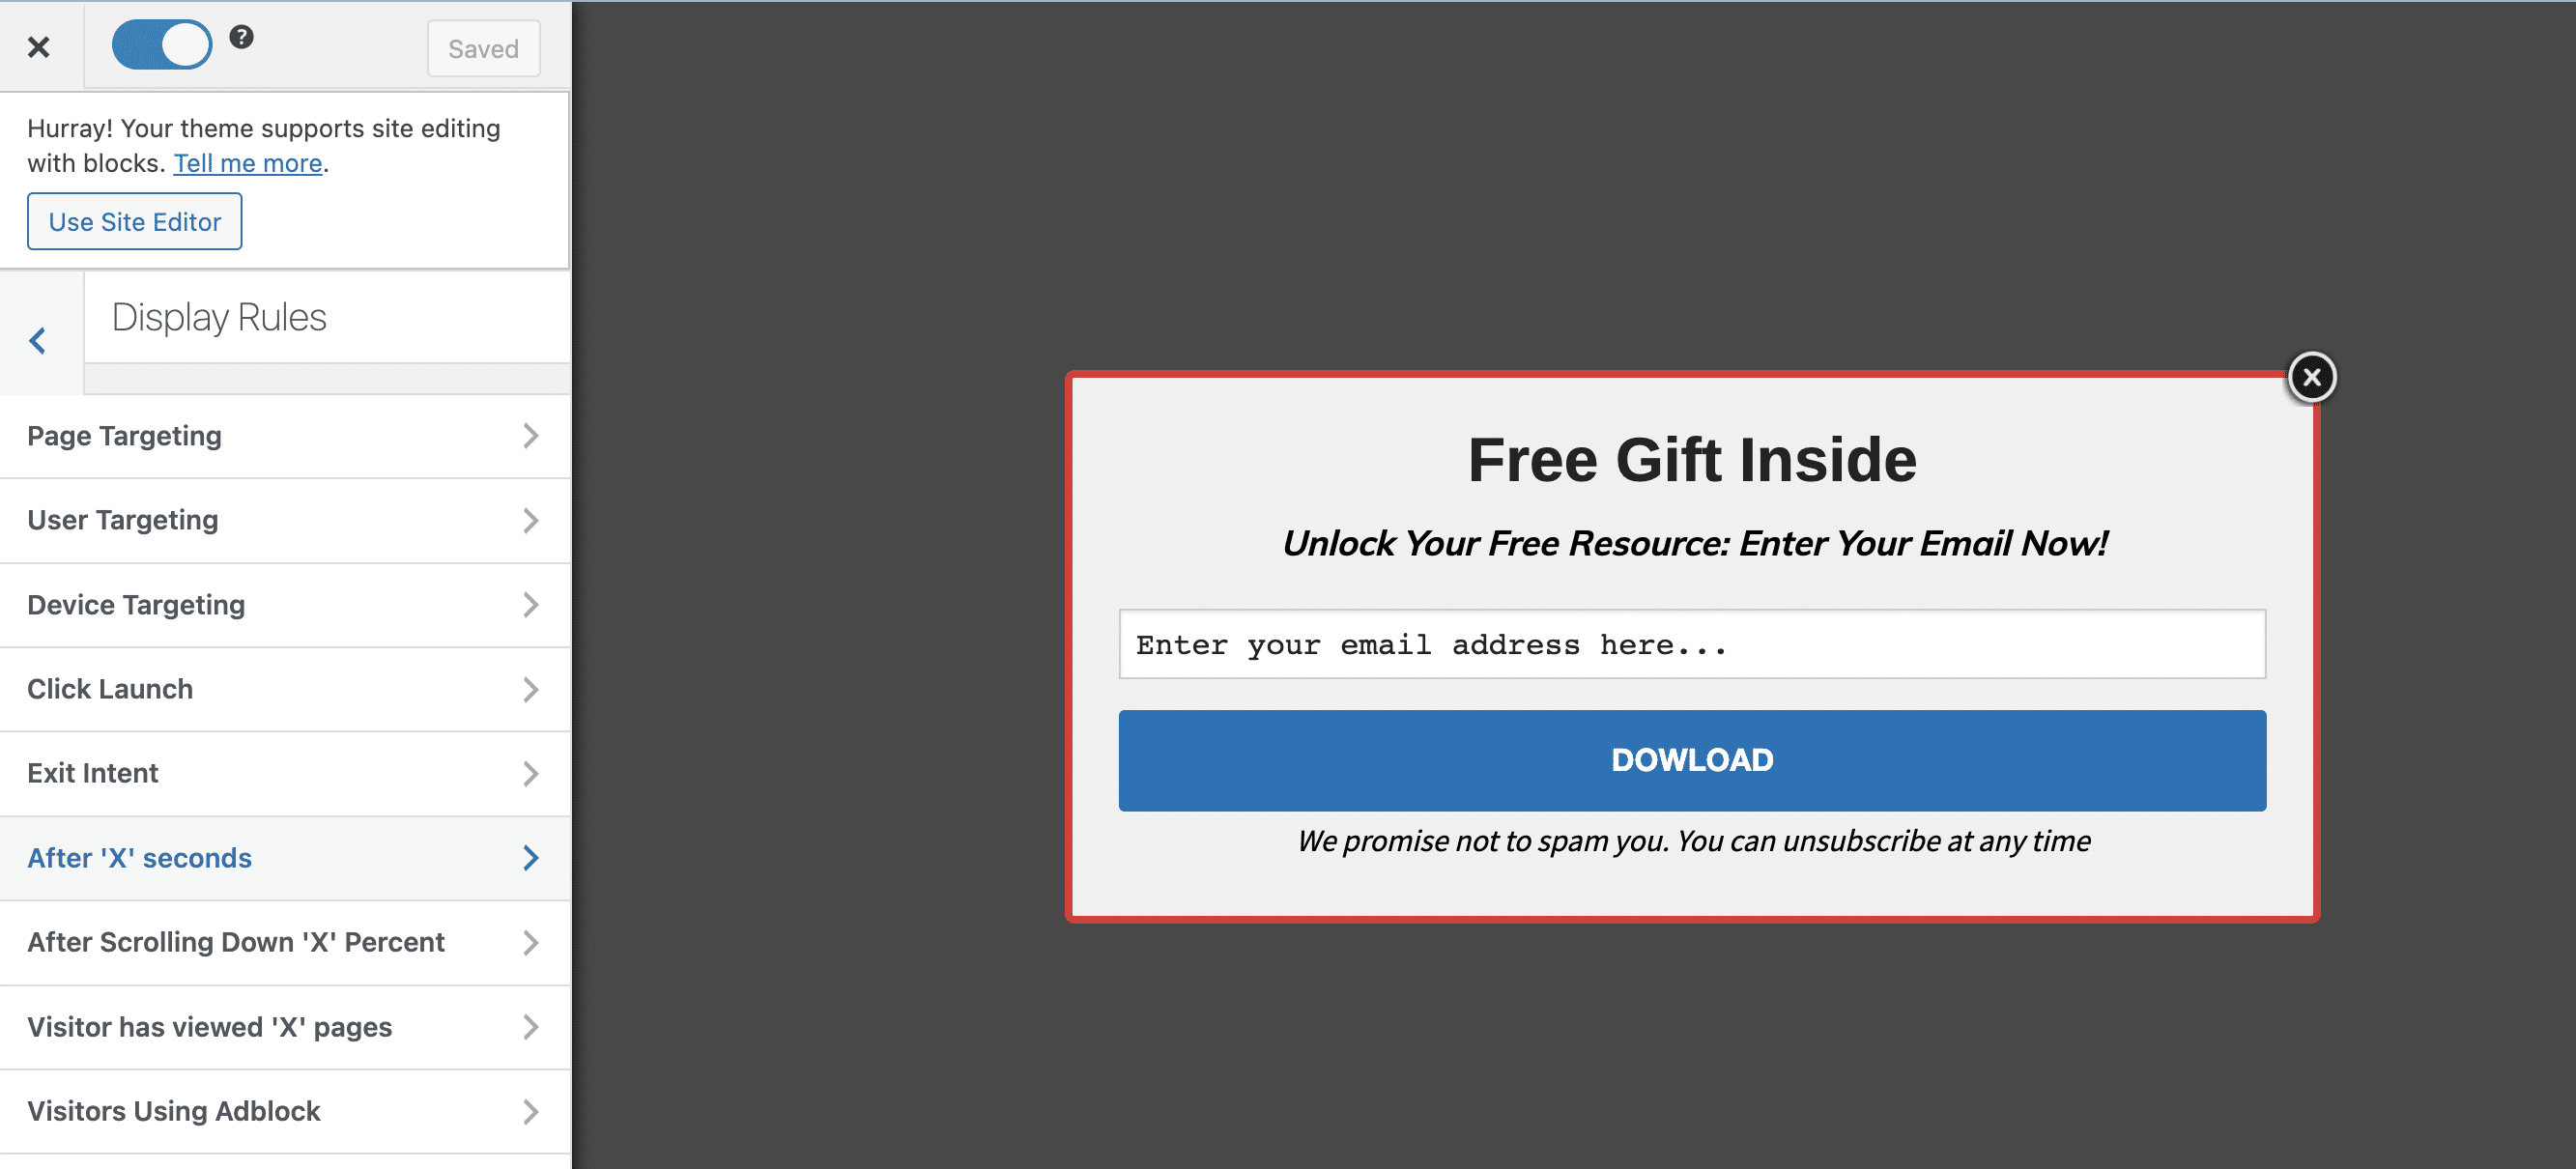
But for this example, we’ll use the “After ‘X’ seconds” to set how long after the user visits the website. Here is how we’ll set it for 5 seconds.
That’s all there is about it. Go test it out. Now, 5 seconds after a user visits your website, the form will show up, and when they sign up, they automatically download the file.
Conclusion
In conclusion, you’ve learned how to leverage MailOptin to implement a dynamic form — and its other possibilities — on your website that allows you to require email from your visitors before they can download a file.
As we know, the importance of collecting emails on your website cannot be overemphasized. MailOptin provides a whole suite of tools that can allow you to run a solid and profitable email marketing campaign and help increase your engagement and conversion rates.