Are you looking to create a custom user profile page on your WordPress website?
By default, WordPress provides a basic user profile page with essential information, such as the user’s name, email address, and password. However, this default user profile page may not always meet your needs, especially if you want to collect additional information about your users.
With a custom WordPress user profile page, you can provide your users with a unique, tailored experience that encourages engagement.
In this guide, we will discuss why a custom user profile page is essential and the benefits it can offer. We will then walk you through the step-by-step process of creating a custom user profile page, including how to design it to match your brand, add custom fields to collect additional user information, and enable front-end editing so users can update their profiles without needing back-end access.
Benefits of Creating a Custom User Profile Page in WordPress
A custom user profile page in WordPress can offer many benefits to both website owners and users, such as:
Personalization: A custom user profile page lets website owners personalize the user experience and create a unique brand identity. By customizing the design and layout of the user profile page, website owners can create a consistent look and feel across their website and provide users with a more engaging experience.
Display Relevant Information: By designing a custom user profile page, you can display more of your users’ relevant information, such as their interests, preferences, contact details, and other pertinent data. This contrasts WordPress’s default user profile page, which only displays basic user information like a user’s username, name, and email.
This comprehensive guide will walk you through creating a custom WordPress user profile page using the ProfilePress plugin.
Why Use ProfilePress?
ProfilePress is a powerful WordPress membership plugin that lets you build powerful and user-friendly membership sites and eCommerce stores.
It lets you create paid membership plans, enforce a paywall to restrict WordPress site content access, integrate with multiple payment gateways (including Stripe, PayPal, Razorpay, Mollie, and Paystack), and create a conversion-optimized checkout page.
It also enables you to create custom login forms, user registration forms, and front-end user profiles.
This WordPress membership plugin provides a wide range of customization options, making it an ideal choice for beginners and advanced users.
Getting Started with the ProfilePress Plugin
Firstly, you will need to purchase a ProfilePress license. Head to the ProfilePress website and buy the pricing plan that best suits your needs.
After your purchase, you will receive an email containing the download link for the plugin and your license key. Alternatively, you can download the plugin from your account page on the ProfilePress website.
To install the plugin, log in to your WordPress admin dashboard and go to Plugins > Add New, Then select Upload Plugin. Next, choose the ProfilePress zip file you downloaded and click Install Now.
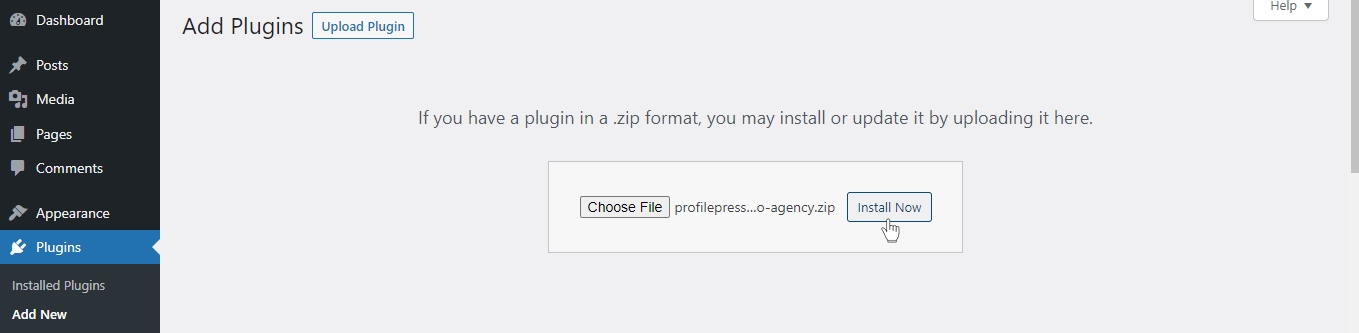
Wait for a few seconds for the installation to be completed. Once the plugin is installed, click on Activate Plugin to activate it on your site.

You’ll see a notification at the top of your WordPress dashboard page saying, “ProfilePress needs to create several pages to function correctly.” Click on the “Create Pages” button to complete the plugin setup.
Creating a Custom User Profile
After installation, when you click the “Create pages” button, as mentioned earlier, ProfilePress will automatically generate a default user profile page. Although the default user profile page is good, you would probably prefer to design your personalized user profile page that matches the visual style of your website.
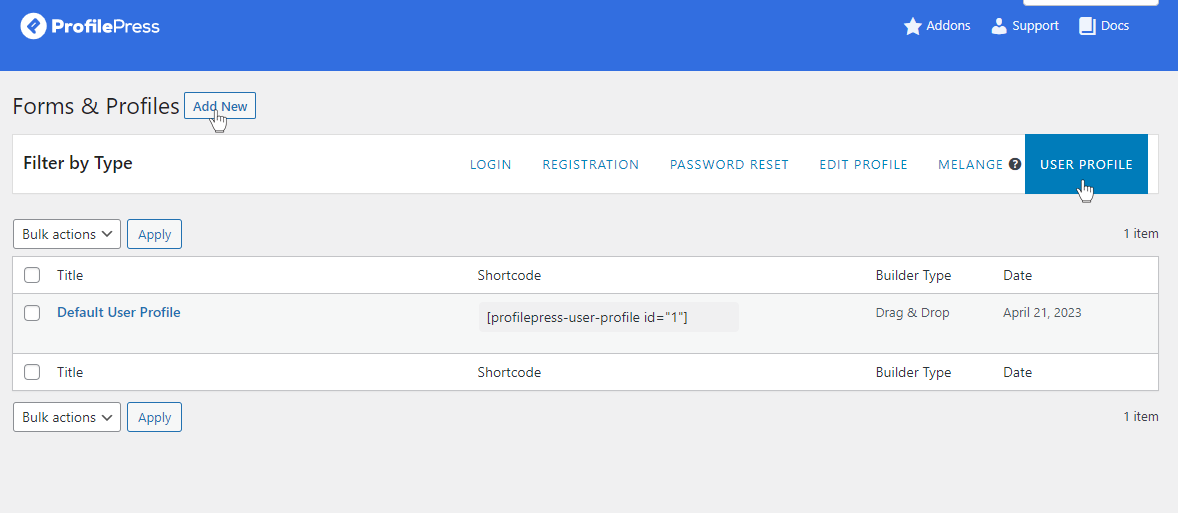
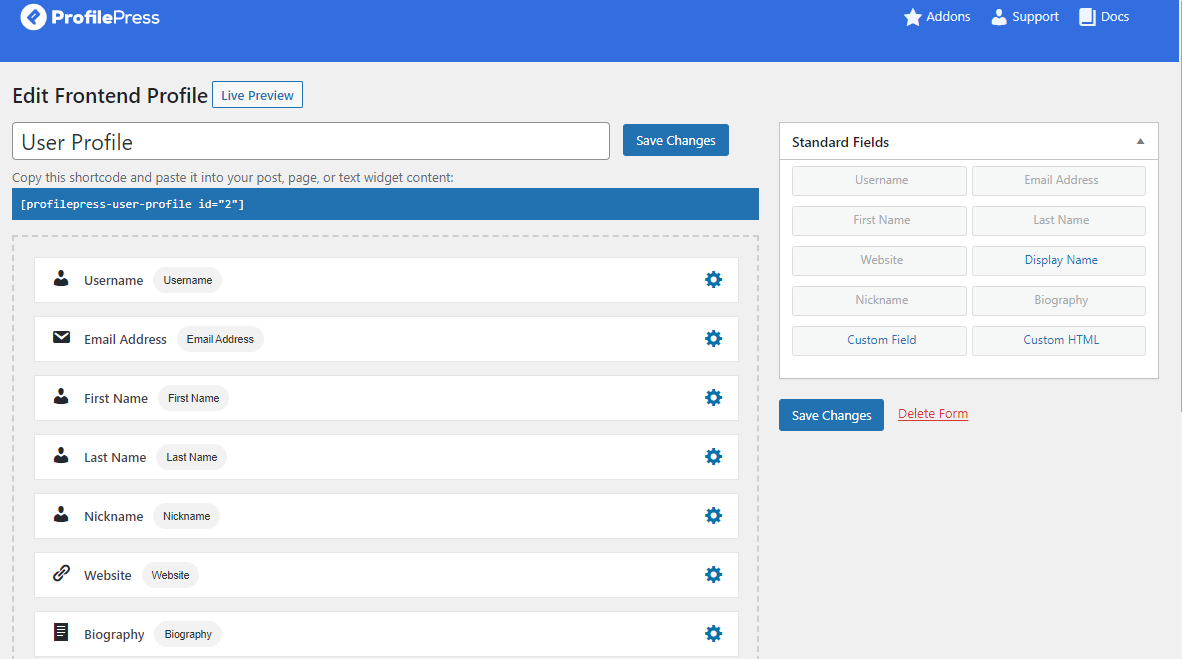
Navigate to ProfilePress > Forms & Profiles in your WordPress dashboard,

Then select the User Profile tab, and click the Add New button.
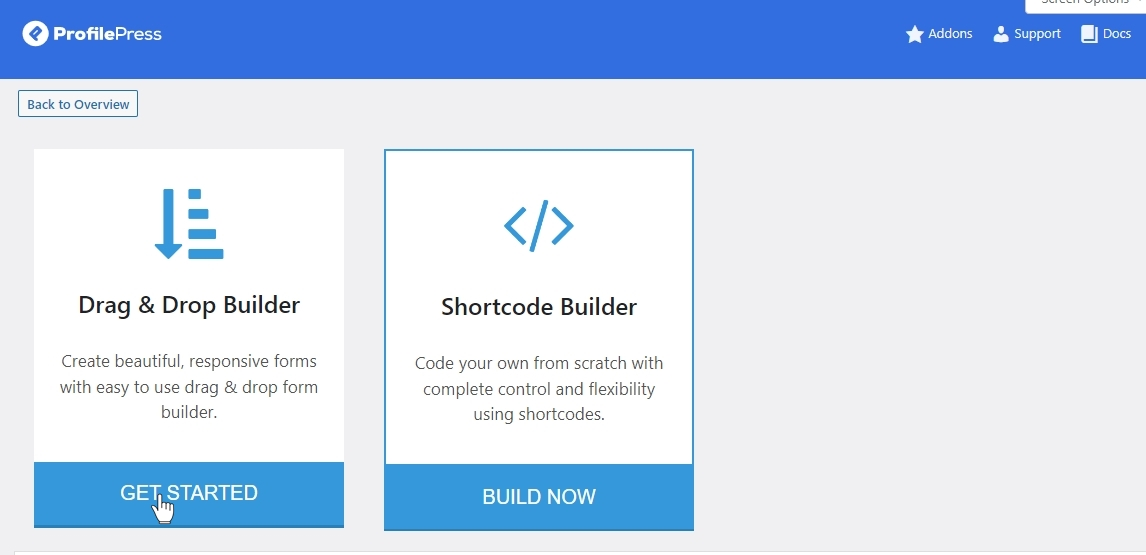
Decide between using the drag-and-drop or advanced shortcode builder. For this guide, we will go with the “Drag & Drop Builder.”
Click the “Get Started” button under the Drag & Drop Builder.
You will be presented with a field where you can input a name for your User Profile. Pick a name that you like, such as “User Profile.”
ProfilePress provides a selection of pre-made templates that you can browse through. For this guide, we will choose the “Default” template.

After selecting the Default template, you will be directed to the user profile builder page.
On the builder page, you will come across various standard fields you can use to create the user profile. Additionally, you will find a shortcode at the top of the fields and a preview button that lets you see your changes.
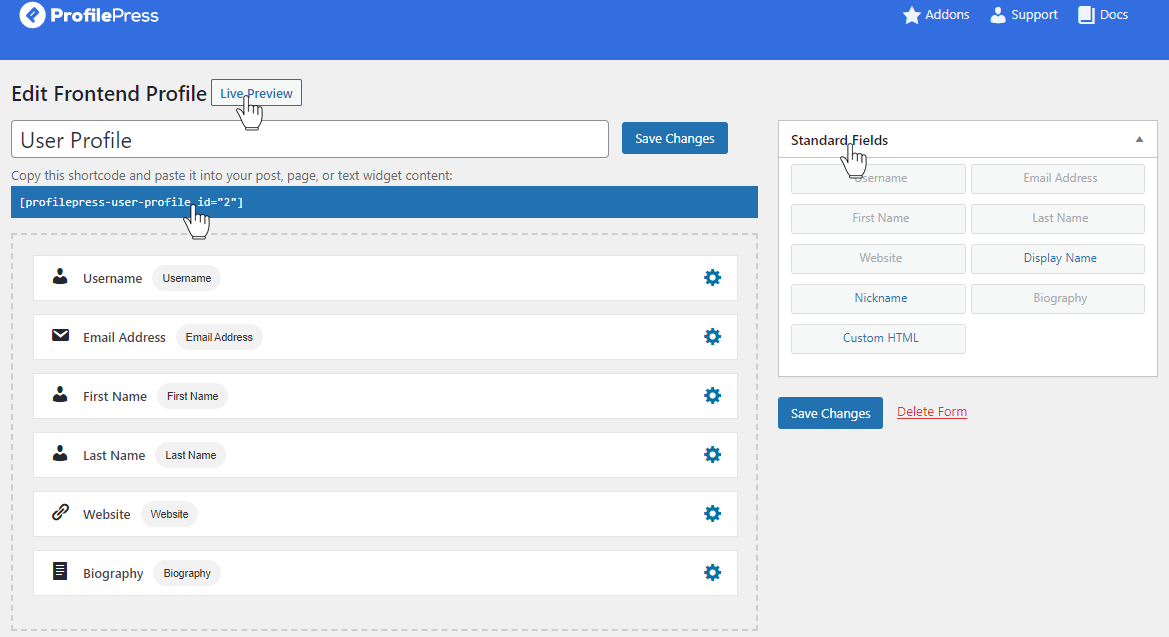
For example, drag and drop the Nickname field to the form builder area and place it under the Last Name field. This specific field allows users to enter their nicknames.
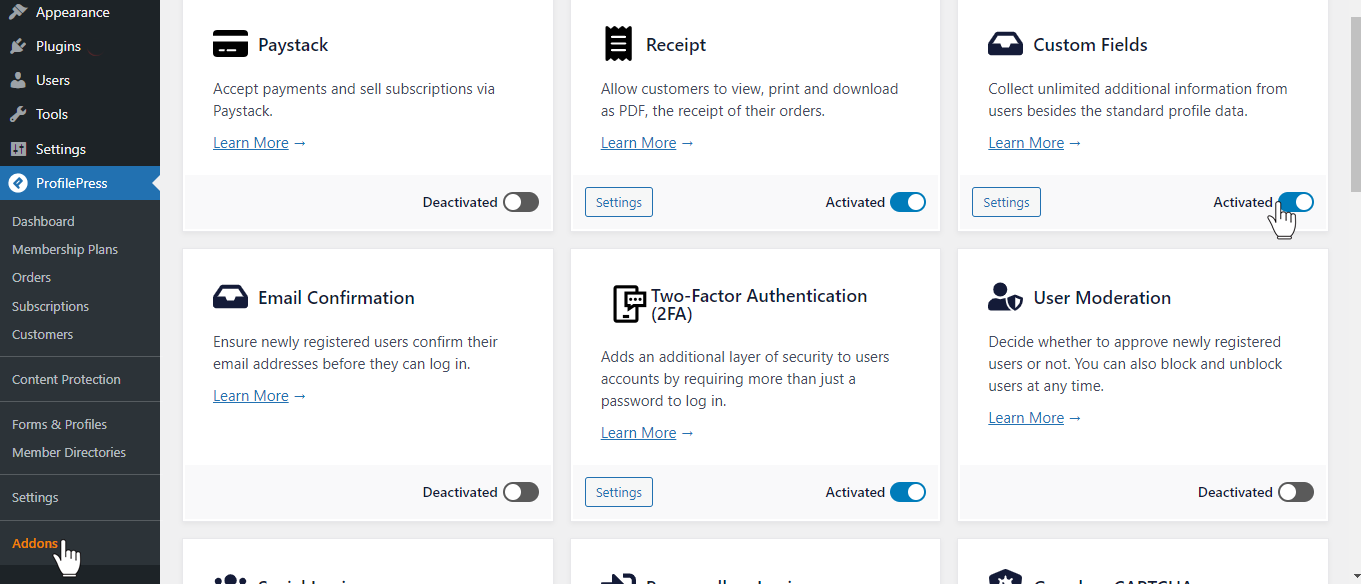
If you need more options to collect and display custom fields in the user profile display, activate the custom field addon.
To do this, head to ProfilePress > Addons > Custom Fields and activate.
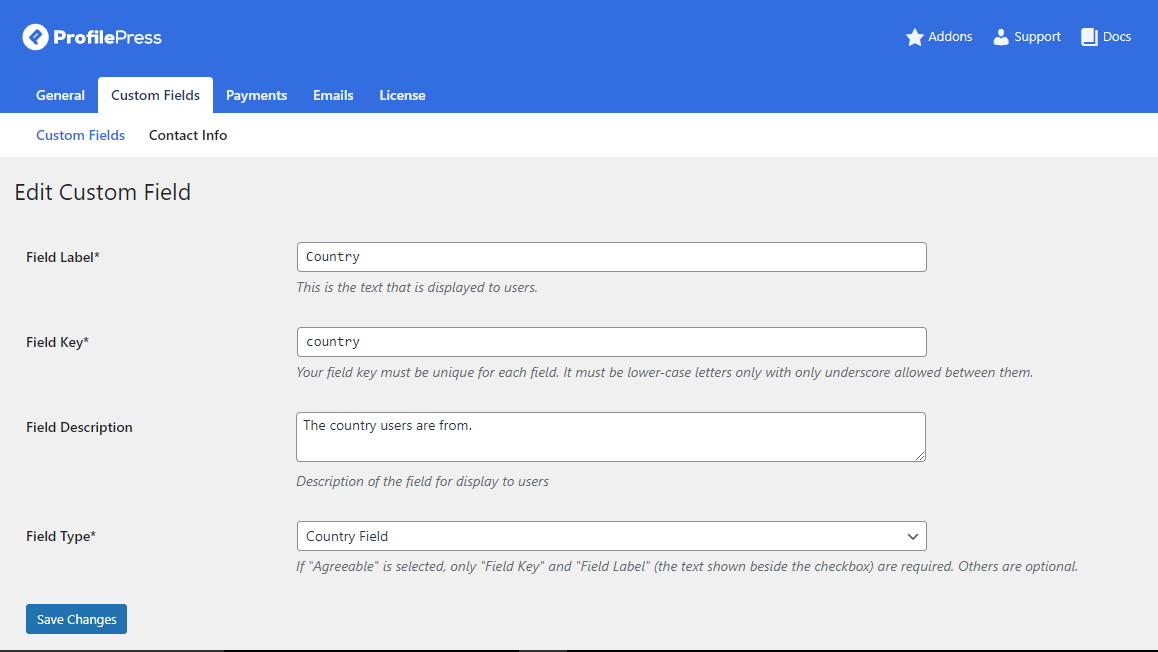
Next, we need to create the custom field by navigating to Settings > Custom Fields. Click the Add New button.
Enter a title or label, field meta-key, description, and type of the custom field. Save when done.
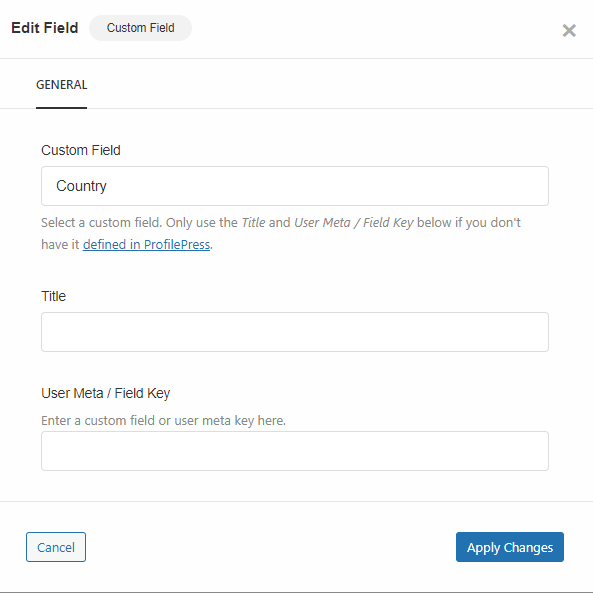
Back to the user profile builder, you will now see a “Custom Fields” block.
Drag and drop the custom field block into the form builder, then click the settings icon.
![]()
Select the custom field to add to the user profile display and save.
Customizing The User Profile
After you have added all the fields for your user profile, the next phase is to customize the appearance of your user profile to your heart’s content via the “User Profile Settings” section.
You can do the following in this metabox.
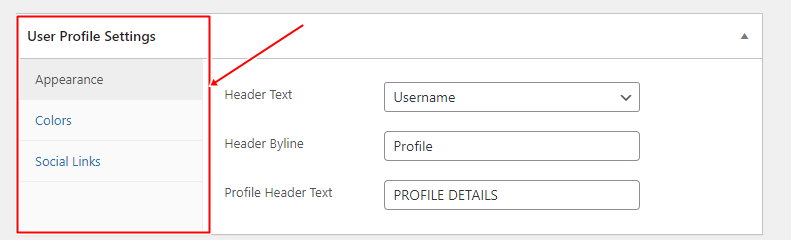
Appearance
It lets you modify various elements visible within the header of your user profile, such as the header text, header byline, and profile header test.
Colors
The Colors section allows you to change the colors of various parts of your user profile, such as the background, header background, header text, text underline, avatar border, and profile info border.

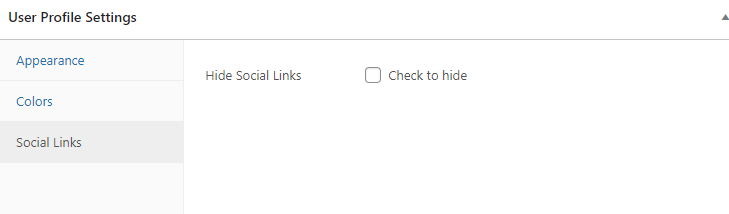
Social Links
The social links section allows you to hide the social links on the user profile.
Creating The Custom User Profile Page
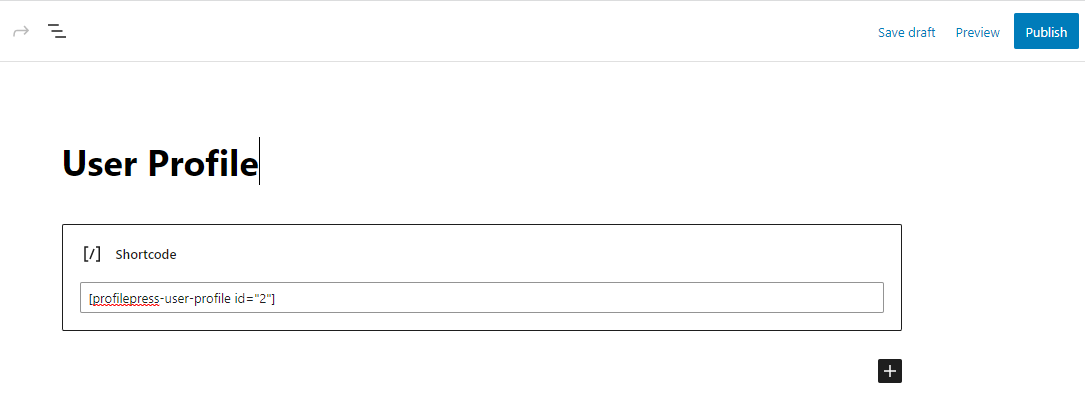
After customizing the design of your user profile to your satisfaction, the next is to create a new page or edit an existing one that will contain the user profile shortcode.
To begin, you need to copy the shortcode displayed at the top of the user profile builder.
If you use the WordPress block editor, add a shortcode block and paste the copied user profile shortcode into the block.
If you use the WordPress classic editor, paste the shortcode into the text editor.
When done, save your page changes.
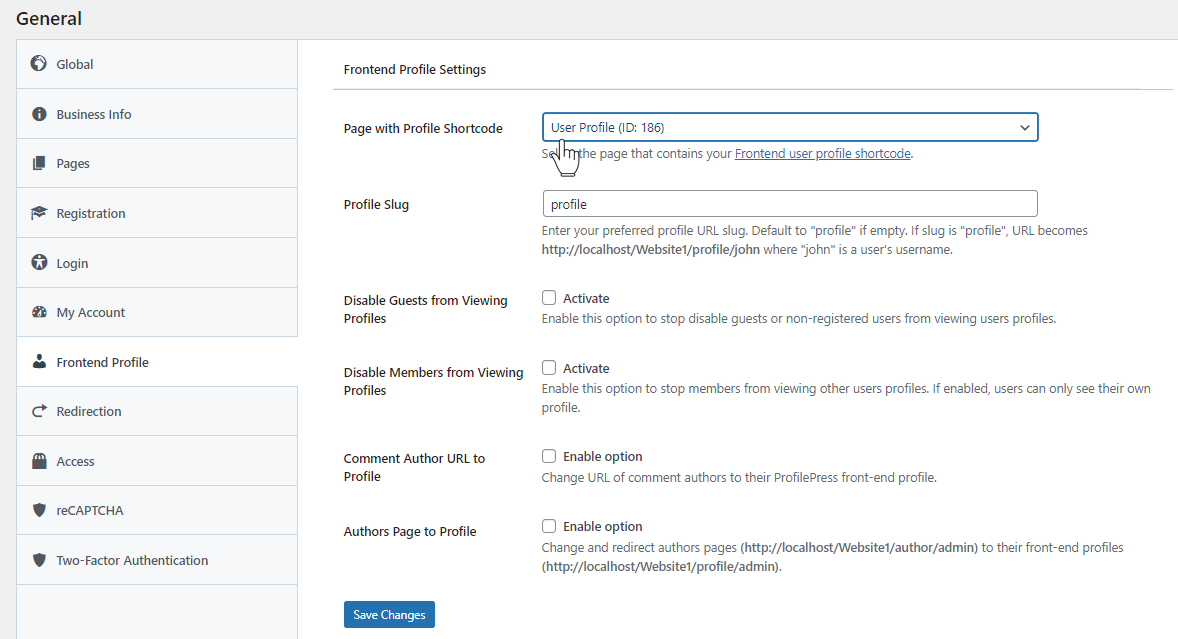
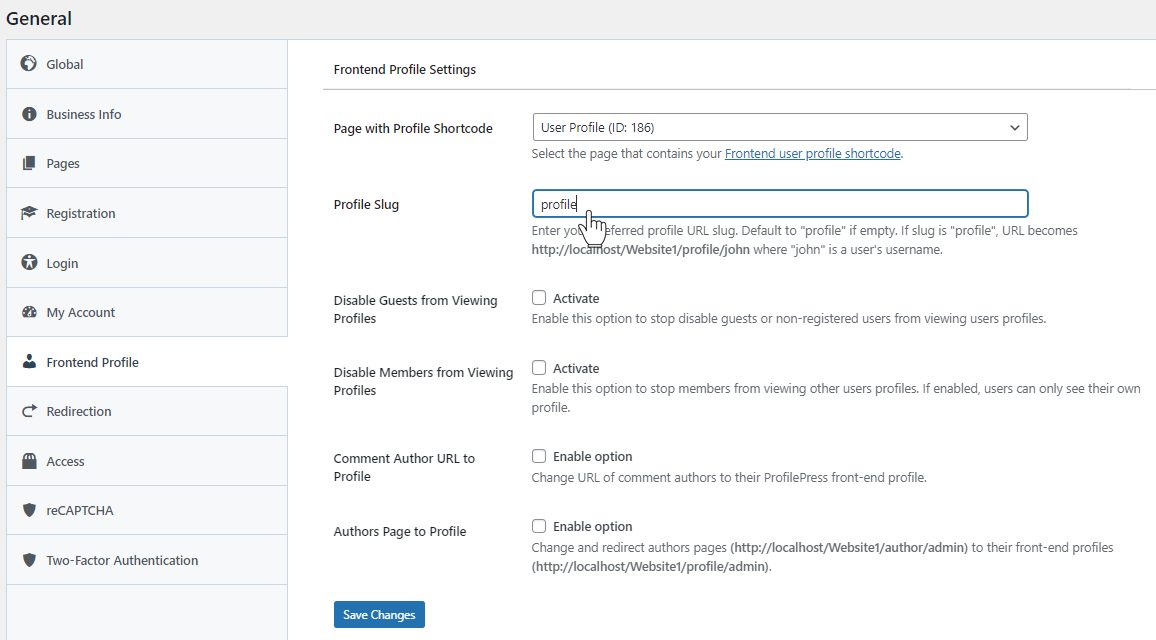
Once the user profile page is live, navigate to ProfilePress > Settings > Frontend Profile > Page with Profile Shortcode, and select the user profile page you created and save.
We have successfully created a custom user profile page for all your users.
Here’s how the user profile looks on our demo site.
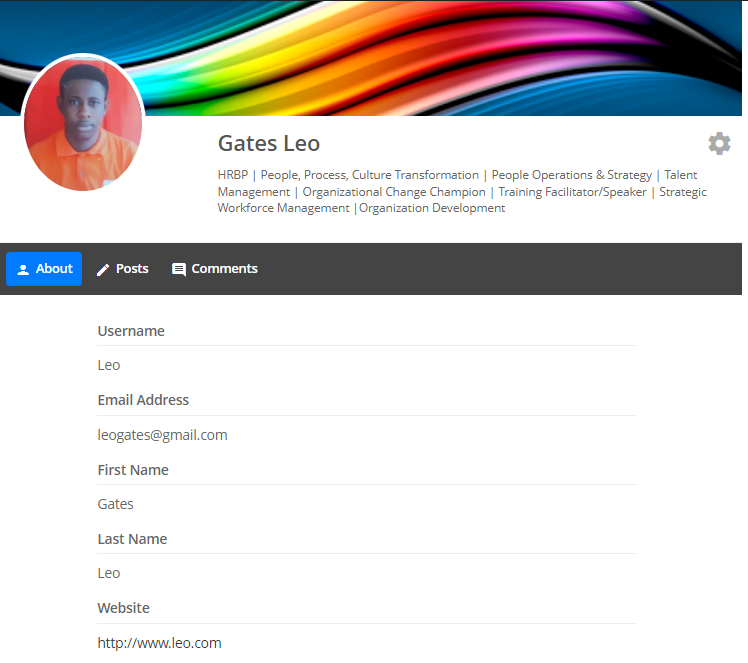
A handy tip: You can access a user’s profile by visiting the URL:https://yoursite.com/profile/leo, where “leo” refers to the username.
Additionally, if you prefer to modify the word “profile” in the URL to something different such as “user profile” or “my profile,” simply go to Settings > Frontend Profile > Profile Slug.
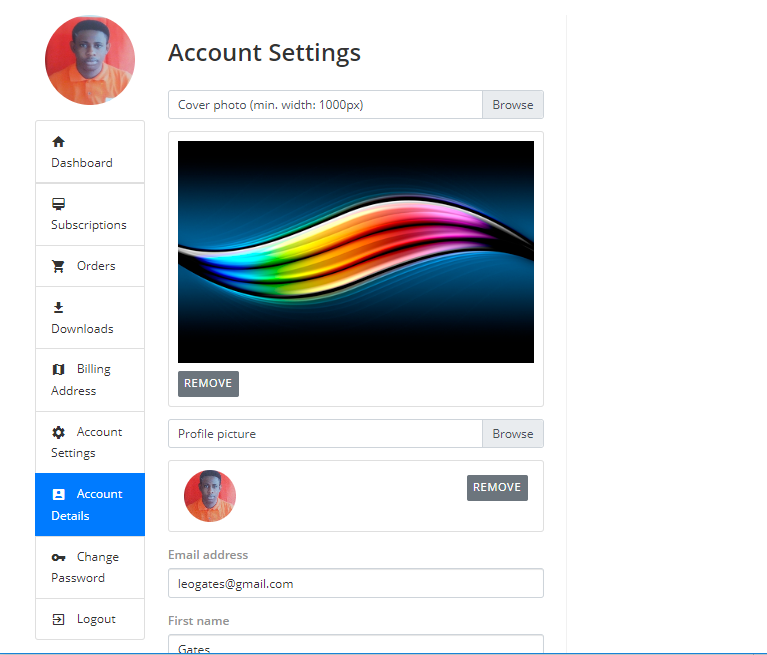
Creating an Account Page
To ensure that your website’s users can easily modify their profiles, they should be able to access the Cog icon on their profile page.
Upon clicking the button, they will be redirected to their account page, where they can edit their profile information, including their profile picture, email address, bio, nickname, website, and social media profiles. However, you will need to create one before users can access the account page.
With ProfilePress, you can create a customized account page effortlessly. Add the [profilepress-my-account] shortcode to a new page.
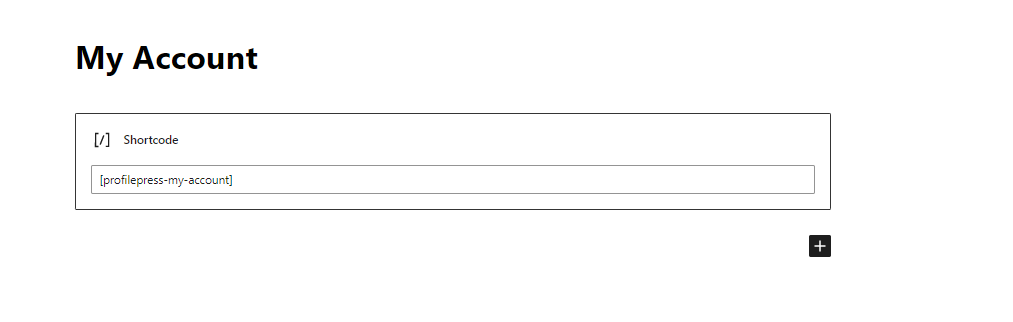
Doing this will create a My Account page on your website, enabling users to modify their account information easily.
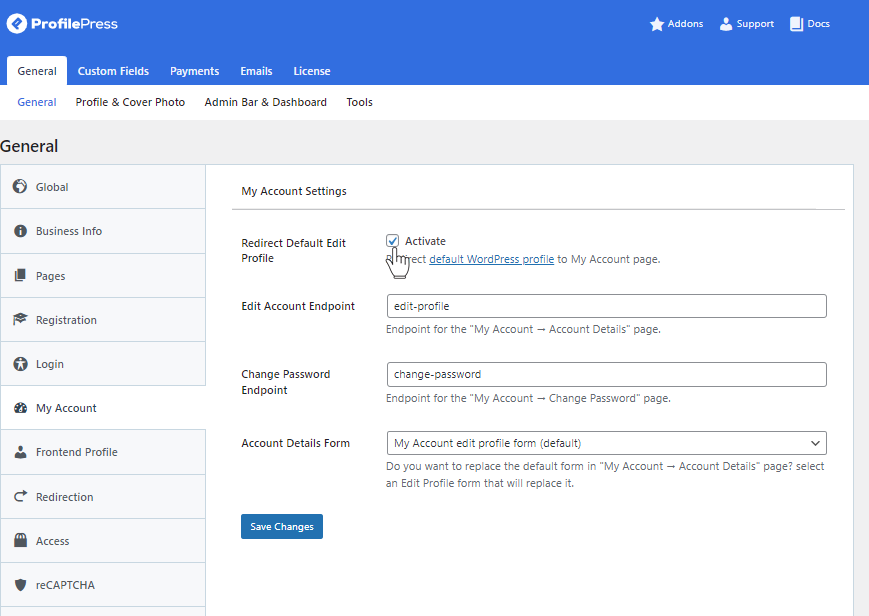
To ensure that users are directed to the new My Account page, it’s necessary to restrict access to the default WordPress account page.
To do this, head to ProfilePress > My Account Settings and activate the “Redirect Default Edit Profile” option. Be sure to save your changes once you’re done.
Below is a preview of how the account page appears on our demo site:
Conclusion
Designing a custom WordPress user profile page can significantly improve the overall user experience on your website by providing a beautiful and personalized interface for users to engage with while granting them greater control and flexibility over their profiles.
ProfilePress offers a range of features, making creating a custom user profile page a breeze. You can easily add or remove fields, change the appearance of the user profile, and integrate social media links.
One of the key advantages of using ProfilePress is that it allows users to edit their profiles from the front-end of your website.
In addition, ProfilePress also offers various other powerful features. For example, it enables you to create custom user registration and login forms, restrict access to particular pages, and even enable two-factor authentication to secure user accounts.
Whether you are building an online community, a membership site, or an e-commerce store, a custom WordPress user profile page can help you connect with your audience and build a successful online presence.
What are you waiting for? Get ProfilePress now!